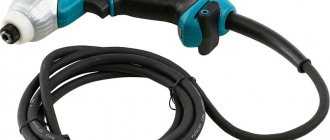
A screwdriver is a fairly popular tool that greatly simplifies the process of screwing in and out of screws. Most of these tools operate on rechargeable batteries, which periodically fail. Many people who have encountered such a breakdown are interested in how to repair a battery for a screwdriver and what needs to be done for this.
A screwdriver is a tool that is often used in the household.
What you need to know before you start repairing a screwdriver battery
Before you try to restore the battery at home, you need to familiarize yourself with the basic recommendations:
- before starting repair work, it is necessary to determine the type of battery used;
- in the process of disassembling the battery case, it is necessary to find out the polarity of the connections;
- all “banks” installed in batteries to protect against overheating are equipped with a soldered resistor and therefore must be removed very carefully;
- Lithium-ion batteries cannot be repaired.
Additional Information! Almost all elements in Bosch, Interskol and Vikhr power tools have a serial connection.
Structural elements of a screwdriver
People who decide to repair a power tool should familiarize themselves with its main structural elements:
- Electrical engine;
- planetary gearbox for transmitting rotation from the motor to the spindle;
- a clutch that regulates torque;
- electronic control unit;
- battery;
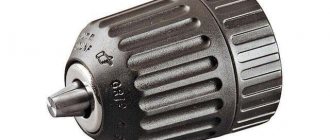
- a clamping chuck with which the working attachments are secured.
If the screwdriver is used incorrectly, each of the listed components may fail.
Checking the screwdriver battery
A multimeter is often used when testing batteries.
Before you start repairing the tool, you need to familiarize yourself with the features of testing the battery.
Checking the battery for functionality
To make sure that the charger is working, you need to perform the following sequence of actions:
- Connect the unit to a power source.
- On the multimeter, turn on the DC current measurement mode.
- Connect the probes to the minus and plus of the charger.
- Review the results of the measurements taken.
If the values differ from the parameters located on the battery case, then you will have to repair it or buy a new one.
Checking battery capacity with a multimeter
Before repairing the battery, it is necessary to check its capacity. This is done like this:
- Fully charge the battery.
- Connect the multimeter probes to the battery contacts.
- Check the indicators on the device display.
If, after testing, the battery capacity is lower than declared, you will have to remove all batteries from the structure and test each of them.
Battery recovery methods
On the Internet you can find advice on various methods of restoring elements of varying degrees of effectiveness and dubiousness. Immediately dismissing such unscientific methods as short-circuiting the battery terminals, you can consider several methods that make it possible to at least briefly extend the life of expensive power supplies.
Distilled water
If jars with zero voltage are found among the NiCd or NiMH battery cells, it can be assumed that their electrolyte has dried out. You can try to repair such an element by introducing distilled water. To do this, you need to drill a hole in the body and fill in about 1 ml of liquid with a syringe. The water should be absorbed. If this does not happen, the element cannot be restored. If the first portion is absorbed, further doses of water must be introduced until completely saturated, then the hole in the body must be sealed.
Injection of distilled water through a syringe.
Then you need to charge the element with a pulsed current (pulses with an amplitude of 10C lasting 2-4 seconds). If everything goes well, you need to let the jar sit for several hours and put it back into the battery.
Increased current
On the Internet you can find advice on how to revive a depleted screwdriver battery by charging it with high currents. The effectiveness of the method is questionable - the chances of the final loss of the element are higher than of its resuscitation. But restoring the capacity of NiMH or deeply discharged Li-Ion batteries through training can have a positive (but not very long-lasting) effect. To do this, you need to discharge the battery with a current approximately equal to C, then charge it. After repeating this cycle several times, it is often possible to restore the jar’s functionality for a while. In this case, you can discharge the elements into a light bulb.
Battery discharge for incandescent light bulbs during the training cycle.
Freezing
also very controversial and questionable . The battery is placed in a freezer with a temperature below minus 10 degrees C for several hours. Most experts consider this method wild. None of the advisers have yet given a clear explanation of what processes occur in the battery when frozen. But if other options have been exhausted, why not, to clear your conscience, try supercooling the battery before throwing it away.
General recommendations before checking the battery
To properly test the battery, you need to familiarize yourself with the basic recommendations for testing different types of devices.
Nickel-cadmium
Nickel-cadmium batteries are most often used in screwdrivers.
This is the most common type of battery. They are most often installed in screwdrivers from Bosch. Among the advantages of these batteries are their resistance to external influences and durability.
Before checking such batteries, they must be fully charged. This will allow you to obtain the most accurate measurements and ensure the functionality of the device. If you check a discharged battery, you will not be able to obtain accurate data.
Lithium-ion
Such batteries are most often installed in the most expensive models of power tools. They have a large capacity and a small percentage of loss of available charge. However, they also have a serious drawback, which is that they cannot be left discharged for a long time. The fact is that their crystals quickly degrade and because of this the battery stops working.
Before testing lithium-ion batteries, they must be fully charged and discharged three times. This is done to eliminate the “memory effect” and obtain the most accurate test results.
How to increase battery life
To maximize battery life, you must carefully follow the recommendations for its use. And what’s interesting is that this information is always written in the instructions for the screwdriver. But who reads it?
At the same time, different classes of batteries differ in the requirements for their operation. Nickel-cadmium batteries have a memory effect, that is, they can remember at what stage of the discharge they began to be charged. And accordingly, they will work only until this mark is reached. Simply put, for nickel-cadmium the rule is: full discharge - full charge.
With lithium-ion, everything is even simpler - you can charge and discharge at any stage of discharge. However, it is better not to use them at low temperatures. And, of course, do not charge in the cold.
In general, the most important recommendation for all types of batteries is to avoid overheating and overcharging. This is equally bad for any battery. But first of all, the charger should take care of this. Therefore, it is better to use only branded products.
Common faults
A short circuit is one of the most common faults.
Owners of screwdrivers who decide to repair the battery themselves should familiarize themselves with the most common types of faults. There are several reasons why batteries stop functioning normally:
- destruction of plates;
- short circuit;
- electrolyte contamination;
- reversal of poles;
- degradation of crystals due to long-term storage in a discharged state.
Additional Information! It is quite difficult to cope with the consequences of such breakdowns on your own. This is why many people decide to entrust battery repair to professionals.
DIY repair and replacement
When all restoration methods have not brought success, and the rejected elements have disappeared into oblivion, it is necessary to find a replacement for them. The ideal replacement would be a new cell or set of cells, but due to the lack of such, you can select a live cell from another used battery. You can select it using the same method as selecting an element from a battery.
Replacing with a used item is not as unreasonable as it seems. If you take a new element, its qualities may be lost against the background of the old battery, but the old living element will work in equal conditions.
How to determine if repair is possible
Before you repair a screwdriver battery at home, you need to figure out whether it is possible to repair it at all. To understand this, you will have to disassemble the power tool and carefully remove the battery “cans” from it.
The extracted cells must be sorted out and laid out in a row in front of you. After this, you need to check each element one by one with a multimeter. The voltage should be about 1.4 V. If on one of the components this value differs by 0.5 V up or down, then this element must be replaced. Therefore, such a battery can be repaired.
Adding distilled water
Restoring the battery of a screwdriver with topping up must be done with a completely discharged battery. Non-CD batteries are covered with paper. If there was evaporation, there will be noticeable marks on the surface.
After measuring the voltage, you need to completely discharge all the banks using a 12 volt light bulb. After this, the voltage is measured again. Those elements where it dropped to 0.7 are faulty.
To add distilled water, you need to make a hole in the side of the jar. A groove is made with a very thin drill (0.5-0.7 mm). You need to make sure that it doesn’t go inside and damage the plates.
A small amount of water is poured into a syringe with a thin needle. After this, the hole must be sealed with epoxy resin or sealant.
Now the battery can be pumped up. Each block must be discharged to zero again by connecting 1.5 volt light bulbs to them. When the procedure is completed, the battery is assembled and it is necessary to carry out 5 charging and discharging cycles.
List of required tools
Screwdrivers may be needed to disassemble the battery case or screwdriver.
To carry out repair work, you may need the following tools:
- Multimeter. This device is necessary for measuring AC and DC voltage.
- Curly and flat screwdrivers. Useful for disassembling the screwdriver body.
- Soldering iron. Inexpensive models with a power of about 40 W are suitable for repairs.
Additional Information! To use a soldering iron, you will need consumables such as solder and tin.
How to determine if a screwdriver battery is faulty
Determining a malfunction of a power tool is carried out as follows:
- Fully charge the battery.
- Disconnect the device from the network and remove the battery.
- Carry out a visual inspection and check for visible defects on the surface.
- Check the voltage of the “cans”.
- Connect a 24 V or 12 V car light bulb to the battery with wires.
- Turn off the lamp after 20-30 minutes and measure the voltage of the “cans” again.
If the capacity of the “cans” has sagged significantly, then they need to be replaced with new ones.
Screwdriver battery repair
Before you start repairing the battery yourself, you need to figure out how to do it correctly.
Disassembling the case
A mallet will allow you to disassemble the glued battery case.
The battery case consists of two parts. Most often they are connected with screws. However, sometimes they are held together with superglue. In this case, the gluing areas should be carefully tapped with a mallet. After this, the glued parts will be much easier to separate.
Determination of defective cans
Identifying damaged “cans” is quite simple. To find them, you need to do the following:
- Conduct a visual inspection of the elements.
- Remove components with traces of swelling and particles of leaked electrolyte.
- Check the output voltage of each bank.
It is necessary to check components with a multimeter several times to obtain the most accurate measurement results.
Important! It is better to replace all banks whose voltage readings deviate greatly from the norm with new ones.
Recovering items
Anyone can restore battery “banks” on their own. This is done like this:
- Disassemble the battery and remove each component. It is impossible to charge all the cells well in a common battery.
- Apply a voltage of 3-4 V to each of the “cans” for five seconds.
- Measure the output voltage. If it is at 1.4 V, then the components have been restored.
Sometimes the above steps do not help restore the battery. In this case, you will have to replace it with a new one.
Battery assembly
Defective battery “banks” must be replaced with new ones.
When all components have been restored or replaced, the structure can be assembled. To do this, you need to install all the components back into the case. After this, the parts of the structure must be reconnected with screws or glue.
Restoring a faulty battery
Lithium screwdriver batteries cannot be restored. They do not have a memory effect, so the problem is probably related to the decomposition of lithium and this cannot be stopped. In such batteries, it is important to determine exactly what is causing the malfunction: any bank or control circuit.
This is done in two ways:
- Replacing the control circuit, which can be temporarily taken from another similar power source. If it is not working properly, it is replaced.
- By supplying a current of 200 mA with a voltage of 4 V to the defective battery. If the voltage on the bank increases to 3.6 V, then it is working, respectively, the problem is with another or with the control circuit.
Disassembling Li-ion
To restore Ni-Cd batteries in a modern do-it-yourself screwdriver, two methods are used:
- Compaction or compression (suitable in cases where there is electrolyte and only volume is lost).
- Exposure to high voltage (more than rated). Thanks to this method, it is possible to remove the memory effect, as a result of which the capacity lost by the can is partially restored. Nickel-cadmium cells mainly lose capacity as a result of boiling off of the electrolyte, so no amount of “firmware” with high current will allow the battery to be revived. This method will allow you to temporarily restore the battery, so you will soon have to change the power source.
Replacement of defective elements
Replacing a defective battery component is fairly easy. To do this, you need to get rid of the broken “can” by disconnecting it from the common plate with side cutters. A new component is then soldered to the ends of the contacts. After this, you need to check with a multimeter whether the installed element is working correctly.
The battery of a screwdriver is a part that often fails. If necessary, a broken battery can be repaired at home. However, before you do this, you need to figure out how to do it correctly.


