- September 8, 2018
- Nail care
- Olya Bodrova
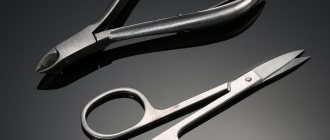
Even the most demanding beauty who regularly visits professional salons must have her own manicure set at home. Over time, such delicate tools lose their properties, as the blades become dull, the bolts become loose, and the “little helpers” urgently need repairs so as not to damage the skin and nails during work. Sharpening nail clippers is, in fact, a delicate matter, and in order to do everything as correctly as possible, we recommend that you first read the information presented in this publication.
Tips for using the tool
In order for the manicure set to last as long as possible without the need for repairs, the following important rules should be taken into account during its operation:
- store all tools in separate protective cases;
- never wash them with plain water;
- clean after each use with special products;
- periodically lubricate moving parts with oil;
- use tools strictly for their intended purpose.
The last rule says that nail clippers will need sharpening much earlier if they are intended for cuticles and are used to remove nails, and vice versa.
Each tool has its own function, performing which it brings maximum benefits for the beauty of the handles.
How to insert and secure the attachment in a manicure machine?
It is important for a novice master to carefully study how to correctly insert a cutter into a manicure machine, since the serviceability and service life of the device and attachments directly depends on this.
There are 3 types of devices with different methods of attaching cutters:
- Automatic: fixation occurs immediately after placing the attachment in the clamp. The nuance of this type of fastening is that either a cutter or a plug must always be in the clamp, since otherwise it may close. It can only be opened at a service center.
- Semi-automatic: fixation takes place in 3 stages. First you need to turn the handle, then open the lock, insert the cutter and close the clamp.
- Manual: the easiest way to attach. To do this, you need to press the button located on the body of the device, remove the washer and insert the cutter. Perform the steps in reverse order - secure the washer and press the button.
Important. Professionals say that all fixation methods are reliable, but the most convenient are manual and semi-automatic.
Next, you can watch a video on how to insert the cutter into the machine:
Checking the sharpness
Professional craftsmen have their own proven methods for determining the sharpness of a tool required for a job, but there are universal methods that absolutely everyone can use. So, sharpening cuticle cuticle nippers is necessary if the tool cannot cut polyethylene thinly, evenly and without effort. After such an experiment, the presence of torn sections indicates similar trauma to the skin during work, so such tweezers should not be used.
In addition, the complete serviceability of the nippers is indicated by the absence of clicks during operation, the tight fit of the cutting blades in the area of the nose, with light pressure and strong compression, as well as the smoothness of movement.
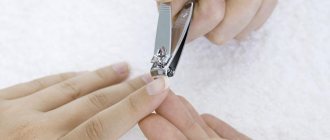
The sharpness of nail clippers is checked by cutting the electrical tape. The cuts must also be smooth, the cutting blades meet tightly along the entire length, and when pressed, a characteristic click is felt.
The sharpness of manicure scissors for cuticles and nails is checked by similarly cutting polyethylene or electrical tape. A scraper is an equally important tool in the set - when working with a nail, it should slide along its surface without catching the top layer.
How to remove it to change it?
Removing the attachment from the manicure machine is as easy as inserting it. The method for removing the cutter directly depends on the type of attachment in the manicure machine:
- with the manual method, press the button on the body, unscrew the washer and remove the cutter;
- with the semi-automatic method, you need to turn the handle clockwise until it clicks and remove the nozzle;
- With the automatic fastening method, the cutter can be pulled out only after turning off the device; to do this, you just need to pull it towards you.
It is important to remember that with the automatic type of fastening, the clamp should not be empty; it must contain either a nozzle or a plug.
Sharpening features
If a manicure tool still needs help, throwing it away right away and buying a new one is too expensive. In addition, its standard metal plates can be put in order yourself. At first glance it seems easy. In reality, sharpening nail clippers at home is a very complex and time-consuming process, requiring a certain amount of experience and skill. The fact is that such a device can cut poorly not at all because of the dullness of the blades, but because of their loose fit.
Play in a tool joint can occur from a fall, impact, or during production at a factory.
Interestingly, the intricacies of eliminating these problems are not taught in any courses. Experienced professionals know how to deal with such damage thanks to their own experience. That is why it is best to trust the repair of “little helpers” to professionals in their field.
Possible problems: how to change it if it’s stuck, why can’t I put it on and something else?
Sometimes, when changing the attachment on a manicure machine, problems may arise. Some of them can be solved independently, and sometimes only a service center specialist can help. Solutions depend on the cause. The most common include:
- Breakage of the cutter. Perform the steps required to remove the attachment. Then shake the handle slightly so that the fragment can come out on its own by inertia. If it remains in place, you should disassemble the clamp and remove the rest of the attachment. You can try gluing the cutter using superglue.
- The nozzle is stuck. There may be several reasons - an incorrectly selected cutter, a broken clamp or motor, clogging, and others. You can only fix the blockage yourself; in other cases you will need the help of a specialist.
- The cutter is not fixed. The main reason is that the cartridge is clogged with biological waste (nail dust or shavings). To fix this problem, you will need to unscrew the cartridge and carefully clean it of dust using a brush. If this does not help, then the collet mechanism should be changed.
Attention! When solving the problem of changing a cutter yourself, it is recommended to photograph each step. Otherwise, you can assemble the mechanism incorrectly, which can lead to more serious damage.
Tool Features
To give a second life to your manicure set, you need to correctly classify it and determine the tools necessary for this. Thus, manual sharpening of nail clippers and tweezers is most often carried out using a needle file, since their cutting blades have a curved shape. If a backlash is formed when they are compressed, then the repair is also supplemented by adjusting the connecting bolt.
After sharpening, the master must polish the tool to smooth out the slightest irregularities and treat everything with a disinfectant.
How to disinfect?
The next mandatory step in caring for cutters is their disinfection. To do this, use 2 methods:
- physical - ultraviolet or ultrasonic treatment, boiling, calcination;
- chemical – aging in special disinfectants.
Reference. The use of chemicals requires certification and strict adherence to instructions, so they can only be used in a salon environment.
At home, it is better to give preference to the physical method of disinfection. To do this, keep the cutters in an oven heated to 180 °C for 20 minutes or boil for 15 minutes.
Professional work
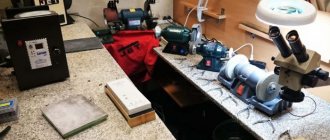
In big cities, finding a workshop for sharpening manicure tools is not a problem. Professional craftsmen necessarily use in their work several machines for sharpening nail clippers, lamps with different lighting, lubricating compounds and many other devices.
Large workshops even accept wholesale orders for tool sharpening from salons, and the quality of their work should not change.
It is difficult to find good professionals in small towns. As a rule, there can be one master for the entire settlement, and sometimes you have to go to a neighboring city to get his services. The lack of competition often makes it possible to perform poorly. In such situations, you can find the best master nearby and ask him for training, or use your own experience and the advice below to try to sharpen the tools yourself.
At what speed should it work?
To perform a manicure using the device efficiently and painlessly, it is important to know at what speed it should operate at each stage of the procedure.
Important! When cleaning the pterygium and opening the cuticle, the optimal speed is 15,000–17,000 revolutions; for cutting, depending on the skin type, 5,000–8,000 revolutions.
There are also speed recommendations depending on the type of cutter:
- “flame” shape with red notch – 10,000–15,000 rpm;
- corundum – 7,000;
- “corn” shape – 30,000 in FWD mode;
- for polishing – 5,000–7,000.
To quickly learn how to perform a manicure using a device, it is important not only to know the technique of the procedure, but also all the nuances of working with it. A responsible approach to training will help you gain the necessary experience and client base in a short time.
Sharpening at home
Before sharpening nail clippers at home, you should check their overall condition. Perhaps they stopped cutting due to a loose fit of the blades, and tightening the bolt will be enough. If even after this you cannot cut the polyethylene smoothly, you will need to go to the market or a specialized store and buy a needle file.
To sharpen your nail scissors yourself, you will need a whetstone. A special stone designed for this process must have a different coating on both sides.
Before work, the block should be wetted with water to prevent dust from flying and placed on a cloth. It is not necessary to wet the file. The manicure tool must be disassembled, since when assembled it will not be possible to reach the cutting blades with a stone. The sharpening direction is similar to the factory one; it can be seen in good lighting. Movements must be smooth and cover the entire cutting surface. When the tool is sharpened, you should polish its blades with the fine-grained side of a stone or another file. Only after this can you reassemble the tweezers and check the results of your work.
How to sterilize?
The final stage of processing of cutters is sterilization, chemical (used only in salons) and hardware. There are several types of devices designed for hardware sterilization:
- glasperlene devices, in which processing occurs by heating to 230 ° C and takes 30–180 seconds;
- autoclaves are sterilized with hot steam for 15–40 minutes;
- dry-heat ovens process instruments at a temperature of 180–250 °C for 30 to 120 minutes.
Treated cutters should be stored in a sterile, hermetically sealed container.
Equipment
What are the advantages of sharpening wire cutters using professional equipment:
- high turning speed;
- precision angle adjustment, clear fixation of the position of the sharpening discs relative to the cutting part being sharpened;
- the ability to fully automate work on CNC equipment;
- safety during processing;
- setting the engine speed.
Many machines are equipped with quick-release mechanisms for abrasive discs and manipulators for quickly changing the position of the tool being sharpened. Brand manufacturers include a set of grinding wheels of various grain sizes, allowing for coarse or fine grinding.
Due to the high processing speed and automatic sharpening quality control, increased efficiency is achieved when performing similar tasks. The number of changeable settings is minimal.
Professional equipment is of the following types:
- mechanical, equipped with diamond-coated abrasive discs, due to which the strength of the metal is preserved, the edges are sharpened, and the service life is not significantly reduced;
- laser, allow you to quickly remove metal from the edges, but make it fragile.
The choice of a specific machine depends on the requirements for the quality and speed of sharpening the wire cutters.
