How to make a saber out of paper? Many parents of boys have thought about this question. You can use it to decorate the belt of a carnival costume of a pirate or hussar, or let your child play “robbers” with other children. This is safer and more reliable, since the child will not injure anyone in the heat of the game. A saber differs from a sword and a dagger by the presence of a handle that protects the warrior’s fingers from an enemy’s blow. The blade of such a weapon can be straight or slightly curved.
In this article we will look at how to make a saber out of paper in different ways. For decorative purposes, the blade can be rolled from several layers of thin A4 paper using the origami technique. A saber cut from corrugated packaging cardboard will be more durable. The surface of the blade is additionally decorated with silver colored paper or covered with foil to imitate metal. The handle can be made brighter, choose a color that harmoniously matches with the carnival costume. For active games, you can leave the craft without decoration, since for the next attack mom will have to make a new blade.
Cardboard version
Let's look at how to make a saber out of paper with your own hands in a curved shape. In every home you will definitely find a flat piece of corrugated cardboard from old packaging on which you can draw a drawing of a saber. The curved shape of the pirate weapon is drawn by hand. You can use the sample presented in the article below.
The handle has a curly shape with thin places to hold the handle. The remaining elements of the paper saber are made from strips 6 cm wide. A short piece is placed at the beginning of the handle into a hole made in the center. The pen is made by bending the paper in an arc. If desired, you can cover the craft with colored paper using PVA glue or wrap it with colored tape.
How to make a katana sword with your own hands from metal
Training edged weapons should be used only for their intended purpose. It is necessary to maintain safety during fencing, as this design is dangerous. Only adults work with her.
In order to forge a sword you need:
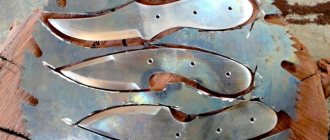
- sheet of metal (even an old one will do) 3-5 mm thick;
- grinder and grinder;
- vice;
- other tools for metal processing.
You can make an iron sword for fencing with your own hands using a simple algorithm.
| Using a chisel, we make a pattern on the handle, thereby separating it from the blade | |
| Additionally, we sand the product and measure the handle to see if it fits the hand. If not, we perform minor trimming with a chisel to optimal parameters. We get the perfect DIY wooden sword holder |
| Illustration | Description of action |
All that remains is to glue the handle to the sword, making it a braid of red leatherette. This makes it possible to make an almost real sword.
Craft from a cardboard sleeve
If you have a cardboard sleeve left around the house after using kitchen napkins, foil or baking parchment, you can use it to make an excellent DIY paper saber. Additionally, you will need a small strip of corrugated cardboard to make the handle. Having outlined the diameter of the circumference of the end part of the sleeve on cardboard, we obtain the contours of the necessary hole for putting the handle on the saber.
Then cut out the excess with scissors and attach it to the base with PVA glue. The handle is put on tightly so that it does not slip off. Additionally, it will be held in one place by foil wrapped around the “blade”. The pointed edge of the saber is made by pressing cardboard on both sides. You can secure the end with a stapler to a paper clip. To prevent the child from scratching anyone, wrap it with additional tape.
Important points
The length of the blade and handle are important, but not the only parameters. Before you start making a sword, you need to find out what the following parameters will be for the future weapon:
- Blade section shape. There are a huge number of options, but for a wooden sword the most suitable are a rectangle with pointed or rounded edges or a diamond.
- Handle shape. The best option is an oval handle, since in this case the weapon will be comfortable to hold in your hand. A round shape is not acceptable (the sword will rotate). You should also pay attention: the handle is usually made thinner than the blade.
- Point shape. It is arbitrary, but if you are making a sword for a child, then it is better to make its end rounded. For an adult, you can make a point, the two sides of which form an angle of 45 degrees.
- Garda. The widest part of the sword. Its width should be enough to protect the hand, and the sword should be comfortable to hold.
Weapons made from newspaper tubes
How to make an original saber out of paper? Use old newspaper and nice, thick, ridged paper for the pen. For density, you can roll up the craft not from one newspaper, but from several. The printed page is laid out at an angle facing you on the table surface and twisted tightly using a wooden skewer or knitting needle. The edge of the newspaper is glued to the last turn with PVA glue.
The end of the saber where the handle will be placed is additionally reinforced with tape or covered with self-adhesive tape. The handle can be made oval, as in the photo in the article, or as a strip, reinforced on both sides, as on the standard version of the weapon. You can tie a satin ribbon to the handle of the saber and hang it on your shoulder or belt.
Metallurgical industry
It is a branch of production for obtaining various metals from ore. Metallurgy is not only called industrial production. This term also applies to the science that studies various industrial methods for obtaining metal. The metallurgical process is the reduction of metal cations using a variety of reducing agents. Metal from ore is obtained by using certain reducing agents. The latter are selected taking into account the active component of the metal, costs, and compliance with environmental regulations. The feasibility of performing the metallurgical process must also be considered. Three main technologies are used to obtain metal from various ores:
- electrometallurgical;
- pyrometallurgical;
- hydrometallurgical.
Each ore processing method has its own characteristics.
Silver Blade
The next version of the saber looks quite impressive thanks to its shiny coating. The paper should be thick. The ideal material for the manufacture of such weapons would be corrugated packaging cardboard, also folded in two layers. The edge of the saber blade is rounded with scissors, and both halves of the cardboard are coated with PVA glue on the inside. For better gluing of strips, place the workpiece under a press.
For the handle, you need to draw a template with edges of different thicknesses. Attach the larger side from the blade side. The entire surface must be carefully covered with silver colored paper; self-adhesive can be used. The handle is isolated separately, tied several times with black tape or tape.
What methods of obtaining metal exist?
Ore, which contains various metal compounds, varies. The specific composition affects the technology for obtaining the material:
- Reduction from oxides involving carbon. Refers to the main method of obtaining many metals. Tin is smelted from tin stone, cast iron is obtained from iron ore. Other metals are smelted from oxides.
- Firing in a special industrial furnace. This technology is applied to sulfur ore. This method assumes that as a result of firing in a special furnace, a sulfur compound is obtained.
The composition of the ore directly affects the specific ore processing technology.
Paper origami
How to make a saber from A4 sheets by folding using the origami technique will be described in detail below in the article:
- Fold one A4 sheet in half horizontally. Then place this blank on top of a flat sheet and roll it all together into a tight tube. Attach the edge to the last turn with a glue stick.
- Take the next A4 sheet and fold it in half horizontally. Then bend the corners inward until they join the center line.
- A similar action is performed with those corners that appeared after the previous folding.
- On both sides of the workpiece you will see short, even sections remaining on the sides of the sheet. They also need to be turned to the middle.
- Fold the resulting part in half, smoothing all the fold lines with your fingers.
- Open the workpiece again and shape the blade with a thinner edge. To do this, fold the last folds another 1 cm inward and fold the paper in half again. In front of you will be the shape of a saber blade.
Assembling the sword hilt
to the begining
After I remade the crosspiece, I widened the hole in the pommel, shortened the tang to reinforce it, and made an additional recess at the top of the pommel.
First of all, I got the crossguard aligned with the sword's fuller. (See picture below) ..looks much better.
I also re-made the blackboard with wood lining and covered it with leather, but this will be covered in more detail later. Below in the picture is the original state of the pommel.
The next shot shows the pommel after I've milled out the hidden area for the tang.
The following illustration shows the pommel after I installed it (you can see the ugly blob). I probably nailed it too hard, but it turned out really strong. I'm sure everything is done very tightly.
In the photo below, the pommel and tang are cleaned, this is how it looks and is holding securely at the moment!
Below is a picture of the polished shank and pommel. The tip of the shank is barely visible.
The picture below shows the finished sword with the new hilt. I'm very happy with how it all turned out. Everything fits very tightly and now it has a lot more metal tang in the pommel.
How to connect parts
All that remains is to attach all the parts together. To do this, insert the first twisted tube into the inner fold of the blade and secure the connection with glue. All that remains is to make the handle. To do this, sheet A4 is folded in half horizontally, and then each half is brought to the center line by bending equal strips. The result is a thin flat strip with an opposing fold in the middle.
Cut a length of 4 cm along the fold with scissors and insert a blade with a tube into the cut. Attach the connection with glue. All that remains is to bend the paper handle and secure it to the other end of the tube with glue.
To do everything correctly, we suggest you watch the video instructions.
Now you know how to make a saber out of paper in different ways. Try making your favorite version yourself at home. Good luck!
Description and typology
- Armory
- Medieval swords
- Sword hilts
To make the sword convenient for use, the main metal structure had to be equipped with certain interchangeable accessories. Only a very small number of such additional devices have survived to this day, since they were made of wood or horn, leather or textile materials. Nevertheless, individual copies have reached us, and in good enough condition to tell us about production methods and changes that occurred over time.
KnifeHelp / Ideal checker
The perfect checkerIronically, the cavalry received the ideal weapon when it was no longer needed.
As children, we all played cavalrymen, and you, probably like me, were tormented by various questions. What is the difference between a saber and a checker? Why are they crooked, but swords and broadswords are straight? Why do some carry the blade up and others carry it down? Why do some sheaths have metal tips at the bottom? Why do some checkers have a hilt and others do not? How to chop correctly? Well, the sacramental question - which checker is the best in the world? We tried to answer these children's questions in these materials, which turned out to be not children's questions at all. Despite the fact that humanity has been hacking at each other for centuries, there has, oddly enough, been virtually no serious research into what an ideal edged weapon should look like. Most works on bladed weapons were nothing more than historical reference books. This probably explains the fact that almost all museum weapons are trash from a military point of view. Perhaps with one exception: the edged weapon of the East remains the best weapon of the horseman to this day. This paradox was first noticed by our compatriot and great gunsmith of the last century, Vladimir Grigorievich Fedorov. And he answered most of the questions in his book “Cold Weapons,” published in St. Petersburg in 1905 - just at the end of the era of this legendary type of weapon. Less than a percent
In fact, the era of edged weapons ended much earlier - already in the Crimean War of 1853–1856, wounds with edged weapons accounted for only 1.5%-3% of the total.
A little later, during the Russian-Turkish campaign, or more precisely, by 1877, when the battle of Plevna took place, this figure had already dropped to 0.99%. And so all over the world, with the exception of expeditionary colonial corps waging war on the native population: British losses from edged weapons in India reached 20%, and in Egypt - up to 15%. Nevertheless, this percentage was not discounted when planning the rearmament of the cavalry by the beginning of the First World War. Chop or prick
Now we have come to the answer to one of the questions. Saber and saber are curved edged weapons designed primarily for cutting. The broadsword is a direct thrusting weapon. The question of what is more effective for cavalry action - chopping or piercing weapons - is one of the main ones that occupied military theorists in the 19th century.
A checker is a weapon with a blade of slight curvature and a hilt with a simple guard or without it at all. A distinctive feature is a pendant for wearing in the Caucasian style, with the blade facing backwards
Let us present the main arguments of supporters of piercing weapons - swords and broadswords. The impact energy is proportional to the mass and the square of the speed (mv2/2), so the rider simply needs to point the tip at the enemy to inflict a terrible wound on him. At the same time, it is much more difficult to hit an enemy with a blow - delivered a little earlier or later, a chopping blow has neither the necessary accuracy nor strength. In addition, a strike requires two separate movements - a swing and a strike, and a thrust - one. When struck, the rider opens himself, and holding the broadsword for the injection, on the contrary, closes himself. The arguments, we note, are very convincing, which is why the European cavalry (especially the heavy ones: cuirassiers and cavalry guards) was mainly armed with broadswords. They were used to arm dragoons and other types of light cavalry, not to mention artillery servants. Since 1711, broadswords have completely replaced sabers in Russia. A special cult of piercing blades existed in France, where they were used as dueling weapons and every self-respecting person was simply obliged to master the techniques of fencing with a sword. From there, fashion spread throughout Europe.
The more tangential the blow is, the smaller the cross-sectional angle of the blade
East is a delicate matter
There is only one discrepancy in these harmonious arguments - the cavalry of the East. Mongol-Tatar and Arab horsemen easily dealt with both light cavalry and heavily armored knights with their crooked sabers. Moreover, captured Asian sabers were worth their weight in gold, and not at all for their appearance, but precisely for their fighting qualities. Not a single eastern warrior was seen with either a two-handed sword or a captured broadsword. “In the entire East, I don’t know a single people who had anything similar to broadswords,” wrote the famous Russian military theorist of the 19th century, General Mikhail Ivanovich Dragomirov, “where the enemy did not refuse a dump, but looked for it for use on horseback - chopping weapons have always been preferred to piercing ones.” But the East is the birthplace of cavalry, and over the centuries, eastern sabers have turned into ideal weapons, where every detail is thought out and tested in practice. Note that the Caucasian highlanders and Russian Cossacks, these born grunts, also always used chopping weapons. Why?
On the eastern saber (a), the center of gravity is behind the axis passing through the handle. On European blades (b), the handle is bent towards the tip, which is better for thrusting, but worsens the balance of the weapon
The first argument was the area of damage - for a broadsword it is a line described by the tip, for a saber it is a plane cut by the blade. The second argument is the advantage of the saber at low speed of the rider, when the broadsword becomes practically useless, and the speed of the saber does not decrease much. Crooked sabers
Fedorov considered his main task not to explain why the East chose the saber, but why it had such characteristics.
And first of all, why is it crooked? You can't do without elementary geometry here. Blade manufacturers are faced with a problem: the narrower the blade and the smaller the sharpening angle, the easier it penetrates the fabric; but blades that are too sharp have high fragility; their blade is easily damaged by a strong blow. However, Fedorov noticed that when striking, it is not so much the sharpening angle of the real blade that is important, but the cross-sectional angle, and the less right angle the blade falls to the body, the smaller the “effective” cross-sectional angle (Fig. 1). From this it is clear that in order to strike more effectively with a straight blade, it is necessary to strike at an angle. In order to impart such a trajectory to the blade, you should, while lowering your hand, simultaneously pull it towards you - the so-called “pull” blow. The pull provides additional action to the blade - moving across the fabric, it consistently cuts the fibers, like a saw or kitchen knife, which further facilitates the penetration of the blade into the body. But such an action, Fedorov notes, wastes part of the force, which is why the blows cannot be so effective. But the highly curved Mameluke sabers, in which the blade angle reaches 450, when inflicting a wound, are 3–5 times sharper than straight blades with a similar cross-section. Along the way, they cut the fibers and cause longer incised wounds. Center of gravity
The next secret of eastern blades is the location of the center of gravity behind the butt. To explain it, let's use a carpenter's ax as an example. If the ax is simply mounted on a round stick, it will be extremely inconvenient to work with it - the center of gravity will be in front of the axis passing through the handle. Therefore, the axes are made curved, moving the center of gravity back (Fig. 3). The same with blades - if the center of gravity is behind the axis passing through the handle, the plane of the blade ideally coincides with the direction of the blow (Fig. 2). The main disadvantage of European sabers is the forward curved handle (this is supposedly more convenient for thrusts), which automatically excludes the possibility of correct cutting, writes Fedorov. Note that Caucasian and Cossack checkers have straight handles.
Handles
Another drawback of European sabers is that their handles, as a rule, are covered with various grooves, and even wrapped in wire, again supposedly for ease of holding the weapon.
In good oriental blades, the opposite is true: their handles are absolutely smooth - made of horn, ivory, hard wood, often covered with suede for ease of holding. This is understandable - experienced fighters practiced with a saber for several hours a day, and the handles with scars would quickly cut the palm into blood. Fedorov again cites the example of carpenter's axes with their perfectly polished handles. Wedge by wedge
Another aspect that was completely neglected by European masters was the cross-section of the blade.
In most European samples it has the shape of a wedge, and in some the butt was even thickened, as, for example, in Russian light cavalry sabers of the early 19th century. As a result, the further the blade penetrates into the flesh, the greater the resistance. In eastern blades, the greatest thickening of the blade is located closer to the blade, and the entire part of the blade behind this thickening no longer encounters resistance (Fig. 4). The valleys on the blade do not play the mythical role of blood flow, but increase resistance to bending and reduce the weight of the weapon. On eastern blades, all corners of the fullers are rounded, but on European ones, both the fullers themselves and the butt have sharply defined corners, which, upon impact, somewhat delay the penetration of the blade into the body. Lightweight arguments
Another stumbling block is the weight of the weapon.
Traditionally in Europe it was believed that the heavier the blade, the more effective it is in battle - just remember the legendary two-handed swords. Europeans disparagingly called eastern sabers lightweight. Nevertheless, even here the eastern gunsmiths turned out to be right - after all, the force of the blow, as we have already written, is proportional to the mass and the square of the speed. Therefore, it is much more effective to increase the speed of impact, which is higher for lighter eastern blades. In addition to increasing speed, lighter blades made it possible to perform fencing tricks that combat units with heavy sabers could not even dream of. In particular, participants in the Russian-Caucasian wars noted that while the Russian rider was swinging a heavy saber, the Caucasian warrior managed to strike the elbow area from below and then deliver a fatal blow to the disarmed enemy. Center of gravity
Well, the last thing Fedorov pays attention to is the center of gravity.
Obviously, he writes, that in order to increase the force of the blow, the part of the blade with which the blow is struck must be heavier than all other parts of the saber, therefore, the center of gravity must be shifted as much as possible towards the tip. The part of the blade adjacent to the handle serves solely to transmit the force of the blow - in an ax this role is played by the ax handle. Therefore, it is not at all necessary to make it the same width and thickness as the rest of the blade. Nevertheless, European blades are made almost the same width along the entire length, sometimes even widening towards the hilt. Eastern curved sabers, on the contrary, widen towards the end, tapering towards the hilt. All this for one purpose - to give the working part of the blade maximum weight and lighten the rest. By the way, with a piercing weapon the balance should be completely different: the closer the center of gravity is to the hilt, the more effective the thrust. A good example is French swords. The center of gravity should not be confused with the center of impact, often indicated on eastern blades by a special notch on the butt; in the Russian saber of the 1881 model, the fullers end in this place. When the direction of impact passes through this point, the hand does not receive any shock. They wanted the best.
In 1881, under the leadership of Lieutenant General A.P.
Gorlov, a weapons reform was carried out with the aim of establishing a uniform model of edged weapons for all branches of the military. A Caucasian blade was taken as a model for the blade, “which in the East, in Asia Minor, between the Caucasian peoples and our local Cossacks there is highly famous as a weapon that has extraordinary advantages when cutting.” Cavalry, dragoon and infantry sabers, as well as cuirassier broadswords, were then replaced by uniform dragoon and Cossack sabers of the 1881 model. This was the first attempt to scientifically substantiate the choice of edged weapons. This checker had one problem - it was developed for two mutually exclusive purposes: for chopping and thrusting. Fedorov writes: “It must be admitted that our saber of the 1881 model both thrusts and cuts poorly. Our saber cuts poorly: – due to its slight curvature, which loses all the advantages of curved sabers; – due to incorrect seating of the handle. To give the saber piercing properties, the middle line of the handle is directed towards the tip - to do this, the handle had to be slightly bent in the direction from the butt to the blade. Which led to the loss of some good cutting properties of the weapon. Our saber thrusts unsatisfactorily: - to give it chopping properties it is made curved, which delays its penetration; – due to the significant weight and the distance of the center of gravity from the hilt.” Weapons of undersized dragoons
What should the ideal saber be like?
Professional grunts - Cossacks and highlanders - have one answer to this question: of course, the famous Caucasian “top”. This is what Caucasian checkers were called in the 19th century because of the often found mark on them with the image of a wolf. However, this weapon is ideal specifically for professionals involved in dressage and practicing with a saber from early childhood for several hours a day. What the Cossacks and highlanders did with their blades was beyond the power of a combat soldier to repeat. They required a simple and reliable weapon, a kind of “Kalashnikov saber machine gun,” with which the soldiers could cut and stab tolerably well. Fedorov divided this problem into four subtasks: choose the correct curvature of the blade and handle attachment, check the position of the center of gravity and the weight of the blade. 1. The curvature of our blade, Fedorov wrote, exactly repeats the curvature of the famous Caucasian tops - ideally suited for both chopping and thrusting. The verdict was this: leave the curvature unchanged. 2. General Gorlov, in order to provide the saber of the 1881 model with better piercing properties, gave the handle a slope from the butt to the blade, directing the middle line of the handle to the tip. It became inconvenient to operate such a weapon. But the checkers of the Caucasian Cossack army of the 1904 model do not have such an inclination. It would be advisable to abandon the tilt in all checkers. 3. In our saber, the center of gravity is located 21 cm from the lower end of the bow, while in all samples of foreign edged weapons it is located at a distance of 9–13 cm from the hilt. If we take such blades in our hands and compare them with our saber, then it will immediately become obvious how much more convenient it is to act first, how light and free they are in the hand. Gorlov adopted the location of the center of gravity the same as in the Caucasian tops, thereby increasing the force of the blow. But let’s not forget, writes Fedorov, that it is easy for the mountaineers to operate with such weapons, since they are accustomed to wielding them from childhood. For combat dragoons with short service periods, this is unattainable. The conclusion is this: the center of gravity needs to be raised closer to the hilt. Moreover, with this arrangement, the tilt of the handle is no longer so important. 4. The blade with the hilt of the Russian saber weighs 1.025 kg. Despite the fact that European models have a similar weight, Fedorov argues that it should be considered significant “for our undersized dragoons.” It is interesting that the saber originally designed by Gorlov had significantly less weight, but during mass production at the Zlatoust Arms Plant, the weight increased by almost 400 g, since the plant could not cope with the quality requirements for blades and sheaths. Therefore, it is necessary to return to the original weight characteristics. Fedorov’s ideal checker
Almost simultaneously with the publication of the book “Edged Weapon” in 1905, Fedorov wrote a report to the artillery committee - “On changes to the 1881 model checker.” In it, he put forward specific proposals for its improvement.
The St. Petersburg Military Historical Artillery Museum houses three samples from that experimental batch of Fedorov. True, which of them was “number six”, no one knows. The far right checker is a soldier's dragoon, an experimental model from the 1900s.
Based on these proposals, several versions of experimental checkers were made with different positions of the center of gravity and modified curvature of the handle. Soon, prototypes of these checkers were transferred for testing to military units, in particular to the Officer Cavalry School. Knowing nothing about Fedorov's theoretical considerations, the cavalrymen had to choose the best example through practical testing on vines and stuffed animals of its cutting and piercing qualities. Blades with a changed center of gravity were presented (20 cm, 17 cm and 15 cm instead of the existing 21.5 cm). At the same time, the blades were lightened by 200 g and shortened from 86 cm to 81 cm. Some of the blades were made with standard handles, some with a corrected slope. All cavalrymen unanimously approved sample No. 6, with a center of gravity 15 cm from the hilt and a modified handle. Based on this model, 250 blades were made; they were armed with a squadron of the Officer Cavalry School and a squadron of the 17th Nizhyn Regiment. “In view of the declaration of world war, these units set out on a campaign with these weapons. The tests were not completed,” Fedorov wrote later.
When preparing the article, photographs from the book by A.N. were used. Kulinsky “Russian edged weapons”, provided by the Atlant publishing house.
1826 Soldier's cuirassier broadsword . Total length 1150 mm, blade length 980 mm, blade width 35 mm. In broadswords of early releases, the lower nut on the scabbard was located quite low, and when the upper pass belt broke, the weapon turned over with the hilt down, falling out of the scabbard. Therefore, from the late 1830s, the lower nut on the scabbard was installed closer to the top
1895. Saber of the lower ranks of the Turkmen cavalry division. Total length 940 mm, blade length 810 mm, blade width 34 mm. The hilt consists of a handle with a head and a cross with a crosshair. The handle is formed by two bone cheeks riveted to the shank of the blade. The upper ends of the crosshairs are recessed into the cheeks of the handle, the lower ends fit into the corresponding recesses on the sheath when the weapon is inserted into them. Wooden scabbard covered with leather
1856 Sailors' boarding broadswords . Total length 880 mm, blade length 740 mm, blade width 36 mm. In 1856, the broadsword replaced engineer and naval artillery cutlasses among the lower ranks of the Naval Department. In 1858, assigned to midshipmen and cadets of the Naval Cadet Corps and technical schools of the Naval Department. In 1900, it was removed from service with sailors and left only to naval midshipmen, cadets and students of the Naval Engineering School, whose uniform was part of the uniform until 1917.
1827 Soldier's cavalry saber . Total length 1020 mm, blade length 880 mm, blade width 36 mm. “The saber in an iron scabbard adopted by us for light cavalry does not satisfy its purpose: it is brittle, heavy, the blade is easily dulled in the metal sheath, hanging low. It pulls back the rider's waist, hits the horse's legs at fast gaits, and makes noise that drowns out the command; in addition, the noise from the saber does not allow hidden movements, so it will always prematurely announce to the enemy the approach of cavalry (to avoid which sabers are often wrapped in straw).” (Military collection. 1868 No. 9)
1827 Cossack Guards Officer's Saber . In 1909, all Cossacks were allowed to serve with “grandfather’s weapons,” that is, with edged weapons inherited from their ancestors. This decision especially affected the armament of the Guards Cossack regiments.
1904 Cossack saber of the lower ranks . Checker of the lower ranks: length 920 mm, blade length 740 mm, blade width 35 mm. In 1904, the question arose about introducing a single sample of checkers for lower ranks and officers of the Cossack troops. It was decided “to leave the good blades of checkers and daggers currently available to the officers of the Caucasian Cossack army without changes; again, the blades acquired by officers must be of the same type as will be approved for the lower ranks of these troops and in the decoration of scabbards and handles... officers should not be embarrassed” (V.G. Fedorov, “Edged Weapons”). The Asian-style saber was also worn by officers of the army dragoon regiments.
1834 Soldier's checkers of the Asian type . Total length 1000 mm, blade length 880 mm, blade width 34 mm. The Asian officer's saber of the 1834 model differed from the soldier's in that it had arbitrary decorations on the handles and sheath. “Officers... began to trim their checkers in silver in the Caucasian manner, the regiment commander Bezobrazov allowed them to be worn not on a uniform braided sword belt, but on a black Kabardian belt with a silver set... Bezobrazov... ordered a model checker, which he intended to send to the sovereign...” (Potto V. History of the 44th Dragoon Nizhny Novgorod... Regiment, 1984)