Currently, laser engraved products are becoming increasingly popular. With its help, not only the usual souvenirs and gifts are produced. Laser printing helps create clothes, bags, wooden models, and is also used in large enterprises. For some, such an activity is a hobby in their free time, while for others it brings good profit and becomes their main activity. Engravers can be large CNC machines or small units for home use. Our article will help you figure out which model is best to choose from the entire variety presented in this segment.
Peculiarities
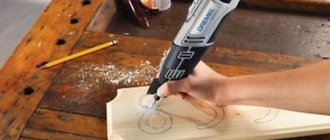
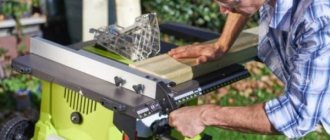
A laser engraver is a special device that performs several functions. It can be used to cut material and apply markings. The laser engraver is universal and can work with metal, wood, acrylic, and glass. It is completely safe, and also has a high speed of completing tasks.
Also, the metal laser engraver is equipped with CNC (computer numerical control). In other words, the device works like a computer. It is enough to select a design, set its dimensions and determine the type of material - everything else will be done automatically.
Important! When using a laser engraver, you must not forget about safety precautions, otherwise you may get injured.
The equipment can be used at home. The main thing is to choose the right model. Anyone can master the art of engraving.
Laser for engraver with power 5500mW. Practical use.
The review is a continuation of the story about the practical use at home of a laser engraving machine with a working area of A3 format. Last time we talked about a kit for self-assembly, equipped with a 2500mW laser. This time I will talk about replacing it with a laser with a stated power of 5500mW. From the review you will be able to find out how many passes such a laser is capable of burning through 3 mm and 4 mm plywood, what is needed for this and, most importantly, what to do with it later. Next - a lot of letters and photos. So, many probably remember the first part of this review in which I tried to talk about the use of both the machine itself and how to work with the BenBox software. At the end of the review, I mentioned that the owner of the device had an idea to upgrade it and install a more powerful laser. The main motivation for modernization was the desire to cut out crafts from plywood. Although initially, before purchasing the first option, there was only a need to cut felt figures, which, by the way, the previous laser did an excellent job with, during the testing period it turned out that it also cuts plywood, but this requires a relatively long time.
The idea of a replacement was in the air for not very long and soon became a real order.
Order screen The laser comes complete with a power supply.
On the laser body, which is essentially one solid radiator, there is a sticker indicating the required voltage and output power.
The power supply is designed for 12v and 5A.
You can use the laser “out of the box”, because The control board is already built-in and located above the radiator cooling cooler. To turn it on, you just need to connect the power supply. After this, the laser will turn on at maximum power. To turn on the minimum mode, use one single button on the board.
Judging by the characteristics, the laser wavelength is 450nm, the beam color is blue. Unfortunately, I didn’t take a photo of the new laser with the old one, but in general, first of all, the difference is clearly noticeable in size. This is most likely due to the size of the radiator, which looks much larger and more impressive.
In addition, the size of the adjustment portion of the focal lens has also become approximately twice as large.
This is what the laser looks like when installed. Here you can see that the additional cooler, which prevents smoke from settling on the laser lens, was still attached to the carriage and now moves with the laser. Its weight is insignificant and so far this has not negatively affected the operation of stepper motors.
For fastening, a part from a children's iron construction set was used. With sufficient rigidity, it is quite flexible, so you can easily select the required angle of inclination of the cooler for a specific situation.
Along with the laser, these tiny radiators (10x10 mm) on a self-adhesive base were ordered.
Radiators were purchased for installation on two microcircuits of the laser board, because When the device is operating, they heat up quite noticeably and there were concerns about their condition.
The first tests showed that the laser is indeed more powerful than the previous one, taking into account the same approach to the cutting procedure. That is, strange as it may be to state, but “by eye” the power has actually been approximately doubled.
Those. What was cut on a 2500mW laser in 6-8 passes is now cut in 3-4. But that’s for now... (more on that later).
The first clever craft, at the request of friends, was to make the so-called “medal box”. Those. it's kind of like a themed medal hanger. Since the machine can only handle “troika” plywood so far, we decided to make two blanks and then glue them together to achieve the required strength.
The photo below shows that the first attempt was not very successful, and all because it is not always clear whether the entire figure was cut through or not, moreover, this is greatly influenced by the bending of the plywood, which is not always perfectly smooth.
In the end, on the second attempt I got what I wanted, but that’s not the point in this case.
And the fact is that every time I got tired of looking for something to put the workpiece on so that it could be seen from below how well it was cut through, it was decided to stock some special device for these purposes.
Machine modernization
Based on the design features of the machine frame, an excellent option as a base for this seemed to be the use of two long guides along which movement of the mechanism is not provided. In addition, these guides have a recess into which you can attach the device. The distance between the centers of the guides was 41.5 cm.
A wide drywall profile that had been sitting idle in the corner for a long time was perfect for its intended purpose. To do this, a piece of the required length was cut from it and cut lengthwise - thereby creating two corners with a stiffening rib.
We cut off the “extra” pieces so that one edge of the corner fits freely between the guides, and the other rests on them.
We bend part of the corner under the groove of the guide on both sides so that the corner can move and at the same time not jump out of the guide.
It turns out that now we have two crossbars that can be freely moved inside the working area of the machine and thereby place any piece of plywood on them.
If necessary, they can simply be moved in any direction so as not to interfere.
This is how you can now place the plywood, while the distance from its surface to the laser lens is about 36 mm.
But perhaps the most important thing with this approach is that now the plywood can be pulled to the resulting guides in the right places, either with self-tapping screws or clamps, and thereby ensure its “evenness” along the entire perimeter of the proposed craft.
Well, this is how it turns out that you can observe during the operation of the laser how well the part is cut and whether or not it is necessary to make additional passes.
Having practiced cutting out flat crafts with a previous laser, I have long wanted to try to make something really useful and interesting, for example something from the category of small boxes. But this matter, as you understand, is not entirely simple, that is, of course, the principle is the same as always - you need to cut the parts and then connect them, but since there are quite a lot of parts, the accuracy of the drawing should be sufficient so that in the end I didn’t have to throw everything away because... I can't connect them. In addition, returning again to the number of parts, the issue of automation of cutting arises from the point of view of the need to perform several passes.
If you read my previous review, you probably remember that the BenBox program I use does not have the ability to set the number of required passes through the picture and you have to press the start button after each pass independently as many times as required.
So here it is. It turned out that after all, not everything with this program is as bad as it seemed at first glance. No, of course I didn’t find a secret field in it to set this parameter, everything is a little simpler and more complicated at the same time.
BenBox is capable of receiving tasks not only in visual mode by selecting a picture depicting the outline of a figure, but also loading a special sequence of commands - G-code - into a special window, and in this very mode you can set the necessary commands the required number of times. Those. in a simple way - you need to draw a circle three times, give these commands three times and the machine will obediently draw a circle three times. True, as always, “there are a couple of nuances...”.
Firstly, you can set these commands only either by entering them manually or by pasting them immediately as a block from memory (clipboard) or by copying them from the desired file.
Secondly, strange as it may seem, there is no mode for loading from a file directly, i.e. only in the manner described above.
Thirdly, despite the fact that this same code also includes setting the speed of the laser, in BenBox these commands are completely ignored and the only value is used - set in its own special field.
This is about Benbox. But it is necessary to remember that this set of commands (G-code) still needs to be obtained somehow. And this is not entirely simple. Those. the principle itself is quite simple - you need to convert the image needed for cutting/engraving into commands, which are then fed to Benbox. But finding a program suitable for this from a large number of existing ones, and even so that the output produces the required set of commands - this is already difficult.
One wonderful person helped me figure this out, who also owns a Chinese laser engraver, with whom we corresponded as part of an exchange of operating experience, for which I would like to express my gratitude and say a big “Thank you.”
So, for the above-described correct and fairly convenient conversion of pictures into a set of commands for cutting/engraving, the VCarve Pro program is well suited. I won’t tell you where you can download it - I think this is not a problem for most readers.
Next, I will talk a little about its application using the example of creating an interesting craft from plywood - a book box. Here is the original (not mine) photo of such a box.
This design immediately attracts attention because it “freely bends something that, by definition, should not bend.” That is, here the upper and lower sides of the box are integral with each other, and the part connecting them bends and does not break with the help of specially cut slots, forming a kind of book binding.
I’ve long wanted to see how it would look in practice; besides, the dimensions of such a box are relatively small, so it shouldn’t take too much time to cut it out.
In its original design, as in the picture, the box is complemented by engraving and has a strange-looking, but very interesting latch lock. I simplified the design a little and prepared the following drawing based on it.
Getting G-code using VCarve Pro
Launch VCarve Pro, load our image into it and select the top menu item, as shown in the picture. This is necessary in order to obtain a “trace” of our image (vector contour).
Next, as shown in the lower image under the number 1, you need to click on the bookmark in the upper right corner of the program.
In the window that appears (2), you need to select the button (Quick Engrave), after which window 3 will appear. A little about its elements. 1 – button for selecting the virtual instrument with which we want to work. 2 – engraver operating mode switch (external contour or filling). 3 – by checking the box, here you can specify the required number of passes (yes, this is the same one!). 4 – any meaningful name for the created task. 5 – button that starts the mode for calculating the path of the laser along the specified contour. 6 – one of the most important elements, the post-processor selection menu. Those. This is where the type of code we need is selected.
And now, in order. First, we need to set the parameters of the virtual instrument with which we plan to work (button 1 in the figure above).
In the window that appears, we need to enter a name that is clear to us (1), select the type of tool - engraver (2), set the maximum (or desired) laser power (from 0 to 255), specify the units of measurement exactly as mm/min (4), and also enter the laser movement speed required for this task (the depth of the cut depends on this) and save the “tool”.
Next, in the main program window, you need to select the contours in the image relative to which the task will be generated. Those. in this case, you can first, for example, select the internal contours for engraving, and then the external ones for cutting. If this is not required, then with the right button you can use the specified menu item to simply select all the contours that exist.
Next, you need to specify the required number of passes (1) and select the desired post-processor (2). As for the post-processor, the program does not contain a suitable one for working with Banbox. You can download it from here and then place it in the program folder at the address “C:\Users\All Users\Vectric\VCarve Pro\V6.0\PostP\”.
After this, you need to click the calculation button (3) and finally, you can immediately save the resulting code to a file if you do not need to generate several tasks, or close the window with the “Close” button.
The generated tasks are displayed at the top of the window (1). To save, you need to check the boxes you need and press button 2. Then make sure that the checkbox in point 3 is checked, check that the post-processor is selected correctly and save the tasks to a file with button 4.
As a result, we get a file with the .nc extension that can be opened with a simple Notepad. This is what our set of commands looks like, which must be selected from the first to the last line and copied to the clipboard.
Then, in Banbox, you must pre-specify the required speed of the laser and press the button, as shown in the picture below.
And using the key combination Ctrl+V or Shift+Insert, paste the code from the clipboard into the field indicated in the picture (the menu for pasting with the right mouse button does not work). After clicking on the blue button with a checkmark, the program should start sending commands to the machine.
An interesting feature of the multi-pass operating mode is that the machine does not go through the entire image in a circle each time, but makes a given number of passes at once through each element and does not return to it again.
So, as a result, we get this set of elements.
And this is how a solid piece of plywood can now bend.
There is no need to use glue during assembly, because... All parts fit very tightly.
The internal usable space has dimensions corresponding to standard plastic cards.
I’ve never done this before, but for testing I covered the box first with a dark stain and then with varnish. Taking into account the lack of experience in this direction, I think that it turned out well for the first time)).
In general, the box-box turned out well, it was cut out in 5 passes (the fifth is just in case, to secure it, so to speak). But for some reason I couldn’t shake the feeling that I was doing something not quite right, because... I still wanted more performance.
After some thought, an interesting idea came to mind. Perhaps I will tell you a fact that has long been generally accepted, but I have not yet personally encountered such an approach, so I apologize in advance.
Focus about "Focus"
So, let's remember by what principle the laser focusing lens is usually adjusted? With the laser turned on at minimum power, it is necessary to rotate the lens focus adjustment to achieve the minimum size of the laser spot on the surface to be processed and ideally turning it into a point. In this case, the minimum spot size guarantees us maximum laser power, everything would seem to be correct. But watching the cutting process, I was greatly embarrassed by the fact that the almost perfect cut at the beginning of the process became somehow weak towards the end, in some places not even cutting the plywood from below.
So, if you haven’t yet guessed where I’m going with this, let me explain. When the laser is deepened into the plywood, it turns out that with each pass the distance from the laser to the surface increases, and what happens? — defocusing of the beam with an inevitable drop in its power at the end point.
And so it turns out: the deeper, the worse. If so, then on the contrary, by focusing the beam slightly below the cutting surface, we should achieve an increase in laser power closer to the opposite surface.
To test my theory, I tried to focus the beam not on the plywood itself, but on the surface underneath it, assuming in advance that nothing worthwhile would come of it, because... the spot on the plywood should not have been very small and therefore the cut should, in theory, be heavily charred. But a miracle happened!
Three-piece plywood is cut in two passes to the “self-falling” state, the cutting speed, according to the Banbox parameters, was 150.
But as always, what? There were some nuances. The main one is that the plywood must lie absolutely flat throughout the entire cutting plane, so it must be pulled together.
Here, as an example, are two circles that were cut using the same parameters. In the first case, the plywood, even with relative “flatness,” was not attracted to the guides and the result was this horror.
On the same piece, but already pulled together with a clamp, it turned out like this. By the way, this process is shown in the video, which will be at the end of the review.
Having finally been satisfied with the result, I wanted to continue my experiments in the field of box making, the goal of which is to create some kind of beauty. But this path must be said to be very difficult and thorny.
After making the book box, I tried to prepare a drawing for the dimensions I wanted, but I quickly realized that although this task was quite doable, I didn’t like the time spent on it at all.
The fact is that you need to be very careful about the dimensions of all the details of the drawing so that later they are joined in the right places and do not fall out, and all this plus depends on the complexity of the design itself. In general, after fiddling around for a couple of days, I realized that laziness had won once again and began to look for ways to automate this process.
Among people engaged in cutting on powerful CO2 laser machines (from 40W), the development of drawings in Corel Draw is very popular, for which there are specialized macro programs that can create various drawings of boxes according to user-specified parameters. There are both free and paid developments.
Having set out to create a beautiful carved box, I quickly realized that among the free programs there was nothing special to catch, since almost all of them were designed only for simple models of boxes. As a result of the search, we managed to come across a very good development called “Casket Designer”.
The Box Designer is a macro for Corel Draw for quickly designing various three-dimensional structures from sheet material (mainly wood). On a specialized forum, a separate discussion is devoted to this macro, in which the developer himself takes an active part.
Speaking of the developer, we must give him credit, because... I have not seen such a detailed and easy-to-understand user manual for a long time. It’s enough to just read it carefully and you’ll already begin to get the impression that you’ve been using this program yourself for a couple of weeks. Further, I will not go into detail about what is intended in the program and for what purpose, because... It still won’t be possible to do this better than what’s already described in the manual.
There is a free version of a similar macro called “Box Designer,” but from its rather utilitarian name it’s easy to guess what it’s intended for and if, for example, you’re not particularly interested in the creative component of a box, then this macro is quite suitable.
After downloading, installing and seeing what’s what in the free version, as well as carefully reading the above manual, I realized that the paid version is exactly what I need in my case. I should immediately note that the cost of a full-fledged program was not as high as I thought, and is comparable to the cost of one or two boxes made according to the drawings created with its help. In addition, on the eve of the New Year holidays, the author provides a discount on it. In short, I bought this macro.
There is no need to install either paid or free versions of the macro as such, just copy the file to a special Corel folder before launching it (in my case it’s “C:\Program Files (x86)\Corel\CorelDRAW Graphics Suite X8\Draw\GMS\ ").
Next, you need to launch Corel and go to the appropriate menu items, as shown in the pictures below.
Select the macro and list and click the “Run” button.
If everything worked out as it should, then a window like this will appear on the screen.
For the first time, I decided to try to make a simple box, but with a lid that opens on hinges. To do this, you need to select the desired type of product from the proposed list.
Making a box with a lid
Go through the tabs, filling out the fields with the required dimensions and a bunch of other parameters that characterize the product you want to create.
After which, returning to the first window of the program, you need to click on the “Create drawing” button and voila - receive/sign a “drawing for an individual project”.
After that, I export to .bmp format and process the drawing as I need. For example, I fill it with black for ease of cutting.
Well, then it’s a matter of technology. We load, cut and get these parts.
Everything comes together very tightly, I even had to resort to using a small hammer.
Well, the time has finally come to set our sights on something beautiful and carved - let's start making the box.
Making a carved box
For all its supposed complexity, the process of creating a drawing is not much different from creating a simple box. Select a carved box from the list of products.
We go through the parameters and select the required sizes, as well as design elements.
Here there is an additional possibility of placing patterns on the elements of the box that will need to be cut out. The principle here is the following. Before selecting this option, you must first open the document that contains the pattern drawing, then click the “Select” button in the desired element of the box and trace the pattern with the mouse in selection mode. After this, if everything is done correctly, the selected pattern will be intercepted by the macro and loaded into the program.
You can also choose the shape of the lid and walls of the box.
For example, this is how the lid and one of the walls of the future box will look like (this is after filling and adding additional holes in the lid).
We cut it.
After cutting, I sanded all the parts in order to remove traces of carbon deposits and give a smooth surface to the plywood.
We collect.
I specially made short walls, one with holes for fastening the bottom, the second without them, to check how realistic it is to assemble the structure in one and the other case. It turned out that both options are quite feasible, the bottom does not wobble.
One more element is not visible in the photo - since our lid is of an overhead type, there is another element here, which is a board that is glued to the inside of the lid.
We cover the box with stain and get this beauty. Apply varnish while your hands are not yet ready.
At this point, I consider the experiment in making the box completed and quite successful.
In conclusion, I wanted to talk about another interesting possibility of using a laser. We haven't forgotten that this is not just a cutting tool, have we? He also engraves. Who said that engraving should just be a flat picture? But what if you try to engrave at a lower speed, what will happen?
Deep engraving
And then you will get some semblance of the work of a cutter! Here is an example of making a medal with a three-dimensional pattern.
We prepare two drawings, first, in the engraving mode, we burn out all the dark areas at a low laser speed (the depth will depend on this).
Then we load the outline of the medal and burn it in the cutting mode.
It turns out something like this.
After this, the product can be painted.
Using the same principle, again by selecting the appropriate material and speed, you can make some kind of seals or similar things. Well, of course, you shouldn’t forget to “mirror” the image.
Video demonstrating how the laser works
I note that, of course, when cutting large parts, it is difficult to pull the workpiece well over the entire plane, and in such places it is not always possible to cut in two passes, but in general, using the focusing method described above, the picture turns out to be quite acceptable.
UPD
We cut four
I got hold of a small piece of 4mm plywood. I tried to burn it. It turned out three passes before the “self-dumping”. The principle of focusing is the same as described above - along a guide under the plywood.
Here it is, a 5.5 W laser.
Discount information
The reviewed 5500mW laser was purchased with a “DotGB” coupon for $247.99
Thank you for your attention and good luck to everyone.
Advantages and disadvantages
The advantages of a laser engraver include:
- accuracy of drawing;
- ability to work with different types of materials;
- simple controls;
- waste-free production.
The main advantage of the device is automation. Thanks to software control, the likelihood of error is minimized. However, they are not excluded and you need to learn how to use an engraver.
With a sufficient level of skill, you can cut out complex designs
However, the equipment also has disadvantages. During the cutting and engraving process, it is impossible to adjust the depth of the design. Therefore, the surface will be non-uniform and this is not always good. In addition, not all materials tolerate laser treatment well—they become deformed under the influence of high temperatures.
Another drawback of the engraver is its low productivity. Even with a powerful model, it can be difficult to produce a large batch of products. You will need to take breaks.
Key advantages of laser engravers
- High level of detail when reproducing any image, even photographic. This is explained by the fact that equipment of this type provides maximum accuracy when positioning the tool above the surface at any speed of its movement. Another factor is the beam diameter, which is extremely small (about 0.01 mm), which allows it to burn the smallest pattern elements onto the surface without errors.
- The absence of mechanical and thermal effects on the surface of the product eliminates the appearance of scratches and other deformations. Despite the fact that a laser tool is a focused high-temperature flow, the material is heated strictly in the cutting zone corresponding to the diameter of the beam.
- Exceptionally high engraving speed (up to 7000 mm/s), several times higher than this figure in comparison with milling equipment, and hundreds of times in comparison with the manual method. At the same time, as already mentioned, the quality of work remains impeccable.
This is interesting: Choosing a tabletop metal lathe for your home
Kinds
Before choosing a laser engraver, you need to decide on its type. This will help save money. In addition, with the right choice, you can find equipment that will be ideal for performing the assigned tasks.
Important! It is not necessary to consider only European or American brands. Among the Chinese there are also many worthy brands.
By source type
There are two varieties:
- Electrical. Just plug the device into a power outlet and it will start working. However, it can be difficult to move it to another location due to the length of the cable.
- Rechargeable. Portable models that are easy to move. However, they work for a limited time, after which the device will have to be charged.
There are also two types of engravers:
- Gas. Inside the device there is a tube containing a gaseous substance. Suitable for applying designs to leather, wood, plastic, glass, etc. Does not work with metals.
- Solid state. Solids are used as the active medium. Works with most materials. They are more expensive than gas ones, but are more suitable for industrial work.
By working surface area
Desktop engravers are suitable for home use. They do not take up much space and allow you to work with small batches of materials. However, they do not always provide a good view of the work surface.
Desktop engraver fits easily on a regular desk
Medium-sized devices offer great capabilities. They can handle a good amount of work, but they will need space. For example, in a garage or separate room.
Industrial machines with an area of 1.5 m are suitable for large-scale production. Special workshops are used for their installation. In addition, working behind them will require special qualifications.
By power
Choosing an engraver for your home is not such an easy task. The higher its power, the better the performance, but at the same time energy consumption increases. At the same time, there is one more nuance: the thicker the material, the stronger the device should be.
Therefore, before choosing a laser engraver, you should decide on the prospects. So, to work with materials up to 5 mm thick, a 15-20 W model is sufficient. Only the speed of this model is low and the work area is small. If you increase the power, the engraver can handle a 10 mm sheet.
A device of 80-100 W is enough to work with metal, plywood and other materials. This will give you good speed and working area. There are engravers with a power of 100-200 W - this is typical for industrial work.
For reference! For powerful devices, sometimes a conventional 220 V outlet is not enough. When choosing, you must pay attention to this.
Engraving technique
Laser engraving is a process in which a focused beam is applied to the working surface. The material begins to melt due to intense heating. If the metal sheet is of small thickness, the laser will quickly cut it into two parts.
There are two ways to apply a drawing:
- vector - images are made up of thin lines;
- raster - to obtain an image, a large number of dots are applied using equipment.
Laser machines are equipped with CNC systems. This allows you to create beautiful images without any effort on the part of the artist. It is enough to download the image to the computer, set the algorithm, set the workpiece, and start the unit. Thanks to this, most errors and inaccuracies during work are eliminated.
Why do you need a laser engraver?
You can find a reliable device, but first you need to decide on the scope of application. For example, making drawings, decorative finishing of packaging, making souvenirs and much more.
Powerful laser engravers are indispensable in funeral agencies. Using the program, the wizard determines the text, drawing, and equipment performs the task. Another option is to make tombstones.
Important! The more multifunctional the device, the more expensive it is. But there are more prospects with him.
The choice of engraver must be made taking into account the complexity of the work. To create complex designs such as barcodes or stamps, fine tuning is important. Engraving is mainly in demand in the field of advertising and the manufacture of souvenirs.
Principle of operation
An engraver is a device that uses a laser to burn a pre-prepared image onto a prepared surface. Control is carried out from a computer. The image is transferred to almost any material. Most often they work with leather, wood, bone, fabric and plastic. The main thing is that the selected application area does not reflect light. But even in this case, a solution can be found. For example, to engrave on glass or metal, you need to apply a special composition with a matte effect.
Such devices allow you to perform vector and raster graphics, apply inscriptions and fine carvings. Such work is possible by adjusting the beam power in the machine.
How to choose
It is not necessary to buy the most expensive engraver. There are decent cheap models. When choosing, several criteria are taken into account - purpose of application, materials, key characteristics and performance. This will help you buy a truly useful device.
Purpose of application
Laser engravers are needed in the following cases:
- production of souvenirs;
- jewelry making;
- production of awards;
- creation of advertising products;
- light industry.
Materials for processing
The more options the better. If you plan to work with a limited amount of materials, then you can choose a simple model. For example, which works with acrylic, MDF, plywood. Metal and leather will require powerful engravers.
Key Features
When choosing, you need to pay attention to:
- laser beam accuracy;
- size of the working area;
- software.
Consider the presence of a cooling system. It prevents equipment overheating and increases operating speed.
Industrial engravers are equipped with an automatic conveyor
Performance
For a “kettle”, a device up to 60 W is suitable. When working with metals, power up to 100 W will be required. All the above are industrial models.
Tips for choosing
Before purchasing, we recommend paying attention to the following points:
- Field size. The parameter depends on the dimensions of the parts you will be working with.
- Power. Selected based on job requirements (home engraver or mass production). Some models have adjustable power, which allows you to more accurately apply a design to the surface.
- Functionality. The devices can serve not only as an engraver, but also have a cutting mode.
- Dimensions. It is better to take a more compact device for home placement. Some models can be placed directly on your desktop.
Top best engravers
If you look at products from China, Europe or the USA, you can find a lot of models. It is difficult to understand the nuances, so it is better to refer to the ratings.
Best in terms of price-quality ratio
KKmoon brand models are characterized by low cost and good performance. For example, models K4 and K5 are equipped with built-in fans. The working area is large - you don’t have to worry about your hands.
You may consider purchasing the VG-L7 Laser Engraver. Works with soft materials and does not require firmware. Compact.
A standalone controller eliminates the need to connect a computer
Universal laser engravers
Here it is worth highlighting the following models:
- NEJE DK-8-KZ - good speed and accuracy, can be used together with a smartphone.
- WOLIKE Mini 3000mW - air-cooled, compact.
- FEUNGSAKE 6550 - durable, variable focus, adjustable power.
Mini engravers
The top includes devices:
- NEJE DK-8-KZ - compact, runs on a mobile power source, supports bmp and jpeg formats.
- TwoWin 3W - high accuracy of drawing, durable body, good speed.
Professional laser machines
The best rating is presented:
- HCZ 6090 - can cut parts, high speed, continuous process.
- HCZ 30w - software in Russian, accuracy, durability.
Voting for the best engraving machine
Which engraving machine would you choose or recommend?
Makeblock LaserBox Pro
0.00 % ( 0 )
Skima 9060
12.50 % ( 1 )
MCLaser 9060
0.00 % ( 0 )
MCLaser 6040
0.00 % ( 0 )
Kimian 1080
0.00 % ( 0 )
Foton YLH-20C
25.00 % ( 2 )
HAUSER HCZ-6090
12.50 % ( 1 )
RAYTRONIC MG2
0.00 % ( 0 )
RAYTRONIC MINI
0.00 % ( 0 )
Kimian 4040
0.00 % ( 0 )
Moski-MSQ Laser AS-5
12.50 % ( 1 )
NEJE 1000 MBT
12.50 % ( 1 )
Features and advantages of Chinese products
Among Asian engravers you can find models of different sizes. They have an average cost, but some people have distrust of such products. Modern Chinese production has high quality standards.
Important! When choosing an engraver, it is important to remember that the cheapest models do not differ in quality and performance.
The advantages of Chinese devices include:
- thoughtful and functional software;
- the plastic case is no worse than the metal one, but costs less;
- wide range of possibilities.
The peculiarity of engravers from China is the variety of forms. You can find a tabletop or manual version, also semi-industrial. Some models can accurately reproduce a seal or stamp - this function is needed for making corporate gifts.
You can apply text of any level of complexity to the material
When choosing a laser engraver, it is important to study the features of different types of devices. Only after this can you begin to search for specific models. This will save time and money.
Which manufacturers should you trust when choosing an installation?
The market where laser engraving machines are presented provides a large selection of American and Chinese devices. These countries can rightfully be called leaders in the production of laser engravers.
Video - What an inexpensive laser engraver from Aliexpress can do
At the same time, the instruments produced by countries are strikingly different. You can decide in favor of which to choose using the comparative characteristics of installations produced in America and China:
| Manufacturer country | Quality | Price segment | Design | Software |
| America | High quality products guarantee a long service life | The expensive models presented in the rating are mainly produced in America and countries that rely on it in the production of engravers | Laser tubes are installed inside the device body to protect the product | Equipped with the necessary software, but its installation may require time and specialist help |
| China | Products can be made of plastic, which reduces the life of the engraver | Installations developed in China, as a rule, are not expensive, representing a more affordable segment | The tubes are freely accessible, which does not affect the operation of the installation, but can occasionally cause breakdowns | Equipped with the necessary software that is easy to install |
Rules for choosing a frame or chassis for an engraving table
90% of the frames, or chassis as we call them, for engravers are made in China. There are a huge number of such machines on Ali. Fundamentally, they are not much different. The main difference is the firmware. It is this that determines what software your engraver will work with. Over all this time, we have tested almost all versions of programs and firmware, such as GRBL, CNCC LaserAxe, ACAN, mDraw and others.
These frames or chassis are called DIY because most of them are shipped unassembled and the user will need to spend a lot of time to assemble.
At the moment, we give preference to those solutions that support CNCC LaserAxe programs. This is where the first nuance lies.
By choosing the frame or chassis of the engraving table (along with the electronics), you determine what program you will work with in the future.
In this article we will not talk in detail about each program separately. Endurance regularly publishes its reviews and instructions on our website and by posting video lessons on our Youtube channel. Here is one of them:
On average, a chassis/frame costs about $100–$300 (depending on the configuration and build quality).
There is another category - MakeBlock plotter XY 2.0 kit.
Assembling it, even with a good video like this one, will take at least several hours:
Remember, the miser pays twice. By saving once and buying cheaper on Ali from an unverified supplier, you risk getting a product of very questionable quality, not to mention the quality of technical support, which may be in Chinese.