17.03.2020
- When should you sharpen drills?
- Drill geometry and parts
- Parameters to be restored
- Dependence of sharpening angle on material
- What to use for sharpening
- Tools to check for proper sharpening
- How to sharpen a drill for metal
- Methods for sharpening a drill for metal to obtain the correct back plane
- Processing options based on the number of bevels on the edge
- Instructions for operating the machine
- Processing on special equipment
- How to sharpen metal drills correctly: video instructions
- Important points
- How to extend the life of a cutter
A dull instrument can and should be restored to sharpness. Therefore, we will tell you how to properly sharpen a drill for metal: processing methods, what geometry to achieve, and so on. As a result, you will know what to do to restore its full characteristics and use it again. Agree, this is much more practical than buying a new one right away.
Attention, as soon as you notice that the cutting edge has lost its original profile, you must immediately stop performing the technological operation. Because its edge, under the influence of friction forces, has heated up and become soft, and continued work will cause even greater deformation, already critical, after which recovery will become impossible.
When should you sharpen drills?
You can understand that it is necessary based on the following fairly obvious signs:
- when the tool is immersed into the thickness of the workpiece, a sharp creaking sound is heard;
- the chips come out in the form of small crumbs, and not a long spiral;
- the edge quickly overheats - if you try it with your finger, you might get burned.
So, if you notice any of these warning signs, stop immediately, otherwise you will not avoid damage. If a usual operation begins to take longer - for example, before you made a hole in 3 seconds, but now in 5 - this also indicates wear.
If in doubt, you should simply check the edge by touch: if it is round or smooth and, conversely, with unevenness, chips, or burrs, this indicates that the tool is unsuitable for further use and it is time to worry about restoration.
How to sharpen a small drill?
For the smallest drills (below 4 mm), special attachments are not available. They also cannot be sharpened on a sharpening machine. Therefore, sharpening of such equipment is done manually using a needle file.
If you don’t have a needle file, you can get by with a simple file. It is desirable that the tool be diamond coated for faster and better sharpening. If using a file, it is recommended to complete the final finishing with a file.
The main difficulty lies in the miniature edge on such drills. Professional craftsmen usually use special magnifying glasses for such work, which allow them to control the sharpening process.
In general, small drills are sharpened similarly to large ones. The main feature is that you should not remove a layer of more than 1 mm. It is very difficult to maintain the factory angle on a small edge, so working by eye is allowed here.
Drill geometry and parts
The design of the instrument in question is quite simple and consists of the following elements:
- cutting edge, directly removes chips;
- neck, which acts as a kind of jumper;
- working part with cut grooves that remove waste;
- shank fixed in the machine (hand drill);
- a pair of rear (back of the head) and front surfaces forming a profile;
- two backs with ribbons creating the outside.
When technological operations are performed repeatedly, it becomes dull, which means that it is the sharpness that needs to be restored.
Features of use
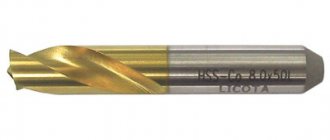
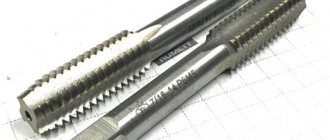
Among the advantages of Lewis drills it should be noted:
- Smooth increase in work load as the tool deepens into the material.
- High quality of the inner surface of the hole, since the burrs formed during drilling are completely cut off by the side cutting edge and are immediately removed outward by the auger generatrix of the drill.
- The wide helical flute ensures reliable removal of chips, regardless of their quantity.
- The hexagonal tip on the shank ensures reliable retention of the drill in the chuck.
High quality and productivity, especially noticeable when producing holes of significant depth, do not cancel out some of the limitations of twist drills:
- When a Lewis drill jams, which is possible when working with hard wood, it stops almost instantly and is accompanied by a sharp kickback. This could result in injury to the worker.
- Since the cutting forces during such drilling are high, the quality of the material is decisive for the durability of the auger drill. Therefore, it is worth purchasing tools from well-known manufacturers who indicate the steel grade (the grade is usually not indicated on Chinese-made drills).
- A twist drill has increased fragility, since during hardening it is usually calcined over the entire cross-section. With relatively low rigidity, this can cause destruction of the working part.
- The cost of Lewis drills is higher than regular ones, with the same diameters of the resulting holes.
- Low-power drills (less than 1000 W) may not be able to turn a drill of this design when started. It is also important that the drill has a reverse function.
Parameters to be restored
Proper sharpening of a drill for metal allows you to normalize the following characteristics:
The apex angle that the edges make with the bridge. Initially, it depends on the quality characteristics of the processing material (hardness is as important as viscosity) and can be 60-150 degrees, and sometimes reach 180. In our case, it is necessary for it to become 116-118 0, accordingly, it needs lead to this indicator.
The angle of the axis and the cutting part - it must be half as narrow as the previous one, that is, 58-59 0, and symmetrical with respect to each side of the tool. Otherwise, uneven wear will be observed, which results in faster tool failure, as well as uneven edges of the finished holes.
Relief angle - should be fixed in the range 7-17 0 (depending on what the workpiece is made of); any deviation of the actual value from the nominal value must be corrected, otherwise the performance will decrease significantly, and a breakdown will not be long in coming.
The shape and length of the edges - it is important that they are equal, otherwise runout will inevitably occur, as a result of which it will not be possible to make holes of a strictly specified diameter. Dimensions (to determine symmetry) should be determined from the edge (top) to the central point of the jumper.
Jumper point
In parallel with the main sharpening of the metal drill, you can sharpen the jumper at home. This measure has a beneficial effect on the quality of drilling, since the processed bridge does not create resistance to the drill when moving deeper into the material. The jumper is undermined on both sides, but not completely. Complete grinding is unacceptable.
There are several ways to sharpen the jumper edge:
- with a groove for chip removal;
- with increasing rake angles at the edge of the bridge;
- with an increase in the front angles on the edge of the bridge and trimming the back of the tooth;
- with grinding down part of the lintel;
- with grinding off part of the lintel and sharpening the cutting edges;
- with a cutting lintel.
Dependence of sharpening angle on material
We already mentioned above that the number of degrees changes in one direction or another, based on what kind of part is being processed. The smaller it is, the longer the edge, better heat dissipation, and longer service life. The more, the more difficult it is to center the tool at the initial stage of the technological operation.
There is a universal value - 118 0 (with a tolerance of 2 0) and 7-12 0, respectively. It is chosen when no details are specified. If you know what the workpiece is made of, you should give preference to the recommended values, which we have summarized in a table for clarity.
| Material | Angle, 0 | |
| rear | at the top | |
| soft wood, plastic, fiber structures | 12-15 | 60 |
| hardwood, elastic rubber, bakelite, malleable rubber | 90 | |
| stainless steel, alloys of corrosion and heat-resistant steels | 12-14 | 127 |
| tool steel | 7-15 | 118-150 |
| copper | 12-15 | 100-118 |
| hard bronze, structural steel, cast iron (when working with casting, it should be double sharpened, making the transition edge angle 70-75 0) | 7-12 | 118 +/- 2 |
| alloys | ||
| titanium | 12 | 70-118 |
| magnesium | 135-140 | |
| aluminum | 12-17 | 90-140 |
| copper | 12-15 | 118-150 |
Practical training
If you feel that you are unable to sharpen the tool correctly, then you should practice more. This can be done through a lot of practice - take a few drills that you no longer use and try to sharpen them correctly. Through trial and error, you can learn to perform the procedure perfectly.
Sharpening a tool is not a difficult process, although some people think otherwise. Many online resources describe in detail and even show the steps of this process. Here you can watch a video that very accurately shows exactly how to sharpen a drill.
The video shows how to sharpen correctly. By following the man's instructions, you can get the job done efficiently. The tool should turn out the same as it was purchased. Only if the procedure is correctly performed will you be able to use it in the same way as before.
If you make a mistake, you will have to throw away the drill. But everyone makes mistakes, so don’t be upset if you weren’t able to sharpen your tool the first time. Every person learns from their mistakes. The main thing is not to abandon unfinished work because something doesn’t work out for you.
In order to learn how to perform an action with the highest quality, try to get involved in the process as much as possible, to understand how it works. Only competent consideration of every detail can lead you to success.
What to use for sharpening
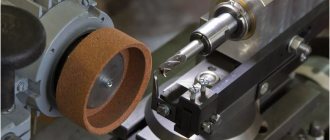
Sufficient accuracy in aligning the angle can only be achieved if the tool is securely fixed, and the feed of the device processing it can be adjusted during the process. This approach will make it possible to restore the geometry of spiral rods ranging in size from 3 to 19 mm.
All work can be performed with minimal errors and maximum productivity on machines. And you will find several versions of suitable equipment, reliable, easy to use, economical and at the same time mobile, in the Izhevsk catalog - choose in favor of quality.
Now we will tell you how to properly sharpen drills for metal not in production, but in the garage or even at home, when there is simply no specialized equipment (the purchase of which for one-time needs is impractical). To do this, you can use the following machines, tools, and devices:
- grinder - will allow you to remove signs of wear and bring the desired edge to 120 0, but for this you will have to remove chips repeatedly for 1-2 seconds, holding the drill vertically in a vice;
- sharpener - you should first remove all the notches from the rod (if any), and then secure it in the clamp and carefully straighten it, lightly pressing (at the required angle) to the rotating circle;
- a special attachment for the drill - just install it, secure the drill in it and turn it on, and then rotate the tool 1800 to debug the second face; but this option is effective for small bluntness, medium diameter (3.5-10 mm);
- needle file or file - here editing is done manually; this is a choice only for cutters made of relatively soft materials; It is not advisable to use an abrasive or diamond stone, since it will be problematic to maintain the desired geometry.
The devices and technologies for their use may be different, but after using each of them, in any case, you should make sure that the desired result is achieved.
Sharpening tools
Ideally, you need to use a special device for sharpening drills with your own hands. Professional craftsmen often have a specialized sharpening machine for this purpose.
However, buying such a device for your home is simply not economically feasible. Therefore, you can also use improvised tools:
- grinding wheel;
- drill or screwdriver with a circle;
- angle grinder (grinder).
From a professional point of view, such sharpening is not entirely correct. However, for home use this will be quite enough.
In addition, in everyday life, drills of small diameters (up to 16 mm) are usually used, which are very easy to sharpen. You can watch a video on how to sharpen drills on various equipment to clearly understand the working process.
Tools to check for proper sharpening
It can be:
- calipers;
- protractor;
- ruler;
- goniometer.
and others - all together or separately. But for maximum accuracy and convenience, it is better to use a universal template - with length scales and angles already applied. The easiest way is to buy a ready-made one, but since it is not always found on sale, it makes sense to make it yourself, it’s not difficult.
You can implement one of two configurations:
- a thin plate made of sheet stainless steel, steel or even tin with markings applied with a diamond pencil;
- 2-3 nuts, welded together or fastened with hot glue - the angle at the junction of their faces will definitely be equal to 120 0, so the tip of the cutter can easily be checked by it.
How to sharpen a drill for metal
With the correct choice of angle, fine-tuning, checking and adjustment (if necessary). But before considering each stage, we note that when working on a modern high-performance machine, using a familiar grinder or a classic abrasive wheel, for your own safety it is better to use an additional locking device.
This could be a simple clamping base or a bushing of suitable diameter. Another option is a template with a whole set of tubes with sections of different widths, suitable for rods of all common sizes. The main thing is that two conditions are met:
- this auxiliary element successfully plays the role of a stop and makes the back movement of the cutter impossible;
- it also ensures accurate centering throughout the entire work period.
Now let's look at each step in order.
Maintain angle
Answering questions from beginners about how to learn how to sharpen drills for metal, the craftsmen note that first of all, you need to get the hang of understanding how sharp the edge should be. This directly depends on the steel, plastic, solid oak or other material for which the tool is intended: the softer the workpiece, the blunter (wider) the angle must be, and vice versa. We provided a correspondence table above, use it as a guide, but here are a few more interesting relationships for:
- silumin – 90-100 0;
- wood – 135 0;
- magnesium and its alloys – 85 0;
- textolite and plastic – 90-100 0;
- granite and ceramics – 135 0;
- aluminum – 135 0.
By analogy, you can select the degree for other cases.
Perform debugging
If you watch any truly complete and well-thought-out video on the topic “how to properly sharpen a drill for metal,” the video will probably contain a stage in which the master arms himself with an angle grinder or a hammer drill with an attachment in the form of an abrasive wheel and begins grinding the edge.
Why is he doing this? To remove minor defects such as burrs or scratches. The geometry of the cutting part does not change, which means the angle remains the same as it was already maintained. But for the most accurate result at this stage, you need to clamp the rod in a vice (or in another such reliable clamp) so that it does not move around.
Finishing is a unique operation in its own way, since it combines two types of surface treatment at once - both rough and finishing - so it is simply necessary to carry out it.
Run check
Those who know from their own experience how to properly thread a metal drill and sharpen it understand perfectly how important it is to ensure the quality of the result. Therefore, after editing the tool, they take a template (we described above how to make it) and make sure that the following indicators meet all standards:
- edge lengths;
- angles - at the vertices, longitudinal edges, inclination of helical grooves.
If any parameter does not meet the norm, this must be corrected. Otherwise, runout will occur and the size of the hole made will be larger than necessary.
Make a point
It is relevant for rods whose diameter exceeds 10 mm. Its implementation makes it possible to reduce the inclination of the leading edge and at the same time increase the angle of the cutting edge.
This will increase the service life of the tool and ensure its resistance to crumbling, as well as narrow it, and therefore make it easier to enter the workpiece (a scraping effect will appear) and reduce the negative impact of friction.
What is needed for the procedure
To sharpen a metal drill yourself, you must first determine what tasks it will be used to solve. In production conditions, for sharpening drills, special devices are usually used to ensure maximum accuracy and productivity of such a process. When sharpening drills at home, you always have to look for ways to make the result of this process high-quality.
The minimum set for sharpening metal drills should include:
- emery machine;
- grinding wheels of varying hardness, selected depending on the material of the drill that needs to be sharpened;
- a container for coolant and the liquid itself, which can be ordinary water (or engine oil);
- devices that allow you to maintain the correct sharpening angles.
When sharpening drills with your own hands, you need to pay attention to the following parameters:
- the angle between the plane of the front part of the drill and the base of its cutting edge (this angle, measured in the main cutting plane, is called the front);
- rear angle, which is measured in the same way as the front angle, but along the rear plane of the drill;
- tool tip angle measured between two cutting edges.
To sharpen drills for metal, according to all the rules, you must adhere to the following values of the above parameters:
- front angle of the cutting part – 20°;
- back angle – 10°;
- apex angle – 118°.
If you need to sharpen a metal drill in production or at home, you must strictly follow safety precautions. This process is accompanied by the formation of a large number of sparks, from the effects of which it is necessary to protect the organs of vision. In addition, since this procedure is performed with sharply sharpened metal instruments, it should be carried out using gloves to protect your hands.
An emery machine equipped with a sharpening wheel is a universal device that allows you to sharpen a drill for metal with high quality even at home. Using such a device, the technological operation should begin with processing the back surface of the tool. The drill to be sharpened is held in relation to the grinding wheel so that its cutting part is parallel to the surface of the wheel. Sharpening performed using this method is optimal for metal drills whose diameter does not exceed 10 mm.
To efficiently sharpen drills with a diameter greater than 16 mm (including those equipped with carbide plates), it is best to use an emery machine with a special device. The use of the latter allows not only to control the sharpening angle of drills of significant diameter, but also to carry out this process with maximum safety.
Sharpening machines equipped with additional accessories are recommended for use in cases where it is necessary to sharpen drills of the following categories:
- used for drilling blind holes, which is characterized by a decrease in axial cutting force;
- universal, characterized by increased strength;
- used for drilling deep holes and characterized by a small point size.
The main task that devices that allow high-quality sharpening of a drill for metal on a sharpening machine solve is the correct orientation of the cutting part of the tool in relation to the surface. That is why the design of such a device has a special base plate. The machine itself, the motor that rotates the grinding wheel, and the rotary column on which the tool being processed is fixed are installed on it. The use of such a column allows you to sharpen drills in almost any spatial position, positioning their cutting part in relation to the surface of the grinding wheel at the required angles.
Methods for sharpening a drill for metal to obtain the correct back plane
Methods are classified according to how the back of the head is treated. Today the following variations are distinguished:
- Single-plane – relevant for small rods (up to 3 mm in diameter); you need to make 1 surface, at an angle similar to the back one and selected within 15-25 0.
- Dihedral - in the back of the head, 2 planes are sharpened with varying degrees of intensity; the first, generally adjacent, is at 7-17 0, the second is at 25-40 0. Then the intersection edge as a result of this execution passes at 0-40 0; Ideally, it should be 25-30 0 for materials of high hardness and 35-40 0 for medium and soft ones. Remember, if you increase it, you will reduce the axial force, weaken the wedge on sharp slopes, and worsen heat dissipation and strength.
- Conical - as it is performed, the back of the head becomes curved, since the rear angle gradually increases, and immediately from the blade. It is narrowest on the cutting part, where it ranges from 7-17 0 (the specific value depends on the workpiece itself). To achieve success in the process, it is worth twisting the shank of the rod from top to bottom.
There are other methods, for example, screw factory sharpening of a drill for metal, and this is carried out mainly on machine tools; There is also a cylindrical one, although it is much less common. There is also a manual method - elliptical: for it, just like for the shaped one, you will need abrasive wheels of a specific (indirect) profile.
Checking the sharpness of the drill
After a visual inspection shows that the cutting edges are smooth and sharp, check whether the correct sharpening angle of the metal drill is maintained and whether the length of the working edges meets the standards. To evaluate, you will need a special template, a protractor or protractor, and a caliper.
Checking the length of the cutting edges with a caliper
What parameters need to be checked?
- Is the angle of the cutting edge tilted forward? The presence of such an error makes the cutting edge not the highest point of the tooth and forms a hill on the back surface. This causes the drill bit to rub against the back surface of the material and not drill. The error is corrected by sharpening the drill again.
- Are the lengths of the cutting edges consistent from the center point on the web to the side apexes of the cutting edges? This distance must be the same on both sides, otherwise the diameter of the final hole will be larger than the nominal value.
- Check that the apex angle is 120°. You can determine the sharpening angle of a metal drill using a purchased or homemade template. It is important to ensure that the apex angles match for both teeth, otherwise only one side will work.
Correct and incorrect sharpening of a drill
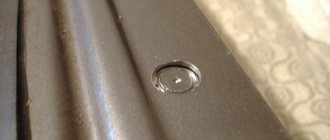
After checking the basic parameters, drill into any metal workpiece. If the sharpening is done correctly, the drill will smoothly enter the metal, and the chips will evenly exit the grooves on both sides. And the finished hole will exceed the nominal diameter by no more than 0.05–0.1 cm.
After drilling the workpiece, sharpen the jumper to reduce the force applied during operation and reduce tool wear.
How to make a template for checking drill sharpness?
A template for checking the sharpening of a metal drill can be made independently from sheet steel or tin. You can take a template from the store as a guide. The simplest template can be made from two or three nuts. Nuts are ideal for these purposes, as they are regular hexagons with internal angles of 120°. If the nuts are connected, the angle between their faces will also be 120°. The nuts can be welded or glued to each other using hot glue.
Processing options based on the number of bevels on the edge
There are two of them, and with each the angle does not remain constant, but changes, gradually narrowing from the central peak to the side ones. This allows for uniform heat dissipation and, in principle, reduces the heating of the tool.
So, 2 technologies:
Normal - the edge geometry is smooth, along its entire length. Very popular, including due to its ease of implementation.
Double-headed - carried out at a couple of angles near the top; Please note, at the first stage and on 4/5 of the cutting part it is necessary to adhere to the indicator of 116-140 0, while on the remaining, final 1/5 of the diameter (if we take the outer edge as the starting point) - already 66-100 0. This approach will allow create a main zone with a transition zone, thereby extending the useful area, which will help improve chip ejection, and therefore increase the service life of the rod.
How does a Lewis drill work?
At the initial moment of drilling, a conical tip is pressed into the material, which is driven deeper during rotation. Then the main, spiral part of the drill rests on it. Unlike other designs of wood drills, the tool in question initially has only one working edge, and then drilling occurs with a spiral cutting part. By increasing the total length of the cutting edge, this helps to reduce the total axial force on the drill, but increases the risk of jamming and “driving” of the drill from the center.
The first problem is solved as follows. Firstly, it is preferable to install a Lewis drill on low-speed, more powerful drills. Secondly, such spiral-like drills are inappropriate to use for making holes in hardwood, since the resulting chips contribute to jamming the waste in a rather long groove. Typically, the number of revolutions is chosen inversely proportional to the diameter of the resulting hole.
To solve the second problem, a twist drill can be used as a reamer, and the preliminary pass, with the exception of particularly deep holes, can be performed using a regular drill. From operating experience it is known that direct production of holes using a Lewis drill is advisable for diameters not exceeding 15...30 mm. In other cases, feather drills are used, and twist drills are used only on the last pass, when it is necessary to increase the smoothness of the side walls.
The moisture content of the wood does not matter when using such a drill, nor does the direction of the wood grain.
Instructions for operating the machine
Naturally, sharpening twist drills for metal should be carried out in compliance with safety precautions, according to which:
- a mask or goggles for eye protection and gloves with hand guards are required;
- while the equipment is turned on, you must not touch its working parts;
- Even after switching off, it is forbidden to touch the abrasive wheel until it stops rotating and stops.
Now let's move on to the nuances of the procedure:
- Level the back surfaces - this will make it easier for you to maintain the desired degree; You can adjust the corners using a drawn line.
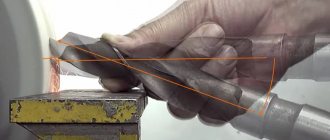
- Place the tool on the index finger of your right hand, fixing it with your thumb and holding it by the shank with your left hand, and then controlling it - this is most convenient.
- Keep the rod strictly horizontal during the process, otherwise you risk removing the jumper and edges; lower only the back part and then smoothly, without rushing.
- Control the pressure and remember that all movements should be short and quick to avoid overheating; Cool the cutter regularly in salted water.
- Continue until you have removed even the smallest defects - it is important to achieve a perfectly smooth surface.
Sharpening process
Sharpening a drill must be done in a certain way. To begin, we take the tool with our left hand near the front (working) part. We tightly grasp the shank with our right hand. We start the rotation of the disk on a grinder or machine and carefully (without strong pressure) bring the back part of the cutting edge of the drill to it.
Important: when sharpening, the drill must be cooled periodically.
Continuing to lightly press the drill bit against the disc, we turn it with our right hand to sharpen the back part. All this time we check the desired angle of the drill. We also make sure that the cutting edges are the same in length and sharpened at the same angle.
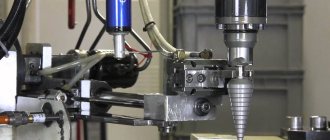
Processing on special equipment
We described in detail how to sharpen a broken drill on a machine, but there are other options. For example, the use of devices specially created for sharpening, which are fundamentally divided into 2 types.
Grinding attachments - each of them is a cylindrical device. On the one hand, it has clamps, thanks to which it is fixed to the drill, on the other, there is a cover with holes of different sizes. Insert the rod into a suitable rod, make sure that it is positioned strictly horizontally, and turn on the power tool for 10 seconds, and then turn the shank 180 0 and repeat the procedure. The downside here is the diameter limitation (3-10 mm) and the need to control the feeding direction. Plus – the affordable price of such an assistant.
Stationary devices - with a fixed platform and a rotating part, on which the cutter is fixed. Bring the latter to the abrasive and remove all defects. The advantage is convenience and safety of use: you can easily and accurately set the angle and do not bring your hand closer to the disc. The disadvantage is the lack of mobility: to prevent vibrations, the base must be rigidly fixed.
How the drill works
In order to update the working part correctly, you need to understand what components the drill has:
- the working part is created by bringing together the groove and rear elements;
- front element under the working part;
- vault between parts at the back;
When using a drill, the tip of the drill, the arch and the edges at the back become more deteriorating. In this regard, repair of the drill occurs by straightening the edges at the back adjacent to the tip and crown of the drill.
But there are some subtleties here: in order to renew the surface of the drill and bring out a clear arch, the sharpening angles must be aligned with the sharpening angles must correspond to the parameters of the drill itself.
Compliance with these standards will allow the working part of the drill to be the first to align with the workpiece, this gives us the greatest return on the tool. The angle of the drill tip determines the length of the working part of the tool. If it is brought out correctly, then the chips will easily fall into the chute and be removed from it. Well, if the angle is sharp, then the area of the strip being removed will increase, the chute will become clogged with chips, and they will not be removed from the hole. Well, an angle that is too obtuse removes the benefit of the tool.
Drills differ in the raw materials used for them and their diameter. Drill parameters vary depending on the direction of the material. Metal drills are best processed at home.
Any drilling unit has two planes at the back, forming a cone at the end of the tool and a pair of cutting edges. If you place the drill on a plane, the edges will touch it, the part located behind them will be located away from them. It is located at a certain angle, which is called “back”. The run-off should approximately be 0.2 mm for each turn.
Important points
When resolving the issue, strictly adhere to the following requirements:
- Keep the rod motionless, under no circumstances allowing it to rotate around its axis; a change in position even by a degree will entail a re-alignment.
- Use only those disks and circles whose surface is perfectly flat; restore it regularly using CBN nozzles.
- Allow the tool to cool after completing the sharpening operations, and only when it has cooled naturally, place it in the template and check.
These rules for sharpening metal drills help to achieve maximum quality of processing and are dictated by practice, so apply them.
Features of choosing a drill for wood
When it becomes necessary to choose the right drill, the first thing you need to pay attention to is the color. So, for example, each shade of the product is responsible for the type of final processing, which shows the life of the drill and its strength.
- The worst option can be considered gray products, which are not processed in any way and their performance parameters are quite low.
- The color can be golden, which indicates titanium coating and a fairly long service life.
- Black drills treated with steam during creation are no worse in performance.
In addition, it is worth carefully visually examining the object. If there are visible signs of deformation on it, then it is better not to use such a product. It is important to choose a drill without a single scratch or crack; its surface should be perfectly flat and smooth.
Types of wood drills
How to extend the life of a cutter
To avoid having to edit it for as long as possible, you should:
- avoid overheating, which leads to rapid softening of the metal, and therefore dulling of the edge;
- lubricate with machine oil - this will help reduce such a dangerous friction force and prevent a sharp increase in temperature in the contact zone;
- control the rotation speed - limit it, focusing on the hardness of the material and the desired hole diameter, but do not chase speed, remember that operating conditions should be gentle;
- remove chips in a timely manner so that they do not clog the recess, otherwise the tool may get stuck and even break;
- also process the jumper with a ribbon - this way you will improve the durability and quality of the plunge, which will allow you to weaken the feed while maintaining proper performance;
- make several passes, giving pauses between each of them - so that the device has time to cool down.
We told you how to properly sharpen a drill for metal, we also provided a video of this process, now you can safely start processing damaged rods. And if you need to purchase a machine for this, you will find it in the plant’s catalogue, contact us and order high-quality and modern equipment.
Tools
0 votes
+
Vote for!
—
Vote against!
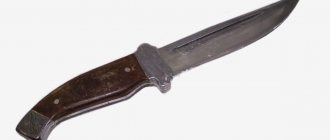
Drills are used to drill a hole in a metal or wooden part. However, they require sharpening during operation. If you do not sharpen the drill, working with it will take a long time, and the quality of the hole will be unsatisfactory. We'll talk about methods for sharpening drills for wood and metal later.
Table of contents:
- Features of choosing a drill for wood and metal
- Sharpening a wood drill: work plan
- Types and sharpening of metal drills
- How to sharpen a drill for metal: technology and features of sharpening
Features of choosing a drill for wood and metal
In the process of choosing a particular drill, you should first of all visually inspect it. There should be no cracks, chips or other deformations on its surface; it should be smooth and even. In relation to the color of this device, the type of final processing is determined, which affects the strength and service life of the drill.
Black drills have excellent performance characteristics as they are processed using steam. If the color of the drill is yellow or gold, then it is treated with titanium plating. This process allows the drill to release excess stress. In addition, the service life of the drill increases significantly.
A gray drill indicates that it has not been processed, so the performance properties of such a tool are at a low level. When you buy a drill, you receive a set of drills that differ in diameter, length and type of use.
Most often, drills are divided into tools used for drilling holes:
- on concrete surfaces;
- on wooden surfaces;
- on metal surfaces.
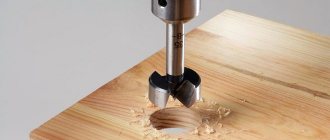
Each type of drill has its own individual appearance and color. For drilling wooden surfaces, drills in the form of a feather, snake or spiral are used.
The most common diameter of a screw drill for wood is from three to fifty-two millimeters. This tool has a double tape, which ensures accurate hole drilling. In this case, slipping of the drill during operation is excluded. To remove chips, the drill has holes in the spiral through which it exits. It is suitable for drilling holes for dowels, solid and wooden slabs, plywood sheets, etc.
The serpentine version of the drill is distinguished by the presence of a carefully polished and milled spiral. It is used to make holes in parts made of veneer.
The feather drill for wood has a wide range of applications. It is easy to use and comes in a variety of diameters. Used for drilling both soft wood and harder wood. A feather drill for wood is an excellent and versatile option for drilling almost any hole.
Screw drills provide drilling against the grain of the wood. The diameters of screw-type drills for metal and wood vary from one to five centimeters. The length of such a drill is from four to ten centimeters.
The quality of the resulting hole is determined, first of all, by the correct choice of drill for a particular material, as well as the level of sharpening of this drill.
Sharpening a wood drill: work plan
In answering the question of how to sharpen a wood drill, there are many nuances that should be taken into account. First of all, you should determine whether the drill is really dull; perhaps the reason is its breakage or wear. Signs that a wood drill needs additional sharpening are, first of all, the fact that the work of drilling a hole takes much longer, the holes are uneven and of poor quality. Also, such a drill heats up very quickly and becomes deformed when exposed to too much temperature.
If you have no experience in sharpening wood drills, we recommend that you initially practice on old and already worn drills. If sharpening is performed incorrectly, further operation or restoration of the drill will be impossible. A large-diameter wood drill can be sharpened better than drills used for drilling metal surfaces. Since wood drills are made from more pliable and soft materials. In this case, household tools are sufficient to sharpen such a drill.
During the sharpening process, you will need a sharpening machine and a container of water used to cool the drill. Water will prevent overheating of the steel and deformation of the drill during the sharpening process.
If you do not have a machine for sharpening drills, then use a regular file. However, in this case, the sharpening process will last several times longer. The main rule for high-quality sharpening of a long wood drill is maintaining the correct proportions and geometric shapes. That is, the shape of the drill should be exactly the same as after its purchase. A ring drill for wood must be sharpened to a certain sharpening angle.
When using the sharpening machine, in this case, you should carefully place the drill against the sharpening disk. To ensure that the required values are as accurate as possible, use additional devices. This may be a device into which a drill is installed and clamped.
Thus, the drill is located in a special mechanism and the risk of burns due to its heating is reduced. In addition, in order to avoid damaging your hands, be sure to wear gloves before sharpening. After preliminary sharpening, the edge is gradually brought to a smooth shape and ideal condition. This is done using the same machine, but at low speeds. After finishing, the drill can be used for its intended purpose.
If sharpening is done correctly, the service life of the drill increases significantly.
Sharpening a wood drill video at the end of the article.
The technology for sharpening a wood drill involves performing the following actions:
1. The sharpening angle of the wood drill is ninety-five degrees. This value must be maintained.
2. The drill is installed exclusively on the edge of the sharpening machine.
3. In order to increase the accuracy of work, we recommend installing a drill inside a special tool, for example, a washer.
4. Tuck its back edges a few millimeters, making sure each edge is even.
5. After sharpening, you should reduce the speed on the machine and continue working.
6. Try to keep the bridge on the drill very thin. Thus, the ease of working with the tool increases. If the drill is too thin, then the jumper does not need to be sharpened.
7. Next, you should cool the drill and check its functionality. If the hole is smooth and the work is done quickly, then the tool is sharpened correctly.
Types and sharpening of metal drills
Metal drill bits vary in thickness, size, shape or application. A spiral drill for metal can be:
- a conical drill for metal is distinguished by the presence of a conical shank; a conical drill for metal has a diameter of six to sixty millimeters;
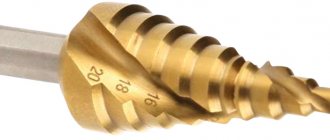
- a step drill for metal is rare;
- metal drill with a cylindrical shank;
- long square metal drill bit.
In relation to the final processing of metal drills, there are:
- untreated differ in the standard color of steel;
- processed with steam, have a black color;
- golden color, capable of transmitting excess voltage;
- Titanium drills have a bright yellow color.
For the manufacture of metal drills, high-speed steel, tool steel with cobalt additives, alloy steel, and special types of metals are used.
Cylindrical twist drills are used to process aluminum, copper, zinc or magnesium alloys. Titanium alloys are processed using special equipment and A-class drills.
Conical metal drills are used for drilling carbide metals. They differ in relation to the grade and type of steel from which they are made. The processing of a particular metal depends on the sharpening angle of the drill. At the same time, there are the following requirements for the sharpening angle of a metal drill:
- if the drill is made of soft or non-ferrous metal, then the sharpening angle is from eighty to ninety degrees;
- if the metal has an average degree of hardness and for cast iron metals, the sharpening angle is from one hundred sixteen to one hundred and twenty degrees;
- for very hard steel, the sharpening angle of the drill is one hundred thirty one hundred and forty degrees.
How to sharpen a drill for metal: technology and features of sharpening
During the operation of any drill, it becomes faulty and needs to be sharpened. In order to save money on purchasing a new drill, especially if it is made of high-quality steel, we recommend sharpening it.
Metal drills, unlike wood drills, are made of high-quality steel, the sharpening of which requires special skills in working with a sharpening machine. The most optimal and common drill diameter is sixteen millimeters. The easiest way to sharpen such a drill is to use a sharpening wheel. If there is no such equipment in the garage, then you should install the drill in an electric drill, fix it in a stationary position, take a grinding stone and start sharpening.
Please note that you should wear a protective mask over your eyes and gloves on your hands, as the drill gets too hot during the sharpening process. Prepare a small container of liquid that will gradually cool.
Water can be replaced with machine oil. If you do not cool the drill during operation, it will become deformed under the influence of high temperature.
The sharpening process must be sequential, first the back of the surface should be processed. Try to keep the drill bit tight to the surface. Watch the sharpening angle of the drill, it should be at the same level. If you examine the drill from the side, it should resemble a cone shape.
Next, you should process the cutting part of the drill. Also, it is necessary to maintain a certain angle of the drill. Next, you should finally finish the back surface. Follow the direction of the jumper; it should be no larger than 0.4 mm in size for small drills. If the diameter of the drill is large, then the jumper can be up to one centimeter.
Before starting work, we recommend practicing on old drills. After gaining the skills to work with a grinding wheel, proceed to the actual sharpening of the drill. Please note that drilling is not done with the tip itself, but with its sides, so they must also be perfectly sharpened.
If the drill has a pobedit tip, then the technology for sharpening it is slightly different from the standard one. We suggest that you familiarize yourself with the recommendations for sharpening a metal drill:
- try to keep the edge of the drill parallel to the working surface of the grinding wheel or stone;
- sharpening should be done gradually, do not press the drill onto the circle;
- try to keep the edges the same length;
- The high quality of sharpening of a drill for metal is evidenced by the surface of the drill, on which there are no reflections.
The first sharpening option is single-plane. This sharpening is used if the diameter of the drill does not exceed three millimeters. This technique is carried out with extreme care, otherwise the drill may crumble. The tool is placed on the circle and moves in parallel with its movements.
If the diameter of the drill exceeds three millimeters, then a conical sharpening should be used. In this case, the drill must be held with two hands, gradually sharpening its feathers. The drill presses easily against the stone and wobbles a little during the sharpening process.
After sharpening the drill, it is necessary to perform fine-tuning. With its help, it will be possible to get rid of small nicks and grind the edge. For these purposes, it is recommended to use a special soft stone.
Please note that the person sharpening must have good eyesight. Also, during the work process it is necessary to organize good lighting. In order to ensure greater sharpening accuracy, it is necessary to make a special tool. It will help fix the drill in a stationary position in relation to the grinding wheel.
Sharpening a drill for metal video: