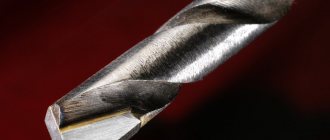
Every hunter, regardless of skill level, must have a knife with him when going to the taiga. After all, this is not only an excellent assistant for performing small jobs and butchering carcasses, but also a “last chance” weapon. This article talks about how and what to properly sharpen a hunting knife, as well as some rules for caring for it.
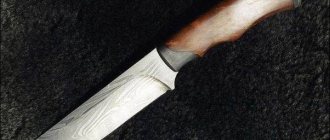
Hunting knife.
Why does the knife get dull?
Sharp objects are dangerous because you can get hurt when using them. But even more trouble will come from a dull chef's knife, which can slip and easily injure your hands.
The blades sold in the store are sharp and easy to work with. But their shelf life depends on operating conditions.
Following a number of recommendations will help keep your kitchen knife sharp longer:
- during storage, the cutting edge should not touch surfaces that have a high density;
- cutting should take place on special boards made of wood or plastic;
- blades of all types must be used for their intended purpose, avoiding shock loads on blades whose sharpening has a small degree;
- Immediately after use, knives should be washed and dried.
The sharpness of the cutting edge decreases for several reasons:
- Impact of organic acids contained in products on the blade material.
- Impacts from a fall.
- Cutting on hard surfaces such as stone countertops or ceramic cookware.
- Uneven load on the cutting blade when the composition of the products is uneven (the blade hits bones, tendons when cutting meat).
- Exposure to aggressive chemicals and high temperatures during cleaning.
- Improper use.
If the knife is intended for cutting the fillet of fish, then when opening cans with it, the blade will be damaged. The nature of the RK violations depends on the material from which the blade is made.
Knives made of stainless steel are resistant to aggressive environments, but without proper care, rust appears on the surface of the blade. Such blades are easy to sharpen, but this process must be carried out more often.
Carbon steel has increased strength, such blades are more difficult to sharpen, but they retain their sharpness longer. With insufficient care, the metal quickly becomes covered with rust.
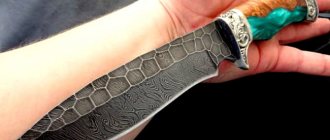
By combining hard and soft steel in industrial production, alloys are created that imitate the blacksmith forging inherent in Damascus blades. Knives are made primarily for hunters using this method.
Products made from zirconium alloy are characterized by increased fragility. These ceramic knives are designed for smooth, soft products and keep their blade sharp for a long time. A special tool is required for sharpening.
Calculate the angle of descent on the knife.
Blades that cannot be sharpened
Modern models of self-sharpening knives do not require additional processing. Moreover, sharpening will only harm the blade, since its surface is treated with a special layer that will be damaged by friction.
It is not recommended to sharpen knives that have a wavy or saw-toothed cutting edge, since they can be sharpened correctly only with special equipment and with certain skills.
Knife device
Any knife consists of a metal or ceramic strip and a handle, which is made of wood, plastic, ceramics or other materials. Depending on the way the handle and blade are articulated, knives can be fixed, folding or detachable. The handle can also be positioned perpendicular to the cutting blade.
The blade has a RC formed by two or one microfeed. Depending on the shape of the perpendicular section, the cutting edge can be formed by a bevel without microfeed.
The part of the blade opposite to the RK is called the butt. It can also have a sharpening, as in the case of a double-edged knife. The section of the blade that is adjacent to the handle and has no sharpening is called the heel.
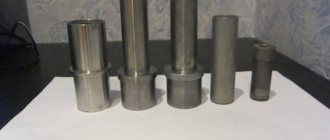
What do hunting knives sharpen?
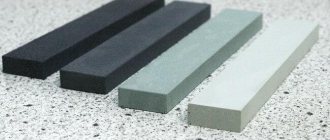
Both natural and artificial sharpening stones are used to sharpen a hunting blade. Also, when sharpening the blade, a certain lubricant consisting of water or oil is used. However, this does not apply to diamond and ceramic stones, because they can work both with and without liquid. Regardless of the material, sharpenings come in different cuts.
Examples of stones suitable for sharpening:
- Arkansas stones. Mined in the US state of Arkansas. Produced on the site of old Novaculite deposits.
- Japanese water whetstones. Despite their names, they are mined in the mountains. Occur in a deposit of modified rock consisting of very small silicate particles that are suspended in a clay matrix. The small grains of this sharpening polish the surface well and also correct defects.
Japanese water stones for sharpening.
Shapes and sharpening angles
Depending on the purpose of the knife, there are several blade cross-section shapes:
- Scandinavian, when the descent connects the butt with the RK and the cross-section has a wedge-shaped shape. A small angle is convenient for cutting, but does not withstand impact loads well.
- Scandi - the RK angle is more obtuse than in the first case. It withstands shock loads better, but cuts worse.
- Razor, when the slopes have a concave shape, which provides a small angle for the cutting edge and ensures high cutting quality. This sharpening is used for straight razors. It is not recommended to subject the blade to shock loads.
- Lenticular - the descents are curved, while the angle of the RK is of greater importance. This cross-section is typical for axes intended for chopping.
- One-sided - the descent is designed on only one side of the blade. This type is typical for carpentry tools and knives made in Japan.
- European - a wedge-shaped descent from the end turns into a micro-approach at the edge. This cross-sectional shape of the blade provides an increased angle compared to the Scandinavian cross-sectional shape, due to which the blade better tolerates shock loads, allowing chopping movements.
Electric knife sharpener.
Table of values for different knives
A table is used to determine the optimal sharpening angle.
| Knife type | RK sharpening angle in degrees |
| Kitchen | 55-60 |
| Chef | 25-30 |
| For fish | 25 |
| For fillet meat | 10-15 |
| For cutting and deboning | 25-30 |
| For frozen fish and meat products | 35-45 |
| Vegetable | 35 |
| Japanese | 15-18 |
| Special | 40 |
| Folding | 20-25 |
| Tourist for cutting | 30-35 |
| Tourist for cutting | 40-45 |
| Hunting | 40-45 |
| For cutting | 25-30 |
| Shoe | 30-40 |
| For cutting | 20-25 |
| Straight razor | 10-15 |
Sharpening tools
Certain devices are used to sharpen different blades. Their main difference is the grain size. Possible tools:
- Lansky sharpener. Designed for small to medium sized blades. It is convenient because it allows you to independently select the sharpening angle. When purchasing a Lansky, the kit includes oil intended for lubrication and bars with different grain sizes.
- Sharpening stone. It is used to correct serious defects on different blades, as it has different grain sizes.
- Professional machines. Used in industrial enterprises. They are distinguished by maximum sharpening and grinding precision. They have a wide range of grit choices. They are intended for specialists, since a small mistake can easily ruin the material being sharpened.
- Musat. A small file with a handle designed to keep a blade sharp. Not suitable for heavy sharpening.
- Mechanical sharpener. Suitable for kitchen knives only. It is characterized by fast sharpening of an object, but low quality.
- Electric sharpener. Used for sharpening various blades, including hunting ones. Automatically selects the appropriate angle. Suitable for repairing many damages.
Knife sharpening.
Methods for determining the sharpening angle
Having bought a new kitchen knife with a good sharpening, it is advisable to immediately measure the angle of the angle of rotation in order to adhere to this value in the future. If you do not have a special device, you can use scissors with long cutting ends.
The knife rests with the RK at the point where the blades diverge, then they are closed until the gap near the microfeed disappears. The angle of spread of the scissors projected onto the paper is measured using a protractor.
You can also use a soft candle to determine the sharpening angle of the blade. To do this, a layer of softened paraffin is applied to the side edge of an oiled wooden stand. The tip is inserted into it in one motion and held in this position until the soft mass hardens. The resulting print is photographed, and the required angle of the RK is determined using a protractor.
Sharpening instructions.
Sharpening and finishing of knives
ATTENTION! Sharpening knives and other cutting tools is a job that requires attention and accuracy. You can assume that the knife hates you during the point and will not miss its chance to get even.
The problem of restoring the lost sharpness of an instrument is no less old than the instrument itself. Our ancestors also carefully beat thin plates from stone knives to restore their sharpness. Some researchers believe that the poor condition of the teeth of ancient people who died quite early is explained not only by the lack of dentists, but also by the fact that teeth were actively used for the “finishing” of stone tools.
Over time, the profession of a sharpener and polisher became a separate specialization: guilds of weapon polishers are known in Europe and Japan.
With the decline in the role of bladed weapons and the migration of people to cities, the skill began to rapidly be lost. If in the 19th and first half of the 20th centuries city sharpeners, announcing the surrounding neighborhoods with cries of “Sharpening knives, scissors,” were a common phenomenon, today this species is almost extinct, and the population is offered to sharpen knives in local metal repair shops. Unfortunately, even among the workers of these glorious establishments, not everyone can sharpen your knife correctly. Regularly carrying knives to be sharpened and paying for it is troublesome and expensive. For those who believe that knowing how to sharpen knives is not superfluous, this article is intended. Why does the knife cut?
A knife is a long and thin wedge that pushes apart the layers of the material being cut, the more easily the smaller the working edge angle (that is, the sharpening angle) it has.
By acting on the handle of a knife, we concentrate the force on a small area of its blade. The smaller this area, the greater the pressure and vice versa: the “thicker” the cutting edge (CR), the greater the force we must apply. At the point of contact of the RC with the material, a high specific pressure develops: the forces and their moments applied by the hand are small in themselves, but when calculated on the tiny area of the cutting edge they acquire significant values. This dictates special strength requirements for the knife material: the knife experiences enormous loads and deformations, especially if the material being cut is not soft food products of animal origin (meat tenderloin or fish fillet), but hard wood or paper. Yes, don’t be surprised - paper, despite its apparent softness, contains abrasive components that can quickly dull a knife.
This is what explains the variety of materials used in the production of blades and the different sharpening angles. Obviously, if for accurate cutting of soft non-abrasive materials you can take relatively soft and strong steel with a low carbon content (from 0.3% to 0.5%) and a small sharpening angle, then for working with hard objects (for example, when cutting wood) you take high-carbon hard and a more brittle material with C 0.8% and a large sharpening angle, which also provides greater mechanical strength of the RC.
To put it simply, it can be noted that high-carbon steels have better RK resistance (i.e., better resistance to wear and dullness), while at the same time having lower strength and toughness. This dictates the need to use sufficiently large sharpening angles or a certain level of care in handling - otherwise the RK material may chip away in pieces.
Soft low-carbon steels, on the contrary, “hold” an edge worse, but having better strength properties allow you to set a smaller descent. Even if damaged, the material does not crumble into pieces, but is deformed, and it is easy to “correct” it in place. There are exceptions to this rule, but we will discuss them below. In fact, setting a certain ratio of the thickness of the trigger, the angle of the cutting edge, the structure of the steel and the overall dimensions of the blade is a rather complex parameter that requires certain knowledge and experience.
Let's return to the cutting mechanism. It is characterized by two indicators: stroke and feed. When cutting, you pull the knife towards you or, less often, push it away from you - this is a move. At the same time, you lightly press on it from above - this is a serve. When you chop, it is a pure feed in which you drive the wedge into the solid body you are cutting, perpendicular to its surface. Feeding is the most “energy-intensive” in terms of effort expended. This is an essential component of the cut: even when a sharp knife seems to fall through the soft material during a “pulling” movement to the side, the feed takes place due to the weight of the blade. The stroke is more effective when cutting soft products - that’s why the professional tool for cooks and carvers has a long blade, which provides a longer stroke. It requires less energy, i.e. “resource-saving”, which is important if you have to work with a knife for several hours in a row.
An effective combination of stroke and feed is implemented on the saw due to the specific orientation of the RC sections - the teeth. Serrated (serrated) blades, or “serrator” as they are called today, allow you to cut (more precisely, saw) even hard materials, and also maintain cutting ability for soft substances many times longer due to the fact that such a cutting mechanism is much closer to “micro-chopping” " To cut with such a blade, it is necessary to develop more force than with a clean cut, but less than with chopping.
To reduce the “harmful” consequences of the tooth, such as an increase in the applied force and the appearance of an uneven cut line, its miniaturization allows it to be reduced. But here a dilemma arises. It is much easier and more convenient to cut with a small tooth than with a large one, a clear example of which is cuts made by cloves of grass or the edge of a paper sheet. But such a tooth is short-lived and polishes faster. A solution was found back in Ancient India: on damask blades, a “micro-tooth” was created by isolating local areas of high-hardness cementite on a relatively soft cutting edge. This made it possible to have a durable and flexible blade combined with high cutting ability. Today, a similar method is implemented on some types of high-carbon corrosion-resistant steels and a number of titanium and cobalt alloys (Stellite, Talonite), where the role of micro-teeth is played by hard carbides located in a viscous matrix of the blade material. To increase cutting ability, it is even recommended to leave them unfinished on a fine abrasive, so as not to polish large micro-carbide teeth.
Cutting edge made of 440A (left) and 440C (right) steel - magnified 1400 times. At 440C, powerful carbides are clearly visible, acting as a “micro saw”.
The legend tells how King Richard the Lionheart competed in the possession of a blade with Sultan Saladin (Salah ad-Din): the king cut a stack of shields lying on the ground with his straight steel sword, and the Sultan cut a silk scarf thrown into the air with a damask saber. As we can see, this legend also contains a certain idea: Richard demonstrated the technique of chopping with a thick and durable blade, as well as his athletic abilities, while Saladin demonstrated technological tricks in making a light blade and the technique of wielding it: the light weight of the scarf required good skills in choosing correct cutting mode (stroke - feed).
However, enough about legends and exotic materials. Let's return to the question - how to make a knife cut.
Types of descents: A - wedge with supply, B - “lens-shaped”, C - double wedge.
As we have already found out, the knife is a long wedge. The following tradition has developed in the naming of parts: the sharp cutting edge is called the blade or cutting edge; the angle between two planes forming it is the sharpening angle; the plane opposite to it is the butt. If the blade profile is an ideal wedge, then the sharpening angle coincides with the descent angle (or, as the tapering sides of the blade are also called, fuchtel or lobe). This profile was popular on Japanese swords and Scandinavian knives, but today the so-called. double wedge: the sharpening angle is greater than the release angle. This profile allows you to have a more durable and “thicker” blade with a small butt size and blade thickness.
The main parts of the blade: A - bevels, B - the thickness of the bevel of the RK.
A variation of this profile is the so-called. a wedge with a supply, where the planes of the slopes are curved towards each other. It is used on skinners and razors. If the planes of descent are curved in the other direction, then they form a specific “lens-shaped” profile, which has the most powerful RK. It is used on knives for heavy work.
Another type is an asymmetrical descent, where one of the planes of the RK is perpendicular to the butt. It can have the same varieties as the symmetrical one with the difference that it is, as it were, its “half”: the descent can be convex, concave or “four-plane”. This profile is popular on large Far Eastern vegetable knives of the “tsai-tao” type, universal Yakut knives, and small kitchen knives for peeling root vegetables. It is also popular on "tactical" American Tanto style knives.
Symmetrical slopes allow you to achieve direct movement of the blade inside the material; they “stabilize” themselves in motion. But the asymmetric descent strives to “make a squiggle” in the material, moving in an arc in the direction of the descent, so that it is more convenient for them to cut thin slices or cut off shavings. Of course, the variety of sharpening is not limited to these options, but they are the ones that are most widespread. In addition, a number of blades may have different sharpening angles along the length of the blade (for example, on butcher's cleavers - near the tip there is a large angle for chopping, and closer to the heel a smaller angle for trimming) and even a different section profile.
During knife work, due to high loads, abrasive wear and electrochemical (corrosive) effects, the geometry of the knife changes over time. This affects both the sharpness of the knife and the ease of use, as well as safety. The point's task is to restore the original RK profile. Thus, cases of sharpening can be reduced to three basic ones.
Slightly dull blade. Bringing it to its original state is more correctly called straightening: the unevenly deformed and slightly bent RC is “put into place” with straightening devices - musat, slings with micropowders, fine-grained abrasive, etc.
Worn or severely dull. A neglected or badly worn blade requires more work. To do this, you will have to remove the “extra” material from the sides of the cutting edge. This is already done with abrasive bars.
Very severe wear, significant damage to the RC - nicks, chips, etc. This case is the most severe. In fact, during the point you will have to do the work of a cutler and re-draw the slopes and form the RC. This task is not an easy one, and if you don’t have the necessary skills, you can simply ruin the knife.
So we see that a knife, like any other tool, needs regular care and reasonable use: the more neglected it is, the more difficult it is to restore it. Nevertheless, the most severe cases occur most often: without knowing how to properly care for the knife, the user uses it until it stops cutting at all. For the same reason, we are experiencing a boom in knives with serrated sharpening; cutting with them is much harder and is not suitable for all products, but the long “lifetime” of factory sharpening has ensured their popularity. What is a cutting edge?
The cutting edge of the knife is made of carbon steel (increased by 1400 times).
By looking at the cutting edge (hereinafter referred to as the RC) with the “armed” eye (using a powerful magnifying glass or microscope), you can make sure that it is a narrow edge with an acute angle in cross-section. The value of this angle can vary within fairly large ranges - from 8 - 10 degrees to 45 - 50 degrees. The angle is determined by the purpose of the blade and its material. Obviously, peel potatoes with an angle of 45 degrees. It’s not very convenient, but trying to chop hard wood with a blade with an angle of angle of 10 degrees. will end in its destruction.
Here the total angle is 24 degrees, and the half is 12
The following recommendations have been adopted for specifying the total angle of the RK:
Up to 10 g - shaving, surgery, thin sections of preparations.
From 10 to 20 - delicate tasks on fairly soft material, requiring ease of operation of the blade: chopping vegetables, working with sirloin, etc.
From 20 to 25 - chef's knives of various profiles.
From 22 to 30 - hunting and universal knives (hiking and tourist).
From 25 to 40 - universal knives and for heavy work.
Keep in mind that the angle at which a knife with symmetrical slopes is sharpened is half: if the angle between the longitudinal plane of the blade and the plane of the block is 12 degrees, then the total sharpening angle will be equal to 24 degrees.
How to sharpen.
To restore the distorted geometry of the RC manually, as a rule, treatment with abrasives of different grain sizes is used, depending on the required amount of metal removal. Working with any abrasive occurs in three stages. First, the grains of the abrasive are cut into the metal, then a steady process begins, during which a constant amount of material removal is established, and finally, “cleaning” or “nursing” is carried out during which powerful risks are eliminated and the surface is, as it were, polished.
Hence, at the first stage, a small force is recommended, at the second - nominal (this is where the “excess” material is removed), which at the third stage gradually gradually decreases to a minimum. It should be borne in mind that the “nominal” force is an individual indicator. On the one hand, the stronger the impact of the abrasive on the knife, the faster the material will be removed, but on the other hand, this should not affect the quality of removal: the material should be removed from the RA evenly, for which the knife should not “wiggle” - bury the blade in the abrasive or, on the contrary, “hover” over it, riding on the descent. If you are tired, it is better to take a break and rest, otherwise an awkward movement can ruin the fruit of long labor. It’s better to calculate your strength so that you can complete the point in one cycle without getting too tired and getting into a rhythm. Some compare this state with meditation, others note some similarities with autoeroticism. In short, the point is that you can even enjoy the process, no matter how strange it is for some.
Knife sharpening scheme:
the knife moves with the RK forward along the block (in direction A) or with the butt forward (B).
The main thing is to accurately set a constant angle. That is why a straight razor has a special design: a thick butt that is laid flat on an even abrasive or truing belt along with the RA. Force is not needed here at all and all attention should be focused on ensuring that the abrasive meets the knife at a certain and strictly constant angle. This is the essence of all sharpening techniques, regardless of whether you move the knife along a fixed abrasive, the abrasive along a fixed knife, or sharpen while holding the knife suspended with one hand and the abrasive with the other. There are two ways to maintain a constant angle: simple and expensive and complex and cheap.
The first is to purchase special devices that make it easier to set a constant sharpening angle. The difficulty of setting a constant angle for a point on a flat abrasive lies in the rather inconvenient and unusual position of the hand: you seem to be trying to cut off the top layer, a fraction of a millimeter thick, from the abrasive with a knife. Moreover, alternately one side or the other side of the Republic of Kazakhstan. Devices help simplify the task: the abrasive bars are either arranged in a V shape in such a way that you make simpler and more familiar movements - pulling the knife towards you from top to bottom, or by forcing the direction of movement with rods, slides and guides, they prevent your hand from wobbling. They are affordable for all categories of users: V-shaped from inexpensive (up to 50 - 300 rubles) Lohman models to multifunctional sharpeners from Spyderco up to $100; machines from Gatco (up to $50) and Lansky (up to $100). In principle, such devices can be made yourself at home.
The second is to paraphrase the well-known slogan “sharpen, sharpen and sharpen”, namely, to acquire the necessary skill. There are many tricks for this. You can make a special plate attached to the butt and perpendicular to it, which will move with the blade along the abrasive, pressing against it, preventing the “angle of attack” from changing, or attach a staple-shaped clip to the butt, the position of which above the abrasive will help you develop the correct technique. You can press a coin into the center of the butt with your thumb, which you can use as a guide. Instead of a coin, you can try the thumb and index finger of your other hand. Try to “turn off” your hand from work and sharpen only using the elbow joint. However, if you have a strong hand, you can sharpen with wrist movements.
Control of a constant angle can be done using a marker: paint over the paint with it and after several cycles of the dot, evaluate the condition of the paint - if it is removed unevenly across the width of the paint, then you are “flooding” the blade. You can be creative: one of my friends tried everything, but nothing helped. Then he took a spatula and a square piece of raw clay, with the help of which he learned to remove even, thin shavings from the surface. This is where sharpening came into play. If the knife has decorative value, then you can seal the blade with tape so that only the RK remains uncovered: even if the hand moves unsuccessfully, the blade will not be scratched.
At first, don’t worry about maintaining a strictly defined angle: just learn to “keep” it even on both sides. When you succeed, you can begin to master different sharpening angles: remember that cutting with a large constant angle, although inconvenient, is possible, but if you don’t learn to set a constant angle, the knife will not cut at all. You can master angles using a protractor or an improvised template - a corner of a newspaper. This is 90 degrees. Fold it in half at an angle to get 45 degrees, twice more - 22.5 degrees, and another - 11.25. The last two angles are the most common.
Let's consider sequentially all three cases of restoration of the RC: light editing, minor sharpening and minor repairs. In this case, you need to be guided by the same simple principle as doctors - “do no harm”: if a very dull knife requires maximum sharpening, then an incorrectly sharpened one requires repair.
By lightly editing the blade, we actually straighten the slightly wrinkled blade and polish it. In principle, abrasive is not necessary. Old experienced barbers could correct the thinnest descent of a straight razor on the rough skin of the palm without taking a sling in their hand. Everyone who uses inexpensive safety razors and cheap “disposable” razors knows this in practice: at first the blade shave “hard” and only after a while the shave becomes “soft and pleasant” due to the fact that you have “corrected” the blade that was not finished properly by the manufacturer. your face. In addition, the razor blade has a lens-shaped profile, obtained as a result of editing on a sling, which reduces the risk of cuts. It has not yet been possible to create “eternal” ceramic razors precisely because of the difficulty of creating a lens-shaped RK on zirconium dioxide ceramics. Professional cutters use soft, velvety musat with almost the same hardness as the blade material. Experienced chefs manage to straighten one knife against another - the editing is done on the edge of the butt. But all this only works on a very thin RK. That is why musat, which is a rod with a single notch along the generatrix, is so loved by cooks, cutters, veterinarians and pathologists. Wood carvers treat it more than coolly, preferring fine-grained abrasive for finishing and straightening thicker bevels. After sharpening, the blade acquires a certain sharpness, but polishing allows you to increase the durability of the blade by 2.5 - 3 times. Polishing is carried out sequentially, changing the side of the brush after each movement. On belts, it is recommended to move the blade with the butt forward so as not to accidentally cut through it.
Nevertheless, “razor sharpness” is not an end in itself - its necessity for those who work on hard materials is inevitable, since the “microtooth” grinds down many times faster. Here another parameter comes into play - the ratio of the time required to bring the RC to the required degree of severity to the life of the RC. If for those working with hard materials or for shaving a polished micro-tooth is a necessity, then for those working with soft “inanimate” bodies it is simply a waste of time, because even after grinding, the fairly large “micro-tooth” formed by its ribs is quite tenacious and efficient, and restoration It takes very little time - it requires literally a couple of movements. For the same reason, universal knives are equipped with an abrasive stone rather than musat - the stone is more universal, and the abrasive agent on such a knife, as a rule, has a significant thickness.
Wait, what about diamond and ceramic musats? - you ask. Alas, only manufacturers call them musats; in fact, they are already needle files designed for significant metal removal. This is already a case of a small point.
A typical example of a “blockage” of the RC during sharpening:
the angle RK consistently increases, the descent thickens.
When sharpening, the main thing is not to change the sharpening angle - not to fill it up. Let's illustrate this with an example. To make sharpening easier for yourself, after the blade has become dull, you can sharpen it at a slightly larger angle. Then a little more, and another. As a result, the working angle RK increases its value from 40 degrees. up to 60 and even 80. It's like trying to cut a corner of a house. Feel the blade (carefully!) with your fingers on both sides. This is what is called a “very thick descent”. This is what happens when the angle is too tight or the trigger is intentionally too thick. And it can be set this way even at the factory: many serial manufacturers, fearing complaints from “advanced” users who test the knife by cutting nails with it, set it specifically. At first, even it cuts at the very least, and the RK becomes much stronger. So very often factory knives need resharpening immediately after purchase or after short use.
Burr formation.
A - beginning of sharpening, B - formation of a burr, C - formation of a burr on the opposite side. Please note: the sharpening angle (i.e. the location of the blade axis relative to the abrasive plane) is constant.
Returning to our knife, sharpened in stages, we had to immediately go to a point at a given angle - the original angle would then remain unchanged. After this, you can proceed to the easy editing described above. Very important for the point stage is the formation of an even burr along the entire length of the RC after the point on one side. This indicates that the material has been removed evenly from the entire blade. If you interrupted the point before the stage of burr formation, then it is possible that “dumb” areas remained on the RC. Having removed the burr, proceed to alternate points on the sides of the RC and then to editing.
Correction of descents.
A - severe wear of the RC, B - asymmetric correction, C - symmetric correction.
However, in case of serious damage to the contact point or its severe wear, even sharpening at a constant desired angle, you begin to gradually approach the butt and the trigger will still thicken. Here you will have to level or correct the slopes. In general, it is better to entrust this work to a professional because it requires mechanical equipment - an electric sharpener, a grinder, etc. Of course, you can try it yourself, but this is provided that you know how to choose descents or valleys. This question can be viewed in more detail on the website of G.K. Prokopenkov. However, there is not always access to a sharpener and a craftsman, and sometimes the knife is such that it is cheaper to buy a new one than to have it repaired by a professional. Fortunately, there are alternative options. In addition to the labor-intensive procedure for straightening the bevels, which consists in straightening them by laying them almost flat on the abrasive, the RC can be moved to the right or left bevel, making it “asymmetrical”. This practice is often found among electricians who have to cut a lot of wires and the symmetry of the cuts is not particularly important for them. When editing bevels, you can alternate the “beginning” side - this will avoid severe distortion of the profile. However, in the case of a complex blade profile (a wedge with a lead), it is still better to turn to a professional.
The popular “American” tanto and serrated profiles are sharpened in a similar way: the material is evenly removed over the area of one of the bevels.
In the case of a serrated blade, this should be done on the side opposite to the one on which the serrated is cut. A burr that forms on the opposite side can be removed from the cord or the edge of the cardboard. After removing the burr, the updated “serrator” is ready for use again. What to sharpen.
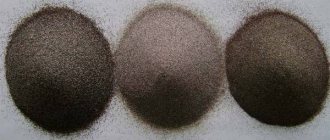
Abrasives can be divided into two large groups - artificial and natural.
Natural quartz rock known as novaculite or Arkansas, mined in the Wachatau Mountains, Arkansas, USA. Deposits of similar rocks are also known in Europe (Harz Mountains), Australia, Turkey, Japan, etc. They are divided according to the hardness and size of quartz microgranules into soft (soft) and hard (hard), as well as coarse (extra coarse, coarse), medium (medium) and thin (fine, extra fine).
Thrifty compatriots also use alternative abrasives - the unglazed bottom of clay vessels, relict fossils of the “Devil's finger” type, flat stones made of hard minerals, etc.
It should be borne in mind that many natural abrasives do not have sufficient hardness for the effective point of modern high-carbon wear-resistant steels, which led to the widespread development of artificial abrasives.
Due to the high density of natural stones, sharpening work is carried out with the surface moistened with oil. The oil should be special, light. Some people use the popular Johnsons Baby Oil as a replacement. Can also be moistened with water. What is better is a debatable question: the advantage of water is the ease of cleaning the point of the bar from wear products during the process and ensuring better “cleanliness” of finishing the paint. The advantage of oil is a more comfortable and “smooth” point.
Among the variety of artificial abrasives used in industry, the most widely used are bars based on diamonds (natural and synthetic), corundum and electrocorundum based on aluminum oxide Al2O3 with minor impurities of other minerals and carborundum based on silicon carbide SiC. For the final stages, grinding powders based on diamond, chromium oxide, etc. are used.
You can also remove material (sharpen) with needle files - personal and velvet. Most consumer kitchen utensils today have a blade hardness in the range of 43 - 52HRC, which makes them possible to use files (semi-personal, personal and velvet). However, in this case, the removal of material from the RC (and, as a consequence, the distortion of the geometry of the slopes) increases sharply. This leads to a sharp decrease in the “lifespan” of the knife, and if done incorrectly, it can ruin it altogether. The same considerations apply to finishing: finishing is more about leveling and polishing the paint, and diamond abrasives (even the smallest ones) remove metal very effectively. However, if the speed of RO recovery is very important (for example, an incompletely cut carcass is freezing in the cold), then this makes sense.
A special feature of diamond is its sensitivity to significant forces and impacts, which leads to chipping. It is advisable to moisten it to reduce wear and clogging, and clean it after use. A typical problem is uneven wear. Diamond abrasive is usually applied as a layer to a metal base or, alternatively, DMT creates cellular cavities in the plastic filled with abrasive. In the first case, with excessive wear, the bare metal of the base comes out to the surface, in the second, the working plane is distorted. We can say that diamond abrasive requires more care when using it - it is very difficult to correct it. So to speak, ordinary abrasive is cared for according to its actual condition, while diamond abrasive is cared for in a planned and preventative manner.
Regular abrasives also require maintenance. Firstly, most domestic abrasives are characterized by high wear, which significantly changes the working plane. Secondly, the pores of the abrasive tend to become clogged with point products, which affects the intensity and uniformity of metal removal, and also dictates the need to moisturize the point exclusively with water and regular cleaning. Highly porous artificial abrasives are generally recommended to be used partially immersed in water to prevent “dehydration” of their surface.
Care can be divided into two parts: regular, performed after each point, and periodic. Regular cleaning consists of brushing with detergent (Persol, Comet, Ajax) after use. The issue of drying the bars is not fundamental: personally, I dry them on a radiator simply so that excess moisture does not fall on the boxes in which they are stored. Some experts recommend the so-called. “wet” storage of bars (i.e. in a plastic container with water). “Wet” storage of the whetstone is especially justified if it is used to sharpen a carbon steel knife - in this case, metal filings embedded in the abrasive simply rust.
Periodic maintenance is aimed at restoring the plane of the bar and removing the so-called. "salting". The essence of “salting” is that metal filings are packed into the pores of the abrasive, as a result of which the RA comes into contact at a point not with the abrasive material, but “rolls” over the embedded sawdust, which leads to deterioration in material removal and its unevenness. By the way, moistening the block, in addition to increasing the smoothness of the point, also reduces the rate of “salting” - it is also recommended for diamond. On a wheel, for example, grease can be easily removed by applying a diamond pencil or a harder abrasive to the working surface, which will quickly remove a thin “greasy” layer. To restore the bars, you have to put in some effort: the layer is removed either with sandpaper glued to glass or another smooth and hard surface, or with another, harder bar. It is better to perform the procedure under running water. The “straightening” of the plane of the block is carried out in a similar way: usually the maximum wear occurs in its middle and the essence of leveling comes down to grinding down the prominent edges. This can also be done using a mechanical sharpener. The shape of a household block (the so-called boat) is designed to reduce wear on the central part by increasing the working area. Checking the plane of the block to see if it needs to be straightened can be done by laying it on a smooth surface (again, a piece of glass) and illuminating it from the opposite side: it is better not to cause severe wear. Although a heavily worn block can be used - for example, for the point of a lens-shaped blade.
It is not for nothing that I dwelled in such detail on the care of the bar.
Its condition is very important for a good result, but I would like to make a reservation right away: 95% of success when sharpening is the developed skills of the user and only 5% is the quality of the abrasive. I would like to warn beginners against purchasing expensive abrasives, the price per bar of which can reach up to $50 - $100 or more. Start with ordinary “boats” and remember that the abrasive itself, even the best, is just a block without your skills. The final question is a test of sharpness.
This is where you can give free rein to your imagination, without forgetting about precautions - a sharp blade does not forgive mistakes.
The canonical method is to check the RK by cutting a sheet of newspaper while hanging. Try expanding this test and try shredding the paper by weight - the paper noodles should easily fly off the sharp blade. You can cut a tomato - place a knife on it and lightly pull the handle towards you with two fingers: the sharp blade “falls” through the tomato. You can put a ring made of a “Hungarian” type of rubber band on the butt and, pulling it back, release it (the rubber band, but in no case a knife): the ring can be easily cut on the fly. You can try cutting off a hanging piece of toilet paper.
Look at the illuminated RK - the sharp blade does not produce glare along the length. The presence of glare indicates the presence of blunt areas on the RC.
Mark Luchin proposed a “national test” - cutting a thin long thread tied to a chandelier. By replacing the chandelier with a balloon inflated with helium, try to ensure that it does not move when hit, and the thread is cut off.
You can try “kitchen tameshigiri” with large chef’s knives: roll a sheet of newspaper into a tube, secure the edges with tape, place it on the edge of the table and try to cut it with one diagonal blow. If after the blow the lower part remains forlornly standing on the table, you’ve done well. You can try chopping empty beer cans and plastic water bottles in the same way. A fun pastime, but the knife will have to be adjusted regularly. Here, not only sharpness is important, but also the profile of the blade: many “combat” knives cannot do this test, no matter how hard you sharpen it.
So, now you can try your hand at sharpening and testing the sharpness yourself. Have a good time!
Table of contents
Angle Holding Devices
The correct sharpening angle of the cutting edge of the blade will help to hold the device in which the knife is fixedly fixed at the required angle to the abrasive surface moving across the wheel.
The blade can also be processed on a machine designed for sharpening. But the high speed of the abrasive wheel increases the likelihood of errors when working with a beginner. Fixed blade tools must be adjusted by a professional.
Electric devices for sharpening the RK do not require special skills and allow you to set values on the sharpener in the range from 15 to 30°.
How to properly sharpen blades made of different steels
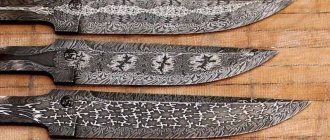
Products made from some metals require special processing. Blades made of Damascus or damask steel, which are highly valued by hunters, stand out here.
Damascus steel
To preserve its integrity, sharpening is possible only by hand, since the composition contains hard and soft alloys.
To check the strength of the metal, immediately before sharpening, the sharpness of the edge is determined: the sharper it is, the harder the steel itself.
Another feature of the process is sharpening, which is carried out only along the blade. At the beginning of the work, a fine-grained sharpening stone is used, followed by a transition to “velvet” sandpaper.
Bulat steel
All work is carried out exclusively on a wet block. The process begins with a whetstone with large grains and ends with a small grain. Finishing grinding is carried out on ceramics.
Grinding the knife after sharpening
After processing the blade, it is recommended to grind it using a block or other abrasive. Then, to obtain an optimal result, it is recommended to continue polishing with a fine-grained material. A leather belt works well for this purpose.
The belt secured on one side is lubricated with goyi paste and pulled by hand through the loop at the other end. Polishing and finishing are done with the butt forward, alternately on each side, gradually reducing the pressure on the belt. Grinding is considered complete when the blade surface is brought to a mirror shine. This method can be used to edit both a shoemaker's knife and a folding knife.
Caring for a hunting knife
Basic rules for caring for a hunting knife:
- It is necessary to have your knife professionally sharpened regularly to ensure that its edge is always sharp.
- Over time, the blade becomes dull and sometimes rusts. To give it shine, you need to clean it with steel wool, which is soaked in special oil. And to remove rust, its surface must be treated with polishing paste.
- If the knife handle is made of wood, then caring for it requires special care. Due to the possible drying of the wood, it is recommended to keep the blade away from the stove, warm radiators or open sunlight. If the knife handle is made of leather, it can also be treated with special products.
Features of Japanese models
The Japanese knife has a one-sided sharpening at an angle of 15-18° and looks like a French chef's knife. The wide blade and the downward tip of the blade on the side of the butt allow you to make movements when cutting only up and down, without swinging. Skill is required to operate this tool.
Sharpening of knives for Japanese cuisine is done only by hand using a water stone. Magnetic blades do not require sharpening because they have a self-healing structure.
Serreytornaya
The previous sharpening options refer to smooth varieties. But there is a serrated edge, it has teeth like a saw, only the teeth are not spread in different directions. From the outside, this sharpening looks like a wave with sharp protrusions.
This product is convenient for cutting hard material with a minimum amount of crumbs or sawdust. This is mainly how knives for kitchen work are sharpened. But it can be found on the blades of hunters, tourists, or on survival products.
It is very difficult to do such sharpening yourself; you will need a special tool. For some knives, a semi-serrator is made, this is when the blade is sharpened in this way only halfway. And also the teeth can be located on the butt of the blade.
Serrated knife sharpening.
Methods for checking the blade tip
Blade sharpness is the most basic requirement for any type. The tool must be safe and reliable for a wide variety of jobs. There are several methods for checking whether a blade has been sharpened well.
On paper
Take a sharpened tool and an A4 paper sheet. The process is this: you should cut the paper, and if at the same time the blade begins to move to the side, then the sharpening is done at a low level, and if the cut is even, then the blade is quite sharp.
On a tomato
In addition to kitchen options, you can also test all types of blades. The meaning of the test is this: take a fresh tomato and cut a slice. If the blade moves to the side, it means that the sharpening was poorly done, but if it is smooth and without difficulty, then the work was done at the highest level.
Testing on hand hair
The knife is drawn against the direction of hair growth without touching the skin. In this case, the blade should cut the hairs.
Blade anatomy
Of course, different blades have different cross-sectional shapes, but their common details can still be identified and clearly defined. Therefore, let’s take an average image, using which we can understand all the necessary terms.
Bold italics indicate details that can be found in the figure.
- The thickness of the blade is the thickness usually measured closer to the butt , where the descents .
- The thickness of the reduction is the distance between the points where the descents end and the approaches (one point on each side, see figure). Why the thickness of the information? Because it is there that the metal begins to converge into one line - the cutting edge.
- Leads are narrow planes that, when converging at one point, form a cutting edge. When examining the blade, it is they that shine in the light, and not the edge, as is mistakenly believed.
- The cutting edge is practically an “imaginary” line, which is still several microns thick, but is conditionally only a place where the leads meet.
- Sharpening angle - the angle at which the leads intersect (or descents - in the absence of leads); This term is popularly understood as the “sharpness” of sharpening. By the way, this angle is always greater than the one at which the slopes meet.
Anatomy of a blade: a clear understanding of what descents, approaches and cutting edges are
The smaller the angle between the slopes (and this value ranges from 8 to 50 degrees), the sharper the knife, that is, we have to apply less force to cut.