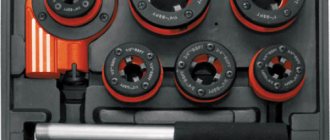
Threaded connections have found wide application in creating components of various mechanisms. This phenomenon is due to the reliability of the formed interface and the ease of its creation by simply screwing the rod part into the corresponding hole. However, there are situations related to the need to perform independent manual cutting of threaded thread. And here you can’t do without specialized tools. Let's talk in more detail about its variety, called the die.
Classification
The division of dies into types is carried out according to many criteria. We will name only the most frequently used ones.
Design. According to this criterion, the dies are:
- round. Most widely used. The design is a solid ring, along the inner ridges of which the workpiece passes. This tool is characterized by high rigidity. Thanks to this property, high-quality threads with turns with a good profile are obtained;
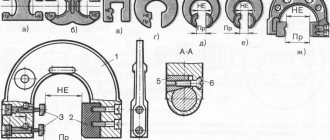
- sliding (square). The design of such dies includes two parts. And the workpiece is fixed when they are connected. Setting the required diameter of the thread knurling is done by moving one of the parts of the die along the guides of the die (this is another name for the die holder);
- Split. They are used in case of low requirements for the quality of thread knurling.
Thanks to the existing radial cut, such a die has shock-absorbing properties. As a result, the cutting area is subject to less wear. But the end result is a thread of low precision. Its run-up (designation P) fluctuates in the range of 0.1 mm≤P≤0.3 mm;
Thread knurling direction. Dies can cut the following types of threads:
- right The thread is knurled in a clockwise direction. Such threads are present on most types of rod fasteners;
- left. The knurling direction is opposite to the clockwise movement. Used much less frequently. In particular, where the right-hand thread can unwind, in mechanisms that differ in the specificity of rotation, and in special components of vehicles. Such dies are marked with English letters LН;
Thread profile. Based on this feature, tools for cutting external threads, that is, dies, come in the following types:
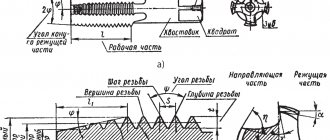
- metric. As the name suggests, they are designed to form metric thread knurls. The designation in technical literature includes the letter M, followed by a figure or number indicating the thread diameter in millimeters. The values of this parameter (designation d) for round dies are approved by GOST 9740-71. They can vary in the range of 1.0 mm≤d≤68.0 mm;
- cylindrical pipes. Easily identified by the letter “G” present on the body. The unit of measurement for the threads they form is inch (indicated by a double stroke “″”). Its ratio to a millimeter looks like this: 1″ = 25.4 mm. The tool marking “G1/4” indicates that we are looking at a die for cutting quarter-inch pipe threads. Diameter change range – G1/8″≤d≤G2″;
- pipe conical. Marking with the letter “K” will prevent them from being confused with other types of such instruments. Used when it is necessary to obtain a threaded surface of a conical configuration. Scope of application – machine components, as well as critical connections operating under high pressure conditions;
- trapezoidal. The cross section of the turns has the shape of an equilateral trapezoid. Scope of application: power couples that convert rotational motion into translational motion. The simplest example is the combination of a lead screw and a nut, which are equipped with bench and machine vices.
Types of instruments
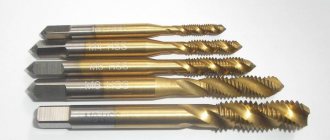
The appropriate tool is selected depending on the characteristics of the material being processed, the required productivity and other parameters. Using different types of taps, you can cut metric or inch internal threads with a cylindrical or conical profile.
According to the method of conducting the process, models are distinguished:
- Pass-through (universal) . Their working part consists of three zones. The first performs rough cutting, the second – intermediate, and the third – finishing.
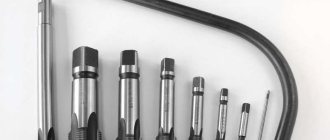
- Complete . To perform a full range of work, several tools are used - for roughing, intermediate and finishing cutting. The sets consist of three taps, less often of two (for roughing and finishing). For processing particularly strong metals, kits with 5 tools are used.
The tool is made of two types: for processing holes manually or using metal-cutting equipment.
- Machine-manual . Has a square shank. Works complete with a holder with two handles - a knob.
- Machine . Installed in the chuck of metalworking machines of various types.
Taps of different designs are used for cutting threads in blind and through holes:
- For non-passable holes, use a complete tool without a conical tip. The work is usually done with a crank.
- In through holes, threads are made using taps with a conical tip. Most often these are varieties of universal type tools.
Die holders
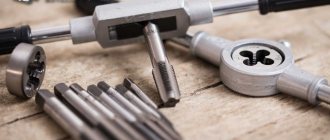
To cut threads, in addition to a die (this is another name for a die), you will also need an auxiliary device - a die holder. With its help, the die body is fixed and held in the desired position and, in addition, the tool itself is given a rotational movement.
The design of one such device is designed for several standard sizes of grooves: for small, medium, and large thread knurling. They are inserted into the holder ring and securely fastened with a screw.
The production of dies is regulated by the provisions of GOST 9740-71. According to its requirements, the following grades of steel should be used as raw materials:
- 9XC – tool alloyed with chromium;
- XBCG – medium alloyed instrumental.
In addition, this regulatory document refers on the issue of material for the manufacture of dies to the State Standard number 19256, adopted in 1973. There, the range of brands has become much wider. Let us give as an example only the most common ones. This is high-speed tool steel:
- P18 with an average mass fraction of tungsten (element W) reaching 18%;
- P9M4K8 with an average mass fraction of tungsten equal to approximately 9%, molybdenum (Mo element) - 4% and cobalt (Co element) 4%;
- P6M5 - high-speed tool with an average mass fraction of tungsten of 6% and molybdenum (Mo element) of 5%;
- P12F3 - high-speed tool with an average mass fraction of tungsten at 12% and vanadium (letter “F”) 3%
- and alloys of other brands.
In mass production conditions, dies whose cutting edges are made of hard steel are better suited. For example, such as THM30 (tungsten-free alloy), TT10K8B (titanium-tantalum-tungsten alloy), T5K12B (titanium-tungsten alloy) and BK25 (tungsten alloy). Using this tool, thread knurling can be formed on rod fasteners made of high alloy steels.
How to correctly determine the hole diameter?
Before cutting a thread, a hole is made, the diameter of which is determined according to standardized tables. If you prepare a hole whose cross-section is smaller than the recommended size, the tool will fail; if it is larger, the result will be of poor quality.
Correspondence table for metric threads and hole diameters for them
| 2 | 0,4 | 1,6 |
| 3 | 0,5 | 2,5 |
| 3,5 | 0,6 | 2,9 |
| 4 | 0,7 | 3,3 |
| 5 | 0,8 | 4,2 |
| 6 | 1 | 5,0 |
| 0,75 | 5,25 | |
| 0,5 | 5,5 | |
| 8 | 1,25 | 6,8 |
| 1 | 7,0 | |
| 0,75 | 7,25 | |
| 0,5 | 7,5 | |
| 10 | 1,5 | 8,5 |
| 1,25 | 8,8 | |
| 1 | 9,0 | |
| 0,75 | 9,25 | |
| 0,5 | 9,5 | |
| 12 | 1,75 | 10,2 |
| 1,5 | 10,5 | |
| 1,25 | 10,8 | |
| 1 | 11 | |
| 0,75 | 11,25 | |
| 0,5 | 11,5 | |
| 14 | 2 | 12,0 |
| 1,5 | 12,5 | |
| 1,25 | 12,8 | |
| 1 | 13,0 | |
| 0,75 | 13,25 | |
| 0,5 | 13,5 | |
| 16 | 2 | 14,0 |
| 1,5 | 14,5 | |
| 1 | 15,0 | |
| 0,75 | 15,25 | |
| 0,5 | 15,5 | |
| 18 | 2,5 | 15,5 |
| 2 | 16,0 | |
| 1,5 | 16,5 | |
| 1 | 17,0 | |
| 0,75 | 17,25 | |
| 0,5 | 17,5 | |
| 20 | 2,5 | 17,5 |
| 22 | 2,5 | 19,5 |
| 24 | 3 | 21 |
| 27 | 3 | 24 |
| 30 | 3,5 | 26,5 |
| Thread designation | Diameter, mm | Thread designation | Diameter, mm | Thread designation | Diameter, mm |
| M 2 | 1,6 | M 8 | 6,7 | M 22 | 19,4 |
| M 2.2 | 1,75 | M 9 | 7,7 | M 24 | 20,9 |
| M 2.5 | 2,05 | M 10 | 8,5 | M 27 | 23,9 |
| M 3 | 2,5 | M 11 | 9,5 | M 30 | 26,4 |
| M 3.5 | 2,9 | M 12 | 10,2 | M 33 | 29,4 |
| M 4 | 3,3 | M 14 | 12,0 | 31,9 | |
| M 5 | 4,2 | M 16 | 14,0 | M 39 | |
| M 6 | 5,0 | M 18 | 15,4 | M 42 | 37,4 |
| M 7 | 6,0 | M 20 | 17,4 | M 45 | 40,4 |
Correspondence table for inch threads and hole diameters for them
| Thread size, inches | Diameter, mm | Thread size, inches | Diameter, mm |
| 1/8 | 8,8 | 7/8 | 28,1 |
| 1/4 | 11,7 | 1 | 30,5 |
| 3/8 | 15,2 | 1 1/8 | 35,2 |
| 1/2 | 18,9 | 1 1/4 | 39,2 |
| 5/8 | 20,7 | 1 3/8 | 41,6 |
| 3/4 | 24,3 | 45,2 |
Thread cutting with a die
This procedure includes several steps. Let's look at them.
- Preparation of the workpiece. First of all, the core part being processed must be securely secured in a strictly vertical direction in a vice.
- The die is inserted into the die holder and centered in it.
- Then it is recommended to grind the section of the rod on which the threaded knurling will be formed with sandpaper or a flat file to a depth of 0.4 millimeters.
- Next, the end of the rod is chamfered at an angle to its longitudinal axis equal to 40°. This will make it easier to center the tool and start the thread.
- Then a die is placed on the rod and the initial turns are cut. This point is the most important from the point of view of the finishing quality of the thread. In addition to centering, you need to control the strict horizontal position of the die in relation to the plane of the workbench.
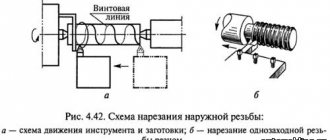
- Actually, the procedure for forming a thread involves forcibly pressing the tool into the workpiece with its simultaneous smooth rotation using the handles of the die holder. The axis of the ladder must coincide with the longitudinal axis of the part. In this case, you need to monitor the amount of forward feed. It must match the thread pitch. Skewing the die is unacceptable, especially when the initial turns are formed.
- After the rod enters the die about half its thickness, you can stop putting pressure on the tool. But the section of the workpiece on which the thread will be formed must be lubricated with machine oil.
- Subsequently, self-tightening is carried out. Thread knurling continues under the influence of rotating force. It should be reciprocating in nature: several turns to the right, after which about half a turn back, that is, to the left. As a result of such actions, the chips are broken and removed through special holes in the die.
Useful tips
- In order to correctly cut threads in metals with low hardness and high viscosity, such as aluminum, alloys based on it, copper, babbitt, it is recommended to periodically remove the tap to clean the channels from adhering chips.
- When using complete models, the complete set should be used. Skipping the roughing tool does not speed up, but slows down cutting. Such a violation of technology leads to a decrease in the quality of the result, and sometimes to failure of the tap.
- To prevent the tap from skewing, check the verticality of its position after 2-3 threads using a square. This precaution is especially important for blind and small holes.
The process must be carried out using liquids intended for lubrication and cooling:
- emulsions, linseed oil, and drying oil are used in steel elements;
- in products made of aluminum and its alloys - kerosene;
- when processing copper - turpentine.
It is possible to cut threads in parts made of cast iron or bronze without the use of lubricant.
Source: metallz.ru
How to restore a thread with a tap while maintaining its diameter and location
If you need to restore the thread while maintaining its diameter, use one of the following methods.
Welding the hole and then cutting a new thread
This method is rarely used due to the fact that the strength of the new thread obtained using this technology will be lower. This method is also chosen in the absence of special devices (screws and spiral inserts).
This method of thread restoration includes the following steps.
Removing old threads by drilling.
Welding the hole. The choice of technologies depends on the materials of the parts.
To weld holes in steel products, electric arc or gas welding is used in protective environments.
When working with cast iron parts, gas or electric arc welding is used in a cold state or with general/local heating.
Electrodes (MNCh-1, OZCh-1, TsCh-1), cast iron rods with a high silicon content and other materials are used as additives.
Machining the hole flush with the base metal.
Cutting a new thread.
Note! When working with aluminum products, this method of thread restoration is usually not used. This is due to the fact that the metal actively absorbs gases during welding. Pores form in the deposited layers. With severe shrinkage, cracks appear.
Restoring threads using a screwdriver
Screwdrivers are special cylindrical devices that have threads of the required diameter and pitch on the inside and large threads on the outside. Such products are made from steel, brass, bronze, copper and other materials. At the final stages of production, the screws are hardened and further strengthened.
Photo No. 2: screwdriver for thread restoration
If you need to restore the thread while maintaining the diameter using a screwdriver, proceed as follows.
Drill out the hole. The drill must be selected in such a way that the diameter of the resulting hole allows cutting a thread for screwing in the screw.
Cut the thread with a tap. Follow the rules listed above.
Screw in the screwdriver. It needs to be installed flush. If this is not possible, mill the part and remove the protruding part of the fixture.
At the border of the new thread and the screw, apply notches using a core. This will prevent the device from unscrewing spontaneously.
Repairing threads using a spiral insert
Spiral (also called wire and spring) inserts are also often used to restore damaged threads.
Photo No. 3: spiral inserts for thread restoration
These devices have high-precision rhombic threaded profiles on the inside. Almost all models are equipped with special driving tongues designed for screwing in devices.
For the manufacture of such products, especially durable high-quality stainless steel is used. This guarantees the resistance of the restored thread to deformation and corrosion.
Preparatory stage
To ensure that the work of obtaining threads does not cause many difficulties, careful preparation should be made for such a technological operation. All methods used related to cutting internal threads assume that a hole of the required diameter has already been obtained in advance. You can obtain the standard thread size when creating a hole according to the correspondence table. For example, for an M10 thread, a hole with a diameter of 8.5 mm is created.
There is often a situation where it is necessary to obtain a thread of a non-standard size. In this case, the required hole diameter is calculated using a universal formula. Calculations are carried out as follows:
The required hole diameter when using an M5X0.75 tap can be determined as follows: 5−0.75=5.25 mm.
The easiest way to carry out the work is when you need to get a standard thread, since all the necessary information can be taken from various tables of regulatory documentation.
To get a quality hole, you need to choose the right drill. When drilling, it is recommended to use equipment that prevents runout during operation. When choosing a drill, it is worth remembering that it must have high-quality sharpening. Experts recommend selecting the sharpening angle depending on the hardness of the material being processed. As the hardness increases, the recommended sharpening angle also increases, but it should not exceed 140 degrees.
