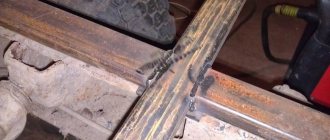
Welding pipes is not an easy task, especially if you need to make sure that they do not leak during operation. But even if this is not necessary, certain difficulties often arise if it is necessary to weld one pipe into another at a certain angle.
It is quite difficult for an untrained welder to do this. To do this, you first need to mark the pipe, then cut it evenly with a grinder and weld it into another pipe. What tricks are there for this? How to quickly and correctly cut a pipe at an angle?
Marking a corner with a piece of paper
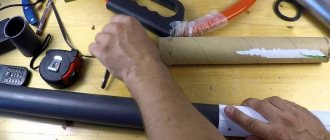
Marking with a paper sheet is one of the simplest ways to complete the task. A square sheet is required. It folds exactly diagonally. The resulting template for cutting pipes must be wrapped around the product so that the long side runs parallel to its cross-section.
Then an angle of 45 degrees is formed on the smaller side. All that remains is to mark the cut line using a construction pencil or marker on a sheet of paper.
It is recommended to wrap the marking area with narrow tape to prevent it from being accidentally erased. This method is excellent for long, large pipes with the cut location approximately in the middle of the product.
Tools used
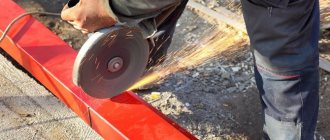
There are several ways to cut a pipe; for this, construction and industrial tools for metal processing are used. Of all the types, only the grinder allows you to obtain curved surfaces without further processing with the closest arrangement of edges.
For individual use
The following tool is used for cutting steel pipes at home:
Manual pipe cutters. Allows you to cut round parts with an even, right angle of cut due to the cutting edges of the rollers. There are several varieties of products of this type, consisting of single rollers or a series of rollers attached to a chain. In everyday life, such devices are quite rare and are more suitable for professional work.
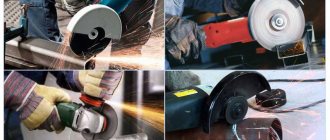
Bulgarian. It is a universal tool for cutting any metal parts with different angles; special metal discs are used for the work, which are ground down quite quickly during operation. This allows you to accurately cut a curved line with a small diameter disc.
Rice. 7 Customized pipe cutting tool
Gas-burner. A quick and effective method of cutting metal surfaces with a hot jet of flame; the disadvantages include melted edges, which complicate further welding. It is difficult to use a gas torch to cut a product according to a paper template, which will burn, and if a line is drawn, then it will practically not be visible in the stream of flame.
Electric pipe cutters. To work with pipelines of small diameters, you can use compact electric pipe cutters, whose operating principle is similar to a grinder. The device is called a roller machine; during operation, the part is mounted on a bed and rotated on roller guides; its surface is cut from above by an electrical device. The main difference between a pipe cutter is the metal disc, which has a special durable coating for cutting metal.
For industrial use
In industry, large-diameter pipelines are used to transport liquids and gases, so pipe cutting units are heavy and have large dimensions. There are also manual pipe cutters of the rotary and clamp operating principle. In the first case, the cutting rollers rotate along a round surface using an adjustable handle; in the second version, cutting is carried out by arcuate plates, which gradually move during rotation.
Rice. 8 Industrial pipe cutting equipment
Method of marking using a container of water instead of a pattern
This marking method is suitable for small-diameter pipes that are planned to be cut at a certain angle close to the edge. First you need to prepare a deep container of water. The planned angle of inclination is marked on it. Now you need to carefully immerse the end of the product in the liquid, tilt it towards the mark, and then pull it out.
As a result of such actions, a clear line of contact with water will appear on it; it needs to be highlighted. The pipe is cut along it at an angle. This method is best suited for jobs that require multiple markings.
Features of production, classification
Bends are manufactured in accordance with GOST 17375-2001. Carbon and stainless steel grades are used in production: 20, 09g2s, 12Х18Н10Т. Corrosion-resistant galvanized steel is also used. The choice of steel depends on the installation location of the steel elbow 90.
The angle of curvature of products is limited by the needs of the market and the capabilities of the equipment used in the manufacture of rolled products. In this regard, the maximum bend angle of the bend is 90 degrees. The diameter of the pipe can range from 15 to 1220 millimeters.
Welding technology is used to connect pipes to the outlet.
Using the computer program
To implement this method of marking pipes for cutting, you will need a computer with special programs. First, you need to draw up a drawing that shows the transverse dimensions of the product, as well as the planned cut angle. You need to get a virtual template.
Print it on your printer. And here it is worth understanding that the larger the diameter of the pipe, the more sheets will be required to print it. Then you need to carefully cut out the details of the drawing from all the pages and glue them together; it is best to use stationery tape for this. All that remains is to attach the template to the pipe and apply the markings.
This method of solving the problem is highly accurate. All necessary programs can be downloaded on the Internet, they are free to download and use. There you can also find a template for cutting pipes at an angle. All you have to do is print it and cut it out. To mark, the pattern is simply wrapped around the pipe.
Oblique cut
When changing the direction of the pipeline at an angle greater than 90 degrees, manual methods for making templates become too complex. Using a special program for calculating and creating patterns on a computer for any angles can come to the rescue. The good thing about this method is that it has high accuracy in creating paper templates and is easy to implement if you have a printer.
To obtain a paper pattern, the necessary data on bending angles and pipe diameter is entered into the program, after which a template is obtained, which is printed on a printer in full size. All that remains is to cut it out, stick it on the element to be cut and mark its outline.
How to cut a profile pipe at an angle
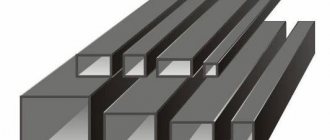
The marking of a profile pipe differs from a round one. Doing it manually can lead to significant errors. The best way to solve the problem is to create a cutting template from the same profile, but with a larger diameter.
You will need a small piece of profile pipe. Using a protractor, mark a 45 degree angle on it. Now, using a grinder, you need to cut off part of the workpiece along the marked line. The edges of the cut need to be sanded and defects eliminated. All that remains is to simply insert the original product into the template for cutting pipes at an angle. Then you need to apply markings along the cut line of the larger profile. And the pipe itself is cut along it.
The text describes ways to cut a pipe at an angle of 45 degrees. When the marking is already completed, it is recommended to use a grinder. With its help you can make an even cut. You can replace it with a hacksaw. You can also cut the product by welding, but you need experience in handling the tool, otherwise there will be unevenness.
Cutting technology
As a rule, the volume and complexity of work required by a home craftsman does not require the use of high-performance and expensive production-level equipment. When making a greenhouse frame, you can completely cut the pipes with a grinder or a traditional hand saw.
Each type of cut has its own nuances, and some require special tricks.
Right angle
The accuracy of the cut is largely determined by the quality of the markings. Experienced craftsmen advise marking cutting lines not with a pencil, but with masking tape, following the following sequence of actions:
- Set aside the required size and make a small mark with a marker or pencil.
- Carefully, applying to the mark, cover the part with masking tape in a circle. The edges of the paper should meet without moving. This is a sign that the paper is pasted correctly. If the edges do not meet, the tape needs to be re-glued.
- Securely fix the workpiece to prevent it from moving or distorting during work. For fixation, use a vice or clamps.
- The cut (smaller) piece of the workpiece should be left hanging so that it does not pinch the blade or disk.
- The cut starts from the top.
- The grinder disk (or hacksaw blade) is guided exactly along the edge of the masking tape, without deviating to the side.
This will allow you to cut exactly the required length.
If the diameter is large, then the markings are done in the same way, but cut in parts, in sectors of 30-60°. After cutting the next sector, the fastenings are loosened and the pipe is rotated. Then they fix it again and continue cutting from the place where the previous sector ended. To make it smooth, special attention should be paid to the beginning of the cut, avoiding steps and nicks.
Dimensions
On the modern market you can find marks of a wide variety of sizes. This allows you to choose the appropriate option for any design. The length of the knee usually does not exceed 350 millimeters on each side of the bend. When it is necessary to install a large bypass part, additional connecting elements in the form of pipe sections are used.
The differences between the marks are mainly in the diameter and bend angle. The standard diameters of such makers have the following values: 10, 12, 13, 14, 15, 16, 18, 20 and 22 centimeters. The most common angle values are 45 and 60 degrees.
Parts with an angle of 90 degrees are also available. However, it is not recommended to use them, as this can lead to clogging of the drainage system.
Many manufacturers are also ready to make a custom-made knee with the required parameters.
For instructions on installing pipes and drainpipe elbows, see the video below.
Chimney tee: 45 or 90?
A chimney tee is a very useful thing. We see two types of tees on sale: with an angle of 45 degrees and 90 degrees. Which one should you choose? Alexey TELEGIN, director of SPP Rubin LLC, tells the story.
Why connect the chimney through a tee?
Why do you need a chimney tee? Connecting a chimney through a tee has a number of advantages over a direct (attached) connection. Firstly, debris does not accumulate in the pipe; it falls below the connection area into the resulting pocket, from where it can be easily removed. Secondly, the system becomes independent: the stove can be disconnected from the chimney, cleaned and even replaced without destroying the building. In general, the chimney tee is a wonderful thing, you can’t argue with that!
What kind of chimney tee do we need?
To understand which chimney tee we need: with an angle of 45 degrees or with an angle of 90 degrees, we need to weigh all the pros and cons of the first and second. Let's do that!
Tee 45: advantages
- Less soot and debris accumulate in the resulting inclined section of the pipe. True, this “plus” does not eliminate the need for periodic cleaning of the chimney. And also the need to provide access to cleaning along the entire length of the smoke channel.
- The rotation of the pipe and the horizontal section are at a safe distance from the ceiling. This means higher safety and easier and cheaper installation. Less fire protection is needed and the costs for it are correspondingly lower.
That's all the undeniable advantages. And there are also those with whom you can argue.
Tee 45: controversial benefits
Thus, it is widely believed that a 45-degree chimney tee creates less turbulence than a 90-degree chimney tee. And does not create resistance to the flow of flue gases. But my experience shows that on a gas-tight horizontal section of a chimney made without narrowing the cross-section, at especially low speeds at which gases move in the chimney (2-5 m/s), we cannot use any instruments to determine the presence of the mentioned resistances, even if they there really are. This means that they can and should be neglected, especially when choosing a tee. And one more thing: if we accept as true that an angle of 45 degrees does not prevent the free exit of smoke, then it turns out that it cannot create barriers to the reverse flow of cooling gases and a sharp gust of wind, provoking reverse draft.
And it turns out that tee 45 does not have any special advantages.
Tee 45: disadvantages
- When connecting a fireplace (stove) to a chimney at an angle of 45 degrees, the most thermally loaded area will be the area in the upper part of the tee insert and on its rear wall , located opposite the connection point. Overheating of this area occurs, causing rapid and premature wear of the entire part. And due to the complexity of replacing a tee, its overheating and wear are extremely undesirable.
- When connecting at an angle of 45 degrees, we lose a section that compensates for the linear temperature expansion of the heating unit and the smoke exhaust pipe . In this case, a lifting force of the pipe arises, exerting upward pressure on the insertion of the tee. While the weight of the chimney presses down on the tee. Due to the multi-vector direction and the displaced center of mass, a breaking load occurs with curvature of the structure and the risk of cracks. This can lead to depressurization and destruction of the tee at the insertion site. Don't forget that this is the most overheated area. At the same time, responsible and difficult to replace.
- When passing a wall at an angle of 45 degrees, to ensure fire safety, we will need to make a hole of a much greater height than at an angle of 90 degrees, which will lead to a weakening of the load-bearing capacity of the enclosing structure and a deterioration in its thermal insulation . To restore the wall after the opening has formed, we will have to spend more effort, time and materials. At the same time, the appearance of the intersection of the pipe and the wall will still be worse.
- The amount of condensate flowing into the smoke pipe and heat-generating apparatus increases. Modern products provide grooves, curtains and inclined sections in tees that significantly reduce this phenomenon. But the fact remains: through a 45 degree tee, the likelihood of condensation entering the fireplace is much greater than through a 90 degree tee.
- The pipe tends to “slip” from the tee. Which requires fixing the pipe. And it makes installation less reliable and more complicated. Because of this, the pipe is often placed “opposite” to the tee. Clamps are used on metal chimneys. But there is no holding device that secures the steel to the inclined ceramic. The process of “sliding” is inherent in both metal and ceramic pipes. But more often this happens in 45 degree ceramic tees.
- The process of connecting a chimney at an angle of 45 degrees is more complex. This is due to the fact that it is necessary to simultaneously align the pipe both vertically and diagonally, trying to fix it at an unknown point.
- Replacing and removing for cleaning a connection pipe with an angle of 45 degrees is more problematic. Of course, you can lift and tilt the chimney tee, but doing this while working at heights in hard-to-reach places is problematic. And with the chimney assembled, it’s almost impossible.
- Complexity of calculations and design. You might think that all problems are provided for in the design data and the customer should not care about them. But I will give you inexorable statistics. Currently, more than 90% of chimneys are installed without a design, and 90% of them are installed independently by the customer, and (or) with the involvement of low-skilled workers. That’s when you have to solve such “fun” questions as:
Where to install the consoles if they fall on the opening?
Are pipes needed below the tee or will this do?
How far should the pipe extend from the wall and at what level should it end?
How to simultaneously lift the chimney, fix the consoles and the platform with the tee, tilt and level?
Will the tee or bend hit the building structures?
How to raise the pipe: together with the firebox or separately?
Sewage systems
Tapping into a sewer pipe may be required when installing a system from scratch or if it is necessary to add several plumbing fixtures that require a sewer outlet.
There are two fundamentally different methods of tapping into a sewer, one of which requires cutting the pipe, and the second can be done without such intervention (read: “How to tap into a sewer pipe - proven methods from a master”). In any case, before work you need to know how to cut into a metal pipe without welding and with it in order to choose the best option.
