How to bend acrylic (plexiglass) on a string
Sooner or later, an advertiser faces the question “How to bend acrylic (plexiglass) on a string?”
Bending the sheet along a straight line, done correctly, gives a three-dimensional structure bent from acrylic a visually attractive appearance. This method (bending acrylic on a string) is widely used for making price tags, stands for goods, racks for CDs, desktop business card holders, multi-level slides, pockets for advertising stands and stands, various holders (single-sided, double-sided holders) for price lists, menu and other advertising and information products. Sometimes, after the acrylic has been bent on a string, defects appear on the products. The most common mistakes made by those who do not know how to bend acrylic (plexiglass) on a string are curved ribs in an arc along the bending line, convexity on the internal corner, unequal radii of curvature on identical workpieces, the presence of bubbles and hairline cracks. Only mastery of the correct bending techniques, knowledge of the heating characteristics and properties of acrylic can avoid defects and achieve an optimal result.
For the simplest method to bend acrylic on string. Along the line, acrylic plexiglass blanks are heated along a narrow straight zone using a hot, tensioned wire, then bent to the required angle and maintained in this bent position until they cool completely. The heater is located at a certain distance from the surface of the sheet, so that the resulting width of the heating zone corresponds to the thickness of the sheet. The optimal width of the heating zone should be at least three sheet thicknesses. Typically, a single-sided linear heater is used for thicknesses less than or equal to 5 mm. With a larger thickness of acrylic, two heaters are used on both sides, or the sheet, after heating one side, is turned over to the other. The side that heats up last should be on the convex part when bending acrylic.
The stretched nichrome wire heats up red-hot when current passes. The heat from the wire is transferred to the acrylic sheet, which is heated to the plasticity temperature in a fraction of a minute. If the temperature of the sheet becomes too high (smoke comes out), bubbles may appear in the heated zone and the end edges of the sheet may melt.
After reaching the softening temperature of the acrylic, the sheet can be easily bent to the desired angle and fixed for a while in a stationary state until the sheet cools down. Features of bending on a string
Do you think it matters how to bend acrylic on a string, relative to which direction of the sheet, i.e. Should the bend line be placed along or across the extrusion? Many did not pay attention to this nuance at all and were perplexed why sometimes the saber effect appears on some blanks, but not on others, despite the fact that they were cut from the same sheet of acrylic. It has long been noted that due to the shrinkage of the material when heated, it is very difficult to bend a narrow bead (up to 3 cm), especially along the direction of extrusion of acrylic over a long length. In this case, the fold line remains arched. If the sheet is made of cast acrylic, then it makes no difference in which direction the bending is made. And if it is made from an extruded sheet, then the difference is quite significant. When heated on a string, the cold side parts of the acrylic hold a narrow heated strip in the middle and therefore, due to a strong temperature gradient and shrinkage, it acquires strong internal stress. When the edge line of the part is located along the extrusion, a rather highly stressed area is obtained.
With a sufficiently long rib with a very narrow heating zone, cracks sometimes occur. Cracking may not appear immediately after cooling, but over time. In the transverse direction of bending relative to the direction of extrusion, the internal stress is much less and cracks (hairline cracks) rarely occur. The stress values in one and the other case differ several times and after bending on the string are always present in any acrylic plastic. When a stressed rib comes into contact with some solvents, cracks may occur. This can occur in subsequent processes, for example, when gluing solvent-based plexiglass with glue, or when solvent or paint gets on the surface of the area of acrylic that is subject to such bending.
Fig.1. “Saber” effect due to acrylic shrinkage.
To relieve stress, it is necessary to anneal it in a furnace. Cast acrylic is more resistant to cracking and, if contact with solvent is unlikely, annealing is usually not performed.
To eliminate the saber effect, you need to reduce the heating zone. To do this, before bending, it is enough to mill a V-shaped groove along the bending line to a depth of ½ of the sheet thickness. The tool is an engraving finger cutter with an angle of 90-100° or more in case of bending angles greater than 90°. After bending, if necessary, fill the groove with 2-component polymer acrylic glue of medium or low viscosity. If you need to bend a long and narrow side, then perfect bending is difficult to achieve. Even if you bend the wide side and then trim off the excess, the effect of the saber still remains, although it is less pronounced.
Fig.2. View of acrylic bent on a string after milling a V-shaped groove.
Another trouble that sometimes appears during bending is the appearance of bubbles, despite the fact that overheating did not occur. The reason lies in the moisture accumulated while the material was in a humid atmosphere. Before bending the string, it is recommended to dry the acrylic, since wet material can form bubbles when heated quickly. Annealing of stressed products
Annealing acrylic is designed to remove internal stress. During thermal types of processing: thermoforming, string bending, laser cutting and flame polishing, the most severe stresses arise. To relieve stress in sheets or products, they are heated in ovens to a temperature below the softening point by approximately 20 °C. They are kept for a certain time, which depends on the thickness, and then slowly cooled. Cooling too quickly leads to the formation of a gradient temperature distribution from the surface deep into the sheet, which again leads to the emergence of stress. The cooling rate of acrylic after annealing should be no more than 10 °C per hour. Cooling is carried out in the same oven to a temperature below 60 °C. Characteristic defects
When bending, several types of violations are possible, which result in a bend of the knee of an irregular cylindrical shape.
Fig.3. Bending acrylic on a string has typical defects.
There is no smooth bending, steps form on the knee (Fig. 3a).
This happens on thick sheets due to insufficient heating of the inner side, and a sharp zone between the heated and cold parts. The acrylic sheet stretches greatly, which causes the thickness of the sheet to decrease at the knee. To eliminate the defect, it is advisable to remove sharp temperature changes, for example, under the “cold parts” of acrylic near the heating zone, which are not directly heated by the string, and place strips of metal, which, when heated by the string, transfer heat to the acrylic. Another way is to increase the heating time at a lower power, then the accumulated heat in the acrylic can spread more evenly to nearby areas.
Irreproducibility of the radius along the bend line (Fig. 3b).
The reason for this lies in the heating zone being too wide or overheating. Inhomogeneous heating along the bend line is also possible. And finally, strong and uneven pressure during bending, especially when the sheet has already taken the desired angle position. This defect can be completely eliminated by narrowing the heating zone and reducing the temperature. When the workpiece is bent and positioned into the forming corner, there is no need to press the sheet into the corner. In this way it is impossible to reduce the radius, but you can easily get a curvature defect.
Formation of a bulge or fold inside a corner.
This defect occurs when the heated side bends inward at the corner (Fig. 3c). It should be the other way around - the heated side should stretch more radially and therefore it should form the convex part of the knee bend.
Main features of working with organic glass
To achieve good results when working with bending organic glass, you should take into account its features. They will allow you to get rid of possible defects and waste of material. Bending plexiglass at home is not a complicated operation.
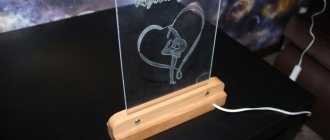
Plexiglas in decor
First of all, it is necessary to correctly calculate the dimensions of the future part, taking into account the bending radius. If experience is not enough, it may be advisable to make a mock-up of the future part from cardboard or thick paper (if the part is not large in size).
When choosing a material, it is necessary to clean the workpiece, it is better to rinse it with clean water and remove all small particles that are on the surface. This occurs due to the formation of an electrical charge on the surface. It is necessary to avoid the use of any abrasive materials, even the smallest fractions. This will lead to a significant decrease in the transparency of the future part. After washing, professionals let the plexiglass dry for 24 hours, preferably at room temperature. If time is limited, you can use a hair dryer. In this case, it is necessary to observe the thermal regime. The temperature of the directed air flow should not exceed 80 °C. To get a good result, use an empirical approach that allows you to calculate the drying time. According to this approach, you need to spend one hour for every millimeter of glass thickness. Therefore, if the glass is 3 mm thick, it must be dried for at least three hours.
After drying, you can begin work. However, it should be remembered that it is more expedient to heat the required area on the opposite side from the bend surface. If it is necessary to obtain a given internal angle, the outer side of the glass is heated.
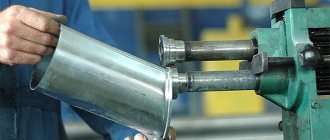
Plexiglas parts
The heating temperature must be taken into account. Plexiglas, as a material made from organic compounds, can not only heat up, but melt and even catch fire. Professionals advise maintaining the heating temperature at approximately 150 °C. If, in addition to the task of changing the surface configuration, there is a need to fill a certain shape with organic glass, it must be heated to a temperature of more than 170 ° C.
An important feature is the need to heat an area of organic glass that is three times the thickness of the glass. When bending glass 4 mm thick, a strip 12 mm wide should be heated
For material with a thickness of more than 5 mm, it is necessary to heat it on both sides along the line of the planned bend.
After completing the work, it is necessary to cool the part, without using quick cooling methods (flow of cold water or air). Such haste can lead to the formation of internal cracks, bubbles, and deformation. Therefore, to obtain the required bending angle, it is necessary to carefully follow the technological sequence.
Heat bending equipment (string)
Heat bending equipment (string)
Post by neznaika » Jun 28, 2006 7:28 pm
Hello. Can you tell me where I can buy a device for bending acrylic; it is popularly called a zipper or a thermal designer. Previously they sold TDC, but now they don’t. I tried to search, I couldn’t find it on sale, they answered that they make such a device themselves, but how exactly.
In general terms, of course, I prefer how it works, but maybe you can read it in more detail somewhere, or better yet, buy it ready-made
Post by Nikolay » Jun 29, 2006 4:12 pm
Good afternoon Oleg.
We bend acrylic on a hot string. The string is mounted on 2 rollers mounted on bakelite plywood (10 mm). One roller is stationary, and the other with a spring (to tension the string while it is heating). Transformer 220 V with 24 V output. Nichrome string D = 0.5 mm, length no less than 600 mm (choose it when connecting so that it is not very red when heated, or install a lat-rheostat). The string runs along the edge of the plywood without touching it. You will attach 1 mm plastic to the table and place an acrylic blank on it, the blank should be higher than the string. Of course, there are ready-made machines for 4 strings. I saw him at an exhibition in Moscow two years ago. I looked at it and did what I described above. With respect, Nicholai.
Equipment and tools for cutting and bending plexiglass.
Post by Ramires » 12 Jul 2006 15:56
We were planning to buy a milling and engraving machine. The goals are the production of small volumetric letters, the production of POS products (price tags, etc.) from plexiglass. Tell me which router is suitable for these purposes (it is unlikely to be European or American). The table size is approximately 100x100. It is desirable that the machine subsequently be suitable for other tasks (engraving, composite processing.)
And a separate question: does anyone have special equipment for bending plexiglass? How much does this pleasure cost, and where can I get it?
Post by neznaika » 12 Jul 2006 20:58
Post by Sergey Belokurov » 13 Jul 2006 05:44
Ramires There are two solutions: “cheap” and “manual”.
Let's start with manual. You need a jigsaw and a string, the cost is insignificant, but everything will have to be done by hand. It will not be possible to cut the composite in the future.
Cheap way. This is a milling machine for cutting, and again bending with a string. The method turns out to be semi-manual, but you can cut composite and wood and brass and plastic with a milling machine. The issue price is about 10 thousand conventional units.
Post by Alexander Romanov » Jul 13, 2006 08:38
Since we're talking about plexiglass, you can't find a better string. It can bend almost any plastic. It’s simple, cheap, and relatively safe.
How to bend plexiglass?
Post by Anton Kuznetsov » 17 Oct 2006 21:22
Post by Vadim Guryev » 20 Oct 2006 21:53
Post by SiL » 21 Oct 2006 07:50
Post by Vadim Guryev » 30 Oct 2006 04:24
I apologize for the silence. We did everything empirically. They took nichrome, stretched it to the required length, and began to select a trans. The diameter of the wire is not critical - from 0.3 to 1 mm, the main thing is a transformer that would produce enough power at 12-24 volts. It is also advisable to have an LATR or something similar to adjust the voltage on nichrome. The first device we assembled was simple as hell - 0.25 wire (I don’t remember exactly), 0.5 m long, an old powerful Soviet iron connected in series and that’s it! The next one was more serious - the trans was bought at the railway depot (they are in every car), the power is amazing, the winding is nichrome. A string with a diameter of 1 mm was unwound from it from a non-working winding. What you need to keep in mind is that when heated, the length of the string increases very much, so you need to come up with a tensioning system. Then two more sheets are attached to the asbestos cement sheet with a gap of approximately 5-7 mm between them. The nichrome is located in this gap. Although they were made from plywood, it smokes slightly and burns, but it works.
In general, we have Uncle Vova, who comes in the morning and asks, well, can you come up with something else for about 200 grams? He is given the coveted grams, and after a couple of days he brings a prototype of the finished device
Homemade machine for bending plexiglass
How to make a simple machine for bending plexiglass with your own hands.
To make my own homemade products, I have long been planning to assemble a small machine for bending plexiglass and plastic.
A case helped: they asked me to make a stand for a paper sheet of A4 size.
When making products from plexiglass, acrylic or plastic, nichrome thread is used. So I assembled a small machine and used an electric spiral. tiles
And I also needed:
- a pair of planks;
- two loops;
- screw terminal block;
- aluminum profile;
- 12 V transformer and pieces of wire (2.5mm 2);
- spring;
- mounting bolts and screws.
Properties of plexiglass
The composition of plexiglass includes various polymers. They give the glass strength; polymer glass is even stronger than silicate glass. Plexiglas is a lightweight material, therefore, when it is used in structures, for example, roofs, canopies, solid supports are not required.
In everyday life, polymer glass can be found in a variety of options; just look at the photo with polymer products: aquariums, decorative design elements, shelves, a TV stand, a coffee table. Artificial glass has excellent transparency, so it can be used to make interior doors and partitions. Probably the only disadvantage of plexiglass is its flammability and thermoplasticity, but the latter disadvantage can be turned into an advantage, because sometimes artificial glass has to be bent at home.
Manufacturing
First, planks were made: two short (200 mm) and two long (400 mm).
At the end of one of the boards I attached an aluminum profile, which will serve as a heat reflector from the nichrome thread.
I didn’t have the required profile length, so I assembled it from two halves.
On the reverse side of the same board, a longitudinal groove was made for laying the power wire.
Using loops, I connected two long boards.
Two short boards served as a backing and were attached to the sides of a long board with a profile.
The distance between the loops is slightly greater than the length of an A4 sheet - 300 mm. The main structure is ready: the planks can easily be folded like a book.
From a terminal block and a spring I assembled a simple tensioner for a nichrome thread.
Since the machine was assembled from what was at hand, and the required nichrome thread with a large diameter was not available, I had to twist two threads together. The downside of this solution was the constant tightening of the thread after each use.
All that remains is to connect the power from the transformer. The thread will be replaced as soon as possible, but even with this option it heats well.
When warmed up, the spring tightens the thread like a string.
Working with the machine
We heat the workpiece on both sides for about one minute (the heating time is selected experimentally depending on the thickness of the material).
Next, we lift one of the halves (the moving part) and give the desired angle to the workpiece, put it aside and fix it until it cools.
I also attached a leg to the back of the holder.
The paper stand is ready!
After assembling the holder, there were scraps of plexiglass left, from which I also made a jig for drilling holes and driving nails.
Using this machine I plan to make more than one useful homemade product.
There are already a couple of ideas where it can be used!
Other methods of bending organic glass
To bend organic glass, place it in boiling water for 1 minute. Then they take out the material and immediately bend it, putting silicone gloves on their hands. There are also many other ways to bend glass at home using improvised means:
- Gas-burner. Using a torch, making a bend is very easy; just heat the organic glass in a certain place. To ensure that heat gets exclusively to the bend, a tin can should be attached to the gas burner, with a hole similar to a slit cut out at the bottom.
- Soldering iron. Using a soldering iron to bend organic glass, you can get a high-quality and precise bend. But before you start the main work, you need to practice.
- Hot pipe. Before bending glass with a hot pipe, it must first be prepared and wiped with a soda solution.
When working with plexiglass, you need to learn one important rule: in order to bend this material, it needs to be softened in a certain place. You can use any heat source for this.
The shape of the material changes just as easily; you just need to put in a little effort, and an unremarkable strip of plexiglass will turn into a real work of art, you just need to heat it to the required temperature.
Now you know what this material looks like, what it is and what characteristics it differs from, which means you will be able to cope with the task by figuring out how to bend plexiglass.
Plexiglas is a solid synthetic transparent material that is made from organic polymers. Organic glass is used to construct aquariums and shelves, as well as glazing greenhouses, doors and decorative trim. Since this material is a thermoplastic, it becomes plastic when exposed to high temperatures. It is thanks to this property that plexiglass is flexible.
The process of bending organic glass: 1 - heating, 2 - bending at right angles, 3 - bending into a tube.
How to deal with the saber effect when bending acrylic pockets
#1 OFFLINE Madden_Apple
- Users+
- 368 messages
- Gender: Man
- City: Neryungri, Sakha (Yakutia)
- From: Neryungri
Good day colleagues. I encountered a problem that when bending pockets made of 3mm cast acrylic, they were warped by an arc (I read on the forums that this is called the “saber effect”). It seemed to heat up as it should, neither overheated nor underheated, and cooled down on its own until the end. There will be photos in the evening. The problem is with pockets for booklets with a width of 1/3 of an A4 sheet, others seem to be normal. I took out a fair amount of material, scored it and made these pockets into prefabricated pieces. But the problem needs to be solved. He was warming up with this little thing:
maybe there is a secret?
#2 OFFLINE saneokokokok
- Gender: Man
- City: Yoshkar-Ola
- Interests: interested in everything
- From: Yoshkar – Oly
There is of course a secret. It means that the workpiece must be on a flat table (surface) as in the video
Post edited by saneokokokok: 30 July 2014 – 10:45
Sometimes it's better to chew than talk
#3 OFFLINE lkbyysq
- Gender: Man
- City: St. Petersburg
- From: St. Petersburg
1. When heated, the material expands and the heating line lengthens.
2. Upon reaching the softening temperature, the material becomes fluid, redistributed and the length of the heating zone is restored to the original one.
3. As it cools, the fold line begins to cool and shrink. The parts that are not heated remain as they were.
The larger the cross-sectional area of the softening zone (the wider the zone), the greater the compression force.
The greater the temperature difference in adjacent zones of the material, the greater the stress.
1. Install a diaphragm - reduce the gap and the width of the heating zone.
2. Heat the entire sheet to 80-100 degrees (I did not do this myself due to the difficulty of implementation). But you will lengthen the material in advance. The temperature difference in neighboring zones will decrease.
3. Use thinner material.
4. Increase the distance from the edge of the material to the fold line.
5. Avoid low sides that are bent at an angle close to 90 degrees.
Post edited by lkbyysq: 30 July 2014 – 13:52