Greetings to car enthusiasts and simply visitors to my blog. Today I want to talk about which battery for the chameleon welding helmet is necessary when replacing it, and I will also make a small upgrade of the mask.
Not long ago it happened that it became necessary to weld one part to another.
I had at my disposal a Resanta MS 2 welding mask, which contained a chameleon filter.
Everything was ready for welding, but as soon as I started welding the part, the “Bunny” was caught.
I stopped working and decided to check the filter.
When I brought the lighter to the filter glass and lit it, the filter did not darken, but only some faint flickering appeared.
It became clear that the filter was faulty.
But they didn’t want to wait for the parts that needed to be welded to each other and had to be welded into the faulty mask.
The chameleon welding mask is not a cheap pleasure, and therefore it was certainly a shame, since the mask was only 1 year old.
Repair of a welder's mask Chameleon
| We are not talking about complex repairs, but just about replacing the batteries in the “Chameleon” welding helmet. It is a faulty power supply that causes failure in most cases. |
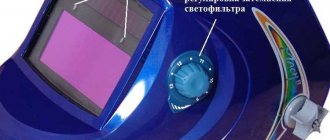
The main element of protection in the chameleon mask is an automatic light filter. It changes automatically as soon as the arc appears, allowing you to control the start of welding without blinding your eyes. As a rule, a light filter has a multilayer structure. The use of several liquid crystal layers makes it possible to reduce the dependence of dimming on the angle of incidence of light. When the arc is ignited, the crystals are arranged in a certain order, due to which part of the light flux is blocked.
For proper operation of the filter, a power source is required. For some models, these are two AAA batteries located in a special compartment on the filter housing. For other models, the power source is hidden inside the case. As a rule, these are one or two lithium elements with a voltage of 3 volts, which have a very long resource. Although it is logical to assume that a cheap mask has a cheap battery installed.
I use a Resanta welding helmet, although the model doesn't really matter. Light filters of all models have the same operating principle and differ only in the design, the element base used and the presence or absence of adjustments. Like many, I do not use welding every day, but only when necessary. And once again, getting ready to weld something there, I was disappointed to discover that the Chameleon welding helmet did not work.
When pointing at a light source, the filter did not darken or only worked once in a while. Be it the sun, a bright lamp or a lighter.
Sometimes, when I lightly tapped the mask, the light filter would work. This suggested that there was a bad contact somewhere, a loose connection or something similar. But first of all, I thought that the problem was in the power supply of the light filter. My battery is almost done.
In such cases, it is sometimes advised to expose the mask to the sun for about two hours so that the battery is recharged from the built-in LED panel.
Perhaps this is true. But I didn’t want to wait two hours every time. Moreover, it is unknown what the final result will be. Maybe it will work, maybe not. In short, I decided to figure out what exactly was going on there and, if possible, restore the filter’s functionality.
The light filter is attached to the mask using two screws. After unscrewing the screws, remove it. There is a narrow gap along the perimeter of the case. Carefully pushing the halves of the body apart, we divide it into two parts. It doesn't matter which way you do it.
Inside the case there is an electronic filling of the light filter and a lithium power source. The first thing you need to do is measure the voltage on it. The nominal voltage is 3 volts, but the light filter works properly when the voltage drops to 2.5 volts. However, this is just an assumption; there may be a spread in one direction or another. In my case, the voltage at the battery terminals was just over two volts, but nothing worked.
Having made sure that the battery is “dead”, we proceed to replacement. My filter used a CR2450 element. It is sealed into the board on both sides. We very carefully unsolder it and replace it with exactly the same new one.
If you don’t find the CR2450, you can replace it with the CR2032 element for a while; it is installed on computer motherboards. It is best to use the battery with a holder, this makes it easier to replace and you don’t have to overheat the “tablet” when soldering. As a last resort, you can solder two pins. Very quickly and with good flux, to perform the operation with one easy movement of the hand.
Work order
As an example of self-repair, consider the process of restoring a professional device, which, after five years of operation, began to show signs of malfunctioning lithium-ion batteries. The cause of the breakdown was the operating mode - the mask was used several days a year.
The optimal operating mode for lithium-ion batteries is daily. If the work is seasonal, the battery requires periodic charging in the sun. It is recommended to store the mask at room temperature.
Description of the problem: at first the light filter did not work during evening work, while during the day it functioned flawlessly. After some time, the filter stopped working at any time of the day.
The following tools and materials are required for repairs:
- Screwdriver Set;
- Stationery knife;
- Glue gun;
- Lighter or matches;
- Battery holders (2 pcs.);
- Batteries (2 pcs.).
The algorithm of actions is as follows:
Dismantling the chameleon module
We carry out the work according to the scheme below:
General design of the welding helmet.
Scheme of dismantling the chameleon module.
Chameleon module. Inside view.
Let's open it
The front and back of the module are glued using heat sealant. Using a utility knife, make a continuous cut. Be careful not to damage important structural elements - shading glass, control module and connecting cable. In addition, the module contains glass solar cells. After modernization they will not be needed.
Internal structure of the module.
Removing solar panels and lithium battery
After dismantling the solar panels, access to lithium-ion batteries will open. All connecting wires must be removed
Remove the solar cell and lithium battery.
Installing battery holders
The type of holder depends on the specific model. In our case, the type of battery holders is CR-2025. Another area of application for these power supplies is motherboards.
We connect the contacts with the holder by soldering to the terminals from the batteries, after which we attach them to glue.
The nature of the connection of the elements is serial, with connection to the positive terminal of the connection from the solar battery.
Battery holder type 2025/2032.
Batteries installed. Pay attention to the positive terminal.
Assembly and installation of the module
Place the module halves on glue. After assembly, you can check with matches - the filter should respond to a flash of light.
Module after repair.
Replacing batteries in the Chameleon mask
Unfortunately, the CR2032 battery did not last long. Despite the fact that current consumption is measured in microamps, after some time the filter did not work again.
Of course, a question like “What should I do?” didn't even arise. It was necessary to install a more powerful power source. The most suitable option is two 1.5V elements of size AA or AAA. They can be placed in a special battery compartment, which is commercially available. I didn’t have one, so I had to saw off the battery compartment from my favorite TV remote control.
I sawed off the part where the contacts for the batteries are located from the printed circuit board. I cleaned everything unnecessary (microcircuit and wiring) and soldered two stranded wires to the contacts. The end was lightly covered with what was at hand. It turned out to be a good battery compartment for two AA elements.
The battery compartment is attached to the mask with two M2.5 bolts. The holes are drilled in the center, so the mount does not interfere with the installation of batteries in the compartment. Can be mounted anywhere. The wires should be as short as possible. I secured the compartment at the top, above my head. In this case, the overall balancing is not disturbed, and there is free access to the compartment for replacing batteries. During idle periods, you can even remove one battery from the compartment. For the purpose of, so to speak, global economy.
When welding, it is extremely important to provide yourself with protective equipment. During the process, a person is exposed to many dangers, such as the possibility of sparks and molten metal getting on the face and eyes, the harmful effects of gases and vapors of molten metals in the respiratory tract, the harmful effects of various types of radiation, and much more. In order to protect yourself from possible injuries, you must use a welding helmet.
Operating principle of the chameleon welding helmet
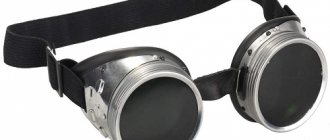
On the market you can find two types of shields, with a fixed degree of darkness and chameleon masks. Masks of the second type are distinguished by their higher cost and the presence of an automatic light filter that can respond to the intensity of light radiation, thereby protecting vision. The principle of operation of the chameleon welding mask is based on the fact that the light filter instantly reacts to light radiation and, depending on the intensity of the latter, automatically darkens the light radiation. The auto-darkening filter, in turn, has a layered structure in which layers of liquid crystals alternate with special films. At the moment the arc is ignited, the crystals are arranged in a certain order and do not allow part of the light to pass through.
chameleon welding helmet diagram
Based on this principle, you can effectively protect your eyesight from the influence of bright vision.
Existing faults. Do-it-yourself chameleon welding helmet repair
Let's look at the question of why the shield may not work. Let's look at typical welding helmet malfunctions. It often happens that a chameleon welding mask does not perform its main function, namely, it does not reduce the level of light radiation. The essence of the problem may lie in dead batteries. The chameleon welding helmet can be powered by both regular AAA batteries and a solar panel located on the body. Simply put, replacing the battery can solve the problem. If we consider the first method of powering the shield with energy, then simply insert the batteries into it. If powered by a battery, you need to hold the shield under a bright light to charge it.
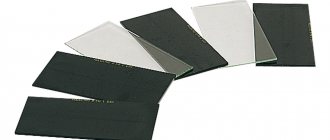
But even after this procedure, you may find that the shield still does not work. The reason may be the protective glass. Typically, with this type of malfunction, cracks, chips and other mechanical damage are visible on the glass. In this case, it is necessary to replace the liquid crystal glass, which is the most expensive component in the mask. It is important to remember that the new glass must fully comply with the previous one in all respects.
The filter may blink. Here the protective glass may be either simply dirty or damaged. In this case, it is better to immediately change the filter with protective glass.
It is better not to repair the light filter of a welding helmet yourself. It would be better to contact specialists at a service center. This will cost money, but the service center can accurately identify the cause of the breakdown and specialists will easily fix it.
Possible malfunctions and methods for eliminating them
- The screen will not respond to light unless connected to a power supply. If the model is equipped with AAA alkaloid batteries or rechargeable batteries, charging indicators are displayed in the screen area. If the red light is on, it's time to replace the batteries. Solar panels are charged while welding. If the mask does not turn on, point it towards a light source for a few minutes.
- If the screen darkens unevenly, check the distance from it to both eyes. Perhaps while they were adjusting the mask and adjusting it to the head, the filter shifted. It should be parallel to the face. Loosen the clamps and align the casing.
- If the screen flickers during welding, it may be due to the outer glass. Sometimes it is enough to wash it. In case of mechanical damage (scratches, surface chips) it must be replaced. If the filter continues to act up, check the cleanliness of the sensor surface. When there are two operating modes (welding and grinding), check which position the switch is in. The screen may flicker when low-current welding in low sensitivity mode. The desired level can be established experimentally during operation.
- The filter does not darken immediately in the cold. Viewing screens quickly change the degree of darkness in the temperature range from +50 to -10°C; Chameleons are not intended for harsh winters.
- If the weld seam is difficult to see, there may be several reasons. Sometimes the film is forgotten on the protective glass. You can try cleaning it, switching the dimming control.
How to properly set up a chameleon mask for welding? What do you need to remember when working?
In order to know how to set up the mask and how to check its performance, it is better to refer to the operating instructions. Important to remember:
- the chameleon mask is not suitable for plasma and gas welding and cutting;
- Do not leave the shield on a hot surface;
- It is better not to disassemble the filter cartridge;
- the shield will not withstand strong impacts;
- Changes cannot be made to the filter. It is allowed to use spare parts specified in the instructions;
- if the chameleon welding helmet does not darken the image, you need to stop working and identify the possible cause of the malfunction;
- it is necessary to prevent moisture from entering the light filter;
- When cleaning the shield, it is not recommended to use detergents and solvents;
- the headband for putting on can cause an allergic reaction, the straps must be adjusted correctly to prevent skin irritation;
- In order to change the batteries, switch the shield to grinding mode. When the red light on the filter lights up, you need to replace the batteries;
- Before starting work, you need to adjust the mask to suit yourself to achieve maximum comfort. You can select the darkness level, delay time and sensitivity level.
Safety precautions
Before putting it on, check the settings, operating mode switches, and battery charge. Always check to see if the filter is getting dark. If it turns off during welding, the protective glass protects the eye to a small extent from IR and UV rays. But it’s safer to stop working immediately. It is dangerous to use a faulty mask. If a defect is found or the filter does not respond, the malfunction is serious and welding cannot be continued.
It must be remembered when working that the powerful radiation of the arc and molten electrodes is destructive. In addition to discomfort, this threatens to damage the retina. To prevent loss of vision, it is necessary to correctly adjust the degree of darkening of the filter.
To preserve the mask, it is important to follow the storage regime: non-functioning filters and solar panels protect from exposure to light.
Carrying out maintenance
In order to reduce the likelihood of breakdown to zero, it is necessary to carry out maintenance from time to time. The minimum interval between repairs should be one month. To remove dirt and dust, you can use a cotton cloth pre-moistened with a non-aggressive liquid. Do not use oil-containing cleaning agents or abrasive materials as this may damage the protective shield. All cleaning actions must be carried out carefully; do not put too much pressure on the material.
Types of adjustments for chameleon welding helmets
There are several types of adjustments in a welding helmet. Before starting work, it is extremely important to configure all the characteristics. This is necessary for the most effective use of the mask when working. The following are the types of adjustments.
Preparation under the head
It is extremely important to securely fix the shield on your head. The diameter of the headband can be adjusted using a handle located on the back of the head. The procedure must be carried out with a shield on the head, which will allow you to obtain the necessary tension. If the headband sits high or low, it should be adjusted using a belt passing through the top of the head. Before starting work, check the fit of the shield. If it does not sit securely, you need to readjust it.
Adjusting the distance from the eyes to the filter
The mask can be moved away from the eyes and brought closer to the eyes by loosening the locking nuts. The distance from both eyes and the filter should be equal. If everything is done correctly, the locking nuts should be tightened.
Adjusting the darkness level
Depending on the type of welding and the current value, you can select the required degree of darkening from the table. This can also be done during operation using the regulator, which is located on the outside of the shield.
Problems with the Chameleon mask
There is the following problem: when argon arc welding at 60...80A of steel strips, previously cleaned with an angle grinder, the Korund ASF 4/9-13 mask turns off for a tenth of a second. This happens rarely and most often when passing seams inside corners. Nevertheless, I manage to catch the “rabbits”, then, naturally, my eyes turn red and pain appears. Question: is the problem with the mask or is it my “crooked little hands” that are to blame?
Naturally, it is impossible to give a definite answer to this question. But there are several recommendations, because Chinese chameleon masks have been sold for several days and a lot of experience has been accumulated in their use. Take more interest from fellow welders.
Read the article on the website: Repairing a chameleon mask with your own hands
- Option number one: the optical sensor “does not see” the arc when welding in hard-to-reach places (or you cover the photocell with your hand). Adjust the sensitivity using the tuning knob. If it doesn't help, try using a regular filter. If you don’t want to burden yourself with selecting a light filter when welding at low/high currents, look for a mask with an electromagnetic arc sensor. Even such good PPE as Speedglas opens if you cook it “around the corner.”
- Option number two: the dimming is very slow, set the adjustment knob to maximum.
- The problem may also be this: simple cheap masks behave quite correctly when working with conventional inverters (without a set of “cool” welding functions). But as soon as you switch to professional equipment with the function of smooth ignition and arc extinction at a predetermined time, problems begin to appear. When ignited, the mask works normally, but after a while, when the arc flares up more strongly, subsecond shutdowns occur. This can be explained this way: the electronics adjust to the brightness of the light flux once, and then, when its intensity increases, it does not work a second time, because it is not adapted to such changes.
Add a comment Cancel reply
You must be logged in to post a comment.
Is it worth BUYING, reviews from welders:
- Welding transformer PATRIOT 200AC 102.00 RUR
- Charger GreenWorks G24C RUB 2,490.00
- Voltage stabilizer PRORAB DVR 1000 2597.22 RUR
- Stabilizer Resanta ASN-2000 N/1-C Lux 3610.00 ₽
- Voltage stabilizer Stavr SN-2000 3920.00 RUR
- Welding machine BauMaster AW-79161 3990.00 RUR
- Hitachi AB17 charger RUB 4,076.87