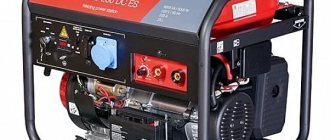
To make a cheap welding generator with your own hands, you can use a small gasoline engine. A motor from a lawn mower or moped is suitable here.
The welding generator has impressive dimensions and is quite expensive.
It is best to use a generator from a tractor as a source of electricity. It produces 24 V (volts) and 150 A (amps), just what you need for high-quality and reliable welding.
Welding generator device
The welding generator consists of the following main parts:
- diesel or gasoline engine (ICE);
- an electric generator whose shaft is driven by the internal combustion engine;
- rectifiers (for alternating current generators): necessary to convert alternating current into direct current, which makes it possible to connect a welding machine with both alternating and direct current;
- electrical protection and control unit.
Important: the welding generator (the instructions for use are required) can be operated near a fire shield equipped with fire fighting equipment.
The operating principle of the welding generator is as follows.
- The gases produced as a result of fuel combustion expand and drive the engine pistons. As a result of the movement of the pistons, the crankshaft rotates.
- The rotating moment from the crankshaft is transmitted to the generator rotor shaft.
- The resulting magnetic field generates (via an inductor) an electric current.
- Converting devices bring the current characteristics to the level required for welding.
How to choose a welding generator
When choosing between a diesel welding electric generator and a gasoline one, you should take into account the main characteristics of the equipment.
It is impossible to use a diesel electric welding generator for operation without additional equipment that converts the generated voltage. Diesel generators can be used for welding under certain conditions.
- If it is necessary to simultaneously connect several automatic welding machines to one point.
- If you need to save fuel: important if welding makes up a large part of the total work.
- To ensure long-term and continuous operation of the welding machine.
It should be borne in mind that prices for gasoline welding generators are lower, and during operation such equipment makes less noise. In addition, gas generators are easier to transport due to their lighter weight.
Stages of connecting the device to the generator
Since it won’t be possible to make a welding machine from a generator, all that remains is to connect an existing inverter to it and power it. To do this, you need to remove the relay regulator from the autogenerator and break the circuit between the brushes and the relay regulator. Next, you need to supply 12V voltage from the battery to the brushes for the generator to work. Now disconnect the cable from the generator to the battery.
At this stage, you need to start the engine and maintain 3000 rpm on the crankshaft. In this case, the generator will have all 9000 rpm. As a result, the generator will begin to produce about 80V voltage, since we previously removed the relay-regulator from the circuit (namely, it limits the current). This voltage will be enough to power a household inverter and welding at 100 Amps. But keep in mind that you should not carry out prolonged welding in this mode. This has a detrimental effect on both the generator and the device itself.
Welding generator: device diagram
Welding generator circuits differ in their external characteristics. According to this principle, devices are divided into:
- universal generators;
- with a falling external characteristic.
The latter are the most popular and come in two types.
- With independent excitation. The winding is powered by an external DC source. The demagnetizing winding is connected in series, and the current is regulated by a rheostat. As the welding current increases during operation, it increases proportionally. The falling external characteristic is created by a decreasing voltage at the terminals of the device.
- Self-excited generator: direct current to the magnetizable winding comes from the generator armature. Such devices are most often used to work with piece electrodes. A stable current value is maintained by voltage fluctuations.
You can learn more about the self-excited generator circuit by watching the video:
Reliable welding current control circuit
The work involves three blocks:
- stabilized voltage;
- formation of high-frequency pulses;
- separation of pulses into circuits of thyristor control electrodes.
Voltage stabilization
An additional transformer with an output voltage of about 30 V is connected from the power winding of the 220 volt transformer. It is rectified by a diode bridge based on D226D and stabilized by two zener diodes D814V.
In principle, any power supply with similar electrical characteristics of current and output voltage can work here.
Pulse block
The stabilized voltage is smoothed by capacitor C1 and supplied to the pulse transformer through two bipolar transistors of direct and reverse polarity KT315 and KT203A.
Transistors generate pulses to the primary winding Tr2. This is a toroidal type pulse transformer. It is made of permalloy, although a ferrite ring can also be used.
Winding of three windings was carried out simultaneously with three pieces of wire with a diameter of 0.2 mm. Made 50 turns. The polarity of their inclusion matters. It is shown by dots in the diagram. The voltage on each output circuit is about 4 volts.
Windings II and III are included in the control circuit for power thyristors VS1, VS2. Their current is limited by resistors R7 and R8, and part of the harmonic is cut off by diodes VD7, VD8. We checked the appearance of the pulses with an oscilloscope.
In this chain, the resistors must be selected for the voltage of the pulse generator so that its current reliably controls the operation of each thyristor.
The unlocking current is 200 mA, and the unlocking voltage is 3.5 volts.
Welding current regulation
Variable resistor R2, with its resistance, determines the position of each pulse passed through the control electrode of the thyristor. The shape of the pulsating current at the output of the power circuit of the welding machine depends on it.
Half-sine ripples can pass through completely when the welding current is set to maximum or be cut off to almost zero.
How to make a welding generator with your own hands
If you know the basics of electrical engineering and want to save money, you can design a welding generator yourself. To do this, you need to purchase some ready-made components and materials.
A homemade welding generator is assembled from the following components.
- Generator with a power of 5-10 kW.
- Gasoline internal combustion engine (for example, from a lawn mower).
- Rectifier device: it is a diode bridge assembled from high power diodes (depending on the maximum current). To install the rectifier bridge, you will need a plate made of getinax or fiberglass - a heat-resistant dielectric material.
- Current regulator: a rheostat of smooth or step action is used as it. The device is necessary to set the current required for welding.
Step-by-step instructions for making a welding generator with your own hands.
- We make a frame from a metal corner measuring 40x40 mm. To mount the internal combustion engine with a fuel tank, generator and other structural elements, we mark the locations for drilling holes.
- We connect the frame parts by welding, install the units and fasten them with bolts, engravers and washers.
- We attach the pulleys to the shafts of the engine and generator, adjust the distance between them so that the transmission belt is normally tensioned. To allow future adjustment, oblong holes should be provided for mounting the generator.
- We fasten and connect the rectifier device and the current regulator in accordance with the diagram.
- For ease of transportation, it is recommended to equip the welding generator with wheels and a folding handle.
Tip: the device can be made universal - use it as an emergency power source. For this reason, additional contact terminals should be provided in its electrical circuit.
DIY pulse welding. How to assemble pulse welding yourself - diagram and instructions
First, let's figure out what it is. If, when using electric arc welding, we also turn on short electric pulse signals, then we will get pulsed welding.
In this case, the main thing is not to draw a parallel of this type with spot welding.
Pulse spot welding and pulsed arc welding are completely different methods of welding metal parts.
Let's analyze the pulse welding collection algorithm
Converter
To begin with, it is necessary to consider the process of assembling a pulse converter. It is accordingly designated as the power element of the welding unit.
The diagram shows the transducer assembly model.
In technical literature and reference books you can find information on the components that are included with the converter.
Control mechanism
In this figure you can see a clear and understandable control diagram, as well as elements of the diagram, which shows the process of starting the electric unit.
Adapter
A descriptive representation of the pulse adapter is shown in the accompanying diagram.
“Soft Launch” is located here.
Assembled device
Just look at the figure below to have a simple idea of the appearance of this type of welding.
The body is also attached to a frame with airflow, a control adapter (it is an integral part of the body), and a plug for welding current.
The electrical fuse and power adapter must also be located on the housing.
Practice of use
Devices assembled as stated in the instructions work for a long time. Welding joints are quite strong.
A homemade pulse welder is only suitable for household use, but it is not suitable for professional work. The costly part of assembling such a welder will not leave any owner indifferent.
The voltage required for the operation of such a device should be within 220 V. But sometimes there may be voltage failures, especially if the work is carried out in a country house.
Despite this, the arc has stable and easy ignition. The most suitable type of electrodes for a homemade welding device are electrodes that melt.
This type of welding is quite strong and has a completely stable arc ignition.
In order to assemble a homemade pulse welding machine, you only need to allocate a little free time. And the result will not remain unjustified.
This will be the most economical option, based on the need to perform welding work. And this does not in any way affect the quality of the work performed.
Priorities of a welding machine manufactured in-house
The pulse welder differs from factory models in many characteristics. A serious advantage is low energy consumption.
The energy costs for performing a minor weld using a factory machine will be high. And of course, not all electrical wiring can withstand such power.
Regarding the weight of the homemade device, we can say that it is small. And its dimensions can be several times smaller than the factory ones. It is very difficult to move a factory apparatus without much effort.
To avoid moving it from place to place, you can use special electrical extension cords. But their cost is very high.
Therefore, a homemade welding machine would be a suitable option for use at home. And its weight will not exceed 10 kg.
The production resource of production welding devices has a limitation. And often it may not exceed 50-80%.
Therefore, the totality of all available technical capabilities cannot always be revealed. Based on this, the duration of welding work will be insignificant, within 3 minutes without a break.
A homemade welding machine does not lead to loss of electrical energy because there are no reactive currents. Non-critical power allows you to use the outlet even in the house, without worrying that the network may not be able to withstand it.
The power of such a pulse welder is exactly the same as in household appliances.
The duration of operation of a homemade pulse apparatus can be more than 15-20 minutes. Which exceeds the operating time of the mechanism that was bought in the store. And of course, the light weight (8-10 kilograms) will not cause difficulties in home use.
Choosing a factory-made welding generator: review of the best models from leading manufacturers
In order to choose a welding generator in a specialized store, it is recommended that you first familiarize yourself with the technical characteristics of the most well-known models. Here are descriptions of some of them.
- Welding generator SAC: a device protected by a metal casing, with an installed diesel internal combustion engine, designed to work with electrodes of different thicknesses (current up to 120 A). In addition, SAC can be used as a power source for power tools. The SAC can be transported by attaching it to the towbar of any car.
- The domestically produced Vepr welding generator is available in several modifications (depending on power, fuel tank volume and configuration). Operating current – up to 400 A. The unit can be used for emergency power supply. The imported engine ensures quiet operation with a minimum amount of harmful emissions.
- Welding generator SDMO: units from this manufacturer are sources of single- or three-phase current (depending on the model), power – up to 6 kW. The mass of the generator in a metal tubular housing is about 80 kg. For ease of transportation, they can be equipped with a trolley kit.
- The ADD welding generator of any modification is a powerful large-sized installation. ADD generators can be stationary or installed on truck chassis. There are single- and double-post units; cooling can be air or liquid. The diesel engine is started using a battery and a starter.
- The EISEMANN welding generator is equipped with an overload protection system. A Honda gasoline engine coupled with a generator ensures reliable operation of the unit. The duration of continuous operation is about 2 hours (depending on the load). The welding current is set by a three-position switch.
- Honda welding generator: this brand produces both powerful generators for industrial use and small ones, indispensable for working in a summer cottage. The weight of the EU10i model (power 1000 VA) does not exceed 13 kg. The EU20i model, which is twice as powerful, weighs 21 kg. Reliability, low noise and vibration levels have made the Honda welding generator in demand for construction work.
- Denyo Welding Generator: Most models are stationary units. The manufacturer equips them with a device for monitoring fuel consumption and noise levels. There is automatic protection against leakage currents, reduction in oil pressure and low battery alarm. The engine will automatically shut down if the side door of the housing is not closed tightly.
- MOSA welding generator: units from this manufacturer are available in various modifications - from portable small-sized to stationary. Portable models work with electrodes with a diameter of 2-5 mm. Units are produced with diesel and gasoline engines. The high level of sound insulation and the features of the electrical circuit allow the use of a Mohs welding generator as a source of electricity.
- Huter Welding Generator: There are models of varying power available on the market. For production needs, the DY6500LXW is recommended: this unit is equipped with manual and electric starters, as well as 12 and 220 V sockets. The generator consumes 2.3 liters of fuel per hour and operates continuously for 10 hours.
- Welding generator Skat: models differ in build quality. In addition to conventional ones, the manufacturer has mastered the production of inverter units that provide high-quality welding current. All SKAT models are equipped with a built-in ATS unit, thanks to which the current parameters are equalized.
The following video will introduce some models in detail.
The information presented in the article will help you decide on the choice of a welding generator or on making it yourself.
DIY welding equipment. Devices for welding profile pipes
Experienced craftsmen and ordinary people who perform welding work know that the preparatory stage does not take more time than the welding process itself.
A significant part of the time is wasted on assembling the welding structure and installing all the elements in the desired location.
Knowing how important tools are for welding profile pipes and knowing how to use them correctly, the welder can complete the tasks assigned to him quickly and efficiently.
In everyday life, a large number of mechanisms and structures are used for welding pipes. These auxiliary devices are most often manual and universal.
They help to quickly assemble a structure with securely fastened parts, and also allow you to do the work with virtually no deformation.
Prefabricated welding devices for profile pipes and their types
They are divided into the following types:
- Fasteners.
- Installation.
Installation mechanisms
These devices allow you to install profile pipes in the required position.
Exactly how they will be located in the end. According to their functional and design solutions they are divided into:
- Stops.
- Squares.
- Templates.
- Prisms.
Persistent. They fix the workpieces on the main surface, and can be used constantly, removed, and there are also folding ones (used for retraction and rotation).
Permanent fixtures are plates that are welded to the base.
And removable devices are used in situations where a permanently installed device cannot be used.
Angular. With their help, profile pipes are installed at a given angle.
Prisms. They fix cylindrical profile blanks in the required position. This device uses very simple designs that are made from corners.
This mechanism helps to install profile pipes in the required position in relation to existing parts of the future structure.
Fastening accessories
Such devices for installing profile pipes for welding allow you to firmly fix the part and protect it from accidental displacement after cooling. These include:
- Clamps.
- Clamps.
- Clamping.
- Ties.
- Spacers.
Clamp. It is a universal device that can be used for all types of work with metal products.
Masters call them the most important in importance, and say that it is almost impossible to do without them.
The clamp can be of different shapes and sizes. The mouth of the device can be of a stable volume, and can be adjusted.
Particularly convenient are quick-clamping devices in which the clamping function is performed by a cam mechanism.
ADVICE! Professional craftsmen recommend purchasing a set of various clamps. For welding activities, you may need several options of different sizes.
Clamps. If we compare these mechanisms with clamps, they are more convenient and more suitable for this type of work. The required size of the pharynx is set by using a screw in the clamping handle and moving the pin.
Clamps. Is the most common. They are: wedge, screw, spring, lever.
The simplest type of such a device is a very ordinary bolt and nut that fastens two plates that clamp the workpiece.
Ties. They are used to bring together elements that have overall dimensions. The length and method of such a structure depends on the tasks that it must perform.
Spacer This mechanism makes it possible to align the edges of assembled workpieces, give them the desired shape and correct minor defects.
Installation and fastening accessories
The most convenient to use designs that perform several functions. When working, you only need to insert the parts and tighten the eccentrics and screws. All parts fall into place without additional effort.
Most of us have to do work such as welding profile pipes very often. Therefore, a large number of different devices have been developed for this process.
Centralizers. Thanks to them, the alignment of the welded parts is maintained, and the edges at the ends are also aligned. They are divided into internal and external.
