Hunting skis are a mandatory and very important piece of equipment for every professional hunter and fisherman.
Skis intended for hunting have little in common with ordinary (recreational) or sports models, and even to a person who is poorly versed in them, the differences will be clearly visible.
The sliding surface of sports skis is much larger and thanks to it, falling through in loose snow is excluded
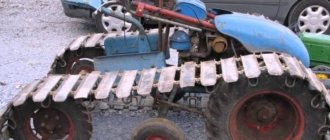
Unfortunately, not every store offers a similar product at a reasonable price, much less skis that are 100% suitable and comfortable, so this equipment is strictly individual. In this regard, homemade skis are increasingly in demand among experienced hunters. Currently, experienced masters of “skiing” can offer hunters the following popular products: camo skis or boot skis. The working surface of skin skis is covered with pieces of skins, making it easier to glide over the snow and help climb uphill. However, with these positive qualities, there are also disadvantages such as greater weight and complexity in manufacturing.
Came skis
Material
It is important to know some basics of craftsmanship and choose good wood for making skis with camus.
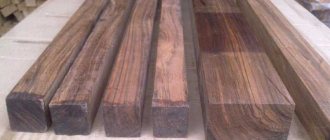
The best choice is Far Eastern wood species: Manchurian walnut, cork, codwood, aspen, spruce, birch. The main thing is that the material for manufacturing is:
- light,
- break-resistant
- elastic,
- dry, without knots (rot).
Wet snow should not stick to the bottom surface of the skis when skiing, so it is worth providing with a reliable (stable) coating.
The best material for making camus is stretchable animal skin: horses, reindeer, elk. Such a coating will give the skis flexibility, thinness and strength.
Step-by-step instructions for resinizing
To achieve maximum results from resining a pair of skis, the products must be processed:
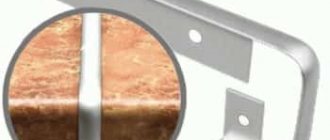
- Before applying homemade or purchased lubricant, it is necessary to prepare the working surface. To do this, using cycle and turpentine, remove the old layer of impregnation and degrease the surface. Then, use fine sandpaper to sand the surface of the product for better adhesion to the new impregnation.
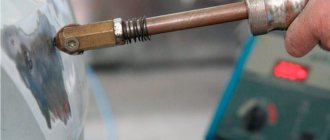
- The resin must first be heated to make it more liquid. Place the ski so that it is in a horizontal position on two points of support. You can use chairs for this.
- Imagine that the surface is divided into three zones. Using a gas torch or industrial hair dryer, heat the first part. Pour a small amount of resin onto it and spread it evenly with a brush.
- Heat the resin-coated surface again until bubbles appear. Go over it with the brush again. After this, wipe off the remaining resin from the edges of the ski and begin the second part. After treating the entire surface, allow the resin to dry completely and absorb. Leave
I will modestly voice my opinion on whether hunting skis need to be tarred.
Sure. No need. Those skis that appear in the ones with the quality mark - they were produced in 1978, and now it’s 2011. They no longer have sharp edges, and the surface is a little scratched, but it’s scratched with the slag that was sprinkled on the roads, because it’s difficult to climb the pass cars couldn’t cross the ice, and we, hunters, were lazy not only to crush the powder along the way for 10 kilometers, but also to descend the hill on foot. I put on my skis and zip down, only to feel how the slag under the ski sometimes gnaws out the wood from it. Back then I didn’t even think that skis could last so long. Please note they are not resinous.
I recently discussed this topic with colleagues and they gave me one of the YouTube videos about tarring skis as a clear example. There a guy grinds his skis and says - I read on the Internet that they need to be grinded, I don’t understand why they don’t do it at the factory. Here, according to Freud, he hit the nail on the head. This is not done at the factory since this procedure is not necessary on modern VENEER skis. Which disintegrate only in one case, in case of IMPROPER STORAGE. Store them out of season in a fabric cover in the shade, not in the sun (or without a cover, but in the shade, not near a heat source (on a stove or radiator) and do not allow the backs of the skis to stand where water periodically appears, for example , rain. That's all, they will never dry out or get wet and nothing will happen to them. People burn leaves, not understanding the stupidity, but having gotten used to it from childhood, from school, from their yard, knowing that “that’s how they do it” - so do it themselves. And looking at them, their children, etc. The circle is closed. And so it is here. Everyone has forgotten the origins, where it came from. And this masturbation goes back to the time when skis were not veneered, but were simply wooden. I also found these. So that they would not dry out (and we are talking about cross-country racers, and this procedure was then transferred to hunting from them by analogy), they were tarred. And then many did not understand why and thought “so that they would ride and glide better,” so athletes tar. And athletes tarred in order to apply “paraffins" - less paraffin consumption and lay down more evenly. I’ll say right away that paraffins are not paraffins as such, but ointments based on them with the addition of temperature additives - i.e. ski waxes. And people will grab the candle and “refinish” the skis - well, now they’ll just carry it, hold on. And they are very surprised that they go to one temperature, but not to another. Heating, cork and hot iron, all so that the layer is not just thin, but even - the glide depends on it, all the unevenness of the ski is leveled out. Now swimmers shave and use smooth suits for the same purpose (they seem to have decided to cancel suits). But look how far we have gone towards sports and how far we have gone from hunting skis. But ski wax is a good thing (if you guess the temperature, otherwise: either the skis will give back, or vice versa, you will scratch them like slag). But if you have a piece lying around in your backpack for above-zero temperatures, that’s a plus (forgive the tautology), in case of a thaw and a potential scam. Although, when we have a podlip, the season is closed for a month and a half. But they also ski in other areas, and a piece of ointment is not large or heavy. Once you use it, you don’t even need to rub it; after 10 minutes, nature will do everything itself. She's such a magician.
=============
Time passes, manufacturers, technologies, standards change...
It so happened that after reading this article, our readers began to ask me a variety of questions not only about lubricants, but also about skis and ski poles. I try to answer all these questions within my competence. In my search for an answer, sometimes I call the best experts in the country in their field and they help me give you the right answer. If, after reading this article and all the answers, you still have questions, please write to me by email. ru, I will definitely answer them.
Ivan Isaev,
Editor-in-chief of the magazine "Skiing"
Master of Sports of the USSR in cross-country skiing
And now, in fact, the letter itself from our reader.
Please consult. I'm going on a ski trip in February. For two weeks. The question arose of how to prepare the skis. Wooden skis, Forest skis. Initially, when I bought them, I impregnated them with Marathon XXI (formerly Visti) paraffin. I warmed it up with a hairdryer and the paraffin was well absorbed. And I treated it to suit the weather with the same series. Didn't resin.
Most likely, this will not be possible during the hike. Old books advise tarring. I'm thinking, what should I do with them? Will the resin lie on top of the paraffin? Or soak them in “cold” paraffin along the entire length for sliding, and apply them under the cargo area depending on the weather? Or sand it and just tar it?
Sincerely, Glekov Evgeniy.
* * *
Evgeniy, you asked a fantastically interesting question that has puzzled me and many of my skiing friends whom I called in search of an answer. The fact is that I have tarred a lot of wooden skis in my life. And it’s impossible to count how many paraffinized plastic ones there are. But to paraffin wooden ones... This (just don’t be offended, please) is the same as harnessing a horse to a car.
In general, you have asked a problem... But the general verdict (after consultation with friends) is as follows:
1. The best solution for you would still be to “go broke” and buy plastic skis intended for hiking in virgin lands. They will not swell, as will inevitably happen with wooden skis, especially if there is a thaw. They have metal edges, which means they will not have rolled edges. Finally, they won’t break in the most inopportune place, as can easily happen with wooden skis. Buy, for example, these:
2. However, it is clear that you may not have the money to buy skis, but you still want to go hiking. Therefore, if we return directly to your question, it seems to us that it is possible to wax wooden skis. But something tells me that the resin will still stick to the ski better (in fact, forever - I know from my own experience), but the paraffin will “leave” from the ski over time. Although, it is possible that from the point of view of hydrophobic (water-repellent) properties, paraffin will still be more effective than resin for some period of time (we are talking, apparently, not about years, months and weeks, but about days). But, in general, I honestly admitted to you that my own experience in this area, both for me and for all my skiing friends, turned out to be zero, don’t blame me.
So, the options for solving the problem in order of preference:
A) buy new plastic skis;
B) paraffin the ends and smear the block with ointment;
C) sand the skis with fine sandpaper and then thoroughly impregnate them with resin. After this, the ski can be lubricated with ointment along its entire length: in the middle (under the block) with weather-appropriate ointment, at the ends with colder ointment.
Workshops (ski services) that provide the service of resining wooden skis are almost impossible to find today. After all, wooden touring skis are considered a dying format. Despite this, they have their fans and connoisseurs, and not only for the much lower recoil when climbing uphill (you can read about improvised methods of dealing with recoil). And they are simply a budget option for equipment for winter hiking. So, to get your wooden equipment ready for combat, you'll have to roll up your sleeves and master tarring skis at home.
How to do
Not everyone knows how to make hunting skis with their own hands. It's easy if you follow the steps. It is necessary to prepare the wood so that it is dry and without knots (chips, cracks, rot).
The optimal thickness of the boards is 1 cm. Step by step steps:
- Prepare the wood.
- Make cross cuts.
- Chop off the excess, trim the workpieces with a plane (electric planer).
- Place the boards in a container, fill with water, laying the boards between them.
- Place the boiler and boil for 1.5-2 hours.
- Transfer the boiled boards to the machine to make the nose of the ski track, giving it a shape so that it does not break.
- Heat the folds.
- Round the heels and toes of the ski tracks, cutting off excess material with a hacksaw, from the center to the ends, to avoid splitting the wood.
- Drill holes (2 mm in diameter) on the heels and toes, having previously marked them with a pencil.
- Burn each hole with a hot awl to harden it to prevent tearing under load.
- Pass the rope through the holes, pulling it tight.
Read also: Is thermoforming necessary for ski boots?
Basic tips to consider when making homemade hunting skis:
- Dry well on the board for at least 1 month to give the skis an effective (suitable) shape.
- Steam the noses of the skis in boiling water for at least 0.5 hours. You can’t do it longer, because excessive steaming can lead to cracks (creases) in the inner parts of the socks.
- Bend the socks at the ski tracks on a wooden template (you can make it yourself), making the curvature with a margin, since the dried boards will bend by 10-12 mm.
- You should not make skis longer than the height of the hunter.
- It is advisable to impregnate finished products with resin, diluting them with turpentine (tar) in a 1x1 ratio.
Sizing
Homemade wooden hunting skis must fit in size, for this you need to know how to determine it. To do this, you need to know the weight of the person who will walk on them. The rule works here: 1 kg of weight corresponds to 50 cm² for each ski, the length is no greater than the height of the person for whom it is created.
Calculation example:
- The hunter weighs 90 kg, his height is 1.75.
- Looking at the formula, the ski area for it is 4500 cm².
- Skis for a hunter should be 1.7 m long and 26 cm wide. If you plan to travel on the plain, then the length can be slightly longer, for mountains - shorter.
Another sizing option does not involve calculations. More specifically:
- install the skis with their toes up, their length does not exceed the height of the arm extended forward;
- width is the distance between the index finger and thumb;
- thickness is the distance between the ring and middle finger of the hand at maximum spread; this parameter will need to be brought up to 8 mm on flat areas, and 5 mm on the bend.
Wood preparation
Suitable wood species for the production of hunting skis: birch, spruce, aspen.
It is best to harvest in the spring (autumn), storing the boards in a well-ventilated area. If you harvest it in the summer, then after cutting the bark, you need to store it for at least 1 year.
It is advisable to prepare material for several pairs of skis at once, since without much experience in the work, you can ruin the material. So, there will be several additional sets in stock.
Ski storage
For storage, skis are tied in pairs and hung on a special spacer. The room must be ventilated and not damp. Some hunters sew special covers from tarpaulin for skis. Homemade skis are in no way inferior to purchased ones, even better, since they are made to an individual size and taking into account the physiological characteristics of the hunter.
Previous post Loading hunting cartridges
Next entry DIY duck decoy
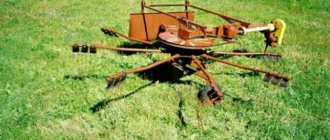
Bending
The camber (middle, front, back) is given to the skis after they are lined up. To work, you will need a special machine. Necessary:
- warm over the fire
- insert the products into the machine to give the required shape, making sure that there are no distortions,
- steam with boiling water,
- insert into the machine,
- calcinate to give the wood softness, obedience,
- refrigerate, cool,
- remove the products from the machine, check for distortions,
- burn special holes for fastenings.
Tool for home work
Over the course of several years of being passionate about alpine skiing, I somehow came up with a small workshop on its own. Everyone has their own necessary and sufficient set for proper care and preparation of alpine skis for the season.
My set of materials and tools fit entirely into the suitcase. What's in it?
I didn’t try to collect one particular brand. I chose it solely based on convenience, availability of information and prices. For example, I used to use Swix only because it was always in the local Sporting Goods. About three years ago I switched to Holmenkol and even Chinese noname. What is important to me is not the brand, but the tools and materials that meet my goals and training objectives.
Scraper
A scraper - or scraper - is used to remove paraffin when processing a sliding surface. For our purposes, the scraper should only be made of plastic. It can be bought in a store or cut from a thick sheet of plexiglass. You can immediately prepare a whole set, especially if you also cross-country ski or snowboard.
The scraper must be very sharp to completely clean the slide. For sharpening, I use regular sandpaper with 80, 100 or even 120 grit and a brush, which is always at hand. A few movements are enough and the scraper is like new.
Structure cleaning brush
I have had several brushes in my hands, all different ones. But in the end I settled on one - directional, with long metal bristles. A metal brush is a must. Better than steel, due to the long pile it will be soft and will not damage the structure of the sliding surface. Copper wears out faster, but will also last a very long time in a home workshop.
A brush with long bristles is very easy to clean on the edge of a table or workbench. It's more difficult with a short one. You cannot clean one brush against another, as they will contaminate each other even more.
Iron for lubrication
The purpose of the iron is to fuse solid ointments into the structure of the sliding surface of mountain skis. The outcome of the entire work depends on the properties of the iron. If the temperature of the sole is not controlled, the plastic may melt if it overheats and will have to be sanded. An insufficiently high temperature will not allow the base to be saturated, as a result it will be poorly prepared for further processing.
I tried several options from the irons and flat irons that were on hand. An ordinary household iron has a huge hysteresis, so its temperature over a wide range exceeds the very narrow range of working with paraffins in both directions. The travel iron is stable only in standby mode. As soon as you start working, the temperature of the sole drops sharply and you have to wait until it rises again. The conclusion is simple - do not skimp, but immediately take a good iron.
Good means a massive sole that accumulates heat, and a precise control of the temperature set point. It is better to buy an iron with grooves on the sole; they are all about the same price. I have another one, smooth, but with grooves, the paraffin spreads noticeably more evenly over the base, almost without dripping. Even consumer-grade lubrication irons are balanced and give good results.
My copy has very precise temperature control and fairly low hysteresis. If in doubt, the actual values can be checked with a household pyrometer. When determining the temperature of the sole, do not forget to prepare its shiny surface for measurements and apply a little KTP-8 thermal paste, otherwise you will be very surprised by the results obtained.
Cantor cutter - types and purpose
To sharpen alpine skis, a file and a special tool that sets the selected angle - an edge cutter - are used. There are a wide variety of designs on sale - from “all-in-one” to special equipment and sharpening machines.
I prefer manual sharpening, which gives complete control over the condition of the edge and its economical consumption. Yes, it is consumed during preparation, and this resource is limited. If the edge is thinned, the skis will have to be replaced.
The most correct option, in my opinion, is a corner with a fixed value. In my case it is 88 degrees. At first I used a homemade edge cutter.
There is nothing tricky about it. A regular corner made of aluminum and a wedge-shaped pad for the desired angle, printed on a 3D printer. Branded file guides provide more than just convenience.
They have special grooves and slots for removing chips, and the material of the corner is not so viscous and does not become clogged with dirt. It would be possible to remake yours, but the prices on sale are very tempting.
For sharpening from the base side, it’s even easier - a file guide with a strip of metal. The thickness of the strip and its distance from the edge determines the sharpening angle on the base side. It is impossible to hold the file in the desired position with your hands, even if you wrap it with electrical tape.
It would be a good idea to paint over the edge with a marker to visually control the progress of sharpening. Especially if you have never done such preparation before.
Oberkantorez
Sharpening from the end can be hampered by the plastic over the edge - the wrapper. In the picture above I have already shown what it is. The plastic clogs the file and the process is delayed. But the wrapper can be easily removed with a simple tool. I used a piece of large file for this purpose. To prevent the metal from being cut off during processing, it is enough to make a small groove, as in the photo.
Such preparation before sharpening is rarely required, but for those who want to collect all the stones in their glove and prepare the skis with a click, I advise you to immediately buy a tool for trimming the side surface. They are really pleasant to work with, and the edges after processing are smooth and neat.
The position of the knife is adjustable in two degrees of freedom, and preparation for the correct cut is simple and straightforward. The essence of the simple process is demonstrated in the video.
Files for sharpening
There is a large selection of files for working with alpine skis. Each has its own purpose, but roughly speaking, the whole difference comes down to one parameter - the number of cutting teeth per centimeter. To prepare the edges, I use only one - a long file with 13 teeth. Long only because it’s more convenient for me to work with.
The file has a working direction indicated by an arrow. The direction of the cut can be easily understood visually by the structure or by running your fingernail along it.
During operation, the file becomes clogged with material and requires cleaning. Even the simplest, cheapest metal brush will do the job just fine. It is not necessary to buy a branded one.
Diamond files
After processing with a file, burrs form on the edges. If you don't remove them, the burrs will break off when you ride and they will become dull faster. Rough sharpening requires finishing with a diamond file. For this, three different stones are used - coarse 200, medium 400 and fine 600 grit. It is not necessary to have all three; the middle one is often used as the most universal.
It must be remembered that the stone does not cut, but only removes rough burrs from the file. That is, it only polishes.
To top it off, you can use ceramics, but this is perfectionism. I am for a reasonable approach to preparing skis for skiing.
Rubber block
Treatment with a rubber block after sharpening is finishing. They blunt the edges from the toe and heel. It will still be sharp, but the alpine ski will be less aggressive when entering turns without biting the slope. If it is not dulled, the ski will do what she wants, but not us.
I will not say that this is actually the case, but a rubber block is very convenient for cleaning off minor areas of corrosion without resorting to a coarser oxide block. That's why I recommend it.
Oxide bar
If the edge is damaged, local dents are formed - cold work. They are very hard, often with tarnished colors. The file of the edge cutter cannot cope with such seals and quickly becomes dull. To eliminate work hardening and some other defects, a polishing silicon block is used.
It makes sense to keep such a block nearby so that you can straighten the peening directly on the slope without waiting for off-season maintenance.
Alpine ski vice
A ski securely fixed on a workbench is not just convenience. This also means precision processing, especially when sharpening.
The method of fixation itself does not matter. For example, with such a homemade machine, nothing dangles or wanders either.
Essentially, this is an imitation of the sole of a shoe, secured with clamps on the table. Cheap and cheerful, no problems with skistops.
I used this option for several seasons and was pleased until I realized how many conveniences I was deprived of compared to a special tool.
The vice holds the ski tightly while preparing the slide, and the clamps have a convenient angle for working with when sharpening.
Really a very good purchase. I recommend it.
Making kamus
For kamus, the skin is cut off from the animal. Next, the camus is stretched onto boards, fixed with nails, and dried for 10-12 days.
Good pieces of skin of smaller thickness are selected. If the pieces are not large enough, then you can:
- sew them in pairs with coarse thick threads,
- soak in water for 5-6 hours,
- dry slightly so as not to tear when stretched,
- drill holes,
- glue the prepared kamus,
- apply the composition to the surface of the skins from the inside and treat the edges of the ski track so that snow does not stick,
- additionally paint or varnish.
Device
Skis for hunting differ from sports options:
- Type of fastening. For ease of walking for a long time and instant removal from your feet, it is better if the fastenings consist of 1-2 straps.
- Width. Models with a width of 15-16 cm are suitable so as not to fall under the snow.
Plastic skis glide well. Wooden models cannot accelerate much, but they move quite well on an unstable route with descent and ascent.
Preparing glue for gluing
The glue must be waterproof (thick), so you can use wood glue (epoxy) with the addition of vinegar to make it waterproof.
Read also: Fisher CarboneLite skis. Features and Specifications
If it is not possible to purchase high-quality wood glue, you can make it yourself from fish skin (catfish, chum salmon). For what:
- remove the skin from the fish,
- clean,
- soak,
- wrap it around a stick
- wrap with wet cloth on top
- steam over a fire (stove) to obtain glue with a viscous consistency.
Fastenings
The fastening is done taking into account the usual hunting shoes. It should be loose enough, but not fly off. It is not advisable to use new leather, as it will creak in the cold and may become stiff. The best option would be a strap made from old reins. For skis, you can purchase straps in advance, and then smoke and fry them. The finished skis are carefully inspected, rubber or birch bark is glued under the foot.
Kamus
While the skis are being made, you should work on the camus. The skin must be skinned from the base of the hoof. Then it dries for a couple of weeks and ski patterns are made from it. The required size of the product is sewn from pieces of skins and glued to the skis.
Glue
Good quality carpenter's glue is not always available, so some hunters prefer to glue skis with homemade glue, prepared according to old recipes and tested over the years. For this you will need chum salmon skin. The fish can be bought fresh in the store, used for food, and the skin can be used for glue. The skin is cleaned of fat and scales and filled with warm water for 1 hour. After softening, roll it onto a rod, wrap it in a wet cloth and place it over the stove, near the coals. Over time, the skin turns into a high-quality adhesive mass.
Ski pole
At the same time as the skis, a ski pole is made from the same material. At the bottom it is made with a spatula, and at the top it is equipped with a claw and a ring. Markings are made on the stick to help determine the thickness of the crust. And the stick itself performs many functions necessary for a hunter: clearing snow, testing the road as a brake, using a stick to tow it, and much more.
Gluing
Gluing is done in a thick layer between the skin and the ski track. It is important that the camus adheres well to the edges and does not warp after drying.
Products should be dried at room temperature. After they have dried, you can thread the straps through the previously drilled holes for fastenings. Thus, skis with a camus will be much stronger at bend.
It is advisable to apply glue to the camus in 2 layers. After drying, apply 1 more layer, rolling it over the moistened skin with a roller, squeezing out excess glue to completely straighten the skin. The camus should fit snugly against the sides of the skis.
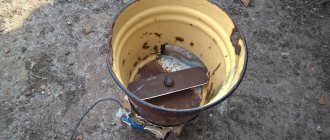
Subsistence
Finished skis need to be protected from moisture absorption, so they are thoroughly fattened. It is very good for this operation to use a mass cooked according to the recipe of the old masters. Pour 400 g of linseed oil into the kettle and bring to a boil. Birch tar is added to it in the same amount and boiled for another 1 hour. Then you will need 200 g of paraffin. After the latter has completely dissolved, the pot is set aside and red wood alcohol (400 g) and formaldehyde (200 g) are poured into it. While the mixture is hot, cover the skis very generously. After the product has been absorbed, the coating is repeated until the wood is completely saturated. Next, the skis are dried and, if desired, covered with drying oil.
Making sticks
Sticks are an indispensable attribute. They will allow you to clear snow and slow down in case of an unsuccessful descent from the mountain. They are made of birch and walnut with blades on the lower ends (upper) claws and rings.
It is good to equip the poles with divisions (marks) every 5-6 cm, which will help in measuring the thickness of the snow cover when skiing. Sticks should be stored in a suspended state and in a ventilated area, tied together in pairs. Today, many people prefer plastic options for ski accessories. Plastic freezes quickly in the cold and it is better to make wooden sticks. The main thing is to prevent moisture from getting into the fastenings. Before storage, poles and skis must be thoroughly cleared of snow, kept in the sun to dry, and checked for the strength of the fastenings and that the screws are not loose.
Knowing the structure of skis and the stages of production, you can make a lightweight, gliding model without any special disadvantages for moving on flat and steep (mountain) snow-covered surfaces with descents, ascents, and slopes.
Place for mounting fasteners
Much attention should be paid to choosing the location where the mount will be located. To determine where to install the mount, the ski is turned over on its edge and lifted at the loading area with two fingers. If the ski lowers its heel down and forms an angle of 45 degrees with the floor, then the point is chosen correctly. If the result is negative, the search continues. The found point is marked with a transverse line. From the drawn line towards the toe, mark 4 cm and also draw a line. On both lines, mark the center and apply a clenched fist to it, combining its center with the existing one. Dots are marked on the lines on the sides of the fist. Moreover, on the line located closer to the toe, the side points are brought closer together by 1 cm each. It would be a good idea to check the markings a second time. If the result is positive, the marks are burned and longitudinal grooves for the belts are made between them. The depth depends on the thickness of the belts: in the end they must be aligned with the sliding surface. The bases for the bindings, 2 pieces, are made from planks and placed in the center of the ski and shifted 3 cm towards the heels. Make a mark, put it on glue and fix it with self-tapping screws.
Sliding Surface Finish
The choice of treatment for the lower part depends on weather conditions. For forest hunting on loose snow, fur-lined skis are used. For spring hikes on rough crust, skis are made, because the frozen snow strips the wool.
Resining
The skis are made thicker than kamus skis. A gutter is sometimes chosen along the bottom plane. Skis will be resinized after production. The operation is repeated every season.
Before going out hunting, the bottom of the loins is treated with 2 types of ointment. Gliding ointment is applied to the toe and heel parts no more than 30 cm on each side, for the toe - on the remaining surface. The product is selected taking into account the temperature conditions.
Camus padding
Kamus - skin from the shins of animals (deer, elk, horse), prevents skis from slipping. For 1 pair it takes up to 12 pieces. Fleshed skins are soaked in pickel:
- 3 liters of water;
- 2 tbsp. spoons of salt;
- bottle of vinegar essence.
After 3 days, the camus is rinsed and dried. The skins are collected into a strip, the pile should lie in one direction, along the course of the ski. Cross sections are aligned. In order not to cut the fur, cuts are made from the side of the flesh with a sharp knife. The cut out pieces are sewn from the inside out using a furrier's stitch using nylon thread folded in half. The seams are flattened with a hammer.
You need to glue the skin to the wood along the entire lower surface, starting from the nose. PVA glue is applied to the ski. Simultaneously with gluing, the skin is stretched and nailed to the end with small nails.
Skis should dry in the machine for 5 days. After this, the edge of the skins sticking out from above is cut off flush with the upper surface.
The upper part of the skis is covered with yachtlak or wood enamel for outdoor use.
Models and manufacturers
Taiga brand products have proven themselves well. They are used for driving on untrodden terrain and professional expeditions. They are made from birch and spruce, the chassis is finished with pressed PET. Operation is possible at +10…+30 degrees. Thanks to convenient holes, the products can be carried by drag.
Another good ski is the “Fishing” ski. They are made by multi-layer gluing of birch and aspen, and covered with ultra-dense polyethylene. The top is treated with protective moisture-resistant nitro enamel. According to reviews, the “Winter Full-Camus” skis are popular among hunters - these devices are equipped with a full casing. This design gives incredible elasticity and strength.
Also among the brands of hunting skis, Shatun, Kirov, Mayak, and products are respected. Among plastic products, the most popular brands are Karhu Jakt and Vyatka.
Many skis are sold without binding, which you can make yourself or buy additionally. Products should be stored in a bundle, hanging in a dry, ventilated place. It is necessary to prevent snow and water from getting on the fastenings during storage. When loosening the screws, epoxy glue is dripped into them - this will return the fasteners to their original functionality.