Although, by modern standards, wiring in residential apartments is made primarily of copper wires, you can often find electrical wiring made of aluminum. If it is impossible to replace the old wiring with a new one, then you need to learn how to connect aluminum wires with your own hands. So, for example, how to connect a chandelier, socket and other electrical appliances correctly? Is it possible to connect aluminum wires with others? How to make the connection reliable? How to firmly connect aluminum wires to each other? You can get answers to these questions in this article.
Feature of aluminum wire
Features of aluminum
Due to its special characteristics, aluminum is difficult to work with. Also, during the oxidation of this metal, an oxide film is formed on the surface. This, in turn, prevents the good flow of current. This film melts at a temperature of two thousand degrees, and this figure is higher than the melting point of aluminum itself. If you peel off the film mechanically, then literally in a short period of time it appears again. As a result, the oxide film prevents high-quality contact of the connection.
Other features of aluminum include an increased degree of brittleness and fluidity. Based on this, the contact should not be subject to any mechanical stress. For example, if the connection is made using a bolt, then it must be constantly tightened from time to time. This is due to the fact that the aluminum will leak out from under the contact over time.
Welding method
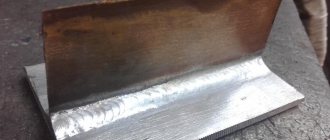
When welding, a drop forms at the end of the twist.
Welding provides the best electrical contact. Due to the homogeneity of the resulting connection, there is no problem of increased resistance of the circuit section.
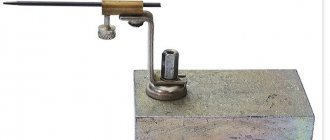
A welding machine is used with an output power of up to 1 kW and an adjustable voltage within the range of 14-20 V. Welding is considered successful if a drop has formed at the end of the twist, with a diameter approximately equal to the twist.
When welding, a carbon conductor is used along the end of the twist. The exposure time should not exceed 2 seconds.
There is an option for gas welding of wires. In an inert gas atmosphere, the oxide film ceases to form, which significantly facilitates the process, but specific knowledge and equipment are required.
Electrochemical corrosion
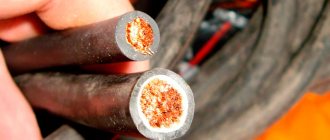
Is it possible to connect aluminum wire with others? Yes! But here it is important to take into account some important points. If there is no moisture, then such a connection will be eternal. However, moisture is present everywhere, which in turn contributes to the destruction of contacts. It is also important to take into account the fact that each electrical conductor has its own electrochemical potential. In this regard, accumulators and batteries were created, however, when water enters the junction of metals, a short-circuited galvanic cell is formed. As a result, one of the metals is destroyed. To find out which metals can be connected and which cannot, it is important to know the value of the electrochemical potential of a particular current conductor.
Factors of galvanic corrosion
For example, it is permissible to connect different wires if the level of electrochemical potential between them does not exceed 0.6 mV. Based on this, it turns out that the connection of copper with stainless steel will be of high quality with a potential difference of 0.1 mV, in contrast to the connection with silver (0.25 mV) or gold (0.4 mV).
Note!
If the copper wire is coated with tin-lead solder, then any mechanical connection to the aluminum wire is allowed.
Classification by material of manufacture
One of the main parameters, depending on which wire sleeves are divided into different types, is the material of their manufacture. The need to use dissimilar sleeves is determined by differences in the electrochemical properties of the connected wires made of different metals. So, if an inappropriate sleeve is chosen to connect wires made of a certain metal, the place of the formed contact will oxidize, which over time will lead to a decrease in its reliability in terms of electrical conductivity.
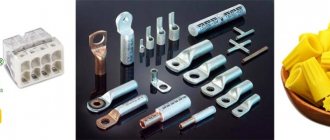
The main types of sleeves for crimping electrical wires, depending on the material from which such tubes are made, are:
- copper sleeves;
- tinned connecting sleeves;
- combined;
- isolated.
Each of the above types is used to solve certain problems, which should be taken into account when choosing such tubes for connecting conductors.
Copper
A copper sleeve, which is marked GM, is needed for crimping wires also made of copper. Taking into account the fact that the copper sleeve does not have a protective coating, it can only be used to connect wires operated in a non-aggressive environment. If you neglect this requirement, the copper sleeve will quickly oxidize and cease to perform its functions.
Copper cable sleeves must be made from copper tubes of grades M1 or M2
Tinned
To connect electrical wires operated in an aggressive environment, tinned copper sleeves for crimping are used, which are marked GML. In order to protect the main material of their manufacture - copper - from electrochemical corrosion, GML sleeves are coated with a special compound.
It should be borne in mind that a tinned sleeve is not used for crimping aluminum wires.
This is explained by the fact that part of the protective coating of such a tube is destroyed when it is compressed, which will lead to contact between aluminum and copper and, accordingly, to the development of electrochemical corrosion.
Connecting sleeves type GML, made of electrical copper with a tin-bismuth protective coating
Combined
Quite often, when installing electrical networks, it becomes necessary to connect wires whose cores are made of different metals. To solve such problems, combined type sleeves have been specially developed and are successfully used. The design feature of such crimp tubes, which are marked GAM, is that one half of them is an aluminum connecting sleeve, and the second is made of copper. At the junction of two such tubes, which are connected to each other by welding, there is a special limiter. It is necessary in order to prevent contact of two dissimilar wires inside the sleeve itself.
Adapter cable sleeve aluminum-copper 16/10 sq. mm
Another design feature of combined crimp tubes is that the part of them, which is the aluminum connecting sleeve, has a larger diameter than the tube intended for copper cables. This design feature is explained by the fact that aluminum, when compared with copper, has greater electrical resistance, therefore the wire made from it, which will be connected to the same electrical network with a copper conductor, must have a larger diameter.
The crimping itself using combined sleeve clamps is performed according to the same algorithm as the procedure with sleeves of any other type. However, it is necessary to carefully ensure that dissimilar wires are inserted into a tube of the appropriate metal.
Isolated
Among the crimping tubes used for crimping electrical wires, the category of insulated connecting sleeves is distinguished. The use of the latter eliminates the need to perform additional insulation of the contact area formed with their help. In terms of their design, insulated sleeves are the same tinned copper tubes, the outer surface of which is covered with an insulating layer of fairly durable and at the same time plastic PVC. Due to the mechanical properties of such a protective layer, sleeves of this type can be successfully crimped without compromising their original characteristics.
Fully insulated connection sleeves
Insulated sleeves for hermetically sealed connection of SIP wire cores
Twist
Electrochemical corrosion possible
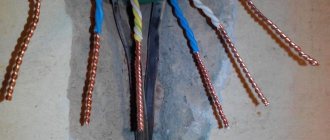
This is one of the easy methods for connecting wires. In this case, absolutely no qualifications or special knowledge are required. But the result is a far from reliable connection. Why? Everything is due to the fact that during the period of temperature fluctuations, a linear expansion of the wires occurs and, as a result, a gap forms between them, which in turn increases the resistance. Afterwards, the contact oxidizes and after some time is destroyed.
Note!
This will not happen in the first year. But if you want to create a reliable and high-quality connection, then you should think about a more reliable alternative.
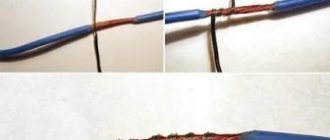
How is such a connection made? It is important here that one wire does not wrap around the other, but that they both wrap around each other. To ensure a high-quality connection, the copper wire can be tinned with solder. There is no restriction on the diameter of the connected wires. If the copper wire is stranded, then it must be tinned with solder. If the wire is thick, then three turns will be enough, and on a thin wire up to Ø1 mm, five turns must be made.
Twisting methods
Threaded connection
Bolted
One of the most reliable options for connecting aluminum and copper wires using nuts and screws. Such connections will ensure high-quality contact for many years. This method can be used to connect wires of different sections, stranded and single-core.
So, first you need to remove the insulation from the end of the wire. Then a spring washer, a regular washer, a ring of one conductor, a simple washer, a ring of another conductor, a washer and finally a nut are put on the screw, which tightens the entire structure.
Note!
If the conductor has a Ø2 mm core, then the screw should be M4.
If the wire is stranded, then it should first be tinned with solder.
How to connect 3 wires
Quite often a situation arises when it is necessary to connect not two, but three wires, for example, when supplying energy from one phase to two consumers at once, and in such cases, the most convenient method of connection is a mechanical clamp.
Depending on how large the load will be, it is necessary to select the appropriate model of the clamp used. The simplest option is a metal sleeve into which wires are inserted on both sides, on the one hand supplying, and on the other, pre-twisted together, feeding.
If one of the wires has a larger cross-section, then it is this wire that is inserted into the sleeve without twisting. After the wires are inserted, the connection is secured with clamping screws.
If the wires are of small cross-section, then the usual twisting of all three is used; pliers are used to ensure a tight connection. The twisting area can be covered with a plastic threaded cap.
Terminal block
Terminal block
Terminal block is another modern method of connecting aluminum and copper wires. Although it is very popular, the screw and bolt connection method is much more reliable. However, the terminal block allows you to quickly and efficiently connect wires. In this case, there is no need to form rings at the end of the wire, or additional insulation. This design completely eliminates the possibility of contact between two bare wires.
This connection is made as follows: The end of the wire is stripped of insulation to a length of up to 5 mm. Afterwards, a wire is inserted into the hole in the terminal block and tightened with a screw.
Note!
The screw should be tightened with sensitivity, especially with aluminum wire.
This connection is very helpful in cases where a short piece of aluminum wire sticks out from the ceiling. If in this case you use the twisting method, then sooner or later the wire will simply break off. The same cannot be said for using a terminal block. Also, if aluminum wires were accidentally broken in the wall, then this technology simplifies their connection. But there is one thing! The terminal block cannot be hidden in plaster or in the wall without a special distribution box.
Connecting wires with slip-on terminals
Widely used in household appliances and cars is the detachable connection of conductors using slip-on terminals, which are placed on contacts 0.8 mm thick and 6.5 mm wide. Reliability of fixation of the terminal is ensured by the presence of a hole in the center of the contact and a protrusion in the terminal.
Sometimes the conductors break off, and more often the terminal itself burns due to poor contact and then it becomes necessary to replace it. Typically, the terminals are pressed onto the ends of the conductors using special pliers. Crimping can also be done with pliers, but you don’t always have a new replacement terminal on hand. You can successfully use a used one by installing the terminal using the following technology.
First you need to prepare the old terminal for reinstallation. To do this, holding the terminal with pliers at the press-in point, you need to use an awl or a screwdriver with a thin tip to move the tendrils that compress the insulation apart. Next, the wire is bent many times until it breaks off at the point where it exits the press fit. To speed things up, you can trim this area with a knife.
When the wire is separated from the terminal, a needle file prepares a place for soldering it. You can completely grind it off until the remaining wire is free, but this is not necessary. It turns out to be a flat platform.
The resulting area is broken through with solder. The conductor is also stripped and tinned with solder using a soldering iron.
All that remains is to attach the conductor to the prepared terminal area and heat it with a soldering iron. The antennae that fix the wire are bent after soldering the wire to the terminal, since if they are crimped before soldering, the antennae will melt the insulation.
All that remains is to pull on the insulating cap, put the terminal on the desired contact and check the reliability of the fixation by tugging on the wire. If the terminal has come off, then it is necessary to tighten its contacts. A home-made terminal attached to a wire by soldering is much more reliable than one obtained by crimping. Sometimes the cap is put on so tightly that it cannot be removed. Then it needs to be cut and after installing the terminal, cover it with insulating tape. You can also stretch a piece of vinyl chloride or heat-shrinkable tube.
By the way, if you hold a vinyl chloride tube in acetone for about five minutes, it increases in size by one and a half times and becomes plastic, like rubber. After the acetone evaporates from its pores, the tube returns to its original size. About 30 years ago, I insulated the bases of light bulbs in a Christmas tree garland in this way. The insulation is still in excellent condition. I still hang this garland of 120 6.3 V light bulbs on the Christmas tree every year.
Terminal block and spring clamp
Block with clamp
This method of connecting wires appeared relatively recently. There are two types: disposable and reusable. In the latter case, there is a special lever that allows you to remove and insert the wire several times. Such terminal blocks allow you to connect stranded wires of different types of aluminum with copper wires.
They are widely used for mounting chandeliers, as well as for connecting wires in junction boxes. The wire is inserted into the hole of the block with force and is securely fixed there. It will take a lot of effort to remove the wire. In practice, it is better to use reusable terminal blocks, which allow you to redo the connection in case of a miscalculation.
10 mm of insulation is removed from the wire. The lever on the reusable terminal block rises up and the wire is inserted. Then the lever returns to the reverse position. The connection is ready!
Permanent connection
This type of connection has almost all the advantages of a threaded connection. You can highlight the speed of installation, durability, affordable price and ease of connection. The principle of its operation is simple. To connect the wire with a rivet, rings with a diameter of 4 mm are prepared. First put on the aluminum wire, then the spring washer, copper wire and flat washer. A steel rod is inserted into the rivet gun and compressed until the handle clicks. As a result, the excess conductor is cut off and the connection is completely ready.
The reliability of such a connection is very high. It is used for splicing wires. The most important requirement when using it is insulation of the connection area.
Twisting aluminum wires together
Parallel twist
We talked about the advantages and features of twisting above, but now we will consider this issue from a different angle, namely, connecting an aluminum wire with a similar one. In this case, the success of using the twisting method will directly depend on the cross-section, diameter of the wires and other important factors. Ideally, aluminum wires are best soldered by first twisting them with a groove.
- Parallel twist.
- Sequential twisting.
Serial twisting
However, it is important to be careful here, since an oxide film forms on the surface of aluminum wires. Even if you clean it, it will reappear very quickly, as noted above, so the ends of the wire can be cleaned with a file until shiny or with sandpaper. It is recommended to compress the lowest turn with pliers. Such a connection will be durable and strong.
Walnut clip
Another good way to connect copper and aluminum wires is to use nut clamps. It is more correct to call this device a branch compressor. It was already the electricians who nicknamed it “the nut” because of its external resemblance.
It is a dielectric polycarbonate housing, inside of which there is a metal core (or core). The core is two dies, each of which has a groove for a certain cross-section of the conductor, and an intermediate plate, all of which are connected to each other with bolts.
Such clamps are sold in any electrical goods store; they have different types, which depend on the cross-section of the wires being connected. The disadvantage of such a device is that it is not sealed, that is, there is the possibility of moisture, dust and even small debris getting in. For reliability and quality of connection, it is better to wrap the “nut” with insulating tape on top.
The process of connecting wires using this compression is as follows:
- Disassemble the compression housing; to do this, pry up and remove the retaining rings using a thin screwdriver.
- On the wires to be connected, strip the insulating layer to the length of the dies.
- Unscrew the fixing bolts and insert the exposed conductors into the die grooves.
- Tighten the bolts, position the die in the compression housing.
- Close the housing and install the retaining rings.
A practical example of using a nut clamp is shown in this video:
Useful tips and tricks
Each wire connection must be properly insulated.
It is recommended to place them in junction boxes. If such a connection is simply plastered in the wall, then access to it is limited and, accordingly, it will be impossible to tighten the contacts. Although if you use spring clamp technology, this will not be necessary.
Connecting wires in the distribution box
If you want to make such a connection with your own hands at home, it is not recommended to use soldering or welding wires if you have no experience in performing such work. The best option would be a contact clamp or one of the methods described above for connecting aluminum wire to copper or to each other.
So, we have reviewed with you the most common methods of connecting aluminum wire. Of course, if you have no experience or are simply afraid to take on such work, then it is better not to risk it and turn to a specialist. Otherwise, if you have experience with such work, proceed by following all the recommendations in this article.
Safety regulations
When performing all electrical work, in order to protect themselves and others, they comply with safety regulations and strictly follow the developed instructions:
- simple twisting of aluminum conductors with copper or copper-aluminum conductors is not allowed, because during the electrolysis process, the contact is destroyed, overheats, and sparks;
- when welding, be sure to use a protective mask and rubber boots;
- in the room where welding work is performed, flammable objects are reliably protected;
- It is better to lay aluminum wiring, especially if it is open, in corrugated sleeves, and place the connections in junction boxes;
- welding and soldering are performed only by people with the appropriate skills;
- All exposed parts of the wires are reliably insulated.
