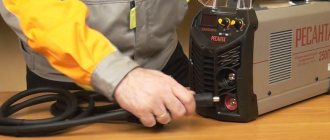
How to properly connect an inverter - plus to the electrode or minus
Many novice welders do not know that an inverter can be used to weld in different ways. They still use it this way, the standard connection is positive to the electrode and negative to the metal.
However, if you connect the inverter differently, the electrode to the minus, and the metal to the plus, you can achieve better deepening of the weld. In simple words, with this connection of the inverter, the main temperature will fall on the metal, as a result of which the workpiece will warm up better.
Well, and, on the contrary, with a “standard” connection of the inverter, when the electrode is connected to the plus and the metal to the minus, it will be possible not to burn through the thin workpiece. How does it work and what is the point? How to connect the inverter correctly, positive to electrode or negative? Read in this review.
What is cooked with reverse polarity?
Thin metals are best welded with reverse polarity
, concentrating most of the heat on the electrode. This way the part will not succumb to overheating, and the electrode itself will melt faster. Kind of metal. ...Type of electrode or wire.
Interesting materials:
When did they start building the metro in Moscow? When does hCG begin to rise after conception? When does chrysanthemum begin to bloom? When does the quest for matters of national importance begin? When should you start teaching your puppy commands? When are points awarded on Aliexpress? When will they start sending parcels from AliExpress? When will PS5 sales start? When should you switch to winter tires? When should you put down a glass of bread?
Connecting a welding inverter - plus and minus
As mentioned above, many novice welders do not pay enough attention to polarity when welding with an inverter. And to be more precise, some have never heard anything about it.
As a result, a lot of problems arise - thin metal is quickly burned through, while thick metal, on the contrary, is not sufficiently fused. Just try experimenting when connecting the inverter.
To begin, connect the holder to the plus of the device, and start cooking, and then connect the inverter, on the contrary, with the holder to the minus. You will definitely feel the difference.
It's all about polarity, since a welding inverter, unlike an AC transformer, produces direct current. And if on transformer machines there is no such difference in connecting cables, then when welding on direct current, it is still the same, and, moreover, significant.
Safety precautions when working
The established safety rules, one might say, were written in the “blood” of the victims, and therefore it is strictly forbidden to neglect them. The health and life of not only the welding equipment operator, but also the people around him depends on their compliance. So, the safety rules include the following.
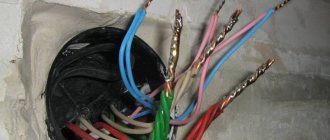
- Before starting work, you should check the integrity of the insulation on all wires and cables connected to the device. It is also necessary to check the serviceability of the equipment, namely, make sure that the open circuit voltage is zero. In this case, there must be a working system that turns off the voltage on the electrode when the device is idle.
- Before connecting the equipment, you should check the electrical network under load (measure the sag range).
- To protect the retina of the eyes from ultraviolet radiation arising from the burning of a welding arc, it is necessary to use a protective mask (shield) or special glasses. Not so long ago, welding masks and glasses with “chameleon” glasses appeared on sale, which automatically darken when exposed to bright radiation. Not only the welder, but also his assistant should wear glasses or a mask.
- If welding work is carried out indoors, then to protect the respiratory system and prevent poisoning by harmful gases, respirators with replaceable cartridges or masks through which purified air is forcedly supplied are used.
- To protect hands from metal splashes, use special gloves - welder's gloves.
- To protect the body, overalls, jackets and pants made of fire-resistant fabric are used.
- To protect your feet, you need to wear high boots to prevent metal sparks from getting into them. Boots must be covered with pants.
- The workplace should be well lit.
- There should be a rubber mat or wooden flooring under the welder's feet to prevent a person from receiving an electric shock.
- There should be no foreign objects around the workplace that could cause a tripping hazard.
- Sand and a fire extinguisher should be located near the workplace to timely extinguish the source of fire.
- Grounding the welding machine is mandatory.
If the safety rules have already been studied, then you can begin to familiarize yourself with how to properly work with electric welding.
Basic rules of DC welding
Welding with direct and reverse polarity are just modes, when using which the following should be taken into account:
- Welding using direct current is considered the most accurate among electrode welding. When welding with direct current, the metal does not spatter so much, the weld is smooth and neat;
- As a result of different temperatures at the cathode and anode spots, the amount of deposited metal will depend on the choice of polarity.
Whatever polarity is used when welding with DC, the rules remain the same. To obtain a high-quality and reliable welding joint, it is very important to prepare the metal. There should be no dirt or traces of paint on it.
Before welding, it is best to secure the workpieces with clamps. Also, it is very important to choose the correct amount of welding current, taking into account the thickness of the metal being welded and the diameter of the electrodes used.
How to find out the cross section
The main technical characteristics of conductors: cross-section, diameter and other important properties are indicated in catalogs or corresponding descriptions. However, if the contractor does not have the opportunity to familiarize himself with this data, and the question of how to determine the cross-section of the welding cable needs to be answered, then you should remember some recommendations.
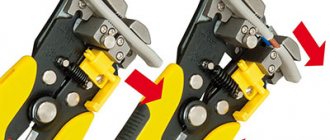
There are several ways to determine the cross-section of a conductor. They all boil down to the fact that first you need to calculate the diameter of the core. This can be done using a micrometer or caliper. However, the simplest method, which does not require special accessories, is to use the following method.
The contractor will need to remove the insulation from the conductive core. Then you need to wind the core around a cylindrical object (screwdriver) and use a ruler to measure the total length of the turns, the number of which for accurate calculations should exceed 10. In conclusion: the total length in mm. must be divided by the number of turns. The resulting value will be the diameter of the wire, from which the cross-sectional value can be found.
The contractor can find complete information about the cross-sections of cables of various brands in articles devoted to this topic:
Methods of working with different metals
Since the welding process is impossible without igniting the arc, you should know that there are 2 methods to do this:
- you need to hit the metal with the electrode several times until the arc ignites.
- You need to strike the metal with an electrode, like a match, several times.
Each master selects the most convenient and suitable method of igniting the arc. But you need to scratch not just anywhere, but along the line of the weld, so that no marks are left on the workpiece.
The place where metal melts under the influence of an electric arc is called a weld pool. To move it along the seam line, use one of the methods shown in the following figure.
For normal movement of the bath, the electrode is tilted at an angle of 45-50°. By tilting the additive at different angles, you can control the width of the bath. Each master selects the optimal angle of inclination to obtain a seam of acceptable quality.
Advice! The movement of the bath is facilitated if the device has the “arc force” function, which prevents it from going out.
The electrode can be positioned at a backward or forward angle. To obtain a wide seam, the equipment is tilted at an angle forward, since this method produces less heat. Thin metals are welded using this method. It is customary to weld thick metal at an angle backwards.
To weld non-ferrous metals, you will have to connect an argon torch to a welding inverter and use a non-consumable electrode (tungsten). The additive in this case is metal rods, which are placed on the weld line and melted by an electric arc. During the welding process, the pool is blown with inert gas.
Electrical connection diagram
Welding of thick (16-17 mm) sheets of metal is performed with 6 mm electrodes at a set output current of 240±20A. In this mode, the load on the power supply increases, which is accompanied by a voltage drop. If the corresponding value is less than the permissible operating parameters, the automation will turn off the inverter.
Another problem is limited wiring options. Aluminum (copper) conductors of the household network are designed for 10 (16) A. It is recommended to check the compliance of the power consumption of the device with the operating parameters of the circuit breakers and fuses.
The figure shows a connection diagram for a welding machine, which minimizes the influence of powerful equipment on other equipment:
Welding machine connection diagram.
It is recommended to straighten the network cable. A bent conductor creates inductive reactance, which increases the load on the power supply. The areas that form the coils overheat until the protective shell is destroyed.
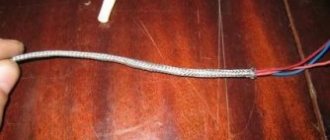
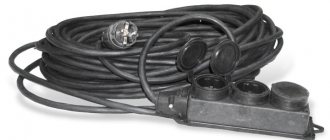
How to extend the cable on an inverter
Typically, the inverter is equipped with a wire no more than two meters long. Working with such a cable is quite problematic and inconvenient. Therefore, performers often have a question: how to extend the cable on a welding machine ?
Previously, we considered that connecting welding cables should be done in several ways, each of which is used depending on the skills of the performer, the presence or absence of specialized equipment and additional accessories.
Advice! In most cases, the owner of the welder connects the welding cables for the holder and the ground into one longer wire and uses it to connect to the ground . And for the electrode holder, the welder buys a part of the cable of the required length .
It is important to know how to extend a welding cable. The connection of welding cables during extension can be performed using the following methods: welding; soldering; crimping.
It is also worth noting the opinion of some professionals who are against lengthening the conductors . Cables that are too long may adversely affect the performance of the device. In addition, the longer the wire, the greater the current loss, which can negatively affect the quality of welding.
Other DIY connection methods
In an older home, the protective devices, wiring, and outlets are not designed to withstand heavy loads. High current causes a short circuit. Voltage surges can damage household appliances in your own apartment and those of your neighbors. To eliminate connection problems, you should consider solving this and other typical problems.
Using a current generator
To organize autonomous power supply, a compact power plant with a gasoline (diesel) engine is used. Such a generator can be purchased or rented for the duration of work operations. When choosing equipment, check:
- power;
- voltage stabilization;
- compliance with working conditions.
Calculation of output parameters for the considered example with welding of thick sheets:
- current – 240 A;
- voltage – 40 V;
- power – 9600 W = 240*40.
A 10 kW generator in this mode will operate at the limit of its capabilities. This reduces the life of functional units and increases the risk of overheating and breakdowns. To eliminate negative factors, choose a source with a power reserve of 25±5%.
Using extension cords
The length of the serial network cable does not exceed 4 m. To expand the working area, a “carrying” is used. If the welding current is not more than 150 A, a 20-meter extension cord with a conductor cross-sectional area of 2.5 mm square is suitable. The power line is installed without bends to eliminate the parasitic influence of inductive reactance.
We recommend reading Schematic diagram of the inverter
Selecting cable parameters
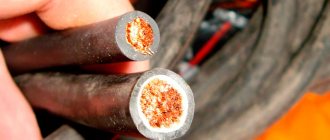
To transmit high current, a conductor with a large cross-section in a thick protective sheath is used. Fixed terminals are used to connect to the welding machine. When choosing a cable, pay attention to the following details:
- copper conductor provides low resistivity;
- the use of aluminum reduces the cost of the product;
- the multi-core design maintains the integrity of the core after repeated twisting/straightening cycles;
- The shell with special additives is resistant to high and low temperatures.
Important parameters of cable products are determined by special markings in the name:
- HL (T) – the product is intended for use in cold climates down to -60°C (tropical);
- N – non-combustible insulation;
- KG – flexible cable;
- PES is a modification for a semi-automatic device.
A suitable cross section is selected taking into account the current strength (maximum):
- 6 mm sq. – 100 A;
- 10 – 120;
- 25 – 200;
- 35 – 290;
- 50 – 300.
| Conductor cross-sectional area, mm sq. | |||
| Current (I), A | Cable length, m | ||
| 0-15 | 15-30 | 30-60 | |
| 30-100 | 25 | 25 | 50 |
| 100-200 | 35 | 50 | 70 |
| 200-300 | 50 | 70 | 90 |
For an accurate calculation, use the formula D=S/K, where:
- D – permissible length;
- C – cross-sectional area;
- K – correction factor (K=I/100).
When checking the package, in addition to the cable, you should select the correct holder and clamp for connecting the ground.
When choosing a cable, you need to pay attention to a number of details.
How to connect
It should be remembered that the safety of the performer and the quality of the work performed depend on the reliability of the contact connections of the conductors. The connections are subject to high technical requirements . But first of all, they must be resistant to shocks, tears and other mechanical influences. Therefore, it is very important to know how to connect two welding cables to each other.
The following are the most popular methods of connecting welding cables, each of which has its own advantages and disadvantages.
Let's look at the connection of welding cables in more detail.
1. The simplest way is to use additional accessories - welding connectors for connecting cables . They make work simple, fast and convenient. In addition, the use of connectors has a positive effect on equipment mobility.
There is a wide variety of these accessories on the market, differing in technical characteristics. Connection of welding cables: “male-female” is a classification based on differences in the design of the connectors. You can find out how to choose the right detachable connections for welding cables and what you should pay attention to here.
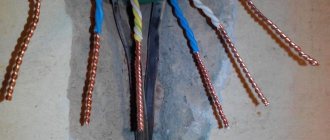
2. The “twist” connection is the first and oldest method, characterized by fairly simple execution, quality and reliability.
Video
The prohibition of the PUE method does not prevent homemade workers from successfully using it, as shown in the video below.
“Twisting” can be done in several ways, which are presented in the pictures below. Regardless of the chosen method, the insulation of the cores should be removed by at least 3-4 cm. Then the sections of the cores must be treated with acetone or white spirit, cleaned with sandpaper and you can begin twisting.
There are also ways to connect welding cables if you have a certain set of equipment and additional accessories.
3. Soldering is a method of connecting cables by covering the heated ends of the wires with molten solder, which hardens and provides strength and high electrical conductivity of the connection. This method is used for small cross-section conductors.
Advantages: does not require special skills and specialized equipment compared to welding.
However, it is worth highlighting the disadvantages: a large number of preparatory operations, therefore, high labor intensity.
Before soldering, the conductors are cleaned of insulation and oxide film, then they are tinned, twisted and pressed with pliers. To avoid oxidation of the cleaned surface, fluxes should be applied to the treated areas.
Soldering of small copper wires is carried out using solder tubes filled with rosin or a solution of rosin and alcohol. These solutions are applied to the joint before soldering.
Then you can begin the soldering process: the joint is heated with a soldering iron or torch. Rosin or flux begins to boil, take a little solder onto the soldering iron tip and add it to the soldering zone by pressing the tip against the conductors. The solder spreads and fills the gaps between the wires, thereby creating a connection. If a torch is used, the solder is added to the torch.
After the soldering process is completed and the workplace has cooled, the flux residues must be washed off, the joint dried, coated with a special varnish, and insulated with tape or heat-shrinkable tubing.
4. Crimping is the process of connecting wires using copper or aluminum sleeves. It is necessary to select a sleeve depending on the size of the “twist” and the cable material (copper or aluminum).
The wires must be cleaned to a metallic shine, bundled/twisted, and then a sleeve is put on them and clamped with special pliers. In this case, the walls of the sleeve are pressed into the conductor conductors and a reliable electrical contact is formed.
Advantages : high reliability; no high demands are placed on the performer regarding his qualifications; independence from the availability of electricity.
Inverter straight polarity
In this case, the electrode holder is connected to the negative terminal, and the ground to the positive terminal. Thus, it becomes possible to thoroughly weld thick metal, deepen the root of the weld and achieve a better connection.
It is important to know that the main part of the heat will be on the metal during welding. As a result, the consumption of electrodes will be reduced than with direct polarity. This is due to the fact that with reverse polarity, the temperature at the tip of the electrode is higher than with direct polarity, therefore the combustion of the electrodes occurs faster.
Share on social networks
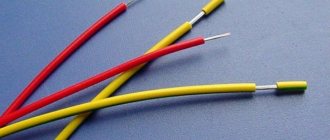
Marking of welding cables
The welding wire marking consists of several groups of letters and numbers. From it you can understand which model is in front of us.
First there are several letters indicating the type of cable.
After the type, a dash may indicate the climate class of the wire:
Next comes a number indicating the number of cores - 1, 2 or more. The designation is completed by the cable cross-section in mm2.