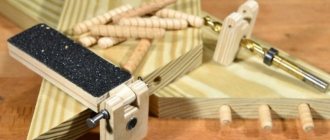
During construction, when working with wooden beams, special attention is paid to the connecting part of the crowns. As practice shows, changes in air temperature and water can change the shape of wood, even when dried according to all the rules. The use of dowels, which tightly fasten the structural elements together, will help to avoid this. But how can you make the necessary holes?
A screw drill and a low-speed drill are the main tools when drilling holes for frames Source techfact.ru
Types of dowels
There are many types of fasteners, but they are conventionally divided into groups according to material and shape. Let's consider this issue in more detail.
Material of manufacture
Two types are actively used:
- Wood. Most experts strongly recommend using a wooden tenon when constructing wooden structures. The main advantages when choosing such fasteners are given:
- Even drying. The beam and dowel should be approximately the same humidity. This will allow the shrinkage process to go through with virtually no visible changes;
- Not affected by temperature changes. The tree practically does not change its linear dimensions at different temperatures, so the fastening element will always be in place;
- No rust. Metal rusts over time, which leads to rotting of wooden surfaces in contact with it;
- There is no condensation. With a sharp change in temperature, moisture forms on steel, which is completely useless inside a load-bearing wall.
- The dowel fuses with the wall. After a certain time, the house will become monolithic, the wooden surfaces will be soldered together.
- Metal. This option also applies to a budget fastening method; waste materials (pipes, fittings) are often used. Although experts prefer the previous method, the metal dowel has its advantages:
- The top layers of wood are protected from torsion;
- Durability of the structure.
Form
There are also several main forms:
- Round section. Taking into account the fact that the holes for fastening in the log are made with a drill, the round dowel will provide the maximum contact area, guaranteeing the reliability and durability of the structure;
- Square. It is easier to make such an element; it also costs less. But that's where the positives end. When entering the hole, the edges of the tenon are deformed, and the total contact area remains minimal. Building a house this way is dangerous;
- Narrow rectangle. The easiest option to manufacture. A board of a certain thickness is taken and cut into rectangles. The only advantage is the very small thickness. Suitable for narrow timber, but installation is extremely difficult.
Main dimensions
There are no GOST standards for Euroscrews - they are manufactured following European standards such as 3E122 and 3E120. They have a very wide list of sizes: 5x40, 5x50, 6.2x50, 6.4x50, 7x40, 7x48, 7x50, 7x60, 7x70 mm.
The most common of all those named is 6.4x50 mm. The hole for the threaded part is created with a 4.5 mm drill, and for the straight part with a 7 mm drill.
When working with other confirmations, the following principle is observed: proportionality between the diameter of the hole for the area with protrusions and the diameter of the rod, while the height of the thread is not taken into account. In other words:
- Euroscrew 5 mm – drill 3.5 mm;
- Euroscrew 7 mm – drill 5.0 mm.
The assortment of Euroscrews is not limited to the presented list. There are even such unusual sizes as 4x13, 6.3x13 mm.
Using confirmations without taking into account their traits will definitely lead to trouble. Without much effort, you can damage a large part by choosing the wrong fastener. The choice of thread diameter is of particular importance. Thick fastener components tear soft materials, this often happens when working with chipboard. The length should ensure that the end is firmly attached.
Plugs and heels for chair legs using improvised materials
In order to avoid damage to the floor in the kitchen or in another room, when using wooden chairs, you should insulate those parts that can do this, that is, the legs. To do this, you can go to the store and buy special heels, or you can save money and make them yourself. The following materials are suitable for making heels for table legs:
- an old carpet, parts of it can be cut out to the desired size and glued to the legs;
- rubber, also cut out to the required size and secured with nails or glue;
- felt insoles;
- linoleum;
- leather.
You can also make plugs for the legs; the most common material for their manufacture is wine corks.
When working with wood, most craftsmen have long been making various tools on their own; for their manufacture it is possible to use improvised means. Thus, you can save a lot of money on your family budget.
Application
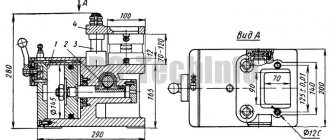
These products have been used for a long time and are widely used in metalworking. Thus, many machines are equipped with conductors. The need for templates for dowels in the woodworking industry is due to the prevalence of closed furniture joints. In this industry, the devices in question are used both in mass production and during assembly. In the latter case, furniture jigs are used to drill holes for dowels.
In addition to the above-mentioned areas, such devices are in demand in construction, mechanical engineering, and household work.
The scope of application is determined by the type of conductor. Thus, overhead devices are used for processing flat parts, chipboard and MDF boards. Corner ones are applicable both for furniture and for chipboard and MDF boards. Rotary products are designed for making holes in cylindrical parts. Universal models are suitable for small-scale furniture production. Tilting options are designed for simultaneous processing in several planes. Clip-on and sliding jigs are most suitable for home use. In addition, the latter are incompatible with single-spindle machines.
Rigid models are designed for making holes in objects with an uneven surface, such as pipes. In this case, they are secured using a clamp, but this method is not suitable for furniture, since deformation of the surface is possible.
The use of conductors simplifies and speeds up the work due to the fact that it eliminates the need for manual measurements and calculations.
What to drill with?
Often home craftsmen have had to deal with a situation where they have to use what is available.
Use of 3 drills of different diameters
This method is suitable for small-sized jobs, as it involves huge time costs. The hole is prepared in 3 steps.
- Drilling the entire length of the confirmat through 2 parts. The diameter of the cutting tool must correspond to a similar parameter of the Euroscrew body, but without taking into account the thread (we have already talked about this). This is done so that the helical surface of the thread creates a counter thread in the material.
- Drilling out an existing hole for an even part of the fastener, which must fit tightly, but not too tightly, so as not to tear the material. The expansion is carried out with a drill similar in thickness to the neck, while the depth must correspond to its length.
- Processing the hole for recessing the cap into the material. This is done using a cutting tool of larger diameter. Experts recommend doing this with a countersink to avoid chipping.
Special drill for Euro screed – 3 in 1
Working with a special drill for Euro screed is much easier, because it has a special stepped design, and the entire procedure is completed in one pass.
Another advantage of its implementation is that it simultaneously chamfers the countersunk head of the fastener. In practice, it connects two different diameter drills and a countersink.
In addition, the confirmation drill has a lead with a pointed end, which ensures clear entry of the cutting equipment and does not allow it to move away from the center at the beginning of drilling.
Classification of tools
Before you buy a ready-made conductor or make it yourself, you need to decide what problems you will solve with its help and only then you need to select the appropriate option in terms of design and functions.
There are a number of categories of devices that differ in their design and functional features. Here are some of them:
- overhead - such devices are applied to a part that can be processed, then it is attached to it or simply fixed manually. With their help, holes are made in various flat parts, MDF boards or chipboard;
- rotary - these templates are used when processing cylindrical parts. They are equipped with horizontal and vertical axes of rotation, so holes can be made at different angles;
- universal - such devices are suitable for small serial furniture manufacturers, where sometimes quick readjustment of the equipment used is required, they have all the functions necessary for this;
- tiltable - used when the technological procedure is carried out in several planes at once;
- sliding - such conductors do not need to be attached. Simply attach them to the surface area of the workpiece where you want to make a hole;
- fixed - they are more convenient to use, but they limit freedom of action, which is very critical when working with machines where there is only one spindle.
Societies › DIY › Blog › device for drilling holes in furniture
I'm not a furniture maker, but I had to redesign the cabinet, dismantled the old one, ordered the newest sides and assembled it at home for confirmation. So that the holes were even and accurate, I came up with such a device from waste. At first I made only a vertical hole, but later I made a horizontal one strictly in size. It’s comfortable to drill on the sides - you don’t need to create a marking, just move it close to the edge with a strobing pin and clamp it, and mark the middle hole. Because the holes were precise and I made three times less markings for them, the cabinet became faster and lighter. I think maybe someone will need my idea. More photos in the blog.
Eccentric coupler
An eccentric coupler is often used in the factory production of furniture. The reason for this is the difficulty of drilling holes. An eccentric coupler consists of two parts: a pin and an eccentric. The pin is installed in one part, and the eccentric in another.
Increase
Fig.7.
The main advantage of this type of fastener is that this fastener is hidden and therefore does not spoil the appearance of the furniture. In addition, this type of fastener, unlike confirmat, allows you to repeatedly assemble and disassemble furniture, which is important, for example, when moving. Also, using an eccentric coupler, you can connect parts at different angles.
When making furniture yourself, it is not often used due to the difficulty of drilling holes and the inability to correct the joint during assembly. The main difficulty in drilling holes lies in the hole for the eccentric. This hole is not through and requires the use of a special drill - a Forstner drill.
Increase
Fig.8.
Increase
Fig.9.
Increase
Fig. 10.
In this case, the sampling depth is about 12 mm, and the thickness of the chipboard is 16 mm. The remaining wall thickness is only 4 mm. There is a risk of drilling more than necessary, thereby damaging the piece of furniture. Therefore, when drilling holes for an eccentric tie, it is necessary to use drilling depth limiters.
This tie is a screw and nut with which two sections of furniture are pulled together, for example, two cabinets. To tie cabinets, 2 - 4 intersectional ties are used. Depending on the thickness of the chipboard, there are intersection screeds of various sizes.
Increase
Fig. 12.
Considering that the intersection screed is used to tie cabinets, and the cabinets, in turn, are made of laminated chipboard with a thickness of 16 mm, an intersection screed with a length of 32 mm is most often used. However, there are ties up to 50 mm long, which are used to tighten parts of greater thickness.
Increase
Fig. 13.
Introduction of 3 drills of different diameters
Confirm screw made of zinc coated steel
This method is suitable for small-sized jobs because it requires more time. Hole preparation is carried out in three approaches:
1st step
– drilling through two parts for the entire length of the Euroscrew. The diameter of the drill must be equal to the diameter of the screw body without taking into account the thread. This is done so that the threads can cut the counter thread in the material.
2nd step
– expansion of the already acquired hole for the smooth part of the hardware, which must have a tight fit, but not too much, so as not to split the material. Drilling is done with a drill equal to the thickness of the neck and to a depth equal to its length.
3rd step
– countersinking a hole to deepen the head into the material. This can be done with a larger diameter drill, but to obtain a high-quality result without chipping, it is better to perform this operation with a countersink.
We carry out calculations
Depending on the chosen fastening technology, it is possible to determine with sufficient accuracy the number of dowels and calculate their correct characteristics.
Deciding on the sizes
There are many scientific works that will help determine the diameter of the dowel. But in the professional environment of carpenters and builders, certain rules have already been formed:
- for timber with a thickness of 20 centimeters or less, a dowel with a diameter of 25 millimeters is used;
- a thicker beam is fastened with a tenon measuring 3 centimeters;
- timber thicker than 0.2 meters can be fastened with a 2.5 cm dowel, but subject to the step being reduced to a meter.
Counting the quantity
Even a small sauna will require quite a large number of spikes that need to be purchased or made, which can take a long time. Therefore, it is better to know the number of fasteners in advance.
There are fastening rules:
- the first dowel is inserted at a distance of 20 to 70 centimeters to the corner;
- the step is from one and a half to 2 meters;
- It is necessary to fasten two adjacent logs in height.
Knowing these tricks, the height of the structure, the diameter of the timber, you can easily calculate the number of dowels needed for construction.
Spikes for fixing timber: which ones to choose and why?
The most popular are dowels made from hard wood. The most durable options are spikes made of oak or birch. It is not possible to deform, bend, or break them. However, there is one condition. They must be properly secured. What are their shape and sizes? The optimal solution is details with rounded contours. Their length should not exceed 25 mm. Wooden dowels must be smooth and even not only at the point of installation, but over the entire surface. It is these nails that guarantee the longest possible service life.
Installing dowels in timber is a mandatory rule for timber and log structures. Birch thorns are the most common option. Such dowels cannot become an analogue of self-tapping screws or primitive nails. If they are used, it is impossible to guarantee the stability and reliability of the structure. It is also worth abandoning the use of reinforcement. Metal versions can lead to a number of negative consequences, which is explained by the direct interaction of materials with different thermal conductivity parameters. What can the use of metal dowels lead to? It could be:
- condensation formation;
- coating the surface of the spikes with rust;
- rotting of the entire layer of wood.
Builder mistakes: typical and gross
As Alexey Markin notes, the most common mistake when making a log house from chopped logs is the small areas of contact between log and log (small width of the inter-crown groove). The thermal characteristics of such a house will be low. The head of the Domostroy-SK enterprise, Oleg Valuev, adds that in some cases the crowns may not be adjacent to each other at all (photo 1). Huge cracks will have to be caulked regularly, which will require considerable additional costs. However, the appearance and thermal characteristics of the house cannot be radically improved.
Photo No. 2
– The log house cannot sit properly due to incorrectly placed racks.
It happens that builders build a house in such a way that it simply cannot sit down.
As Oleg Valuev explains, if you plan to make a veranda under the roof, then between the upper end of the post and the upper crown you need to install a special jack for shrinkage (photo 3). This will allow the log to sit evenly. Instead of a jack, you can put several planks that will need to be knocked out periodically. By the way, shrinkage jacks are clearly visible in the first illustration (Fig. 1) to ours.
Photo No. 3
– Jack for shrinkage (photo by Domostroy-SK).
Another mistake that prevents the shrinkage of a log house is an attempt to fasten adjacent crowns with nails. The log lies unevenly on the nail head, and an inter-crown gap appears. Due to a loose fit, the log may begin to “spin” during the drying process.
The problem of poor-quality waterproofing of the lower crown of a log house has somewhat lost its relevance. As a rule, the installation team performs this operation efficiently
However, the customer should pay attention to how the foundation and wooden walls are connected. If the foundation is strip or grillage, then the surface of the strip should be leveled, and between the foundation and the lower crown there should be 2-3 layers of roofing material, or a waterproofing layer of similar effectiveness
However, excess moisture can enter the wood not only through the foundation. If you lay floors and hang ceilings in a house before the frame has settled and dried, this will impede air circulation and lead to “steaming” of the house - mold or mildew may appear on the internal walls.
The head of the Domostroy-SK enterprise, Oleg Valuev, notes that in the washing room there is also no need to make baseboards on the floor. Moisture collects under them and the process of rotting also begins.
Photo No. 4
– Mold on unventilated wooden structures.
Types of connection
When connecting wooden parts, you need to remember an important point - a thin part is always attached to a thick one, but not vice versa.
According to the relative arrangement of the elements, the following methods of connecting wooden parts are distinguished:
- extension - increasing the height of a part;
- splicing - elongation of the workpiece;
- consolidation—increasing the element’s width;
- knitting - joining at an angle.
The most commonly used methods for joining wooden parts in furniture making are:
- gluing;
- "dovetail";
- end-to-end;
- grooved;
- overlap;
- deaf on spikes;
- through tenon.
Let's look at the technologies of some connections in more detail.
Features of application in the furniture industry
Conductors and templates are needed when assembling furniture. These things will prevent you from having a common problem that occurs during drilling—the drill hitting the part at the wrong angle. Correcting such an error will take an extremely long time, in some cases it will even be impossible.
A jig for making holes will not only allow you to correctly orient the working tool, but will also prevent it from straying from the desired trajectory.
In the furniture industry, jigs and templates are used in the following cases:
- in mass production;
- when assembling structures, when it is necessary to make holes for fasteners in the parts being connected. In this case, a jig for drilling holes for dowels or confirmat is suitable;
- a jig for drilling holes at an angle is used both in such cases and when working with thin boards, for example, MDF or chipboard.
When using such a device, the assembly process will be much easier and faster; you will be able to make the necessary holes regardless of how far they should be located from the edge of the part and how wide it is.
When assembling furniture yourself, you often have to connect parts end-to-end using dowels. Holes for dowels are best made using a special jig. The peculiarity of dowels is that despite the fact that such fasteners, although outdated, are still relevant in furniture production.
The difficulty in their use lies in the fact that the axes of the holes that are made in the parts when connecting must have a right angle with each other. Accordingly, they must be placed strictly perpendicular to each other. It is difficult to do this without a special device. Therefore, if you want to achieve high quality performance, it is recommended to buy a dowel jig.
Other uses
Hole jigs are used not only in furniture production. Quite often they are used when you need to make a hole in a pipe or other cylindrical part. Thanks to them, you can make a high-quality hole even in a pipe with a small diameter.
Such devices are universal and easy to use, so they are also used in the following industries:
- mechanical engineering - drilling holes in different-sized workpieces based on different materials;
- construction - drilling holes in building structures;
- home communications - as already mentioned, pipe drilling and more.
Modern drilling jigs can be of different sizes and have different operating principles. Some of them are complex, so they are easier to buy. And some modifications can be made independently, especially since some serial furniture models, especially those with universal purposes, are expensive.
Workflow Description
Let's consider the basic rules for carrying out work; they are quite simple, so almost anyone can cope with them, the most important thing is to do everything carefully and use high-quality materials and tools.
Making dowels
Of course, you can buy ready-made elements, but their price is quite high, and the DIY process is not very difficult.
The work is done as follows:
When making dowels, neatness and attractiveness are not important, what is important is accuracy and compliance of the elements with the holes
- First, you need to choose a manufacturing method; if you have at least a simple lathe, then you can make round versions that are no different from the ready-made ones that are sold in the retail chain. If there is no equipment, then you can get by with rectangular elements, there won’t be much difference anyway;
- The length of the blanks should be 2.3 times the thickness of the timber. This is due to the fact that the correct location involves an option in which each fastening element passes through three beams, and in the upper and lower crown it should be located approximately 2/3 of their thickness. As noted above, the dowel must be recessed by at least 20 mm so that deformation does not occur when the structure moves;
This diagram clearly shows all the basic rules for fixing crowns; this option has been used by professional carpenters for more than two centuries
Advice! You can simplify the manufacturing work by purchasing a block of the required size; its cost is low, but you just need to round the corners a little - and the fasteners will be ready.
- You don’t have to cut the elements right away, but do it as you work, it all depends on which option is preferable for you.
Fastening the timber
It is important to carry out the work correctly, since this determines how securely the structure will be fixed; the list of measures is as follows:
- First you need to choose a high-quality drill for dowels for timber. Too weak options are often used, so cases when a power tool burns out while drilling are not uncommon. Low-speed modifications with a three-stage gearbox with a power of 1300 watts or more are best suited; they do the job well, as they are designed for high loads;
Choose modifications with a handle on top, it will be much more convenient for you to carry out work on drilling timber
- As for the drill, select a screw version of the required length; it is better not to save money and purchase a product from a well-known brand, since cheap analogs are usually not durable and can fail almost on the first hole. The length depends on how thick your timber is, and the diameter varies depending on the width of the walls; most often, products from 20 to 30 mm are used;
Drills with a diameter of 30 mm are among the most popular
- Drilling is carried out starting from the third row, and it is very important to maintain the vertical position of the equipment when working, because the dowel will serve as a guide, and if it is located at an angle, the surface may bend over time. The work should be entrusted to a physically strong person, as the drill sometimes jams and can turn the tool, which is unsafe when working at height;
When working, you need to hold the drill very tightly
- Remember a simple rule - the hole should be 1-2 mm larger than the size of the dowel, this will ensure its sufficiently tight location, and the fastening will not interfere with the shrinkage of the structure. That is, with a drill diameter of 30 mm, the dowel should be 28-29 mm;
- The distance from the edge of the beam must be at least 300 mm, the distance between the attachment points is from one and a half to two meters. Sometimes you can increase the number of dowels by placing them in places that may become deformed;
- Driving in the dowels is done using a heavy hammer or sledgehammer weighing 2-3 kg; in order to drown the elements, stock up on a spacer in advance.
As you can see, the instructions for carrying out the work are not complicated; it is important to have a reliable tool on hand and use fasteners of the right size.
Dimensions of holes for confirmation
There are no GOST standards for confirmed screws; they are made according to European standards 3E120 and 3E122 and have a fairly wide size range, represented by the following standard sizes: 5x40, 5x50, 6.2x50, 6.4x50, 7x40, 7x48, 7x50, 7x60, 7x70 mm.
The most common size is 6.4x50 mm
. To drill a hole for its thread, a drill with a diameter of 4.5 mm is used, and for the smooth part - 7.0 mm.
When working with euroscrews of other sizes, the following rule is adhered to: the diameter of the main hole (for the thread) must be equal to the diameter of the rod without taking into account the height of the thread. In other words:
- 5 mm screw – 3.5 mm drill
- 7 mm screw – 5.0 mm drill
In order to prevent the risk of parts moving during drilling, you need to aggressively fix their position relative to each other. The easiest way to do this is with a corner clamp or other clamps.
Hello! We purchased furniture manufactured by BRV-BREST IOOO. During assembly, it turned out that the holes for the 7mm confirmations were not 5mm clear. and f5.9 and they do not tighten the parts (sidewalls of the cabinets) but are welded. There are 20 such parts in total. In response to the complaint, the factory responded that: “the dimensions of the holes on the furniture parts, also used for installation of confirmations from the KENTAKI furniture set, displayed on the photographic material, correspond to the normative ones that were included in the design documentation at the design stage.” If there is no GOST for connection under confirmations, does that mean I won’t prove anything and it’s stupid to sue? Thank you if you answer.
Marking drilling locations
In order to perfectly fasten two parts, it is necessary to mark the places of their fastenings as accurately as possible.
On the part that will be applied to the end (the one on which there will be a through hole), you need to make two measurements - along the length (usually 5-10 cm) and from the edge - exactly 8 mm (this is if the thickness of the plate is 16 mm).
On a part that lies perpendicular, mark the drilling point at the end. Here you need to maintain the same distance in length (5-10 cm from the beginning), and in width - strictly in the center (8 mm from the edge).
Markings must be done as accurately as possible, especially along the length, because If the markings are incorrect, your parts may have extra gaps or protrusions when joined.
It is better to make a through hole in the first part, attach it to the second - and immediately use a drill to mark the drilling location at the end of the second part. And then, separately, calmly drill the hole.
Homemade conductor devices
Jigs of the simplest design, for example, those used for drilling holes for confirmation, are relatively inexpensive, so many craftsmen do not bother making them themselves and purchase serial models. Meanwhile, there are those who try to make even such simple devices with their own hands. The question of how to make a jig for drilling with your own hands often arises and, if necessary, drill non-standard holes.
To make your own jig for dowels or a jig for confirmations that is simpler in design, you can use drawings and videos on the Internet.
When manufacturing a jig, you will need perfectly accurate drilling of guide holes and hardening of the finished device
To manufacture such a device, naturally, you will need a drawing of it. You also need a minimum set of tools and equipment:
- electric or hand drill;
- a set of locksmith tools;
- Bulgarian;
- welding machine (for the manufacture of jig devices of a more complex design).
The simplest homemade conductor can be made from available tools and materials that are available in abundance in most home workshops or garages. The use of such materials, which include pieces of metal reinforcement, wooden blocks, metal plates, etc., allows you to significantly save on the purchase of a serial model of the device.
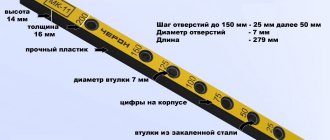
Drawing of a homemade conductor for drilling holes for confirmations
Making a homemade jig for a drill or single-spindle machine takes place in several stages.
- Square reinforcement with a cross section of 10 by 10 mm, using a hacksaw or grinder, must be cut into pieces of the required length.
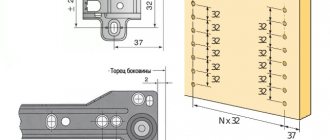
- The centers of the holes through which drilling will be performed should be at a distance of 8 mm from the edge of the conductor plate. It is at this distance that the center of the chipboard or MDF board in which the hole is drilled is located.
- The pitch between the holes on the jig, in accordance with generally accepted furniture standards, is 32 mm, while the diameter of such holes should be 5 mm.
- If you equip a homemade conductor with a stop, then using such a device will be much more convenient. To create such a stop, you need a metal plate 1 mm thick and 25 mm wide, which is bent at a right angle and fixed to a ready-made jig device made from reinforcement.
- After the structural elements of a homemade conductor are fixed with a clamp, they must be securely connected to each other using threaded fasteners.
Ready-made jig with rotary stops
To minimize the amount of dust generated when using a homemade conductor, its design can be supplemented with half a plastic bottle. Such a simple device can also act as a tray in which the chips generated during the drilling process will be collected.
The method described above allows you to make a simple homemade jig, which greatly facilitates and speeds up the process of assembling any furniture structure.
The main fastening element in furniture assembly is the confirmat. It is screwed in with pre-drilled holes. It is the drilling of assembly holes in chipboard for confirmations that we will consider in this article.
Making a tap for wood carving with your own hands
To cut carvings in wood, you may need a wood tap; this tool will most likely not be cheap, and it can be quite difficult to find. But don’t be upset, because such a part is quite easy to make yourself. To do this you will need:
- angle grinding machine;
- sharpening machine;
- drill;
- Next, you need to select a bolt or screw that will have the required thread.
When using a bolt, first cut off the hex head, then use a sharpening machine to make a small part for entry, this is done by rotating it by hand or by securing the end in a drill. Next, you will need to grind out 3-4 grooves and clean the threads from any debris that got into it during grinding; this can be done with a nut.
Secure the tap in the chuck and, while the drill is running, make sure that it rotates smoothly along the axis. I did not notice any unevenness left on the chuck from the threads. But if you want to avoid possible damage, grind off the threads at the clamping point.
wood carving tap
Advantages and disadvantages
Like any other fastening element, the dowel has a number of positive aspects, as well as disadvantages.
Advantages:
- The spike provides reliable grip and prevents the crown from sagging;
- Provides long-term reliability under bending loads, which nails and bolts cannot boast of;
- Promotes uniform shrinkage of the house. The fastening element moves freely along a vertical plane, preventing horizontal deformations;
- The wooden product is not subject to the formation of moisture and corrosion, excluding the process of rotting;
- Extremely cheap. Even buying ready-made dowels won’t put a big dent in your pocket, allowing you to minimize your budget.
But there are also disadvantages:
- Difficult to install. Absolute vertical position, ideal selection of diameter, implies the presence of decent construction skills;
- Serious quality requirements. The presence of knots or heterogeneity of the material can lead to disastrous consequences;
- Excessive force when driving often leads to cracks in the timber. After which it needs to be changed.
Adviсe
There are a number of fundamental rules and tips that need to be taken into account.
- To prevent the drill from moving sideways from the very first minutes of the drilling process, it is necessary to create a recess in the middle of the planned hole. This is done using an awl, although other sharpened objects will also work: a self-tapping screw, a nail, and the like.
- Reduce speed. Drilling wood must be carried out at low speeds with an electric drill.
- You can reduce or minimize the formation of chips on the bottom surface of the product when drilling through it by performing the work in one of the following ways:
- we create a hole of a through type and a small diameter, then drill along it to the center on both sides with cutting equipment of the required diameter;
- To the side where the drill is supposed to come out, use clamps to tightly press a flat backing made of wood or fiberboard, drill a hole, and remove the backing.
4. The verticality of the drill is ensured by the introduction of a guide for an electric drill; for workpieces that have a cylindrical shape, a special jig can be used, which ensures both centering of the drill and vertical drilling.
If the drilled hole is very large in diameter, you have the opportunity to return it using the following method: drill the hole to a larger diameter, then insert a wood chip (wood dowel) of a suitable diameter into it and place it on the adhesive composition. Allow the adhesive to harden and align the top edge of the chopstick flush with the plane using a chisel, then drill the hole again in the same place.
How to create a hole for confirmation, see below.
Tags
under the dowels follows wooden dowels wooden dowels subdivide furniture dowel dowels wooden dowels blanks furniture dowel dowels Buy similar dowels for dowels availability of wooden dowels. under dowels drilling holes in drilling holes under deep holes large making holes. drilling holes in drilling holes large area holes Next is the hole made. As a result, the hole is drilled. The diameter of the holes will accept a jig. No jig. Kind of jig templates. Multifunctional jig for a Multifunctional jig for a multifunctional jig for this jig. the jig is applied with pins. Then the jig is turned. How to drill a beam. Techniques for drilling holes. Drilling with feather drills for confirmation. for confirmations. better than confirmations hold. with confirmat you
