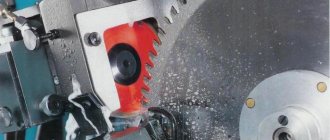
In the vocabulary of a Russian-speaking carpenter, “thicknesser” means 2 completely different tools. By manual or marking we mean a device for marking. The context of the machine extends to the complex electrical mechanism used to plan the thickness of the boards.
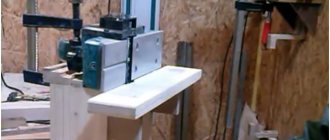
Thicknesser for parallel planing of wood blanks Source industriation.ru
Purpose of a surface planer
In order to understand the importance of having a surface planer in the workshop, just look at any piece of carpentry: a table, a chair, a wardrobe, a bed... They all consist of boards or bars that have the same thickness along their entire length and edges that are strictly parallel to each other. The parallelism of the edges and constant thickness give the product a perfect look that pleases the eye, demonstrating the accuracy and skill of the craftsman. This kind of work cannot be done without a thickness planer.
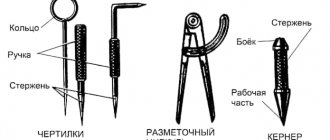
- A thicknesser is a tool used to draw lines on a part at a given distance.
- Also in everyday life, a thicknesser is a woodworking equipment designed for planing workpieces to size according to a given thickness.
If in a conversation there is a fear that the interlocutor will not understand which type of thicknesser we are talking about, then the tool for applying markings is called a marking thicknesser, and woodworking equipment is called a thicknesser.
The word "reismus" came into Russian from South German. In modern German, this instrument is called “streichmas”, that is, a device for applying strokes. German carpenters also use the word “raismas”. In Russian, the “half-German” pronunciation of the name of the instrument is often found: “reismas”.
Safe to use equipment
When performing any homemade woodworking machine, you need to take care of the safety of working on the equipment. If possible, the cutter should be covered with protective devices, and working on a machine where the working cutting element does not have any protection is prohibited. Most home-made planer manufacturing schemes have high-quality protection for the electric planer, which eliminates injuries when working with such equipment.
- When working with homemade tools, you must use safety glasses and work gloves. In particular, the latter will be required when working with coarse, dense workpieces, when beating of a homemade surface planer from an electric planer is observed when processing the material.
- The studs used must not have cracks, defects or damage. If cracks or damage are found, the defective parts of the machine should be replaced.
If you follow the simplest safety measures, working with a thickness planer will not present any difficulty, and the machine itself will last for many years. Using homemade machines, it will be possible to perform high-quality wood processing, saving on the purchase of industrial milling cutters.
Manual carpentry thicknesser
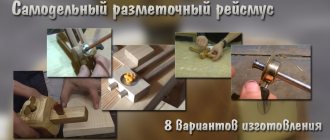
The simplest marking thicknesser is a board with a ledge (bracket) into which a scriber is inserted. A scriber can be, for example, a nail driven in so that its sharp end sticks out and allows you to draw a line.
The thicknesser works very simply: the carpenter guides the bracket along a flat surface with the ledge, and draws a marking line with the sharp end. Naturally, with such a tool it is possible to apply markings only at one, unchangeable distance from the ledge. In order to be able to draw a line at different distances from the ledge, the surface planer is made up of two parts; marking strip and base, which can move relative to each other. Also, such a tool requires a mechanism for fixing its parts after setting the required distance. This mechanism can be a hardwood wedge or a screw. To make it easier to mark the markings, you can stick a ruler with divisions on the staff.
There are many varieties of marking strips, differing both in the material for which they are intended and in the ability to apply more complex markings than one straight line. For example, tenon and groove marking gauges allow you to quickly and accurately mark joinery joints on multiple parts.
Types of height gauges
This measuring instrument is classified according to several main characteristics:
- Depending on the method of taking the reading, there are the following types of height gauges - manual with linear and circular reading (dial), as well as digital.
- According to the maximum length of the part being measured. The maximum length is indicated in the designation. So ShR-250 is a manual height gauge with a maximum length of 250 mm. Next come ShR-400, ShR-630, etc. up to ShR-2500
- By accuracy class. The first class is 0.05 mm, the second is 0.1 mm.
- By discrete step (for digital devices) – from 0.03 to 0.09 mm.
With the standard designation of the height gauge, all the main characteristics are indicated. For example, a hand-held measuring device with a maximum measurement length of 250 mm and an accuracy of 0.05 mm. designated as height gauge ShR-250-0.05 GOST 164-90.
Stangen gauge included
Bench thicknesser
In plumbing work, a special type of surface planer is used. A bench planner is a vertical stand on a horizontal platform, to which an inclined scriber is attached. By moving the scriber along the vertical stand and sliding it out or in, you can get any distance from the base side of the platform. The selected position is fixed with screws and the tool traces a template or base plane so that the scribe leaves marks on the workpiece.
Also in plumbing, a height gauge is used, which is an analogue of a caliper with a base scale mounted on a stand. With this tool you can measure heights and draw marks at a given height.
Design and application of height gauge
This measuring tool is widely used for marking workpieces and parts in mechanical engineering, in the production of metal structures, in metalworking, repair and assembly operations. Another area of application for height gauges is the precise determination of the height of parts placed on a marking plate.
According to the figure below, the device of the gage is in many ways similar to a caliper. Main components of the tool:
- Solid cast iron base.
- Marking leg or reading prism (depending on the purpose of the height gauge).
- Main scale frame.
- Vernier.
- Micrometric feed screw pair.
- Barbell with measuring ruler.
- Micrometric feed frame.
- Micrometric feed frame clamp.
- Main frame lock.
Thicknesser
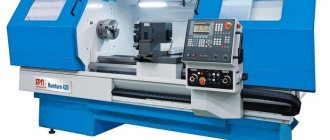
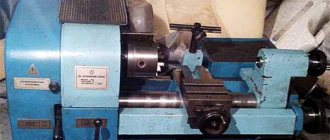
A thicknesser allows you to obtain a board with a given thickness. The workpiece in it is pressed tightly against the table by rotating rollers and pulled through the workspace. One or more knives rotate in the working space of the thicknesser, which ensures the removal of chips. Due to the fact that the workpiece is tightly pressed into the table with its lower surface, the thickness of the board after processing is constant. At the same time, the machine must have a mechanism for adjusting the height of the knives above the table.
It is important to understand that a thickness planer is not a replacement for a jointer or jointer. The board, which has a bend before being fed into the thicknesser, will be pressed by the rollers as it passes through the machine and will bend back as soon as it is released from the pressure. Before thicknessing, at least one face of the board or block must be smooth and flat. You need to start processing on a surface planer by placing the workpiece flat (faceted) side down.
The most important characteristics of a thickness planer:
- Engine power. The ability of the machine to process hard wood directly depends on the power. In addition, a weak motor can cause uneven finishing even on softwood boards.
- Maximum planing width. The larger it is, the better, of course, but you need to remember about power - processing a wide board puts a lot of stress on the engine. A machine with a large planing width must have a larger engine.
- Maximum workpiece height. The choice of this parameter must be made based on what the machine is intended to be used for.
- Maximum planing depth per pass. Affects work productivity. The lower this indicator, the greater the number of passes required on average, which means it will take longer to process.
- Number of knives and their location. There are thicknessing machines that allow you to process two opposite faces or even all four sides of the workpiece at once. Of course, such equipment is more expensive, more difficult to set up and set up, and more demanding both in terms of engine power and the weight of the machine itself.
What it is?
The cutting element of any wood planing machine is a knife shaft with 2, 3 or 4 knives. Its design is the same for any machine, jointer or surface planer. This made it possible to combine both functions in one unit, which is called a planer-thicknesser machine.
It works in two directions - from above it is a regular planer, but if you feed the workpiece from the opposite side under the work table, the unit works like a surface thicknesser. This design is compact and fully provides both functions. First, one plane (or edge) is processed, then it is fed from the opposite side with the processed surface down.
The broaching mechanism grabs the workpiece and passes it under the knife shaft, which removes chips to a given thickness. The ability to use one universal unit instead of two machines makes it possible to fully work in confined spaces. the quality of the surfaces meets all technical requirements corresponding to the class of the machine.
What to look for when choosing a thickness planer?
During operation, the thickness planer is subjected to significant loads. This can lead to its vibration and, as a consequence, to failure of settings and wear of all mechanisms. Due to wear, the accuracy of the thickness planer settings can be greatly reduced. As a result, several boards trimmed to the same size will actually end up being of different thicknesses. This will be especially noticeable if boards or bars calibrated with a thicknesser are intended for gluing furniture panels.
An industrial thickness planer, used in carpentry shops, is a heavy device with a solid frame that reduces vibration. The mechanisms for raising/lowering knives in it are usually designed with a large margin of safety. All this leads to the fact that reliable industrial thicknessing machines weigh hundreds of kilograms or more. Such a unit is not easy or even impossible to install in a home workshop or in a country house.
Household thicknessing machines are made on a stand made of metal profiles. Cheap models may use low-quality bearings and simplified knife lift designs. As a result, the thicknessing process can turn into “dancing with tambourines,” and the quality of the resulting blanks will very much depend on the ingenuity of the craftsman. Therefore, when choosing a thickness planer for a home workshop, it is very important to study user reviews that can be found on the Internet or from friends. In these reviews, you should pay attention to how the equipment behaves after a long period of use. It will also be useful to study user experience in refining specific machine models.
However, for someone who enjoys carpentry, a thickness planer is one of the most important pieces of workshop equipment. With its help, the work of making carpentry will become much more enjoyable and efficient.
Design
The device of a planer-thicknesser machine is a frame or frame on which the hubs of the knife shaft are rigidly mounted. A movable work table with a mechanism for drawing the workpiece is installed under it. It is able to rise or fall to ensure the thickness of the part. When feeding a workpiece, the broaching mechanism picks it up and moves it under the knife shaft, which removes a layer of chips from the upper plane. Usually it is allowed to remove no more than 2-3 mm in one pass. Large professional machines sometimes have a tolerance of 5 mm.
A second table for jointing is installed along the upper generatrix of the knife shaft. The workpiece is fed in the opposite direction, towards the movement of the shaft. The back of the table is stationary, but the front can move up or down. This allows you to change the thickness of the removed layer. This feature is convenient when processing curved or screwed boards - the table is lowered to the maximum and the bottom surface is quickly brought to a flat plane. When it is necessary to remove a thin layer, the table is raised up and the chips are made to a minimum thickness.
The knives are replaced with the lower table completely lowered. The shaft is fixed in a stationary state, the clamping cone stops are loosened and the knife is removed. After sharpening, it is installed again, adjusting the position so that the cutting edge in a vertical position is exactly in the plane of the rear (fixed) table.
