Home / Welding technique
Back
Reading time: 3 min
0
1996
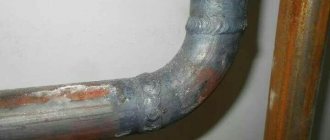
One type of welding work is pipe welding. In his career, perhaps every welder has encountered this. Pipe welding has its own dangers and difficult aspects of work.
Novice specialists, aware of the complexity of pipe welding, refuse to work with such parts. There are few specialists with serious experience in this matter.
However, if you study this type of welding, it becomes clear that it is not difficult to perform. It is important to weld the root of the seam correctly. Transmission welding will help with this.
- Introduction
- Stages of work when welding through transmission
- Selection of RDS
- Pipe welding stage
- Errors in welded pipe processing
- Conclusion
Introduction
This article talks about what transmission welding is, how to properly join pipe elements, what equipment settings are needed, and how to reliably fill a seam.
By studying the data provided, you can understand how transmission welding of pipes occurs and how to achieve seam quality with this type of welding.
By welding “through” or “through” the root of the seam, the welder welds pipes with a gap between the parts. This gap must be through, that is, have a gap.
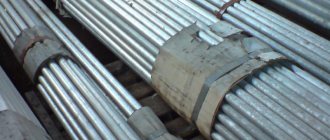
This technology is suitable for pipes up to twelve millimeters in diameter. However, in rare cases, large-sized pipes are also processed. Parts that are ready for processing are called “coil”.
The term "through" is also used for connecting pipes subject to radiographic inspection. During this test, rays are directed at the metal, which “transparent” it.
Welding pipes using manual arc welding
Before starting the process itself, it is necessary to prepare the parts and materials used.
- This option involves the use of pipes with a diameter from 159 to 219. At the same time, the wall thickness is only 8 millimeters.
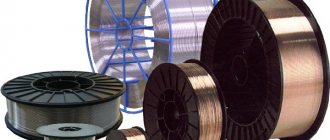
- Reinforcement can be used as additional materials. As a last resort - wire.
- Welding machine.
- Electrodes.
Stages of work when welding through transmission
Preparation for machining the part plays an important role in creating a reliable connection. This type of welding is no exception.
However, if a novice welder is performing transmission welding, a couple of training passes should be carried out. To do this, unnecessary parts are taken that can be damaged. Medium-sized pipes with walls 5-10 mm are suitable.
The preparatory stage always begins with cleaning the surface of the part. Whether it is welded for training or for subsequent use, the seam area must be cleaned of dirt, traces of paint, and rust.
Using a suitable tool (sandpaper, files, grinder, metal brushes), irregularities and burrs are removed.
At the end of preparation, the surface of the part should have a characteristic metallic sheen. After cleaning, the metal is degreased. For this purpose, you cannot use highly flammable substances (gasoline, kerosene and their derivatives).
After preparation, the parts are joined. Their weight can be high. And it is difficult to make an exact connection. Therefore, at this stage additional mechanisms (centralizers) are used. There are budget, small-sized models.
They are easy to install and use in everyday life. A small distance is left between the parts. It should not exceed the dimensions of the filler rod. On the contrary, the diameter of the rod should be slightly larger than the gap left.
The recommended distance between parts is 2.5 mm.
Having finished preparing the pipes, you need to move on to preparing the filler rods. Leaving a gap of two and a half millimeters between the pipes, the rod is taken with a size of 2.6 mm.
Electrodes of this diameter are produced by different manufacturers, among them Kobelco model LB52U.
If the rods have been stored for a long time without use, they need to be dried before use. To do this, they are placed in the oven for one and a half to two hours. The drying temperature should not exceed 380°C. Drying is carried out before the welding process.
If it is not possible to calcinate the electrodes, you need to ensure they are dry during storage. To do this, they need to be placed in a pencil case for rods. You can make such a pencil case yourself or purchase it.
The coating of the electrodes absorbs moisture from the environment well, so maintaining dryness is an important point. A wet coating may be damaged during welding, which will impair performance.
Selection of RDS
Setting the welding mode is the basis for high-quality joining of parts. Transmission welding is no exception. There are different types of welding joints suitable for different types of welding work.
When processing pipes, when choosing a welding mode, the thickness of the pipe wall and the filler rods used are important. The current strength is selected for each type of part separately. Experience or advice from a colleague will help with this.
Regarding other points of the welding regime:
- A short welding arc length is used.
- The welding speed is set to average. An increased speed is fraught with skips, a reduced one – with burns in the seam fabric.
- The polarity is set to negative.
- Type of current – constant.
The power of the arc voltage plays an important role in the welding mode. However, it and several other indicators are selected in accordance with a specific part. Many characteristics of welding work depend on the preferences of the craftsman.
The key point in transmission welding is the correct technological window. It is a depression formed during the melting of the edges of the pipe joint.
You need to carefully monitor it, since with its help you can notice in time that the quality of the seam is compromised.
Flash welding a root weld requires a lot of practice. The selection of the correct welding mode occurs experimentally, which means that the more pipe welding is carried out, the easier it will be to determine the settings for a specific part.
At the stage when there is no experience yet, you can ask recommendations from older generation masters.
Start setting up the welding machine
After hardening the electrodes, it is necessary to adjust the current strength for operation. It depends on the size of the walls of the pipes being welded. In this case, it is necessary to select the current strength so that the electrodes are not filled with slag or metal when working at the top.
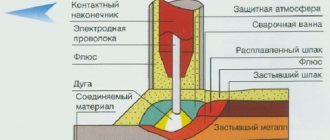
Basic settings of a semi-automatic welding machine.
In this case, it is worth paying attention to the fact that in the event of a change in polarity (when the electrode becomes “+” and the pipe “-”), the molten metal will flow in the direction of the welding object. It is important to note that this process only exists when welding with direct current. Next, the electrode is ignited and the edges are melted (this process is usually called cutting), as a result of which jumpers appear between them. Then you need to form a short arc and lightly touch the chamfers. In this case, the touches must be the same for both sides. During the welding process, metal molecules from the electrode move towards the object, and then, “hanging” over the jumpers, form an internal bead. In the future, you should move forward without moving the electrodes towards you, i.e. without increasing the gaps. In this case, the electrode should be perpendicular to the surface of the object and slightly inclined relative to the axis of the object.
If the electrode is incorrectly selected, it is possible that the object will not have time to cool down and the weld seam will sag from welding, forming a sag. If a mistake is made and the electrode is pulled away from the pipe, the metal may fail. Therefore, it is necessary to constantly monitor the technological window. It is the presence of this hole that indicates the correctness of the process and the presence of penetration. In this case, the hole (technological window) should have a relatively stable small size, about 3 mm. If the window has a larger diameter, this will lead to the formation of sagging.
After welding the root, the surface is cleaned.
Pipe welding stage
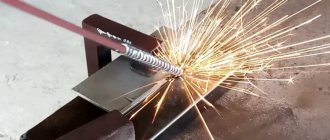
After the surface preparation has been carried out and the welding force has been selected, the transmission welding process can begin. At the beginning of creating a joint, several tack points are formed.
These elements will protect the root of the seam from deformation during operation. The number of tacks is created depending on the diameter of the pipes. Larger diameters require more tacks.
The number of points should be enough to hold the parts together. This fastening must be reliable, so you need to weld the potholders in the same way as welding the seam.
After all points are created, the joint is cleaned. This is done to identify root defects. At this stage, they can still be removed and remade. If the root has defects during subsequent processing, the part will be damaged.
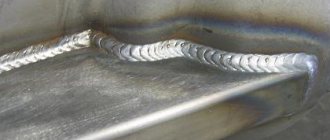
After creating a reliable seam, uniform filling of the joint begins. When welding a pipe through the gap, this is a simple step.
During normal stripping, the root is melted at a level of thirty percent. A good degree of stripping will reduce root melting.
If during welding it is necessary to change the filler rod, then you need to continue working slightly below the stopping point. This will give the connection accuracy and protect against defects.
Welding steel pipes “through transmission” - step-by-step instructions
Pipes with thick walls, in which 2 mm is only the amount of dullness, are welded “through the light”.
Preparation and cutting of edges
The abrasive method is the least reliable due to the introduction of abrasive particles into the metal, which interferes with high-quality melting and leads to the appearance of cracks.
- Use a double-sided Y-shaped symmetrical groove with an angle of 65 degrees, an optimal amount of bluntness and a gap of 2 mm.
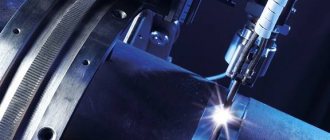
- When preparing bevel edges, use thermal or mechanical methods. Due to the high cost of thermal cutting (laser, plasma), various types of mechanical processing are used in practice, which make it possible to obtain a plane with high accuracy:
- processing on a milling machine;
- manual bevel processing;
- cutting using abrasive wheels;
- processing with slotting-type edge cutters.
- Clean the joints of the welded products to white metal. There should be no irregularities, burrs or rust left.
- Treat surfaces with acetone or any similar substance. The presence of grease, dirt, and dust prevents the high-quality connection of metal molecules.
Centering and joining of pipes
- Centering and joining of small-diameter products is carried out by fixing them using improvised means or using assistants.
- Center large pipes (from 60 mm) with special equipment - a centralizer: internal or external. Both have an electro-hydraulic drive. Internal ones are more preferable due to the fact that when they are used, the joint remains uncovered. This allows the use of automatic welding machines, and also does not limit manipulations during manual connection.
- Do not allow deviations when using the manual alignment method. It is impossible to dock perfectly without a centralizer, but try to minimize the deviation.
- Having connected the pipes exactly, proceed to welding the root seam.
Root welding
- Cook the seam under the following conditions:
- minimum current;
- reverse polarity;
- short electric arc;
- dry electrodes;
- lack of wind in the pipe.
- Cook vertically, the electrode is perpendicular to the plane.
- Use an electrode to melt the edges - a bridge will appear between them, which is called a weld pool. In front of the jumper there is a so-called technological window.
- Carefully monitor the size of the technological window: throughout the entire process it should remain the same diameter.
- Make a root seam no more than 1 mm high. The return roller should also not exceed this value.>
- Clean the beginning and end of the seam and the transition area between the electrodes to avoid the formation of pores in the metal, the presence of which will sooner or later lead to loss of the pipe’s tightness.
Filling and capping of the weld
- After welding the root, fill the entire seam section.
- Depending on the wall thickness and material, use a single-layer or multi-layer penetration method.
- The movement of the electrode during filling is a triangle: edge 1 - edge 2 - technological window.
- Pay attention to the heating of the edges and root seam. The greater the heating, the wider the filling step.
- After each layer, clean the surface of slag.
- If you have the skill, and if the wall diameter allows, fill and cover in one pass.
Video lesson on welding pipes under clearance
Errors in welded pipe processing
Since in practice, penetration welding of pipes is a difficult job, novice welders often reject parts. It is impossible to get rid of it without practice and personal experience.
An analysis of the theory of welding and standards for transmission welding can speed up learning.
The following will describe errors in pipe clearing and ways to prevent them.
The first problem is the uncooked areas. They appear when the welding speed is exceeded and the welder is not experienced enough. Lack of practice plays a key role in transmission welding.
And it is the accumulation of experience that will prevent the occurrence of incomplete welding in the future.
Often the part is spoiled by the presence of sagging areas created by sloppy seams. This is the result of non-compliance with the technological process and transmission welding mode.
Experience and intuition are important in penetration welding, but studying the technical documentation for the task will greatly facilitate the work.
A couple more tips to prevent common mistakes:
- Despite the complexity, welding is performed with a short welding arc length. Even if you want to make the task easier, you cannot change the length of the arc. Welding already at a medium value will deteriorate the quality of the connection.
- During the welding process, the rod does not come off. The filler rod is torn off only when it is necessary to update it.
- From part to part you need to monitor the current settings.
- The preparatory stage should not be ignored. Proper stripping and trimming of edges makes the job easier.
- The work is carried out only with dry filler rods.
- You should not carry out the welding process in the light during bad weather.
- The quality of equipment and additional elements also plays a role in the reliability of the result.
RAD WELDING PIPES AND HOW TO WALK WITH THE NOZZLE (WALKING THE CUP)
Foreign experience Published by: Anton Churakov
# RAD how to TIG GTAW nozzle moving the nozzle manipulating the torch walking the cup
Having observed from my foreign colleagues how deftly they manipulate an argon arc torch, I decided to find a detailed description of how this is done. But, unfortunately, I did not find anything like this on Russian-language resources, as well as in textbooks and manuals. I decided to look through foreign sites. The result of my searches is in the translated article below, my comments are given in square brackets. Also at the end is a selection of links to videos for clarity.
Header photo: @shutupandweld
Nozzle walking is a welding technique that is actually exclusive to RAD pipe welding! [In the original Walking the cup, no Russian equivalent of the phrase was found, at first I decided to leave all the terms in the original, but later I decided to translate it taking into account the context. “Walking with a nozzle” seemed the most acceptable translation]
This technique is the industry standard for manual TIG pipe welding. Many companies that hire argon welders will not even consider candidates unless they weld pipe using the nozzle walking technique. My personal experience is that in every interview I have had for TIG pipe welding, the question was whether I knew how to walk the nozzle.
There are three ways to walk with a nozzle:
- Ratchet [orig. Ratcheting the Cup, can be translated as “loosening the nozzle”]
- Nozzle wobble [orig. Wobbling the Cup]
- Nozzle sliding [orig. Sliding the Cup]
- Increase your driving speed
- Reduce the current
- Do not spread the root far to the edges
- Increase the burner angle RAD
- Filler wire is too large in diameter
- Insufficient shielding gas supply
- Increase the filler wire angle
Ratchet
The first is the ratcheting technique, performed in the same way as tightening a bolt with a ratchet wrench. The ratchet is typically used wherever there is a flat surface to rest the nozzle of the argon arc torch.
This can be done by placing the nozzle on the pipe, turning the handle in the same way as a ratchet on a bolt. The forward movement is created by a slight twitch of the wrist at the end of each swing of the ratchet.
This is the most difficult nozzle walking technique, but also the best of all when it comes to weld quality. Explained by the arc length being extremely close to the pool, remaining constant during welding.
Nozzle wobble
The second way to walk with a nozzle is to wobble the nozzle from side to side, similar to moving a heavy barrel that stands vertically.
This method is usually used with a large nozzle size and is best performed on a flat surface or directly on the weld. This method is much simpler than a ratchet, but not as accurate! This is all because the arc length is constantly changing as the nozzle oscillates.
This method is still better than free hand welding and I still use it in tight spots where I need to weld left hand with a mirror. Nozzle wiggle is a good start to learning other types of nozzle walking. Once wobbling the nozzle has been mastered, you can move up to the next level by mastering the ratchet. This is where you learn how to perfect your TIG pipe welding.
Nozzle sliding
Nozzle gliding - no more and no less! The nozzle slides and you literally push it to guide the electrode where it needs to be. Nozzle sliding is used in a place where the surface is too unfavorable for walking with the nozzle.
Nozzle sliding is most often used in cutting thick-walled pipes. You have a large edge groove and a nozzle size that fits between the edges. Simply set the desired electrode extension and begin sliding the nozzle from side to side and forward to capture the welding wire with the arc.
The sliding nozzle is also used for root welding and hot pass welding on thick wall pipes. This technique is never mentioned in welding books, but is usually learned on the jobsite.
The nozzle slide is also used when the joint is almost filled and is ready for a cap joint. In this case, the surface of the nozzle rests on a base that is not flat enough for the nozzle to walk and the groove is not deep enough for the nozzle to slide. Compromise, that's what you need! You do your best to fill the gap. Most of the movement is spent sliding the nozzle, and the other part is walking. It's a little tricky, but it will take a little time to get used to.
RAD welding of pipes with a gap
When it comes to TIG welding a gap pipe, edge preparation is more than half the battle! The edges, as well as the entire surface of the pipe, must be clean. The scale must be removed at least 1 inch [25.4 mm] from the inside and outside surfaces of the pipe. The bevel should have a rounded edge and the gap should be between 1/16 [1.6 mm] to 1/8 [3.2 mm] inch depending on the size of filler wire used.
For most college students, the gap can be set using wire bent into a V. Simply lay the wire on the edges of one spool and then place another spool on top of the first. Make sure that the pipes are aligned correctly. The main thing you need is a gap around the entire perimeter of the pipe that is small enough to allow the welding wire to be placed in the groove without it slipping into the pipe.
Pipe tack
The tack is applied by placing the welding wire in the groove and passing an arc through it. If you are using 1/8" [3.2 mm] wire, then set the gap with 1/8" [3.2 mm] wire. To grip the pipe, find a place where the welding wire will not slip into the gap. Next, just put on an oven mitt.
Once the first tack is in place, you need to remove the spacer [wire from the gap] fairly quickly. The tack will shrink and then you will install another tack on the opposite side of the pipe. After installing the first two tacks, pull out the spacer. Now check the gap around the entire perimeter of the pipe and make sure it is uniform. If not, make some adjustments. Ideally, tacks should be about ¾ inch [19 mm] long.
The technique used to tack pipes is similar to wobbling a torch. You place the welding wire in the groove and arc across it, making sure you melt both edges of the pipe. When you finish setting up the tack, extinguish the arc and do not remove the wire! Wait a moment for the tack to cool and then break off the wire. This is done to avoid creating a keyhole, which could later cause excessive root penetration when attempting to fuse the root and tack.
Once all the tacks are in place, you must remove the ends before applying the root. If the potholders aren't perfect, don't worry because you'll be re-melting them by applying the root. When you remelt them on the root pass, they will smooth out and be barely noticeable.
After setting each tack, make sure you cut off the end of the oxidized wire to avoid contamination.
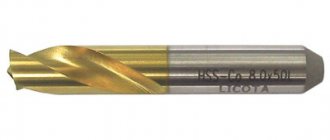
Contaminated wire can cause problems with seam welding and can make tack welding or welding difficult. When it comes to argon arc welding, the trick is to keep everything clean. This means that the joint, welding wire and tungsten electrode all need to be very clean. The photo below is a perfect example of a dirty electrode that needs to be resharpened!
Pipe root welding techniques
When it comes to the techniques used for root welding, there are two ways to do it. It depends on where you learned to cook. Welding in the southern states is different from welding in the northern states. In the northern states, they simply put the filler wire in the groove and run an arc through it. This is us - the Yankees!
In the southern states, mainly in the Gulf of Mexico, they use a smaller wire diameter than the joint gap. What they do is feed the wire from the opposite side of the pipe, resting it on the tack. The welding wire is literally fed from inside the pipe! This is not easy to do, but knowing how to do it can be very useful if your pipe is poorly assembled. For me personally, passing the torch along the rod is more preferable, it is much easier than feeding the filler rod from the inside!
The welding technique used will also depend on the thickness of the pipe. On thin-walled pipes you can either ratchet or wobble the nozzle. You will have a shallow cut so you can walk around with the nozzle. If it's a thick wall pipe, you'll want the nozzle to be small enough to fit between the edges and slide easily.
Before you start welding, you need to cut your welding wire at an angle to fit the pointed tack. Then place the wire on a pointed potholder and strike an arc in the middle of the potholder. Wait until the tack begins to melt and slowly move the nozzle towards the filler rod.
As you approach the wire, you need to keep the wire pressed against the root and slowly walk towards it. Move the torch slowly enough so that the welding wire becomes liquid and is sucked into the tack. At this moment, increase the speed of movement and continue to move the nozzle.
When walking with the nozzle, do not spread the root too much along the edges. If you do this, you will get a concave root surface or a sinkhole. Once the weld is ready to fuse with the next tack, begin to slow down the torch speed. Approach the tack slowly, pressing the filler rod against it.
Once the welding wire rests against the tack, begin pressing and lifting it at least 45 degrees or more as it fuses with the tack. If you don't raise the welding wire and make a sharp corner, you will most likely make a hole before properly fusing the wire to the tack.
Extinguishing the arc on the tack should be done by quickly increasing the speed of the torch and lengthening the arc. This is done to prevent the appearance of fish eyes. The finished root of the seam should be smooth on all sides. The fusions should be barely noticeable, and the root surface should be flat-convex. A flat surface doesn't really matter because you'll need to feed a little more wire on the hot pass.
Analysis of problems of RAD root welding
When it comes to root welding, there are some common problems, but they are all easily corrected. Tig welding is a very forgiving process! Here are some of the most common root welding problems and how to solve them:
Concave root surface or sinkhole
Welding technique for hot pass and fill layers
If we are talking about the welding technique of the hot pass and filling layers, then it is the same as for the root pass, but requires more heat input. For example, if you are welding a 2" 160 schedule [60.3x8.74 mm] pipe, then the root of the seam will require about 90 A, and the hot pass 125 A. On thick-walled pipes, the sliding nozzle technique is used. On thin-walled pipes, a nozzle walking technique is used. This is possible because the groove is small enough to allow the nozzle to follow the edges of the bevel.
The general rule for these passages remains up to 3/4 inch [19 mm] wide. After that, start making several passes. A hot pass is also necessary where root pushing is necessary to correct a flat or concave root surface.
On the hot and fill passes you want to spread the filler wire very well around the edges. Unlike the root pass, where you focused on feeding the filler wire into the groove, here the emphasis is on spreading the filler wire onto the edges.
The filling pass does get more difficult as you end up filling a thick walled pipe. This is one area that will require some compromise when it comes to the welding technique used. This compromise is typically half the nozzle sliding motion and the other half nozzle walking.
When choosing a nozzle size for thick-walled pipes, it is very common to use several nozzles depending on the thickness of the groove. In most cases, you start with a smaller nozzle and work your way up to larger nozzle sizes, depending on the fill of the cut. The idea is to use a nozzle large enough that it will slide through the cut without touching the seam. Once the weld is almost filled you go back to the smaller nozzle, at this point you can make a flat surface on the weld and begin the transition to walking the nozzle.
Pipe reinforcement welding technique
Gaining on a pipe is no different from walking with a nozzle on any other surface. Ideally, you should use the ratchet method, but if you have not yet mastered this technique, then just wiggle the nozzle. Seam reinforcement welding has some common problems that are easily solved.
The most common problem is seam undercut. Undercutting is usually prevented by cleaning the weld area before each pass with a grinding disc or file. What happens is that every pass of your weld creates a heat affected zone. What needs to be cleaned is the surface of the pipe that will be welded.
This area usually has a blue tint, which shows you the area of thermal influence. Simply remove the surface of the metal with a file or fine-grit sanding disc! This also applies to all welding restarts and thread rolls. After this, the seam should flow smoothly again. When it comes to TIG welding of pipes or other structures, the key to a good quality weld is cleanliness!
Source: www.gowelding.org
Material prepared by Anton Churakov
Below I have selected a video that clearly shows the technique of walking with a nozzle.
Nozzle walking technique for RAD welding:
RAD welding techniques - Walking nozzle vs Free hand and finger tip:
How to weld RAD using the wire laying technique:
RAD welding training can be carried out in the comfort of your home!:
When using this material, a link to the YASVARSHCHIK resource is required.