Homemade gate hinges: save 1000 rubles
Good hinges for metal gates are expensive. the price for one loop can reach about 1000 rubles. Of course, you want to save such an impressive amount for an ordinary piece of metal. Is it possible to do this? It turns out that it is possible!
This article will talk about how to make homemade gate hinges with your own hands . Go!
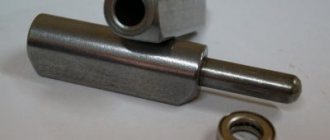
And it is proposed to make our miracle loops from ordinary scraps of metal pipes. It is necessary to take pipes of such a diameter that a smaller pipe fits inside the large pipe.
It is also necessary to weld the bottom of the outer pipe. To protect the internal mechanism from external influences. As a result, we have a high-quality analogue of the factory hinge. You can even weld the bottom of the inner tube to fit the bearing inside.
A high-quality hinge will last a particularly long time if it is well lubricated. Our homemade loop also requires timely lubrication . For this we used graphite lubricant. You can take any similar lubricant.
The final step in our work will be attaching metal plates to our pipe scraps so that we can comfortably attach our loops to the elements of the enclosing structure.
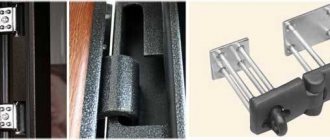
The final version of homemade loops is shown in the photo below. As you can see, these loops are not at all different from their store-bought counterparts, but cost mere pennies.
We hope that this article will be useful to you, dear readers! We wish you smart savings and efficient use of resources!
How to make hinges for a door with your own hands
Let's talk about how to make hinges for a door with your own hands. What are they good for? Firstly, they can withstand enormous loads and can be installed on both doors and garage doors. Secondly, they can be given any size, that is, they can be made both small and large. And thirdly, there is much more confidence in the reliability of self-made hinges than purchased ones.
What tool do we need?
- tape measure or ruler;
- marker (chalk);
- hacksaw with blade for metal (grinder);
- hammer;
- file;
- welding machine.
From materials:
- metal plate 2-3 mm thick;
- pipe section;
- steel rod (it must be selected based on the internal diameter of the pipe. It should not dangle. Ideally, a piece of rod should fit into the pipe with tension).
The first step is to cut off a piece of pipe. In general, it is planned to produce metal hinges for a door with a total length of 110 mm. Therefore, we mark 50 mm on the pipe and cut it off. The second segment should be 10 mm larger, that is, 60 mm in size.
We file the pipe sections outside and inside. This is done in order to remove burrs.
In the same way, mark a length of 110 mm on the rod, and then saw it off.
We hammer the rod into the pipe to get a picture like the one in the photo below. If you have a lathe, then everything is much simpler. You grind two parts of the sleeve from a single piece of blank, all that remains is to weld the plates.
Next you need to cut the plate. There is no point in showing the sawing process. Everything is clear here. The result should be 2 plates, 2 pieces of pipe and a piece of rod.
Let's move on to the welding part. If you are new to working with a welding inverter, then this information can be found at this link.
The end of the pipe from which the rod comes out should not be scalded, otherwise the second half of the canopy will cling to the welding seam.
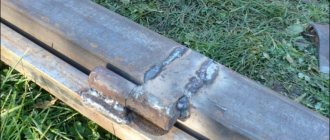
We grab the plates to the pipe, level them, and scald them.
We get ready-made door hinges. Don't pay attention to the hole, there was just a finished plate.
That's all. This is how you can make hinges for a door with your own hands. If they are painted or galvanized, they will look no worse than purchased ones, and in terms of functionality they will be in no way inferior.
14, total, today
Tips and tricks
Incorrect welding can lead to problems during further operation; to prevent this from happening, you should listen to the following recommendations:
- Before starting work, make and study a schematic drawing; if all the details are taken into account in advance, then the risk of redoing the finished structure will be much less;
- straight hinges are welded to the gate laid on a flat surface;
- You can open gates with newly welded hinges after the seams have completely cooled;
- on round posts the loop extends 5 mm outward, on rectangular posts it is welded flush;
- the welding seam should go from bottom to top.
Tools for work
Welding tools
It should be noted that even specialists, let alone inexperienced welders, cannot always perform this work correctly. They may encounter many difficulties. A beginner will read these lines and may give up. Well, is it possible to do it yourself? It turns out that it’s quite possible, even for people who have no experience. All you need to do is know how to cook at least a little and be attentive. Worth a try. To work you will need the following tools:
- hammer;
- tape measure or other measuring tool;
- level for leveling the door leaf;
- selected loops;
- mounting plates;
- electrodes;
- Bulgarian;
- welding machine;
- protective mask and gloves.
Types of loops
Cylindrical with bearing
To extend the service life of the gate and increase its reliability, such an important element of the door leaf as hinges must be selected with the following characteristics:
- easy to turn;
- operate silently;
- do not move voluntarily.
For this purpose, select appropriate hinges that can withstand the weight of a particular gate and provide all of the above qualities. Among the market offers, the main types of hinges are popular:
- Cylindrical, with bearing supports. These hinges are intended for light gate leaves (up to 400 kg).
- Cylindrical with amplifiers. They will hold weights up to 600 kg.
- Through. They are chosen when it is impossible to strengthen the gate with either welding or a screw; they will hold a small gate.
- Overhead, with three sections. Designed for large gate halves that have a large mass.
- Forged hinge option. More suitable for gates made of wooden materials.
- In the form of an arrow. These are hinges of a hinged or semi-hinged type. They are usually chosen for very massive gates.
- Adjustable. They allow you to change the height of the canvas, but the weight can be kept quite small, no more than 200 kg.
More modern and expensive ones include those equipped with a bearing. The bearing redistributes the load. Thanks to this, the gate structure lasts much longer. Moreover, such gates open completely silently.
Purpose of the product
Hinges, or awnings, are devices with which gates are opened. The mechanism consists of several elements. They rotate around their axis and ensure the operation of the gate. The principle of free rotation underlies all types of locking mechanisms. This quality makes them an indispensable part of the gate.
After installation
To choose the right gate awnings, you need to take into account the following:
It is better to purchase loops in a specialized store. Only large retail outlets have all the necessary documents: a quality certificate, a guarantee from the manufacturer and a hinge installation diagram. This does not always guarantee the quality of the product 100%, but if you are not satisfied with the product, it can be returned or exchanged. You should buy a mechanism taking into account the weight of the swing gates. Each type of canopy is designed for a specific load that it will withstand. It is advisable to choose with a margin of safety. For example, for a sash weighing 200 kg, take a device designed for 300 kg. Take into account the location of the house for safe operation of the gate. Some types of hidden swing mechanisms prevent the gate from opening completely. This is inconvenient when leaving the yard, since open doors interfere with street traffic.
You need to use gate canopies with the correct connection method
Hinges are welded onto metal sashes, and screwed onto wooden sashes with bolts or self-tapping screws. Therefore, it is important to know what material the sashes are made of. It is worth paying attention to the material from which the canopy is made. This affects the service life. Products made of plastic or thin metal will not last long on heavy sashes
Over time, they will begin to warp and jam. If you select such loops, then this must be taken into account.
Installation option
How to cook loops
Welding process
When working with a welding machine, it is extremely important to observe safety precautions. That’s why you need rubber gloves, as well as a mask to protect your eyes from damage. It is better to start cooking by laying the gate cloth on the surface of the ground. Welding steps include:
- The very first step is to take a lining 2-5 mm thick, then slip it under the bottom of the canopy.
- The upper part of the canopy can be lightly secured by welding at the end.
- Further, the technology differs depending on the shape of the pillar.
Operating procedure
- Install the door leaf vertically.
- Check using a plumb line.
- Place the hinges on the gate and check whether they are on the same line or not, even or not.
- The awnings are first welded towards the canvas, and then towards the pillars. It is necessary that the seam is even.
- At the end of welding, the seams are cleaned using a grinder.
Plates for welding parts
The importance of editing records
Quite often, to simplify the welder’s work and at the same time redistribute the load, metal plates are first attached to the hinges by welding.
Such plates depend on the mass and thickness of the metal gate leaf. The plates can also play a decorative role.
Hidden internal hinges
If there is a need to weld internal hinges to the sashes, it is easier to ask a professional to do it. Welding such hinges yourself is quite a labor-intensive task and requires an experienced welder. Therefore, it will not be possible to weld them with inexperienced hands.
Recommendations
To summarize, some recommendations should be given that will simplify the installation and further operation of canopies and swing structures using them.
- The first thing worth noting is that any hanging of opening structures on poles should be done only after the concrete has completely hardened, if they have been concreted.
- When choosing metal for canopies, you should use only high-strength alloys.
- For installed canopies, it is recommended to make one thin hole in each. Through these holes it will be possible to lubricate the hinges using an oil can, grease gun, or aerosol sprayer.
- It is recommended to attach the cylindrical part of the canopy to the gate, and the pin to the poles. This way the cylinder will be on top. This will allow rainwater, if it gets inside the hinges, not to accumulate.
- To prevent the sashes from being removed, you can weld a small piece of metal onto the post, in a place just above the top level of the gate part of the canopy.
- Installation of lock hinges, deadbolts, etc. It should be done only after the final installation of the gate on the supports.
- It is recommended to leave a small gap between the sashes, which will allow them to function freely.
- When installing the pole part of the hinge kit, current must not be allowed to pass through both halves of the canopy. This may cause welding contact to form inside the hinge.
- Some canopies have a ball in their design, the purpose of which is to provide better gliding. However, in rarely opened or heavy structures, this element may rust or collapse under load. Therefore, the use of such a kit should be thoughtful.
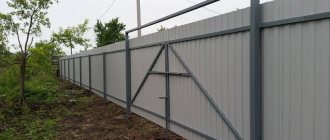
If the gate is made of corrugated sheets
Hinge for gates made of corrugated sheets
The sequence of welding operations looks like this:
- Make two jumpers, directing them parallel to the long sides of the sash. They are secured with special squares.
- The distance between the jumpers is set so that the sash is divided into three equal parts. Then it is necessary to weld loops to them.
- Corrugated sheeting is screwed on top of the canopies.
Be careful! You can properly strengthen the loops so that there are no negative consequences by adhering to basic rules. You cannot brew with faulty equipment. No welding should be done until the paint is dry. Do not weld in clothing that contains traces of oil, grease or gasoline. Do not hang rags soaked in flammable materials on cylinders.
