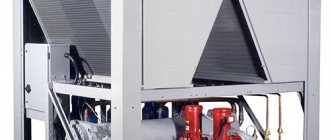
Laser cutting is the most advanced, but also expensive technology. But with its help you can achieve results that are beyond the power of other metal processing methods. The ability of laser beams to give any material the desired shape is truly limitless.
The unique capabilities of the laser are based on the following characteristics:
- Clear directionality - due to the ideal directionality of the laser beam, the energy is focused at the point of impact with a minimum of losses,
- Monochromaticity - the laser beam has a fixed wavelength and a constant frequency. This allows it to be focused with ordinary lenses,
- Coherence – laser beams have a high level of coherence, so their resonant vibrations increase the energy by several orders of magnitude,
- Power - the above properties of laser beams ensure that the energy of the highest density is focused on a minimal area of material. This allows you to destroy or burn through any material in a microscopically small area.
Design and principles of operation
Any laser device consists of the following components:
- energy source;
- working body that produces energy;
- an optical amplifier, a fiber-optic laser, a system of mirrors that amplify the radiation of the working element.
The laser beam produces precise heating and melting of the material, and after prolonged exposure, it evaporates. As a result, the seam comes out with an uneven edge, evaporating material is deposited on the optics, which reduces its service life.
To obtain smooth thin seams and remove vapors, the technique of blowing melt products from the laser impact zone with inert gases or compressed air is used.
Factory laser models equipped with high-grade materials can provide good indentation rates. But for household use they are too expensive.
Models made at home are capable of cutting into metal to a depth of 1-3 cm. This is enough to make, for example, parts for decorating gates or fences.
Laser cutting of metal
Depending on the technology used, there are 3 types of cutters:
- Solid state. Compact and easy to use. The active element is a semiconductor crystal. Low-power models have quite affordable prices.
- Fiber. Glass fiber is used as the radiation and pumping element. The advantages of fiber laser cutters are high efficiency (up to 40%), long service life and compactness. Since little heat is generated during operation, there is no need to install a cooling system. It is possible to produce modular designs that allow you to combine the power of several heads. The radiation is transmitted via flexible optical fiber. The performance of such models is higher than solid-state ones, but their cost is higher.
- Gas. These are inexpensive but powerful emitters based on the use of the chemical properties of gas (nitrogen, carbon dioxide, helium). With their help you can weld and cut glass, rubber, polymers and metals with a very high level of thermal conductivity.
Optics placement
To create a collimator, it is recommended to remove the optical lens from the Chinese laser pointer. In this case, the beam will have a diameter of at least 5 mm, which is too high. The stock collimator lens reduces the beam diameter to 1 mm, but you will have to work hard to tune such a laser. This is due to the small focal length, which makes it difficult to regulate the beam width.
If you do manage to set up the stock optics, the laser can easily cut through plastic bags and pop balloons in no time. When pointed at a wood surface, the beam will burn through it like a soldering iron. The main thing is not to forget about safety precautions when using.
It's no secret that each of us as a child wanted to have a device like a laser machine that could cut metal seals and burn through walls. In the modern world, this dream can easily come true, since it is now possible to build a laser with the ability to cut various materials.
Electrical circuit of the laser diode power supply.
Of course, at home it is impossible to make a laser machine so powerful that it will cut through iron or wood. But with a homemade device you can cut paper, polyethylene sealing or thin plastic.
Using a laser device, you can burn various patterns on sheets of plywood or wood. It can be used to illuminate objects located in remote areas. The scope of its application can be both entertaining and useful in construction and installation work, not to mention the realization of creative potential in the field of engraving on wood or plexiglass.
How to make a plywood floor correctly.
Review of plywood crafts: their pros and cons.
Homemade household laser
To carry out repair work and manufacture metal products at home, do-it-yourself laser cutting of metal is often required. Therefore, home craftsmen have mastered manufacturing and successfully use hand-held laser devices.
In terms of manufacturing cost, a solid-state laser is more suitable for household needs.
The power of a homemade device, of course, cannot even be compared with production devices, but it is quite suitable for use for domestic purposes.
How to assemble a laser using inexpensive parts and unnecessary items.
To make a simple device you will need:
- laser pointer;
- battery-powered flashlight;
- CD/DVD-RW writer (an old and faulty one will do);
- soldering iron, screwdrivers.
How to make a handheld laser engraver
Nutrition
Dependence of the absorbed energy of laser radiation on the radius of the beam and the type of connection.
Before creating a battery for the diode, it is necessary to take into account that it must be powered from 3V and consumes up to 200-400 mA, depending on the speed of the recording device. You should avoid connecting the crystal directly to batteries as this is not a simple lamp. It can deteriorate even under the influence of ordinary batteries. The laser diode is a self-contained element that is supplied with electricity through a regulating resistor.
The power supply system can be configured in three ways with varying degrees of complexity. Each of them requires recharge from a constant voltage source (batteries).
The first method involves electrical regulation using a resistor. The internal resistance of a device is measured by detecting the voltage as it passes through the diode. For drives with a 16X write speed, 200 mA will be sufficient. If this indicator increases, there is a possibility of damaging the crystal, so you should stick to the maximum value of 300 mA. It is recommended to use a telephone battery or AAA batteries as a power source.
The advantages of this power supply are simplicity and reliability. Among the disadvantages are the discomfort when regularly recharging the battery from the phone and the difficulty of placing batteries in the device. In addition, it is difficult to determine the right moment to recharge the power source.
Figure 4. LM-2621 chip.
If you use three AA batteries, this circuit can be easily installed in a Chinese-made laser pointer. The finished design is shown in Fig. 2, two 1 Ohm resistors in sequence and two capacitors.
For the second method, the LM-317 chip is used. This method of arranging a power system is much more complicated than the previous one; it is more suitable for stationary type laser installations. The scheme is based on the manufacture of a special driver, which is a small board. It is designed to limit the electric current and create the necessary power.
The connection circuit of the LM-317 microcircuit is shown in Fig. 3. It will require elements such as a 100 ohm variable resistor, 2 10 ohm resistors, a 1H4001 series diode and a 100 μF capacitor.
A driver based on this circuit maintains electrical power (7V) regardless of the power source and ambient temperature. Despite the complexity of the device, this circuit is considered the simplest for assembly at home.
The third method is the most portable, making it the most preferred of all. It provides power from two AAA batteries, maintaining a constant voltage level supplied to the laser diode. The system maintains power even when the battery level is low.
When the battery is completely discharged, the circuit will stop functioning, and a small voltage will pass through the diode, which will be characterized by a weak glow of the laser beam. This type of power supply is the most economical, its efficiency factor is 90%.
Diagram of a two-standard optical head.
To implement such a power system, you will need an LM-2621 microcircuit, which is housed in a 3x3 mm package. Therefore, you may encounter certain difficulties during the period of soldering parts. The final size of the board depends on your skills and dexterity, since the parts can be placed even on a 2x2 cm board. The finished board is shown in Fig. 4.
The choke can be taken from a regular power supply for a desktop computer. A wire with a cross-section of 0.5 mm is wound onto it with a number of turns of up to 15 turns, as shown in the figure. The throttle diameter from the inside will be 2.5 mm.
Any Schottky diode with a value of 3 A is suitable for the board. For example, 1N5821, SB360, SR360 and MBRS340T3. The power supplied to the diode is adjusted by a resistor. During the setup process, it is recommended to connect it to a 100 Ohm variable resistor. When testing functionality, it is best to use a worn or unwanted laser diode. The current power indicator remains the same as in the previous diagram.
Once you find the most suitable method, you can upgrade it if you have the necessary skills to do so. The laser diode must be placed on a miniature heatsink so that it does not overheat when the voltage increases. After completing the assembly of the power system, you need to take care of installing the optical glass.
Laser cutter manufacturing process
- You need to remove the red diode from the computer disk drive, which burns the disk when recording. Please note that the drive must be a write drive.
After dismantling the upper fasteners, remove the carriage with the laser. To do this, carefully remove the connectors and screws.
To remove the diode, you need to unsolder the diode mountings and remove it. This must be done extremely carefully. The diode is very sensitive and can be easily damaged by dropping it or shaking it sharply.
- The diode contained in it is removed from the laser pointer, and the red diode from the disk drive is inserted in its place. The pointer body is disassembled into two halves. The old diode is shaken out by picking it up with the tip of a knife. Instead, a red diode is placed and secured with glue.
- It is easier and more convenient to use a flashlight as a body for a laser cutter. The upper fragment of the pointer with a new diode is inserted into it. The glass of the flashlight, which is an obstacle to the directed laser beam, and parts of the pointer must be removed.
Laser pointer
When connecting the diode to battery power, it is important to strictly observe the polarity.
- At the last stage, they check how securely all the laser elements are fixed, the wires are connected correctly, the polarity is observed and the laser is level.
The laser cutter is ready. Due to its low power, it cannot be used when working with metal. But if you need a device that cuts paper, plastic, polyethylene and other similar materials, then this cutter is quite suitable.
Disassembling the DVD-RW drive
This process must be done with great care, since the internal parts are fragile and can be easily damaged. Having dismantled the case, you will immediately notice the necessary part; it looks like a small piece of glass located inside the mobile carriage. Its base needs to be removed; it is shown in Fig. 1. This element contains an optical lens and two diodes.
At this stage, you should immediately warn that the laser beam is extremely dangerous to human vision.
If it hits the lens directly, it damages the nerve endings and the person may remain blind.
The laser beam is blinding even at a distance of 100 m, so it is important to watch where you point it. Remember that you are responsible for the health of others while such a device is in your hands!
Figure 3. LM-317 chip.
Before you begin, you need to know that the laser diode can be damaged not only by careless handling, but also by voltage surges. This can happen in a matter of seconds, which is why diodes operate based on a constant source of electricity. When the voltage increases, the LED in the device exceeds its brightness standard, as a result of which the resonator is destroyed. Thus, the diode loses its ability to heat, it becomes an ordinary flashlight.
The crystal is also affected by the temperature around it; as it drops, the laser performance increases at a constant voltage. If it exceeds the standard norm, the resonator is destroyed according to a similar principle. Less commonly, the diode is damaged by sudden changes, which are caused by frequent switching on and off of the device over a short period.
After removing the crystal, you must immediately tie up its ends with exposed wires. This is necessary to create a connection between its voltage outputs. To these outputs you need to solder a small capacitor of 0.1 µF with negative polarity and 100 µF with positive polarity. After this procedure, you can remove the wound wires. This will help protect the laser diode from transients and static electricity.
How to increase laser power for metal cutting
You can make a more powerful laser for cutting metal with your own hands by equipping it with a driver assembled from several parts. The board provides the cutter with the required power.
The following parts and devices will be needed:
- CD/DVD-RW writer (an old or faulty one will do), with a writing speed of more than 16x;
- 3.6 volt batteries – 3 pcs.;
- 100 pF and 100 mF capacitors;
- resistance 2-5 Ohm;
- collimator (instead of a laser pointer);
- steel LED lamp;
- soldering iron and wires.
You cannot connect a current source to the diode directly, otherwise it will burn out. The diode draws power from current, not voltage.
Laser collimator
The beams are focused into a thin beam using a collimator. It is used instead of a laser pointer.
Sold at an electrical goods store. This part has a socket where the laser diode is mounted.
Nutrition
Dependence of the absorbed energy of laser radiation on the radius of the beam and the type of connection.
Before creating a battery for the diode, it is necessary to take into account that it must be powered from 3V and consumes up to 200-400 mA, depending on the speed of the recording device. You should avoid connecting the crystal directly to batteries as this is not a simple lamp. It can deteriorate even under the influence of ordinary batteries. The laser diode is a self-contained element that is supplied with electricity through a regulating resistor.
The power supply system can be configured in three ways with varying degrees of complexity. Each of them requires recharge from a constant voltage source (batteries).
The first method involves electrical regulation using a resistor. The internal resistance of a device is measured by detecting the voltage as it passes through the diode. For drives with a 16X write speed, 200 mA will be sufficient. If this indicator increases, there is a possibility of damaging the crystal, so you should stick to the maximum value of 300 mA. It is recommended to use a telephone battery or AAA batteries as a power source.
The advantages of this power supply are simplicity and reliability. Among the disadvantages are the discomfort when regularly recharging the battery from the phone and the difficulty of placing batteries in the device. In addition, it is difficult to determine the right moment to recharge the power source.
Figure 4. LM-2621 chip.
If you use three AA batteries, this circuit can be easily installed in a Chinese-made laser pointer. The finished design is shown in Fig. 2, two 1 Ohm resistors in sequence and two capacitors.
For the second method, the LM-317 chip is used. This method of arranging a power system is much more complicated than the previous one; it is more suitable for stationary type laser installations. The scheme is based on the manufacture of a special driver, which is a small board. It is designed to limit the electric current and create the necessary power.
Assembly Tips
To check the operation of the driver, use a multimeter to measure the current supplied to the diode. To do this, connect a non-working (or second) diode to the device. For most homemade devices, a current of 300-350 mA is sufficient.
If you need a more powerful laser, the indicator can be increased, but not more than 500 mA.
It is better to use an LED flashlight as a homemade housing. It is compact and convenient to use. To prevent the lenses from getting dirty, the device is stored in a special case.
Important! A laser cutter is a kind of weapon, so it should not be pointed at people, animals, or given to children. Carrying it in your pocket is not recommended.
It should be noted that do-it-yourself laser cutting of thick workpieces is impossible, but it can cope with everyday tasks.
Disassembling the DVD-RW drive
This process must be done with great care, since the internal parts are fragile and can be easily damaged. Having dismantled the case, you will immediately notice the necessary part; it looks like a small piece of glass located inside the mobile carriage. Its base needs to be removed; it is shown in Fig. 1. This element contains an optical lens and two diodes.
At this stage, you should immediately warn that the laser beam is extremely dangerous to human vision.
If it hits the lens directly, it damages the nerve endings and the person may remain blind.
The laser beam is blinding even at a distance of 100 m, so it is important to watch where you point it. Remember that you are responsible for the health of others while such a device is in your hands!
Optics placement
To create a collimator, it is recommended to remove the optical lens from the Chinese laser pointer. In this case, the beam will have a diameter of at least 5 mm, which is too high. The stock collimator lens reduces the beam diameter to 1 mm, but you will have to work hard to tune such a laser. This is due to the small focal length, which makes it difficult to regulate the beam width.
If you do manage to set up the stock optics, the laser can easily cut through plastic bags and pop balloons in no time. When pointed at a wood surface, the beam will burn through it like a soldering iron. The main thing is not to forget about safety precautions when using.
Laser cutting is the most advanced, but also expensive technology. But with its help you can achieve results that are beyond the power of other metal processing methods. The ability of laser beams to give any material the desired shape is truly limitless.