During the operation of systems containing pipelines, leaks often occur. Such malfunctions can occur as a result of careless handling, improper installation, or simply due to wear and tear of the material. Moreover, a leak can occur in pipes made of both metal and plastic-containing substances (plastic, metal-plastic, polypropylene, etc.)
The following troubleshooting methods are available:
- Mechanical
- Chemical
- Combined.
The first type is associated with the use of improvised means. Self-tapping screws, harnesses, clamps and more can act in this capacity.
With the chemical method, the malfunction is eliminated using adhesive and astringent chemicals, such as silicone or other sealant.
The latter method involves the use of mechanical means and chemicals.
Regardless of which method will be used, it is necessary to decide “whether it is necessary to shut off the entire water supply system, only a separate part of it, or whether shutting off is not required at all.”
In case of small diameter holes (up to 2-3 mm), shutting down the system is not necessary. If holes of a larger diameter appear, in order to avoid emergency situations, it is better to shut off the network above the leakage point (along the direction of movement of the liquid in the pipe).
Eliminating leaks at pipe junctions
To repair a heating or plumbing plastic structure, a minimum number of tools is required. Any property owner can study information on how to fix a plastic pipe leak at a joint and easily complete the job. The main thing is to choose the best option for troubleshooting and eliminate it in the shortest possible time.
The first thing that should be done when repairing a water supply system is to stop the water supply to the entire system or to a separate area where there is a leak. The flow should be shut off before the leak appears. If the system is multi-circuit, turn off the liquid supply to the circuit being repaired and close the diverter valve in a local section of the water supply structure.
Then they only begin restoration measures. Next, the optimal method in this situation is selected to eliminate the leak at the junction of polypropylene pipes. The main criteria in this case are the elimination of the accident in the minimum time and the elimination of the hole or crack formed with the highest quality possible.
Methods for eliminating leaks
As a rule, emergency services work slowly and do not always eliminate the consequences of an emergency. Therefore, it is important to know how to seal a leak in a plastic pipe or metal system.
The most common ways are:
- installation of a clamp;
- use of wedges;
- use of cement;
- use of special compounds;
- sealing with self-vulcanizing tape;
- using a bandage and regular salt;
- sealing with flax, FUM tape and other similar materials.
Clamps
Elimination of leaks in metal-plastic pipes, plastic or metal pipes on a flat surface of the main is mainly done using repair clamps.
A plumbing clamp is a metal piece (plate) with a rubberized base. The clamp is fixed with bolts.
Repair clamps
The clamp is installed without turning off the fluid supply, and in a matter of minutes. The work is performed according to the following scheme:
- The device is disassembled for ease of installation;
- The rubberized side of the clamp is placed over the crack;
- The device is fixed with bolts.
Technology for eliminating leaks with clamps
How to install a clamp on pipes without liquid supply, which allows you to achieve a higher level of tightness, watch the video.
If there are no ready-made clamps of suitable size, you can make the device yourself. To do this, you will need a piece of rubber (for example, rubberized fabric or a cut from a bicycle tire) and a metal wire (you can use other holding devices: belts, cords, etc., or small clamps without a rubber base).
To seal a leak with a homemade clamp, you need to:
- wrap the rubber tightly around the crack;
- secure the rubber with wire.
Making and installing a homemade clamp
The clamp can serve as a reliable barrier to liquid if the dimensions of the device are 3–5 cm larger than the dimensions of the crack formed on the surface.
Wedges
Leaks on the surface of metal pipes can be eliminated using a wooden wedge or a metal screw with a rubberized gasket or a press washer. This method is unacceptable for plastic and metal-plastic pipes.
Fixing a leak with a wooden wedge
The advantages of this method are:
- speed and ease of work;
- no need to purchase special products;
- cheapness.
The disadvantages include:
- damage to pipe coating;
- fragility;
- possibility of fistula enlargement if incorrectly installed.
Cement
Leaking pipe connections and a section of the smooth surface of the pipeline can be repaired using a regular medical bandage (any thin rag) and cement mortar.
The work is performed in the following order:
- a small amount of prepared cement mixture is applied to the fistula and leveled over the entire diameter;
- the hole (crack) is tightly covered with a bandage. Every 2–3 turns, the bandage is soaked in cement;
- the finished “bandage” is also soaked in the solution.
Bandage made of bandage and cement mixture
Cement dressings should only be used for minor leaks. Otherwise, the solution will not be able to harden completely.
Special formulations
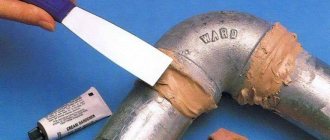
Various chemical mixtures are very popular among professional craftsmen, allowing them to quickly seal a leak at a joint or a flat section of a pipe. How to seal a leaking pipe? To seal pipelines the following are used:
- automotive sealants. If a leak needs to be repaired on a hot water supply or heating pipe, the sealant must withstand the highest possible temperature conditions;
- two-component epoxy resin, which is suitable for all types of pipes, including cast iron pipes;
- heat-resistant rubber compounds;
- mixtures for cold welding.
The special composition is selected in accordance with the type of pipeline and temperature conditions. The main parameters and method of use are indicated on the packaging or in the attached instructions.
Varieties of cold welding for various materials
Sealing tape
A leak in a pipe joint or a flat area can also be repaired using sealing tape. The main advantages of this method are:
- speed of work. Leak repair tapes are wound onto the damaged surface. No additional devices or mixtures are required for sealing;
- Can be used to troubleshoot problems on pressure pipes;
- versatility. Using tape you can seal leaks on all types of pipes.
Pipe Sealing Tape
Bandage and salt
What to do if special compounds, tapes and clamps are missing? If there is a small leak, you can use the old “old-fashioned method”, that is, use a medical bandage (gauze) and table salt, which can “tighten” the crack. Fixing a leak is carried out in the following sequence:
- At the initial stage, it is necessary to determine the leak in the pipe: the size of the crack, the location of the leak, and so on, as well as the material used to make the pipes. Salt can be used on accessible areas of metal pipes. This method is not suitable for other types of pipelines;
- a small amount of salt is applied to the leak site and a layer of bandage (gauze) is applied;
- Gradually, a bandage (gauze) is wrapped around the pipe, and each layer is sprinkled with salt. To eliminate a leak, you need to wrap at least 1.5 cm of bandage.
Fixing leaks with salt and a bandage
Within 2–3 days, the salt completely dissolves and ceases to retain liquid in the pipeline. Therefore, a saline bandage can only be used as a temporary measure.
Rules for choosing a material to solve a problem
When the cause of the pipe damage has been established, it is necessary to look for acceptable repair methods. There are several of them. Only most are suitable for low water pressure in the water supply circuit or heating system.
If you don’t have such a device at hand, then any piece of rubber (for example, from a bicycle inner tube) and wire or something similar will do.
But other methods of eliminating leaks when it comes to heating or hot water supply systems are unlikely to work. Thus, often used cold welding and special sealants are not relevant for wet surfaces.
Other instantly hardening composites (epoxy resin, dichloroethane) are also excluded, since they can be used on dry and disconnected water supply routes.
Minor leaks in the pipeline can be repaired on your own. But this will only be a temporary measure. At the end of the heating season, it is recommended to carry out major repairs so that the system no longer fails.
How to quickly fix a leak
Here are some methods for emergency pipeline repair. Each of them can eliminate the leak even if it is not possible to close the water supply to the system. This will allow you to save your home from flooding before specialists arrive.
If the water leak is caused by depressurization of the threaded connection of the pipeline with the distribution or shut-off valves, you can try to tighten it. There is no need to apply excessive force to avoid stripping the threads. If there is no positive effect, as soon as possible, reassemble this unit and replace the seals (tow, gaskets, FUM tape).
A leak in a straight section of pipe can be quickly eliminated using special metal clamps with a rubber seal. If there is no factory bandage at hand, then a homemade one is made. To make it, you can take, for example, an old bicycle tube or a boot top. A rectangle of suitable dimensions is cut out of rubber, which is tightly wrapped around the pipe and tightened with clamps or wire. It is important that at least one tie is located directly at the site of damage.
In addition to soft rubber, you can use mounting tape to make a bandage.
Despite its simplicity, repairing a leaking pipe cannot be carried out using this method if the water supply is located close to the wall.
It is quite possible to make reliable clamps of the required size yourself from a strip of sheet metal of suitable width by drilling holes for installing tie bolts along its edges.
You can also significantly slow down the flooding of your home until the water supply in the riser is cut off using wooden wedges. If the hole in the pipeline is small, just drive a regular toothpick into it. Such a wedge swells with water and is able to withstand pressure for some time until repair services arrive.
If the heating system pipes are slightly damaged, to temporarily stop the leak, try wiping the crack with a handful of salt. In the event of a significant pipeline leak, it will be more difficult. To urgently eliminate it, you can try to apply several turns of a bandage to the defective area, periodically sprinkling it with salt. In this way, it will only be possible to temporarily stop the leakage of water as long as it remains hot.
Preparation and necessary tools
Before repairing a pipe, the water supply must be shut off. Wipe off any escaped water and prepare the necessary materials and tools:
- “grinder” or hacksaw for metal;
- gas and pipe wrenches;
- coupling;
- putty or special tape.
This method involves replacing the damaged communication area with a new one, so you will need to buy a pipe with the same diameter as the old one.
How to take measurements to install a new site
Instructions for eliminating leaks
A more complex and reliable way to fix a leak is to replace the broken area. To do this, you must perform the following sequence of actions:
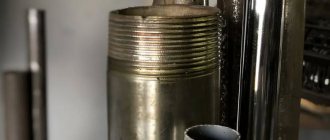
- Using a grinder, cut off the damaged section of the pipeline, taking into account a distance of 30 cm in both directions.
- Unscrew the threaded connection of the pipeline located adjacent to the leak.
- Using a gas wrench, hold the end of the cut pipe and cut the thread.
- Screw the coupling onto the machined end.
- Measure how long the new pipe should be, taking into account the threaded location.
- Thread the new pipe section at both ends.
- Apply putty to the threaded sections of the section to seal them.
- Connect the new section of the coupling, holding it with a pipe wrench.
Pipe replacement
Thus, there are several simple and quick ways to fix a leak. However, we note that all of the above methods will only help temporarily eliminate the problem. In any case, you need to contact specialists.
In connection, on threads and joints
If a threaded connection of metal pipelines leaks, a common reason is wear of the sealing material. For sealing, tow and FUM tape are used. You should start by checking the cause of the leak. Sometimes, due to uneven mechanical load, damage to the metal occurs at the joints and microcracks appear. For such cases, use the methods described above, best of all - cold welding with emergency glue.
Before repairing pipe leaks at joints, it is recommended to tighten the threads. Its weakening could lead to a leak. If this does not help, you need to select “winding”:
- FUM tape. Made from fluoroplastic, it is well suited for repairs in cold water supply systems. After winding the threaded connection, the line will not leak. The disadvantage is rapid wear; the old sealant must be removed before installation.
- Plumbing thread. During production, the fibers are impregnated with a special composition. Provides a reliable connection and is installed over the old sealant.
- Linen. Outdated seal. It tends to dry out, which is unacceptable for a water system. Can be used as a temporary measure.
For installation it is necessary to loosen the threaded connection. Then wrap one end of the seal around the pipe. The seal must remain on the thread while tightening. Disadvantage: the water supply must be removed. Actions can be done without this, but then most of the liquid will end up on the floor and walls.
Tip: for reliability, you can apply linen winding to the threaded connection, and then install several layers of FUM on top of it.
Damage troubleshooting
- On a straight plot.
- At the places where pipes meet (how to connect PVC pipes for water supply is written on this page).
- At the junction of individual radiator cells.
The risk zone is considered to be welded joints, insertion points of heating equipment and hidden sections of communications.
All these points need to be checked visually, and only then, with the circuit turned on.
A small fistula or even the smallest gap can be detected with a piece of ordinary toilet paper.
It absorbs moisture well and quickly, and thus you can see a hole in the pipe or at the junction of its sections (read how to properly connect HDPE pipes in this article).
This will only take a few seconds.
But what to do if this method turned out to be ineffective and you were unable to identify the fistula?
You continue to look for obvious signs of depressurization in the system, which manifest themselves as follows:
- large differences or lack of pressure,
- high level of humidity in the room,
- heating units are in good working order.
In this case, there is a way out of this situation, this is a pressure gauge. With its help, they determine how stable the pressure in the line is (one by one, check all its individual sections).
Please note! The leak must be sealed taking into account the entire period of operation of the system. Major repairs of the main line can only be carried out at the end of the heating season.
Advice you should heed!
In order to properly seal the gap in the heating system, you need to discharge water from the riser. Otherwise, a large amount of hot and dirty water will spill onto your floor.
How to stop a leak in a hidden pipe?
You won’t be particularly happy when a pipe hidden under a building structure starts leaking. Especially if the renovation has only recently been done. Since it is not always possible to quickly reach the source, you need to know how to temporarily stop the flow.
Here are a few techniques that are suitable for a water supply system in a private home:
- Powdered mustard is added to the expansion tank.
Then the water circulation is resumed. In just a couple of hours, mustard will seal microcracks from inside the pipeline. When the leak is fixed, the circuit should be flushed. - The heating system is temporarily filled with industrial sealant. It will settle on the internal surfaces of the pipeline and thereby stop water from seeping through microscopic gaps. After a major overhaul, the coolant is replaced with a new one.
Large holes cannot be sealed this way. Then they turn off the system, drain the water from the riser and begin straightening. Namely, it will be necessary to dismantle the structure and replace problematic spans. If you live in an apartment building, neighbors are warned about the upcoming event.
What difficulties may arise
During repair welding of water pipes using electric welding, the quality of the seam from contact with water will be low. This repair of defects is a temporary measure. It is not provided for by GOST. When water pressure increases and the system is pressurized, the seam formed during welding can crack. Not all welders undertake this type of work. Surfacing of metal in the damaged zone often leads to multiple fistulas around the welding zone, because during welding the oxidation process is activated by contact with water. Instead of one fistula, many are formed.
Welding a pipeline containing water is a technologically complex job for a number of reasons:
- Due to the steam generated from the water during welding, you have to periodically wipe the mask; the work area is difficult to see.
- Water constantly cools the welding working area and prevents the metal from penetrating to great depths. Setting occurs immediately and crystallization begins.
- When pipelines located under the ceiling leak, work clothes get wet from the water. This is fraught with breakdown of current. The hand twitches and the electrode gets stuck.
What to do if a pipe or riser in an apartment bursts, where to go, who is to blame
This is the problem: I live on the 8th floor of a 9-story building, the neighbors from above did not use the sewer pipe, or rather, they bought an apartment there not long ago, before that there was no one there! As it turned out, my pipe was cracked, and they drowned me for about 2 days... because I couldn’t find them at home... when I came home from university they were no longer at home. After much quarreling, they finally agreed that it was their problem, so the plumbers at home told me that it was their pipe. In the end, they themselves found a person who made all the robots with cement and wrapped a bandage around the pipe; they didn’t want to replace the pipe! Water no longer pooled in the toilet. After 5 months, the downstairs neighbor appears, saying she has been gone for a year, and the walls and ceiling in the toilet are crumbling, and water is still dripping. As it turned out, my pipe was leaking just above the crosspiece, I didn’t see it and didn’t know about it, the neighbors built the pipe before it, they didn’t touch it... although it was burst below, there was no noticeable leak there then.
What to do in this case? To clean the riser, the following can be used: At a small (up to 2 - 3 meters) distance from the nearest revision to the place. First, measure the size of the pipe in the toilet from floor to ceiling. Please note that the old pipe should protrude from the ceiling and floor.
You hardly pay attention to the plumbing if it works smoothly. But you become wary if the toilet starts to leak or make unusual sounds. And there is every reason for this, because a leaking toilet is a serious thing, it can cause a lot of trouble not only for you, but also for your neighbors below. To avoid having to explain yourself about flooding, you need to regularly check the performance of your plumbing.
No one is protected from minor everyday problems and unpleasant surprises that plumbing supplies periodically present. In this article we will try to figure out how and with what to seal a leak in a sewer pipe. Useful: where special reliability is needed, cast iron sewerage is stamped with a graphite seal. Asbestos fiber with graphite, unlike bonded fiber, is not biodegradable and lasts for decades.
WATCH THE VIDEO ON THE TOPIC: Sewer smell in the apartment. What is the reason? / Sewage smell in the apartment
In this article we will try to figure out why the toilet is leaking and how to eliminate leaks in the most common cases.
Please note: pouring hot water down the toilet is never a good idea. The toilet bowl may simply crack due to a sharp change in temperature, unable to withstand the internal stresses that arise from local heating. Or if the rubber cuff between the toilet and the plastic drain leaks?
Or if the rubber cuff between the toilet and the plastic drain leaks?
Good afternoon, the question has become that condensation has started to accumulate heavily on the cold riser between the ceiling with the neighbors above, everything is dry with us, it’s already dripping from the ceiling, their riser is dry.
Everyone is familiar with the situation when plumbing begins to fail, and you don’t know what to do - buy a new one or repair the old one. The most unpleasant thing is when the toilet leaks. In order to take urgent measures, you should find out the reasons for this phenomenon. We will tell you how to do this in our instructions.
Moving a gas boiler in a private house: is it possible to move it and how best to do it
We can make as many repairs as we want in our home, rearranging furniture and household appliances. However, such a conversion as moving a gas boiler in a private house can cause certain problems with the gas service. In addition, disagreements will certainly arise with the local authorities of the city/town/district, which will be resolved in court.
Agree, it’s better to foresee everything and make it official than to then wander around the courts, pay fines and change everything back. But how to carry out the transfer correctly - with minimal loss of time and damage to nerves?
We will tell you everything about this difficult procedure. Let's look at whether it is even possible to move gas equipment in suburban private property and in a city apartment. We will tell you where and with whom to coordinate the reconstruction, as well as what documents need to be collected.
Relocation of the boiler from a regulatory point of view
Internal gasification project is a document containing detailed schematic information on the floor plan of a residential building with identification of technical points for the location of gas-using equipment on a scale of 1:100.
That is, moving a gas-fired heat generator to another location is a violation of the design documentation and requires changes to it.
The gas supply project is drawn up taking into account design and technical features. The adjustments made to it require careful calculations from specialists of the relevant profile
Let's figure out whether it is possible to move a gas boiler to another place? And if it is possible, then by what regulatory documents is this approved and where is it recorded?
The “housing issue” regarding the transfer of a gas boiler and other equipment in an apartment is determined by a number of articles of the Housing Code (Housing Code) numbered 25-29. And this process is called reorganization. The regulatory collection contains detailed information on the approval of the procedure, possible refusal and its protest, the consequences of unauthorized transfer, and so on.
The specified articles of the code of housing standards apply specifically to the premises of multi-apartment buildings, i.e. regulate measures and standards for the transfer of gas pipes, meters, boilers within apartments. However, this does not mean that no rules apply to private houses.
According to the resolution of the State Construction Committee of the Russian Federation dated September 27, 2003, clause 1.7., only after obtaining permission is it possible to carry out the refurbishment of premises for any purpose. In this case, the transfer of gas appliances falls under this definition.
Moreover, independent installation and replacement of a gas heat generator is not prohibited, but its admission into operation and connection must be carried out by employees of a gas supply company with the appropriate license.
In addition, you will have to coordinate the transfer of gas distribution, metering devices and other gas equipment at home. For uncoordinated actions, you may be required to return all gas equipment to its original location. In this case, you will have to pay considerable fines for each of the moved devices, even after reinstallation.
Administrative liability for unauthorized transfer of a boiler is determined according to the type and severity of the violation. There are penalties, obligations to return devices to their original location, and even shutdown of gas supply. It is almost impossible to challenge the sanctions in court, because you will in fact violate the requirements of the housing code.
Relocating the boiler also involves altering the gas wiring. When working independently, such actions are equated to unauthorized connection and threaten with fines, as well as termination of the gas supply contract
The punishment is justified, because unprofessional installation of equipment, as well as changes in the design, are a gross disregard of fire safety requirements, a threat to the life and health of people living in the building, and a violation of the gas supply engineering scheme.
How to arrange the transfer of a boiler in a private house?
Coordination on the movement of gas-using equipment and gas distribution is carried out with representatives of the resource supply organization. The application is filled out according to the form approved by Decree of the Government of the Russian Federation No. 266.
When visiting the gas service, you should have a package of the following documents with you:
- Passport of the applicant (owner of the residential premises).
- Home gas supply project.
- Technical passport for residential premises.
- Passport for a gas-using device.
- Consent of all other homeowners, if the house is in shared ownership (representative of the interests of minor owners).
The exact list of documents should be clarified in advance during a call or visit.
You will receive the commission's decision on a separate form by mail or in person.
A sample application for refurbishment and reconstruction must contain information about the applicant, the facility, a list of attached documents and information about the planned work. If you receive a refusal to restructure, it must be justified by the relevant paragraphs on the reasons for such a decision
In practice, failures practically never happen. They can only be associated with the non-compliance of the new boiler room with established standards and the lack of documents for the facility confirming the rights of the owner. Gas workers don’t care how many times and where you move the boiler.
If you want to speed up and simplify the procedure, try using the services of a gas service that offers to perform all types of work on a turnkey basis. Some organizations provide a similar service and all you need to do is write an application and conclude an agreement.
Representatives of the company will come to the site, draw up protocols for the replacement and transfer of all required equipment, carry out coordination and installation work from installation and grounding of the gas boiler to its start-up and configuration.
Important points for moving the boiler
First of all, please note that transfer is only possible to an officially registered premises. That is, you will not be allowed to use recently constructed extensions that are not technically present in the house as a boiler room.
If you are moving a boiler with a design change, be prepared that you will have to do so under the new SP that came into force in July 2019. Regulatory acts of 1989, 2003, 2011 are invalid.
The joint venture specifies all the basic requirements for boiler rooms, chimneys, ventilation systems, as well as references to other current norms and rules for gas supply for both apartment buildings and private houses
SP 402.1325800.2018 “Residential buildings. Rules for the design of gas consumption systems" differs slightly from the old standards and at the same time is mandatory for use according to the order of the Ministry of Construction.
Let's consider the main nuances of gas design, taking into account old and new rules:
- The room into which you are moving the boiler must be non-residential and included in the house plan.
- The ceiling height in a room with a boiler with an open combustion chamber must be at least 2.2 m.
- The volume of the room (kitchen, kitchen-dining room, corridor) with a gas stove must be at least 8 cubic meters for an appliance with 2 burners, each subsequent burner increases the volume by 3 cubic meters. meters.
- The room with a gas stove and a heat generator with an open combustion chamber must be at least 6 cubic meters. meters more than in point No. 3, but not less than 15 cubic meters. meters.
- The heat generator can be installed in the basement or basement, but it is prohibited to place it in the bathroom and sanitary facilities.
- It is necessary to equip a natural exhaust with three air changes per hour, and the influx should be in the volume of the exhaust + combustion air. For accurate calculations, technical calculations are carried out.
- In kitchen-dining rooms, exhaust ducts are provided with one air exchange per hour + 100 cubic meters. meters.
- The door to the room opens outwards
- The socket for volatile boilers should be located no further than 0.5 m from the device
You will also find other important nuances that may be useful to you when moving the boiler in SP 62.13330.2011 and SP 402.1325800.2018.
The boiler room into which gas equipment is transferred must comply with the requirements specified in the joint venture. Otherwise, the owners will be denied reconstruction at the stage of making a decision
Complying with the rules is quite difficult in terms of constructive arrangement. If you are just building a new boiler room, take into account the entire list of requirements while designing the room.
How much does it cost to move a gas boiler?
It is difficult to answer how much it will cost you to move a gas boiler to another location.
This depends on many factors:
- Transit distance.
- Replacement of shut-off and control valves, supply hoses.
- Possibility and necessity of transferring other equipment.
- Replacing or making changes to the project.
- Difficulty completing the task.
- Local price list for similar types of services.
Before implementing your plans, it is best to calculate everything and make sure of your financial capabilities. It is also worth rounding the resulting figure, since unexpected expenses may arise in the process. On average, the final estimate starts at least 8 thousand rubles, but the figure can be many times higher.
How is equipment transferred?
The procedure for changing the installation location is not as complicated as it might seem. You take the package of documents to the local branch of the GorGaz company and write an application. In this case, it is important to indicate the new installation location, specifying the dimensions and other features. The easiest way is to use the registration certificate at home.
Gas workers come to you and draw up project documentation for the transfer, one copy of which is given to the owner of the house for review.
Be prepared for the fact that in addition to moving the gas boiler, you will also have to change the gas wiring, move the meter, and so on. All these nuances (cost and need for work) should be carefully clarified with gas specialists
Next comes the transfer of the heating system complex and gas distribution, and then the starting start of the heat generator. If everything goes well, the contractors draw up an act according to which the owner of the house goes to the gas organization to register the installation activities carried out.
To ensure that all work is completed faster, first prepare the place for installing the boiler if you are sure that it meets all the standards.
You will need:
- Remove flammable items from the room.
- Rehang the door if it previously opened inward.
- Install the outlet in accordance with regulations.
- Place gas and water pipes, as well as electrical wires, to the places required by regulations.
- Hang a shield made of non-combustible material at the installation site of the wall-mounted boiler and attach brackets to form a flat base for the floor-standing unit that meets fire safety standards.
- Make a hole for the chimney.
Finally, you will need to check the exhaust openings and make sure that the passage to the unit installed in the new location is clear.
Free space around the gas boiler is necessary for monitoring the equipment by you personally, as well as for technical inspections and maintenance by employees of the company with which you have an agreement to monitor the condition of the device and supply blue fuel.
Conclusions and useful video on the topic
Video: What are the dangers of installing gas equipment:
Moving gas equipment to a more convenient location in a private home is a complex procedure, but quite feasible. However, it is strictly not recommended to carry it out without the approval and services of the gas company. If you complete everything correctly and save the received work certificates, you will not have any problems with supervisory structures.
Would you like to talk about how you received permission to move a gas unit into your house/apartment? Do you have useful information on the topic of the article? Please write comments in the block below, share valuable information, ask questions.
How does the pipeline material affect the solution to the problem?
Metal pipes are distinguished by their enviable resistance and durability. Almost their only drawback is their susceptibility to corrosion. This is often what causes a leak in the circuit.
Less commonly, other pipelines also fail: plastic, polypropylene (mainly in places of threaded or fitting connections).
It is enough to compress the plastic pipe in the problem area, and all manipulations can be carried out under water pressure. The main thing is not to overdo it with the screed, otherwise the plastic will crack, and then you will have to replace the entire pipe.
A polypropylene pipeline can be easily repaired by soldering a separate fragment; a metal-plastic pipeline requires inserts. In the latter case, if the damage is not extensive, wrapping with electrical tape or treating with an adhesive (polyurethane, epoxy) will be sufficient.
Where to call if a pipe is leaking
In the event of a break in the water supply, heating or sewerage lines, you must contact the Housing Office to call a plumber (locksmith), or the emergency service. The telephone numbers of service organizations can be found in the help desk, on the notice board at the entrance to an apartment building, or on the receipt for utility services.
If a leak occurs on a weekday during business hours, you need to call the housing office, the management company, or directly the plumber assigned to a specific residential area. During non-working hours, at night or on weekends, you should contact the emergency service of the water utility. They will not do the work for the management company’s specialists, but they will come to the site and turn off the water in the heating, water supply or sewerage system until the housing and communal services specialists arrive.
Best answers
Yaoza:
Here! There can be problems just because of the sewer pipe! The neighbors downstairs are so sick of me that I keep filling them up and filling them up. First I changed the water supply pipes - they complained. Then it was time for the sewer system - but they didn’t want to change their tee (the one between the floors, into which my horizontal pipes and the riser itself go), I just changed the pipes, inserted a new one into the old sewer tee. And it turned out that it was precisely this that was leaking - there was a crack between the floors. That's where it leaked. Then they had to change this tee anyway. Of course, the water in the sewer does not constantly flow, but when the upper floors are lowered, the water flows down + the circular centrifugal movement of water inside the pipe - that’s what happens. that it gets into the crack of the pipe.
Galina Nikitina:
After our renovation, water also flowed down from us, and when our neighbors from above drained the bathtub. It turned out that some kind of thing like a tray was not installed in our toilet... They did it - and there are no problems.
Winds:
Canal water riser (for example, the junction of the outlet channel to the toilet may be poorly sealed, and with high pressure of water from the bathtub or when flushing the tank) it may end up on the neighbors’ ceiling. You must clearly describe (or take a photo) the projection of the leak..
when chipped in channel. riser - water can gush out of the fistula onto the wall and flow down.
Romance:
Our neighbors also accused us more than once of drowning them, they even came from the zhek, I’m not saying we’re dry here, but they mean it’s dry, but damn.. . how dry it is if the neighbors are still dripping. I personally climbed under the bathtub and checked in the toilet - it was dry! I sent it to the neighbors above, but no one listened to me. They drowned us more than once and the water has already done its job, finding new passages
647 acc:
The problem could be in the sewer pipe! ! !I live in a five-story panel Khrushchev building, there are 20 apartments in the entrance, our riser is adjacent to 10 apartments. In apartment 62 on the first floor there was dripping from the ceiling, we live in apartment 67 on the second floor. The cast iron sewer tee between the floors was leaking. The mechanic from the housing department replaced him in three apartments at once: in ours, 66 and 62. After his replacement, everything became normal. And before that, the neighbors from apartment 62 also came to us saying that we were drowning them, but ours was dry.
Are her boners dry? The fact is that water can flow from the floors in its ceiling, neatly flowing down the risers. Have you checked this? The plumbers from your housing department are simply too lazy to look, there are never consequences without a reason. Well, or a cold riser leaking in the ceiling... That the leak is in the ceiling is already a 100% option.
Raffi Baghdasaryan:
Cold water supply, hot water supply and sewerage pipes pass through the floors in floor slabs, in hot water supply and hot water supply sleeves, this is according to SNiP. Due to the negligence of builders, sometimes they pass without sleeves and when they come into contact with concrete, the pipes quickly rot. If the floor slab is hollow, then water can pass through the hollow and seep further from the riser. As for sewer pipes, there may be a crack in the passage through the ceilings, which is also the cause of flooding.
Eliminating leaks at the junction of a cast iron pipe
If a sewer pipe made of cast iron is leaking at the junction, you can fix the problem using:
- cement mortar;
- lead cones.
In both cases, the work procedure is the same and consists of the following steps:
- All unusable residues (residues of cement screed or lead) are removed from the joint;
- the junction of cast iron pipes is cleaned of dirt and corrosive deposits, and then dried with rags;
- if lead is used to seal the joint, then new cones are placed in the resulting hole and then covered with cement mortar prepared in a ratio of 1:10 (10 parts of cement are needed for one part of water);
- procedure for sealing a joint without lead:
- prepare cement mortar and a regular medical bandage;
- the bandage is dipped in the solution and placed in the hole between the pipes;
- The final filling of the connection is made.
Sealing the joint of a cast iron pipe
It takes approximately one day for the cement to dry completely.
Signs of a leak
If the pipes become damp, droplets of moisture similar to dew appear at the fittings, or the pressure in the system drops sharply, the property owner should pay attention to the condition of the plumbing structure and take appropriate measures.
When a plastic pipe leaks at the junction, and measures are not taken in a timely manner, even a small trickle of water can cause a lot of trouble. It can get on household appliances, electrical wiring, or ruin new renovations in the apartment below.
How to repair a fistula in plastic and metal pipes
Any IC (engineering system) of water supply and heating can leak. When it is not possible to immediately replace a section of a water pipeline, you need to know how to eliminate a fistula in a water pipe; most often, deformation appears in the bathroom; plastic pipes are characterized by:
- The pipes were installed under water pressure.
- Polypropylene fitting, not sealed.
- The structure is swollen.
- The water supply system is crumpled.
Fistula repair, polypropylene material:
| Way | Action |
| Welding | Cut the damaged piece of pipe, prepare the fitting and workpiece. Using a plastic soldering iron, melt the ends of the fitting and pipe and connect the melted ends. You should work “quickly”, remembering that the plastic hardens quite quickly, so it won’t be possible to redo it; you need accuracy and precision in your actions and work skill. |
| Threaded connection | Prepare an insert of the required size, cut a thread using a tape measure on a plastic pipe, then fasten the structure using a coupling. |
Repair of metal pipes is carried out in the following ways:
- Adhesive bandage. Technology: a medical bandage soaked in an adhesive solution is wrapped around the pipe 5-6 times, coated with epoxy glue, and a clamp is placed on top. Instead of a bandage, you can use fiberglass. The system is filled with water only after the adhesive has completely dried.
- Using a screw. Technology: the hole is widened, a thread is cut, a screw or self-tapping screw is screwed in. It is well used in minor damage; it cannot be used on an old pipeline, on a “decrepit” pipe.
- Cold welding agent. Technology: prepare the required amount of substance and apply to the damaged area. This leak fix is temporary. The “cold welding” substance loses its properties under the influence of hot water.
Sealing with adhesive bandage
Elimination of a fistula using this method is carried out in stages:
- Use a metal brush to clean the pipeline from dirt, treat its surface with acetone or gasoline and allow it to dry for 15 minutes.
- Tapes are cut from fiberglass, the length of which depends on the diameter of the pipe - it is necessary that the winding has at least 6 layers. The width of the material must exceed the cross-section of the pipeline by no less than one third.
- BF-2 glue is applied to the edges of the tape, then one side of it is covered with an epoxy adhesive with a spatula.
- The tool is pressed firmly against the fiberglass so that it is well saturated with glue.
- Then the tape is tightly wound onto a previously prepared surface so that its center covers the problem area.
- The bandage is secured with metal tape.
- After 24 hours, the repaired pipeline can be used.
If the system is laid in an unheated room where the temperature does not exceed 17 degrees, the pipeline can be used only after 4 days.
How does the pipeline material affect the solution to the problem?
Metal pipes are distinguished by their enviable resistance and durability. Almost their only drawback is their susceptibility to corrosion. This is often what causes a leak in the circuit.
Less commonly, other pipelines also fail: plastic, polypropylene (mainly in places of threaded or fitting connections).
Metal pipes are the most difficult to seal, since electric welding is not applicable to them. After such exposure, corrosion processes only become more active.
It is enough to compress the plastic pipe in the problem area, and all manipulations can be carried out under water pressure. The main thing is not to overdo it with the screed, otherwise the plastic will crack, and then you will have to replace the entire pipe.
A polypropylene pipeline can be easily repaired by soldering a separate fragment; a metal-plastic pipeline requires inserts. In the latter case, if the damage is not extensive, wrapping with electrical tape or treating with an adhesive (polyurethane, epoxy) will be sufficient.
Types of water supply system breakdowns
Partial repair of pipes is the optimal moment for their complete replacement. Among the main breakdowns of the water supply system are:
- interruptions in water supply (can be short-term or long-term);
- complete loss of water in the network;
- low pressure in the pipeline;
- extraneous, uncharacteristic noises in the system;
- formation of condensate on the pipeline;
- mechanical clogging of pipes;
- failure of network elements.
Low pressure is a common problem that leads to the disappearance of water in taps. As a result, residents of multi-storey buildings do not receive it at all.
A pressure gauge is used to measure pressure. If the readings are low, first of all, you should open the valves in different parts of the pipeline network: in the wells and at the entrance to the system.
Equipment malfunction means failure of fittings, water metering unit, and alluvial installation.
If you suspect a valve is broken, it is worth checking all its types: safety, shut-off, water and control.
Metal worn areas can be easily and economically replaced with plastic ones
To ensure that the sediment is broken, a pressure gauge is also used. It is installed at the entrance of the water supply system to the building and after installation. If the difference in performance is obvious, the pump is broken.
What pipes are used for pipeline repair?
There are several types of pipes that are used to repair the water supply network (i.e., to replace damaged sections):
- polypropylene;
- metal-plastic;
- polyethylene;
- metal (cast iron).
Polypropylene products have the following advantages:
- tightness and reliability of the connection;
- maintaining operational characteristics throughout the entire service life;
- resistance to corrosion, deposit formation and the influence of chemical compounds;
- simple installation, affordable installation elements.
A new leak on a pipe is a signal for urgent repair.
Metal-plastic products are a three-layer “pie” - there is a metal layer between two plastic plates. They are suitable for local repairs in small areas.
They stand out for the following advantages:
- affordability of pipes;
- simple installation;
- resistance of pipes to the occurrence of corrosion processes and the influence of chemicals.
However, metal-plastic pipes have lower fastening reliability indicators than plastic pipes. There may be a loss of joint tightness when the pipe is heated, which leads to the formation of a leak. Fittings are used to install the matelloplastic system.
Polyethylene products are used only for the installation of external water supply networks. Among the advantages: simple installation using fittings, durability and affordability. Since they are not resistant to high temperatures, they are used exclusively for cold water supply networks.
Metal products have long faded into the background. Their negative aspects include the complexity of installation, high cost and susceptibility to corrosive processes.
Repair methods
Repairing a heating pipe without draining the water is only possible temporarily. In the summer, the water from the system will need to be drained, then the crack will need to be sealed. You may have to completely replace the area with the damaged liner with a new pipe.
There are several ways to repair this type of breakdown. Each of them requires basic knowledge and skills:
- method using chemicals;
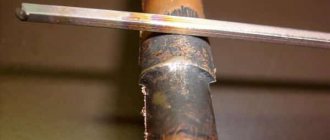
- working with a welding machine;
- mechanical method, where various metal fasteners are used in the form of a clamp and bandage.
Required tools and materials
For work you will need the following locksmith tools:
- sealant, epoxy resin and glue;
- rubber band and elastic gaskets for fittings;
- welding machine and electrodes;
- pliers, wrenches, steel wire and plumber's tape.
It is also worth stocking up on clamps of the required diameter and choosing a bandage. When working with chemicals, it is recommended to wear rubber gloves.
On a running system
You can fix a leak in a heating system full of water in the following way:
- If the crack has a small, almost invisible diameter, then chemical agents can be used. Before applying active substances to a metal surface, it must first be cleaned with sandpaper. Then soak a bandage or cloth in a chemical and apply it to the damaged area.
- You can use cold welding or make a bandage from a plaster-cement mixture. During such work, water is not drained from the pipes, but the pressure level in the heating system must be reduced.
- If the leak is located in places with threads, then it is recommended to simply replace them completely or partially, as in the case of damage to the fitting or clamp.
On a stopped system
You can independently and completely repair a damaged heating system only if it is in shutdown mode. Then, in order to eliminate damage, it is allowed to use any electrical tools and replace metal pipes.
When carrying out repairs, you should always follow safety precautions and, most importantly, correctly assess the nature and extent of the damage. This is necessary in order to make a competent and correct decision to eliminate them.
Source
What time of year should I repair?
If you notice that a heating pipe is dripping, then no matter what season it is (heating or summer), you do not need to wait until the damage site becomes larger in size or winter comes and water begins to flow from the crack.
It is necessary to immediately repair the damaged area, replace the pipe, or think about replacing the entire heating system as a whole (of course, if your budget allows), for example. Rehau heating pipes have proven themselves to be excellent. They are suitable for use under the conditions of our “domestic” heating system and cause their owners a minimum of hassle over the entire period of use (subject to all standards for their installation and operation).
During the period when the heating is not yet functioning, it is, of course, easier to repair and replace pipes, but this does not mean that if a leak is detected in winter, nothing needs to be done. A heating pipe leak must be repaired as soon as possible after detection!
Regular monitoring of the condition of heating pipes and immediate elimination of any faults will protect yourself from unpleasant surprises and even emergency situations.
Sooner or later, every home craftsman is faced with the issue of sealing threaded connections. The battery may be old or start to leak - one way or another, to eliminate such troubles, you need to learn how to properly seal the threads. Many people will think that this process is quite simple and does not require any knowledge or skills. But this is not so - as elsewhere, thread sealing has a lot of subtleties and nuances. And if you don’t pay attention to them, the process of eliminating leaks can turn into an endless story with no end or edge in sight.
Types of threaded connections
There are four types of plumbing products, the threads of which, as they say in the language of plumbers, are packaged differently: these are ordinary threaded adapters, foot nuts, rivets and lock nuts. The principle of their sealing is slightly different from each other, they have only one thing in common - this is the material with which the connection is packaged.
How do you seal the threads?
In order to make a threaded connection capable of withstanding high water pressure, plumbers have three things in their arsenal: tow, fum tape and a special thread. In principle, they all adequately cope with the responsibilities assigned to them - the difference lies only in the material from which they are made and in the application.
For example, tow - it can be called a universal investment material - it does not tolerate high temperatures and high pressure, the main thing is to correctly observe all the conditions for its use. For reliable and durable sealing of threads using tow, you additionally need either paint or special ointments such as “unipack”.
Unlike tow, fum tape and thread do not require additional materials - they are made entirely of synthetic materials. Working with them is much cleaner and neater. But they cannot be used for connections such as foot nuts and lock nuts - they are simply not able to properly seal these products.
Another nuance, oddly enough, lies precisely in the thread itself - its sharp turns can cut tow or fum tape wound on them, and then there can be no talk of any tightness of the connection. How to deal with this? Yes, it’s simple - you need to grind off the sharp edges of the coils with a file. Most modern threaded products are already manufactured taking these subtleties into account.
Squeegee sealing
The process of sealing the squeegee, as you already understood based on its configuration, is based on two different principles. Depending on what the squeegee consists of, it is compacted differently. If the drive includes a fitting and a lock nut, then the fitting is packaged separately, after which the lock nut is tightened - this connection is often used to connect heating radiators. If the drive is equipped with a coupling instead of a fitting, then the coupling is packaged as a regular threaded connection and then tightened with a lock nut. Such surges are still used to create detachable connections on pipelines.
That, in principle, is all you need to know about sealing threaded connections. But a theory that is not supported by practice is not worth much. So practice, and it’s okay if the first joint fails. As they say, he who does nothing makes no mistakes
Did you find this article helpful? Subscribe to site updates to receive the latest articles about renovation and interior design before anyone else!
Source
How does the sealing effect manifest itself?
You should not expect the leak to be eliminated immediately, but only on the 3rd or 4th day. During this time, the sealant for heating pipes will compact and close the cracks in problem areas from the inside. Eliminating the problem of coolant leakage will manifest itself in the fact that the sound of falling drops of liquid will no longer be heard in the house, moistened areas on the floor will dry out, and the pressure in the system will no longer decrease.
At the same time, one of the negative effects may be a slight blockage of passages in devices for distributing coolant flow, as well as in thermostats. But this problem can be easily solved by periodically opening and then adjusting these types of regulators to the desired position to prevent them from further sticking.
The video lesson will help you understand how to fix a leak in your heating system yourself using liquid sealant.
Based on all that has been said, you can be sure that liquid sealant is undoubtedly worth using to eliminate leaks in the heating system. Even though its price is steep. However, it should be understood that hidden installation of heating pipes is not only a convenience, but also a certain risk, for which you sometimes have to pay.
How do problems manifest themselves?
- A welded or seamless heating pipe has started to leak.
- A leak has appeared in the area where pipes and batteries, fittings and pipes, or two different fittings meet.
- In the intersection space of the radiator.
- In an area of the battery that is accessible and open for repair work.
Each of the described situations with different types of accidents can be eliminated even with the help of improvised means and various methods, but only in one case - if the leak in the heating radiator or pipe is small, and the water or coolant flows in a thin stream (or even drips). In case of a more serious accident, the leak can be eliminated using more radical methods, which we will talk about. Anyone who has ever repaired a leak in their heating system knows exactly how much trouble they were able to save themselves, their family and the neighbors who live below you.
For both large and small leaks, you should immediately first turn off the shut-off valve, which supplies the working fluid inside the system.
Getting rid of leaks with a bandage
A plumbing bandage is a piece of pipe, cut along the longitudinal axis and equipped with eyes for a screw tie. Bandages are made of durable metal - cast iron or aluminum, steel. Polymer bandages can be used to repair plastic pipes.
In welded structures, sometimes a seam running along the entire pipe begins to leak. In the initial stage of a leak, individual holes are almost indistinguishable to the naked eye. In this case, applying one or more bandages helps. However, a defective welded pipe should be replaced as soon as possible.
The disadvantages of the bandage are its high cost and low efficiency when sealing fistulas on an uneven surface. A hole that has rusted in the immediate vicinity of a poorly executed weld may not be closed tightly enough with a bandage. In this case, the leakage will resume after some time.
The main causes of leaks and their locations
The most common reason for damage to any steel heating pipe is caused by oxidation of the material, when a fistula appears in the pipe. From the inside, water is almost constantly in motion, but from the outside, the metal is often exposed to moisture, air and temperature fluctuations, which contributes to the rusting of the pipe. This is the reason for the appearance of a leak in the most vulnerable place of the heating system.
Many of you may be wondering whether polyethylene pipes leak, because they do not oxidize like steel pipes. Naturally, in this case, the chance of leaks occurring is much less - the reasons for their occurrence will be of a slightly different nature. For example, heating pipes made of polypropylene and polyethylene may leak if they are incorrectly selected, that is, if they are used for other purposes.
This problem often arises among people who, for a number of reasons, decided to save money when building a heating system. Quite often, people buy PP pipes for cold water, which is a gross violation. The fact is that under the influence of high temperature, pipes undergo deformation, swell or burst. This in turn can greatly damage your home and your neighbors. As a result, there is no need to talk about any savings; on the contrary, at the end of the heating period, a significant part of the system will need to be replaced.
However, such a problem can arise even for those craftsmen who decide to use metal-plastic pipes for heating systems. In fact, even such heating pipes leak, and again the problems will need to be solved quickly so as not to harm anyone.
As a rule, the heating pipe leaks in the following places:
- on a flat section of the pipeline;
- in places where pipes are joined (on fittings or threads);
- at the junction of pipe sections.
Based on where the heating pipe leaked, the sealing method will be determined.
Reasons for leaks
A common problem with plastic pipelines is the lack of tightness in the places where the sections were connected. There are several explanations why plastic pipes leak at the junction. This largely depends on the method of laying them, the type of fittings, and the qualifications of the technician.
The main causes of leaks are:
- Incorrectly selected temperature conditions for soldering plastic water pipes. This violation contributes to the destruction of the integrity of the connection at the junction of the pipe into the fitting and back. As a result, a leak forms. During the repair process, it is necessary to cut out the entire assembly and reassemble the connection from new parts. The use of sealant in this case is pointless.
- Loosening the clamp nut. It will not be difficult to deal with the leak (you need to tighten it), but only if the internal gasket and the fitting itself are intact. It will not be possible to cover the nut with sealant - if it has burst, it should be replaced with a new product.
- Poorly pressed compression fitting. It can be sold complete with a pipe. If such a joint begins to leak, then pressing in a new connecting type fitting will be required. Manufacturers of these parts do not recommend using pliers to repeatedly crimp the same shrink ring.
- Pipe not properly prepared. The joint of pipeline sections made by using push-on fittings will leak when the cut on the product was not smooth.
- The joint of plastic pipes leaks if it is made using an incorrectly selected adhesive joint or the time interval after completion of installation is not maintained - the glue has not dried, which means the surface has not had time to polymerize to a state of complete tightness. You need to select high-quality glue for plastic pipes for water supply and repeat the connection.
Installation of the clamp
Special plumbing clamps are also not free from shortcomings. The rubber gasket included with the clamp is usually thin. To ensure that a fistula is eliminated in a water supply or heating pipe, equip the clamp with a porous rubber gasket. You can use a car or bicycle inner tube, a micro-shoe shoe, or an insulating mat.
It is not always easy to purchase large diameter clamps. However, many models of screw clamps can be easily disassembled and connected into one clamp of the required length. The prefabricated clamp holds the tension almost as reliably as a single clamp.
The clamps used in aviation for attaching all kinds of pipes to the ends of metal pipes are of the highest quality. Their coverage around the perimeter of the pipe is uniform, the tightening is reliable and is often carried out without the use of tools. Such clamps are expensive, but easy to use and almost eternal. Unfortunately, not every model of aircraft clamp opens for easy placement on a water pipe.
Repair using a temporary bandage
This method is used when the fistula in the pipeline has an oblong, elongated appearance.
A bandage is applied to the hole using sealing gaskets, which can be made from the following products:
- medical tourniquet;
- thick glove;
- bicycle tire;
- boot top, etc.
The main thing is that the size of the rubber gasket is significantly larger than the size of the hole. To fix the bandage on the pipeline, clamps or bolts are used.
Let's summarize the information considered
A pipe leak is, of course, a rather unpleasant event. Especially if the water in it is under pressure. However, this cannot be called a disaster. After all, as they say, knowledge is power. The main thing for a home master is not to panic. And there will always be a couple of means to solve the problem in the house. No one is immune from such troubles, because it is impossible to visually see that a pipe will soon leak. We can only hope that if such a situation happens, it will not happen at night, when there is no one to notice it.
The situation is, of course, unpleasant, but not fatal.
We hope that today's article was useful and interesting to our dear reader. Perhaps someone still has questions on the topic. The Homius.ru editors will be happy to answer them. All you have to do is state the essence in the discussion below. If you have had a similar problem or know other ways to solve such a problem, please share your experience with novice home craftsmen. After all, such information is always relevant and in demand. And finally, we suggest watching a very exciting video on today’s DIY topic.
Watch this video on YouTube
Previous Engineering How to make money by installing a two-tariff electricity meter? Next Engineering Stainless steel sinks for the kitchen: all the pros and cons