How to dig a hole for a post? The first thing that comes to mind is using a shovel. However, there is one caveat - you won’t be able to make a neat hole with a shovel.
Therefore, let's immediately move on to the second option.
To dig a hole for a post, you can use an earth drill. It can be mechanical or electrical.
In principle, both types of tools are good.
But we will look at the manufacturing process of an electric drill, because it is more powerful and productive - it saves effort and time.
We also recommend reading the article: how to make foundation posts from sewer pipes with your own hands.
How to do it yourself?
If you have a hole drill with an electric motor, then there is no longer any need to strain yourself when digging the ground with a shovel.
The tool now does everything itself, with it you can make holes for various purposes, you can bring water to the site, lay the foundation of a house and design a garden by planting trees. Instead of buying, as an option, electric drills are made with your own hands from scrap materials. Designing a high-quality unit is a feasible task for everyone. A homemade drill is not inferior to the one you purchased ready-made.
Moreover, the inventor is given freedom to make his own changes: modifications provide the device with additional functions and make operation easier.
You can create just such a unit that would be ideal for drilling. The type of nozzle and the size of the blades, power, dimensions of the equipment, engine characteristics based on the soil properties are determined independently.
To get a new, reliable electric drill, you need to assemble parts such as the cutting part, the rod, handles and the motor. The blades can be circular disks, and to create an auger yourself, you can look for a suitable model - ready-made drawings are used to create working attachments based on a template. The electric motor is made from a hammer drill, and a powerful motor is also obtained from the starter and gearbox of the drill.
With your own hands, using an electric cultivator, it is easy to create an effective machine for cultivating the land, including plowing it and removing roots from it, which a drill can do well. What do you need to start designing?
Tools and materials
One of the simplest options for a homemade drill is a drill unit. The tool is ideal for using it to develop your own powerful techniques.
So, before you start, you will need the following materials:
- drill;
- worm gearbox, it is easy to install;
- Bulgarian;
- steel disks of the required diameter, depending on the size of the pit.
You can start working.
Manufacturing stages
- On the disks, the number of which corresponds to the number of tiers of the cutting part, make holes in the middle for the rod. The hole should be equal to the diameter of the rod.
- Cut the disks to create circle sectors.
- Weld the disks in a spiral and connect them to the rings.
- The ideal tip option would be a metal drill; it facilitates the drilling process. A sharpened pike is less convenient.
- The tip is placed 5 cm below the auger nozzle.
- We sharpen the tip of the drill and auger.
- Now the attachment is installed on the drill with a gearbox.
The universal electric drill is ready for use.
For a review of an electric drill for winter fishing, see below.
Nuances of choice
When the question arises of choosing the appropriate electric drill for the soil, it is important to determine the conditions in which the unit will be used. Based on the type of land that prevails at the work site, it is decided what power of the device is optimal. Serious large-scale work is carried out using a device slightly larger in size than a household electric drill.
The parameters of the device determine its cost and scope of operation. Thus, a low-power electric drill (about 1.5 kW) will be a good option for solving simple tasks such as making single holes for seedlings in a summer cottage. If the product is to be used in a large construction project, which may require pile drilling or other deep holes in the ground, then you will need a drill with a power of at least 2 kW.
The equipment of the unit also plays an equally important role and is worth paying attention to when choosing. For example, for household work, the diameter of the nozzle can be no more than 15 or 20 mm.
The diameter of the nozzles depends on the massiveness of the structures drilling the soil. The attachment that comes with the electric drill can be replaced with new ones as needed.
To take advantage of all the advantages that an electric drill has over other drilling machines, do not purchase a unit if you doubt the integrity of the supplier. Then you will be able to appreciate the bonuses that come from using an electric drill. Namely, efficiency in energy consumption, noiselessness and harmlessness to the environment, because during operation no toxic exhaust gases are released into the atmosphere.
How to make an earth drill yourself
With a little effort and strictly following the requirements of the step-by-step instructions from the masters, you can make a bracelet with your own hands in a matter of hours.
Selection of materials
To assemble the blanks for the main elements of the drill, you will need:
- For the rod. Round or square pipe. Size - 20*20 mm, 35*35 mm.
- For blade knives. Sheet steel 4 mm thick or a saw blade from an angle grinder or circular saw (optional). Below we will consider the use of each of them.
- For the pen. Round pipe. The diameter is selected according to the circumference of the palm.
- For the pike. A sharpened large diameter reinforcement rod or steel strip is used. A combination of both materials is allowed.
It is better to work with metal wearing protective gloves and goggles.
Tool preparation
The list is like this:
- welding machine with electrodes, protective mask;
- grinder with disc attachments;
- electric or hand drill;
- hammer;
- sharpener;
- vice;
- mites;
- marker, tape measure;
- compass.
For anti-corrosion protection of metal, a primer and a brush are purchased separately.
Drawing or diagram
Scheme. 1 – steel rod; 2 – welded half-disk knife; 3 – crossbar-handle; L – depth of the hole to be punched.
Here, each master makes a drill for himself, selects the dimensions, material, type of construction, calculates the material consumption and its cost. The finished product can be improved during use.
Drill assembly
It is necessary to analyze which blades it needs to be equipped with: stationary or removable.
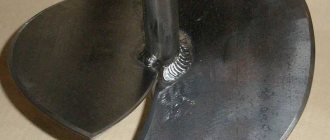
Stationary blades are simply welded to the rod.
To make them removable, you will need:
- Weld shelves made of thickened steel on one side of the shaft.
- Make them so that the knives diverge at an angle of 25-30 degrees.
- Make 2-3 holes in the shelves for fasteners and 2-3 holes in the blades of the same diameter.
- Secure the blades with a bolted connection.
Made from sheet steel
To start, it’s easier to cut out a sketch from white paper. After which a circle of steel of suitable diameter is cut along it. A hole is made in the center in the form of a square or circle, depending on the cross-section of the pipe for the shaft. The hole size is taken slightly larger than the rod for ease of welding.
Blades are made in two types:
- From two halves of a circle.
- From an open circle, where the edges shift, resembling a spiral turn. To increase drilling efficiency, the edges are placed at an angle of 25-30 degrees from each other.
From a saw blade
The best saw blade option is a diamond one. It is highly durable.
Used disks from circular saws will also work. They are made from hardened steel. They have a well-sharpened edge and are reliable, but they cannot be bent, so the disk is sawed in half and the two parts are placed at an angle. To make the drill go easier, the side edges are additionally sharpened on a machine or by hand.
Photo: drill from a circular saw blade
Welding
It is carried out wearing a chameleon-type protective mask (preferably) and gloves. The blades are welded to the rod both from the inside and outside, and the seams are cleaned.
Corrosion protection
The finished product is sanded with sandpaper and treated with an anti-rust primer. An alternative is a phosphating solution.
After priming, the drill can be painted.
Care
It is recommended to periodically disassemble it, clean it of accumulated dust and dirt, and lubricate it with a water-repellent solution. This will avoid jamming of parts, repair or replacement of individual parts and will extend the service life of the product.
Making a drill is not difficult, but it requires skill. In skillful hands, a homemade drill will be an excellent assistant in work on a summer cottage and in the construction of small structures.
Making a garden drill
A garden auger is the simplest but most effective design. It consists of:
The post drill can be equipped with a prefabricated rod
This is a basic design, and there are many modifications to it. But let's first talk about what an earth drill can be made from.
Materials
As already mentioned, the rod is most often made from a round or square pipe. Diameter - from 3/4′ to 1.5′, profiled pipe can be taken from 20*20 mm to 35*35 mm.
Blade knives can be made from:
Earth drill with blades made from a saw blade for an angle grinder
The spear-drill is made from different materials - there are many different designs. They just make a sharpened rod. Then you need a piece of large diameter rod. The second option is to make something like a drill from the steel strip. And yet - a combination of these two.
And finally - about the pen. It is more convenient if it is made of a round pipe. Its diameter can be selected according to the circumference of the palms. The main requirement is that you should be comfortable.
Knives and fastening method
First of all, you need to decide whether you are making a drill with your own hands with removable or stationary blades. If the blades are removable, weld shelves made of thick steel at one end of the rod. The shelves are made at an angle - so that the planes of the knives are separated at an angle of 25-30°.
After the shelves are welded, two or three holes are made in them for fasteners. Then the same holes will need to be made in the blades, and installed on bolts of substantial diameter.
One rod can have several sets of cutting blades - for holes of different diameters
You will have to cut holes in the center of the disks themselves so that they fit more tightly to the rod, but this operation is also required for the monolithic version - with welded blades.
Sheet steel
If you are going to make the blades from sheet steel, cut out a template from paper and use it to create a circle of steel. Drill a hole in the center - you will need to insert and weld a rod into it. Circle or square - depending on the chosen rod. The hole dimensions are slightly larger than the dimensions of the rod.
Next, you need to decide what kind of blades you will make - from two halves of a circle (as in the photo above) or in the form of an open circle with offset edges - one turn of a spiral (in the photo below).
Manual drill with one turn
The edges should also be separated by 25-30 degrees. In this case, drilling efficiency will be maximum. If you work on dense soils (clay, loams with a predominance of clay), the blades may collapse under load. To avoid this, stops are added from a corner or a thick strip of steel.
Strengthening a hand drill for drilling wells in dense soils
The blades bend due to the fact that unhardened steel is used, but it is almost impossible to find it in the sheet, and even if it is possible, it is unlikely to be bent.
From a saw blade
If you have an old saw blade of a suitable diameter, you have found an almost ideal option. They use hardened steel, which is elastic and durable. But such a disk cannot be bent, so it is sawed in half and these halves are placed at the required angle.
The disc is sawn in half
Shock-rope technique
You can drill a hole in the ground for a well or install a pole not only with a rotary type tool. To perform similar work, the shock-rope technique is also used. You can carry out drilling work in this way yourself, and the depth may be suitable for the well. A drilling rig can be purchased or made from scrap materials. It consists of the following parts:
- tripod 2.5-3 m high;
- projectile (bailer);
- cable;
- winch.
The operating principle of this technique involves dropping a tubular projectile onto the well site. Due to its own mass, the bailer enters the soil and grabs it. At the lower end of the working part of the installation there is a valve that holds the soil extracted from the well. After removing the projectile, it is deployed with the technical hole down and the accumulated soil is shaken out with blows from a heavy tool - a hammer or crowbar.
Manufacturing of the installation
To prepare the drilling rig for the percussion-rope technique, you need to place a high tripod at the drilling site. It is made of high strength metal, but it is recommended to make spacers. A cable block is attached to the top point of the tripod; it must be designed for the maximum weight of the projectile filled with wet soil, taking into account a reserve of about 50 kg.
To remove the bailer from the hole in the soil, you need to use a winch with a cable. They are also selected based on mass. It is fashionable to use a manual or automatic winch for drilling, but the fasteners must match. To fix the lifting device, an object that exceeds the mass and loaded with soil, a projectile or a static object, for example a tree, is suitable.
Structure of the bailer
A bailer is a tubular projectile for percussion-rope drilling. The main part contains soil mined during well drilling. To capture, a petal or ball-type valve is made at the bottom of the projectile. The distance from the cutting part is at least 5-7 cm. The diameter of the blank for the bailer must correspond to the expected size of the well.
For reference!
The depth of the well with the percussion-rope drilling method increases by 40-50 cm in one approach. But, you should not focus on this parameter when making a bailer yourself.
The drilling speed depends on the mass of the working part of the tool. To increase this parameter, it is recommended to place a weight at the top of the projectile. For this purpose, use pancakes with holes in the middle or fill the top of the bailer with lead. When pouring along the length of the workpiece, it is necessary to take into account the place with the partition. The algorithm for making a bailer is as follows:
- The cable fastening must be located in the upper part of the pipe along the center line. To do this, weld a transverse strip and drill a hole in it according to the diameter of the cord used.
- The lower end of the pipe needs to be sharpened. Depending on the softness of the soil, you can choose a ring type (for hard soils) or a serrated type (for loose and soft soils). If there is a muffle furnace, the edge is hardened.
- To clean the internal cavity of the projectile, a longitudinal hole 3-4 cm wide is cut in the upper third. During percussion-rope drilling, the soil becomes densely packed into the projectile - it can be loosened with a crowbar and shaken out.
When working with a bailer, you need to pay attention to the condition of the cutting edge - when that part spills, you need to use other drilling methods. This is due to the fact that large stones are easier to remove from the hole with an auger tool
In dense and viscous soil, it is better to attach a bell-shaped collar to the end of the bailer, with the extension downwards.
Tips and tricks
A simple and convenient device in the form of a drill will make your work in the country easier.
Experienced craftsmen advise choosing the necessary tool calmly, without rushing, so as not to make a mistake in the purchase.
When choosing a coil, you should pay attention to the spiral of the product you are purchasing. The steeper it is bent, the faster the drilling speed will be. If you need to drill small slot holes, choose a design with a shallow spiral. Such products are less subject to wear. A product with “self-sharpening” will save you from frequent sharpening of knives, because
because they will become sharpened by friction against layers of soil. The metal from which the device is made must be thick enough to withstand a certain load and not rust. A well-known brand indicates not only the high costs of purchasing a tool, but also its high quality. Over time, the spending pays off.
Such products are less subject to wear. A product with “self-sharpening” will save you from frequent sharpening of knives, since they will become sharper when rubbing against layers of soil. The metal from which the device is made must be thick enough to withstand a certain load and not rust. A well-known brand indicates not only the high costs of purchasing a tool, but also its high quality. Over time, the spending pays off.
It is also worth considering recommendations for using the tool.
- The speed of drilling must correspond to the speed of the drill. Exceeding can lead to rapid wear of parts and render the tool inoperative.
- Before drilling, check the operation of the device at idle speed, make sure that all parts are working properly.
To learn how to choose a drill for wells, see the following video.
Ways to improve the tool
When drilling holes, the master may encounter a large number of plant rhizomes that lie tightly in the soil. The sharp edges of the blades will make working with the drill much easier. For ease of use, you can cut several teeth on the sloping area of the blade or round off its cutting area.
You can improve the design and make removable cutters for the drill. Thanks to them, it will be possible to drill holes of any diameter. In addition to the manufacture of spare parts, it is necessary to provide for their attachment to the collar. The easiest way is to connect them with two iron plates, which are secured by welding.
In the mounting plates, as well as in the blades, you need to drill two holes for the sides. The cutters are fastened with M6 bolts. To ensure that the bolts do not interfere with work, they must be screwed in with the threads facing up.
There is another way to improve your homemade pole drill. You can increase the efficiency of the lower end of the knob. To do this, you need to cut out a narrow metal plate (10x2 cm) and grind it into a cone shape using a grinder, making a kind of point.
There is no need to make cuts in the collar; turned metal plates are inserted into its end, fixed by welding and flattened. The result should be a peak.
There is another method for making a pike. A metal plate is cut to a length of about 17 cm and a screw is made from it, similar to a corkscrew. Further, the algorithm of actions is the same as in the described first option.
A suitable drill can act as an auger, which can easily handle wood as well as metal. Such a tool will penetrate the ground much easier and will drill a hole to the required depth without any problems.
Builders who work on dense deep layers of soil will need one piece of advice. Between the pick and the cutter you need to weld a small flat cutter. Thanks to this design, it will be possible to loosen the earth and center it when drilling. For such a part you will need 2 metal plates 3x8 cm. This trick will significantly speed up working with the tool.
Milling cutters can also be made from grinder discs, which are designed for working with stone. The circles need to be cut along the radius and the hole in the center should be expanded according to the diameter of the knob. Bending the disk with the sides apart gives the appearance of a corkscrew or auger. All that remains is to weld the part in the manner described above.
The cutter is very easy to make from a circular saw blade. The teeth of this model can easily cope with plant rhizomes and hard soil.
The master can choose how to modernize his drill independently. It is worth saying that making a drill for poles with your own hands is not a complicated process at all and requires minimal physical and financial costs from the master. The entire manufacturing process takes two hours at most.
Finally, there is one important piece of advice: before the drilling process, it is best to loosen the soil with a shovel, then the device will fit into it more easily and the work will go much faster. The recommendations given will certainly help the master make a functional and effective tool that will serve him for decades and become a very good assistant.
Homemade hammer drill: concrete vibrator and hole drill
When pouring concrete, each layer is compacted. This is done manually by punching the mixture laid in layers with rods made of different materials (metal, wood). All work can be done much faster with the help of special devices - vibrators. But a factory-made vibrating plate purchased for home use is not always an economically viable option because it is expensive. It doesn’t make any sense to work on it several times and then leave it to just lie there. In this case, you can make a vibrator for concrete from a hammer drill with your own hands. A homemade product will speed up the compaction process and improve the quality of the work.
Designs and Applications
There are three main designs of earth drills:
- Garden. Usually these are two semicircular blades welded at an angle to one another. A hand drill of this design is used to organize holes for planting plants, which is why it is called “garden”. But the same tool is used to make holes when installing posts for fences, gazebos and other light buildings.
An example of a homemade earthen garden auger
- Auger drill. It differs in that it has a longer cutting part. It is used for the same purposes - to make holes for pillars. Due to its design - a longer cutting part - it needs to be removed less often, so drilling usually goes faster.
The auger drill is distinguished by spirally wound several turns of the spiral
- Drill for TISE piles. This design is similar to a garden auger, but has an additional folding blade to form the expansion at the bottom of the pile characteristic of this type of foundation.
Folding blade - features of the TISE pile drill
Garden earth drills that are easier to make. Depending on the type of soil on which drilling is carried out, their design is slightly modified. This is the beauty of homemade drills - they can be “sharpened” to specific conditions and it’s not just about the size - the blades can be made removable, bolted on, but also about the design features. Yes, ordinary drills in the store are inexpensive, but they are “universal”. They work well on “light” soils.” On loams, clays, marl, etc. they are ineffective.
This is interesting: How to make a hand drill for the earth with your own hands - we explain in detail
Electric drill for excavation work: advantages of modern devices
You have to use a variety of equipment in your garden. To plant trees or build a fence, the owner will need an electric excavation drill. This device is simple in design and has high performance. You just need to choose the right device, and the work will take less physical effort and time.
general information
Before going to the store to buy such a device, you should find out what an electric drill for excavation work is and how it generally works.
Most models have a special frame as the main structural element. It has two handles, and also has an electric motor, complemented by a gearbox.
The latter is necessary to increase torque when using the device.
There are many criteria for choosing an electric drill
During work, the unit must be held by two people at the same time. When the gearbox shaft rotates, torque is transmitted to the screw auger.
Thanks to him, it becomes possible to perform a variety of earthworks. How much you have to spend on purchasing equipment largely depends on its characteristics.
The most important are:
- dimensions;
- power;
- terms of Use.
The range of such devices on the Russian market is small, which is explained by the limited scope of their use. But in fact, an electric drill is a fairly universal device.
The choice in favor of a specific type must be made by the consumer based on the type of soil prevailing on the site.
In addition to it, you can purchase a variety of attachments that manufacturers offer for different surfaces.
In this video you will learn more about the earthen drill:
Advantages and disadvantages
Although electric earth drills are available in stores, they are rarely used on sites. Many people refuse to buy a device because they simply do not know about its main advantages:
- Saving physical strength. These devices are powered by electricity, making the job of drilling holes in the ground an easy task.
- Environmental friendliness. Unlike gasoline devices, their electric counterparts do not emit exhaust gases during operation, so there is no harm to plants or the environment.
- Silence. An electric drill does not create noise during work. Thus, its use completely eliminates discomfort for neighbors.
- Minimum weight. Modern models are lightweight, which also gives them an advantage over gasoline devices.
The main and only disadvantage of these devices is that the drill is tied to a 220 V electrical outlet. If the site is not electrified, then it is not possible to use such equipment. Although many models are equipped with batteries, the battery energy is not enough for long-term operation of the device.
Rules of application
Typically, an electric earth drill is used to make holes for planting fruit trees or shrubs. But this device can also come in handy during construction work. It is great for creating holes where piles or other supporting elements will later be installed.
Manually creating holes in the ground is a labor-intensive task and is made more difficult by the presence of rocks and tree roots.
However, using an electric drill can solve the problem easily and quickly.
In a situation where it is necessary to drill holes in a hard-to-reach place, where it is not possible to place large equipment, such a device will significantly facilitate the process.
There are a variety of electric drills available in the market today. They differ in size from each other. They can even be used for work such as drilling a well or constructing a well. If you need a device to perform a wide range of tasks in the garden, then you can easily purchase it at any specialized store.
Nuances of choice
In order for equipment to provide high efficiency when used, it should be selected correctly, focusing on the tasks to be solved. The main points that deserve attention when choosing an electric drill are the power of the device and the equipment of the device.
It is necessary to understand that low power limits the scope of use. But buying high-power equipment is also an irrational decision, especially if it is planned to be used only occasionally in the garden. The optimal choice would be to purchase a device with a power of 1.5 kW.
If an electric drill is required to install a pile foundation or perform another labor-intensive task, then models from 2 kW and above should be considered.
The well-equipped device makes it easy to perform a variety of jobs. Such a device can be considered universal, but this leads to an increase in its cost. In specialized stores, the minimum price for such equipment is 15,000 rubles. To get a high-quality and reliable device at your disposal, you need to spend a lot of money.
Main manufacturers
Many companies produce drilling equipment for use in garden plots. In countries such as Japan, Sweden and Italy, there are many companies producing electric drills . Among Russian consumers, the most popular devices are from the following companies:
- ECHO. This Japanese company produces a variety of products. The models are highly reliable and delight with their performance characteristics. Their feature is a fairly simple design. This eliminates frequent breakdowns and facilitates maintenance. The average price tag for devices from this manufacturer is 28,000 rubles.
- EFCO. The Italian manufacturer offers a variety of devices for drilling operations. A special feature of the devices is their increased strength; they can easily withstand heavy loads. The devices are great for frequent use. The brand's products are offered at an average price of 29,000 rubles.
- STIHL. The equipment of this company is well known on the Russian market. The domestic manufacturer offers a variety of devices. Its product line also includes electric drills. The models are practical and durable. They are also economical to use. The devices can be used to perform work of varying complexity and are equipped with a safe locking system. The average price for them in comparison with foreign analogues is much lower and amounts to 15,000 rubles.
By choosing a device from one of the well-known manufacturers, you can get a reliable device that will last a long time. You should not purchase equipment secondhand. The best solution is to cooperate with a dealer. You can buy really high-quality equipment from an official representative of the brand, and in this case, competent service is guaranteed.
: how to make a manual hole drill with your own hands.
An electric drill is an indispensable device in the garden. Many jobs are difficult to perform without this universal device. Modern models are very easy to use and allow you to solve a variety of problems.
Even creating holes for a pile foundation will not require large expenses and physical strength, when such a technique is used, you just need to choose the right device. Preference should be given to products from well-known companies.
Types of equipment
In what cases can this type of equipment be used:
- When utility networks are laid.
- For the construction of a well.
- For installing a load-bearing base on piles for light outbuildings or other structures.
- When installing a fence.
Types of structures and their technical characteristics
In the past, vertical shovels were used for such purposes. They have been replaced by new, improved, simple models that will greatly facilitate all types of work.
A few simple kits:
The simplest mechanical device
It is a conventional double-sided equipment with a tubular rod, a handle and a cutter with 2 blades on the other side.
Used for digging shallow holes and shallow wells.
It can be used for all types of work
Auger drilling device
The main differences of the improved manual model are that behind the cutting blades there is a screw auger. Thanks to several cutters and a split design, work is carried out quickly, and due to extension, penetration occurs to the required depth.
What happened
The weight turned out to be 5 kg. Rotation can be provided either left or right, it all depends on how the terminals are connected to the battery. Rotation speed is about 140 rpm. This makes it quite comfortable to make holes in the ice.
I’ll also tell you a case of how NOT to do it. I started assembling the drill at the end of last season, screwed on the handle, installed the auger, threw the wires directly without buttons and relays and ran to the tests. The first hole was good, the second was a total “song”, and on the third the auger got caught on the lower edge of the ice..... In general, while I ran up and threw off the terminals, the handle broke off on the ice. It’s good that the drill itself didn’t drown. So don't repeat other people's mistakes. I wish you all a good bite and big catches in the coming season.
