10.13.2020 Author: VT-METALL
Issues discussed in the material:
- The nuances of vertical welding
- 2 methods for creating a vertical seam using arc welding
- 3 techniques for creating a vertical seam using arc welding
- Possible defects in a vertical arc welding seam
- Recommendations for vertical seam welding
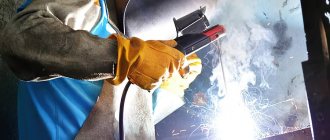
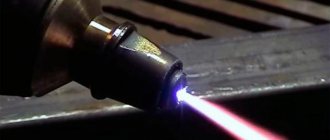
Vertical arc welding is a rather complex technique that often baffles novice welders. The main problem is that the molten metal flows downwards, thereby creating a barrier to the progress of the main weld. Due to the presence of electrode slag, the connection point turns out to be of poor quality, and the work goes down the drain.
However, there are ways to avoid this. Naturally, without practice you cannot learn and it is better to trust the specialists. But if you want to do everything yourself, then knowing the rules for welding vertical seams will greatly simplify the process. In our article we will analyze in detail how to correctly carry out such a procedure and what features need to be taken into account.
Peculiarities
Vertical seams are performed by welders with a grade of at least 3, since welding this type of seam is not an easy process. It has a number of the following features:
During the process of making a vertical weld, molten metal flows down under the influence of gravity and forms defects such as sagging and this must be dealt with in a certain way.
There are several welding techniques, which ones are used and in which cases we will consider below.
The process is performed at reduced welding current values (10-15%) from the values for the lower position.
Depending on the direction of vertical welding, the designations B1 are used - the process is carried out “ascending”, starting at the lowest point and going up, and B2 - “descent”, that is, starting at the top point and leading to the bottom.
Horizontal surfacing
Welding of horizontally positioned butt pipes is considered a rather complex technology. Only a professional welder with certain skills and experience can perform such work. The most difficult thing is the constant adjustment of the electrode to change the angle of inclination.
Welding is performed in three consecutive positions:
- Ceiling.
- Vertical.
- Bottom.
Each seam is made with an individual current value. The ceiling position allows welding at a high power level. All stages involve continuous welding; at the beginning it is best to use the “backward angle” method, and complete the work with the “forward angle”.
Welding principles and basic requirements
The basic principle when welding vertical seams using manual arc welding (MAW) is that the process must be carried out from the bottom up continuously or with the electrode detached.
It is always more difficult to weld from top to bottom, because the metal will drain more actively and the process will have to be carried out at low current values, which often does not provide the required penetration.
When welding “uphill” from the bottom up, the metal of the weld pool will be supported from leakage by the previously deposited and already crystallized metal. The flow of metal will be especially noticeable after it heats up and becomes more fluid.
Also an important principle when welding vertical seams is the oscillatory movements of the electrode. We'll talk about how to perform the movements below.
The basic requirements for preparation and welding are as follows:
The workpieces to be welded must be cleaned to a metallic shine using an abrasive tool, file or wire brush.
Next comes assembly and tack work. A tack is a short-length welding seam performed to secure parts during the welding process. Because due to an increase in temperature, the metal expands and deforms.
The size of the tack depends on the thickness of the parts being welded. As a rule, the tack height is 0.5–0.7 times the thickness of the parts. Their length is from 10 to 30 mm. The distance between tacks is 150-250 mm.
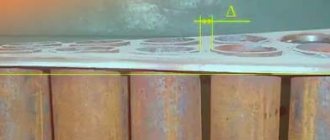
Check dimensions after assembly. The gap between the parts, the angle of the bevel of the edges (if provided for by the type of connection), and the displacement of the parts relative to each other are checked.
Below are the permissible values of the controlled parameters using the example of a C17 butt joint with a V-shaped one-sided groove in accordance with GOST 5264-80.
Fillet welds
This type of connection is quite common in cases where it is necessary to fasten two plates or profile pipes at an angle of less than 180 degrees. In metal products, the most common joints are those located normal to each other. In this case, a uniform load and stability of the entire structure is ensured.
There are several types of fillet welds:
- overlap;
- T-bars;
- with adjacent edges of parts;
- with and without edge cutting.
The spatial positions for performing such work may be different. The hardest part, even for experienced welders, is a T-joint turned upside down.
Fillet welds can be welded horizontally or vertically. In addition, welding can be carried out with or without separation. In terms of length, there are short joints up to 250 millimeters long and medium joints up to one meter.
In order to weld a fillet weld efficiently and correctly, you should know about the main defects when making it.
Methods for making welds.
The most common problems are:
- applying the deposited metal to the sides of the part in an uneven layer;
- undercuts resulting from the “gnawing out” of small areas from the surface of the metal by an arc;
- lack of root penetration is a characteristic defect that appears in inexperienced welders as a result of incorrect movement when welding the electrode on the sides;
- incorrect leg - a disadvantage associated with non-compliance with the speed of the electrode, as well as with the choice of incorrect welding parameters;
- wrong angle.
In addition to the indicated defects, which often occur in case of non-compliance with welding technology, there are other features. These include voids, various inclusions, cracks, and irregularities in the shape of the seam.
In order to properly weld a fillet weld with electric welding, it is worth remembering not only about possible defects, but also about the correct preparation of the edges of the part. The joint of products up to five millimeters thick does not require additional measures. If the metal is covered with rust, remove it with a brush.
Products with greater thickness require one-sided cutting of edges. In this case, make a 45 degree bevel on the attachment plate. This creates the necessary space for the additive to flow, which strengthens the joint.
Double-sided edge cutting is performed for parts with a thickness of more than ten millimeters. The cone of the plate is usually left blunt, with a thickness of up to 2-3 millimeters, which helps protect the part from burns and sagging.
The possibility of distortions and deformations should also be eliminated or reduced to a minimum. This is done using tacks placed on both sides of the part. Welding with an inverter is carried out alternately on both sides.
Making several passes from one part and then from the other is unacceptable, since the tacks will burst under such a load.
As mentioned above, making corner joints may be accompanied by a number of defects. In this regard, you should remember the reasons for their occurrence and try to prevent them. For this purpose, technologies have been specially developed that make it possible to form a joint between metals at an angle.
The welder decides which method to use, depending on the situation. There are two main technologies: “boat” and in the lower position. The first type is used for small-sized structures not secured to the floor. In addition, this option will be the easiest for beginners.
The electrode is held in a vertical position with a slight tilt towards the welder. No oscillatory movements are made to fill the root. Once the slag has been removed, another pass is made. Their number is determined by the thickness of the product.
Subsequent seams can be made with oscillatory movement of the rod. This will give them the required width. The method is excellent for uniformly placing the additive on both sides of the part; it also eliminates undercuts and lack of penetration.
In the lower position, large-sized metal structures are welded, which cannot be tilted to a position convenient for “boat” work. High-quality root filling is achieved by tilting the electrode at 45 degrees relative to the shelves and tilting to the right or left.
Types of seams when welding.
The first pass is performed without transverse movements of the electrode. However, you should constantly make longitudinal jerks. This will remove slag, which would otherwise flow forward and block the view of the weld pool. After the joint has been completed correctly, subsequent passes can be applied in a “crescent” pattern.
If you adhere to the above tips, the seam will be of high quality, reliable and beautiful.
T-type connection
This type of connection is a type of fillet weld. Obtaining an ideal joint can be achieved with the normal arrangement of the parts relative to each other. In this case, one of them must be on a horizontal plane.
A high-quality weld can be obtained if simple rules are followed. As for additional preparation of the product, it is absent when the metal thickness is less than 12 millimeters, and in the case of thicker walls from 12 to 25 millimeters, preparation should be performed in a V-shape.
One-sided processing of U-shaped edges is done with wall thicknesses from 25 to 40 millimeters. Above forty millimeters, double-sided V-shape trimming is performed.
When welding a vertical part, its lower edge is cut off evenly, the width of the joint should not exceed two millimeters.
An important point in this type of work is the correct ignition of the arc. Do this before starting welding.
The surfaces to be joined are positioned at 45%, and welding is carried out with a “boat”.
Lap joints
A similar joint is made on sheets of metal placed on top of each other at a distance of three to five thicknesses of these plates. In this case, no additional edge preparation is required. The products are welded around the perimeter, as well as along the edge of the corner formed during application.
You should keep in mind the high consumption of material in this type of work. Nevertheless, in practice this option is used quite often.
Conditions for obtaining a high-quality seam
In order to obtain high-quality connections when making vertical seams using electric welding, several important conditions must be observed:
The welding current is less (10-15%) than when welding in the lower position. This condition will ensure minimal flow of molten metal and avoid sagging.
The choice of welding current should be carried out on a test workpiece. Initially, you need to set the recommended, average current values and start cooking.
If the electrode often goes out, sticks, and the arc burns poorly and unstably, then you need to add more current.
If, during welding, the edges are burned and the metal of the bath seems to fall through, then the values need to be reduced. The setting step is usually 5 A, that is, if you need to increase it, add it by 5 A and try cooking again, and so on until we find the optimal values.
The welding process should be carried out with a “short” arc. Arc length is the distance between the electrode and the weld pool. A “short” arc is considered to be an arc whose length is 0.5 - 1 electrode diameter, but not more than 1.5 mm.
The longer the arc, the stronger the heating of the metal and the higher its pressure. All these factors inevitably lead to defects in the form of pores, burns, sagging and undercuts.
An undercut is a welding defect in the form of a small depression between the weld and the base metal.
Useful article - How to find yourself in the NAKS register of welders.
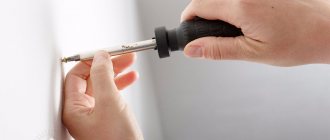
Instructions for a beginner welder
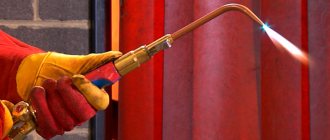
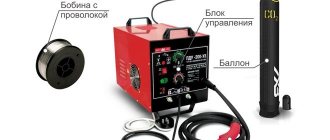
Welding work can only be performed if appropriate equipment is used.
Standard kit contains:
- Jacket, trousers, gloves, shoes made of fireproof, durable, strong materials.
- A headdress that completely covers the back of the head.
- A special protective mask for the face and eyes.
To carry out welding, you should use a working device, the electrical part of which is closed with a reliable housing. The electrical cables included in the device must have complete insulation and comply with the electrical characteristics of the device.
The welder's place must be equipped with a work table, light sources, a grounding bus, means of protection against electric shock and fire-fighting equipment.
And even before starting work, you need to carefully study the rules of electric welding, consider and study methods and options for making connections.
How to cook vertical - methods
As mentioned earlier, there are 3 techniques: bottom-up, top-down and electrode separation welding.
Experienced welders most often use the bottom-up technique; it is designated B2. The process is performed “ascending” from the bottom to the top.
The top-down method is less commonly used - B1. Here the reverse welding situation is performed “downhill” from the top to the bottom.
Beginning welders and amateurs use a method called welding with electrode separation.
The process goes from bottom to top “ascending”, at the same time the welding arc is ignited and a small area of the “welding point” is welded, and the arc breaks. Afterwards the process is repeated until the cutting is completely filled.
For the first two methods, it is best to use electrodes with a basic coating, and for pull-off welding with rutile. Because rutile electrodes provide easier ignition of the arc, but it is more difficult to weld long seams with them due to the large amount of slag.
During the welding process, the slag spreads greatly and it is difficult for a novice welder to understand where in the weld pool there is metal and where the molten slag is. Because of this, such a defect as seam slagging often occurs.
Let's look at each of these methods in detail below.
Down up
Using this method it is easiest to control the weld pool and weld large thicknesses. The welding seam begins at the lowest point and gradually fills the groove and rises to the top.
The process of welding a vertical seam itself is carried out in several stages: initially, a friend is ignited, the length of which is slightly more than 2-3 times the diameter of the electrode. This is done in order to warm up the metal so that the electrode does not stick. Warming up occurs for 2–3 seconds, after which the length of the others decreases to 0.5–1 the diameter of the electrode.
Next, you can begin the welding process, namely surfacing at the lower point of a small roller (flange). If the metal thickness is more than 3 mm, then welding must be performed in several passes. The first is that the root pass must be cooked without oscillatory movements, simply moving the electrode slowly from bottom to top or making reciprocating movements along the cutting edges.
During subsequent passes (filling and lining), the electrode is slowly moved from one edge to the other.
During the welding process, you need to pay special attention to the speed of the process, since if you weld too slowly, the metal will begin to flow down, forming sagging. At the same time, if welding is carried out too quickly, then there is a risk of not welding the joint.
Beginner welders can use this technique here. It is necessary to weld so that the top edge of the weld pool is approximately in line with the top edge of the electrode.
When making vertical seams from bottom to top, the welding electrode is usually held at an angle of about 45–50 degrees.
In cases where it is necessary to ensure deeper penetration, the electrode angle is chosen closer to 90 degrees. And when the metal begins to flow, the electrode is tilted towards the weld pool, holding the molten metal in the weld pool due to arc pressure.
To fill the groove, the welder needs to make oscillatory movements with the electrode. The main types of movement have the form: triangle, crescent, letter Z and others. They will be described in detail below.
Top down
The top-down welding method is used less frequently, since its technique is more complex and requires certain welding electrodes that allow downhill welding. With this method, the weld will have a smaller penetration depth, but a larger width. This is good in cases where you need to weld thin metal so as not to burn through it.
The arc initiation process occurs when the electrode is positioned at an angle of 90 degrees to the surface of the part. After the arc has ignited, the electrode is placed at an angle to the weld pool so that, due to the arc pressure, the molten metal does not flow out.
The process is also performed with oscillatory movements. In this case, Z-shaped movements or crescent-shaped movements are most often used.
This method (B1) is often used in semi-automatic welding, and quite rarely in manual arc welding.
Useful article - Silumin, what kind of metal is it?
How to weld a vertical seam with lift-off arc welding
The undoubted advantage of the pull-off welding method is that even a beginner can weld a vertical with it. Since when used, the metal will have time to cool and will not flow. This greatly simplifies the process, but there is also a disadvantage in the form that the speed of welding is greatly reduced.
The execution process is as follows:
- connect the device to reverse polarity and set the current strength (select the value on test pieces)
- the arc is ignited in the cutting of the edges and we increase its length to 1.5–2 times the diameter of the electrode;
- electrode at an angle of 45–50 degrees.
- we heat the metal at the lowest point for 1-3 seconds by moving the electrode from one part to another;
- the metal cools down changing color from bright red to burgundy at this moment the arc is ignited again;
- the arc is transferred from one part to another, lingering on each of the walls, making, as it were, movements in a spiral, superimposing points on one another.
Electrode melting process
To speed up the time, it is much easier for beginners to learn how to weld a vertical seam with an arc tear. As work progresses, the arc discharge is supported by the cut of the weld pool. The trajectories of conductor movement during the formation of a crater with and without separation are carried out according to the figure below.
Metal welding from top to bottom will become more stable when short electric arcs are produced. You need to confidently guide the conductor strictly perpendicular to the edges. In the process, it is tilted down 45°.
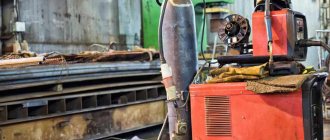
The assembly result directly depends on the equipment and its capacity. Manual welding provides:
- penetration into hard-to-reach welding areas;
- installation in every position;
- use of main types of alloys.
The disadvantages include: low efficiency, dependence of the quality of joints on the qualifications of the worker, harmful fumes and sparks that occur during work, a special welder’s uniform and mask are required.
How to weld a vertical seam - electrode movements
For vertical joints, 3 types of electrode movement are most often used:
- Oscillatory movements across the joint.
- Reciprocating movement along the joint.
- Rectilinear (direct) movement.
Oscillatory movements of the electrode make it possible to obtain seams of large width (up to 3–4 electrode diameters in one pass). This seriously increases productivity, especially in cases where the metal thickness is 20 mm or more.
Reciprocating and straight-line motions are used when welding root pass, also for parts with small thicknesses and on stainless steels. The seam will be more accurate and durable, and during the process you can clearly see where the slag is and where the metal is. With this method it is easier to maintain the same speed and arc length, and therefore it will be easier for beginners.
Do you want to know what MIG MAG welding is and what is the difference? Follow the link.
Reciprocating (for rutile electrodes)
Reciprocating motion when welding vertical seams is most often used when the thickness of the parts to be joined is small (up to 5 mm); welding is performed with rutile electrodes. This method can also be used when welding a root seam (the root seam is the seam that is performed very first in multi-layer welding).
The technique is simple and consists of the following:
- The arc is ignited and a small section of the seam is welded (5-10 mm).
- Next, the electrode returns to 1/3 of the welded area.
- Afterwards, the electrode is moved upward again, welding a new 10-15 mm, and this is repeated until the end of the joint.
The result is a weld bead with a width of 1.3-1.5 electrode diameter.
Herringbone
For vertical connections, this method of movement is performed as follows:
- A small shelf is fused at the bottom, which will prevent metal from leaking out.
- The electrode begins to move up and to the right, after which it returns down.
- Next, the electrode is led up and to the left and then returned down again.
- This process is carried out until the joint is completely welded.
- The process must be introduced evenly (at the same speed) in order to obtain the most accurate seam.
Triangle
This method of movement is most often used when it is necessary to weld large thicknesses, since it allows you to obtain the widest seam up to 4 electrode diameters in one pass. It is very convenient to use for T-joints. The technique is as follows:
- The arc is ignited and the metal is heated.
- In the lower part, you still need to fuse a small shelf on each of the edges.
- We start welding in the center, light the arc and delay a little (up to 0.5 seconds).
- We move the electrode to the right edge and linger on it.
- We move to the left edge and linger on it.
- We move to the center of the joint a little higher and repeat the process until completion, lingering on each of the edges and in the center.
You need to pause at points so that the seam has a smooth transition to the base metal (it is not extremely convex), and also so that an undercut does not form.
Crescent and Z-shaped movements
Z-shaped movements, as well as their complicated version with a crescent, are performed in the following sequence:
- We direct the shelf below.
- We light the arc and warm up the metal a little.
- The electrode moves smoothly and at the same speed from one edge to the other
If you use these methods for cladding, it is better to use an angle close to 90° so that the seam is not excessively convex. When filling, the angle can be made more acute.
Technique for obtaining a good weld joint
When the rollers begin to turn out smooth, you can try to start making connecting seams. This operation can be performed by a fairly experienced trainee who knows how to weld using electric welding.
The electrode is ignited according to the technology described above. The only difference will be the movement of the welder's hand. She will perform oscillatory movements. The melt will seem to move from one surface of the part to another. Movement can occur along several trajectories:
- Zigzag;
- Loop-shaped;
- Herringbone;
- With a sickle.
For training, you can take a small metal blank. Draw a line along the surface with chalk so that it can be seen through the dark glass of the mask. It is along this that you need to move the electrode in order to get a kind of seam, in the form of any of the above paths.
After the seam has cooled, you need to beat off the slag with a hammer and examine the work done.
When you have a little experience, you can begin to make connecting seams, which have several types:
- T-bars;
- Butt;
- Angular;
- Overlapping.
In addition, such seams can be horizontal and vertical, and can be welded in different directions.
Only after numerous trainings can you achieve uniform hand movement. After this you can get beautiful details.
How to properly weld a vertical seam using semi-automatic electric welding
Semi-automatic welding of vertical seams is most often performed using wire with a diameter of 0.8 to 1.2 mm. For this welding method, the top-down method is very often used for thicknesses up to 4 mm without oscillatory movements. The angle between the burner and the product should be about 20-35°.
If the thickness is greater, then welding from bottom to top is used. The torch, in the same way as during manual welding, performs oscillatory movements. Most often this is a “triangle” type movement with a delay in the middle. The angle of inclination of the burner to the product is around 75–85 degrees.
The welding arc is oriented towards the leading edge of the bath. This is done in order to reduce the flow of liquid metal due to arc pressure and ensure deep penetration of the root.
Useful article - Semi-automatic welding for beginners with gas
Types of connections
Vertical seams are performed on such types of joints as:
- Overlapping;
- Butt (butt);
- T-bars;
- corner.
Butt-butt
Vertical welding of butt joints is most often used for pipes, sheet structures and profile products. The process can be single-pass or multi-pass, single-sided or double-sided, with or without a lining. The most common butt joint is a double-sided V-groove made without a backing.
Butt welding with a thickness of up to 3.5-4 mm is most often performed without oscillatory movements and without cutting edges in one pass. In cases where the thickness is more than 4 mm, the edges are cut and the process is performed with oscillatory movements of the electrode.
overlap
The lap joint is used when welding sheet structures, as well as welding shaped and profile products. The most common is the H1 connection in accordance with GOST 5264. Lap joints can be up to 60 mm thick according to this GOST. The welding process is carried out by performing Z-shaped oscillatory movements from bottom to top.
How to weld a vertical seam in a T-joint or corner joint
Vertical corner and T-joints are welded from bottom to top with oscillating movements of the electrode in the form of a triangle with a delay at each of the edges and in the center.
Vertical joint welding technology
Without experience in welding, it is difficult to understand how to safely electric weld vertical seams to specifications and make it smooth and consistent. Professional metal adhesion is obtained when:
- The mutual perpendicularity of the electrodes and metal parts is constantly monitored.
- A shortened arc is used, due to which crystallization is accelerated. This reduces the number of drips and registration defects.
- Changed the angle of the conductor to stop the flow of melts.
- There has already been a leak. Then you need to increase the current readings and increase the steps to increase the crystallization time.
You can learn more about how to weld properly here.
When you need to lay a path from top to bottom in a hard-to-reach place, it is better not to rush and follow special standards. As a result, the iron will be pliable, and drips will not interfere.
Rules on how to carefully, correctly and professionally weld a local vertical seam when the metal sheets are very thin:
- pre-treat the product, remove dirt and other residues on the metal, remove galvanization;
- in targeted steps, reduce drips and burns of the material.
It is easy to understand how to properly weld a vertical seam using inverter welding if the welder takes into account the following factors:
- composition of connecting materials;
- welding techniques for such compositions;
- master's experience;
It is also necessary to find out in advance about the capabilities of the equipment used.
Electric arc length control
When welding a vertical seam, controlling the length of the welding arc is extremely important. An increased arc length leads to the formation of many defects such as:
- surges;
- undercuts;
- craters;
- pores;
- spray;
- seam unevenness;
- metal burns.
Beginning welders need to practice holding the same arc length, especially when moving the electrode.
The following arc lengths are distinguished:
- Short arc (which is 0.5 - 1 electrode diameter, but not more than 1.5-2.0 mm).
- Normal arc is 2.0-3.0 mm.
- Long arc - more than 3.5 mm.
For manual arc welding, it is recommended to use a short arc. Using normal arc length is also acceptable.
Welding mode tables
For the most commonly used electrodes of group E50 (for group of materials M01 - carbon and low-alloy “black” steels), the welding modes for vertical joints are given below.
| Electrode diameter, mm | Type of current, polarity | Welding current, A |
| Position - vertical | ||
| 2,5 | D.C. Polarity - reverse | 65-80 |
| 3,0 | 85-100 | |
| 4,0 | 110-140 |