A source of through corrosion, or simply a hole, in the bottom of the car is the price to pay for comfort in the cabin. Its primary source is not anti-icing reagents acting outside, but moisture accumulating under the “pie” of heat, sound and waterproofing. Therefore, when eliminating it, work is carried out mainly from the inside.
If you follow all safety rules when welding, you must completely dismantle the interior, including the trim. This is always very time consuming. Therefore, the question of how to seal the bottom of a car without welding is very relevant. Moreover, most alternative methods do not give worse, but rather better results.
Methods for restoring a car floor
Let's look at effective methods of how to repair a hole in the bottom of a car without welding for a long time.
Fiberglass and epoxy patch application
To fill the void in the bottom of the car with fiberglass material, you must:
Prepare the metal, remove rotten parts, treat with a converter. Clean the surface from traces of dirt and grease. Cut several pieces of fiberglass. The first should exceed the size of the hole by 25-35 mm, the second by 35-45 mm, the third by 55-65 mm. For larger holes, 4-5 pieces of material may be needed. The patching begins by soaking the first patch with epoxy glue. The piece is carefully placed on the hole, the edges are smoothed with a roller or brush. The remaining fiberglass fragments are glued one by one
It is important to saturate the material well with resin. This will prevent moisture from seeping between the layers and destroying the adhesion of the glue.
It is recommended to apply the following patches with a 45 degree rotation. After hardening, the fiberglass will evenly distribute the load due to the displaced layers.
The next patches are applied after the previous ones have set. Work is carried out outside and inside the salon. After final hardening, the fiberglass can be sanded and prepared for the application of primer, bitumen mastic or paint.
Method for filling holes using putty
There are special types of putties on the market that contain fiberglass. They are used to seal small defects. Fiber filler increases the strength of the putty and resistance to mechanical stress.
The process of patching a hole is similar to using epoxy glue. The composition is applied in small portions in several stages
It is important to wait until the previous layer has set - this will prevent the wet putty from sagging and loss of strength.
This method requires careful degreasing of the edges of the defect. In addition to rust removal procedures, it is necessary to thoroughly treat the area with anti-silicone compounds. Otherwise, the putty will not bond properly to the metal.
Does the DVR suction cup not stick to the glass? Let's glue it tightly!
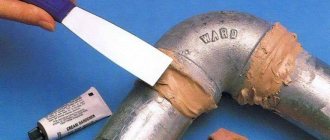
Soldering a metal patch
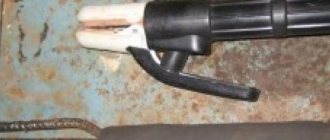
Soldering is one of the effective methods for repairing a hole in the bottom of a car without welding. But household soldering irons are not suitable for heating metal - the area is too large. Portable gas burners are used. For convenient access to the defect site, use a remote gas supply through a hose.
Solder and flux are required for soldering. A low-melting filler with a high content of tin and lead is used as a soldering mixture. The flux used is acidic; if not available, battery electrolyte can be used.
Soldering has two disadvantages:
- Fire hazard. If safety precautions are observed, this point is leveled out.
- Tin-lead solder causes electrochemical corrosion of the metal in the joint area. To reduce this effect, you need to thoroughly heat the overlapped joint.
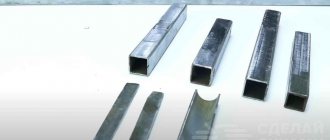
Installation of galvanizing and riveted connections
The technique of applying new sheets with rivets is popular among garage workers. The technology allows you to repair small and large-scale defects without resorting to chemical components and careful preparation.
First, the affected part of the bottom is removed. The edges of the cut are cleaned to a shine, paint, primer, and traces of sound insulation are removed. A new sheet of zinc steel is cut along the contour. The connection points of the patch with the bottom are marked, and holes are drilled to the diameter of the rivet. Note that the patch sheet is cut with a margin of 5-10 mm, depending on the damage.
The next step is to install the steel rivets. The operation is performed with a manual or pneumatic gun. The second option significantly speeds up the process and relieves the burden on the master’s hands. Upon completion of fastening, the joint is treated with bitumen sealant, and the sheet is primed and painted in color.
It is more difficult to install metal patches on curved areas of the floor. The repairman will need the ability to form the correct geometry from a straight galvanized sheet. In the area of power elements (spars, spacers, etc.), it is allowed to install bolts in these units. Together with rivets, they “tighten” the structure and increase the mechanical strength of the floor.
Methods for unscrewing bolts, screws or screws with licked heads
Is it worth soldering
You can also seal holes in the bottom using soldering. However, ordinary household soldering irons are not suitable for heating metal with a thickness of 0.5 mm or more. Most likely, a hair dryer will not help you with this. You need to use a portable gas burner, for example, Super-Ego R355, which fits into a small - volume from 400 to 700 ml - cylinder for camping stoves.
Solder and flux are required for soldering. The solder used is low-melting, with a predominant content of tin or lead. Flux can be replaced with electrolytic acid. The connection is strong and can withstand high vibration loads.
Soldering has two disadvantages.
- It involves hot work, which increases the overall complexity of the repair. This can be neglected if your hands grow from the right place;
- The main material of solder - lead or tin - is a substance that has a lower electronegative potential than iron. Therefore, upon their contact, electrochemical corrosion occurs, in which iron will play the role of a “sacrificial anode” and be destroyed.
Now you have an idea of how to seal the underbody of a car without welding. If you are careful and persistent in cleaning the surfaces, then treating them and protecting them, then the installed patch can outlive the car itself.
Application of fiberglass and glue
For moderate damage, the method of sealing holes with fiberglass is often used. When this area has been processed and cleared of layers of paint and rust, it is necessary to cut several overlays from fiberglass, the size of the hole plus 2 centimeters. This area should be pre-primed and allowed to harden.
Auto repair kit
An overlay is applied to the dry surface and secured with a mixture (polyester or epoxy resin + glue). The next “part” is applied and also fixed. Thus, all the fiberglass parts are glued, placing them one on top of the other. To prevent them from sagging or deforming, you should put a lining. When the resin and glue have dried, you need to treat the work area and paint it.
Fiberglass
Fixing holes on a car without welding
The main enemy of cars is corrosion.
If it is not removed in a timely manner, holes may appear in the car body that require the golden hands of a master. Types of possible patches. 1. Thin steel, laid over the holes and riveted.
True, you need to work carefully here so that it is not visible.
2. Fiberglass is glued to the inside using epoxy, and the outside is puttied with regular putty.
After it dries, knocking on this place, you can hear the sound of metal. Lightly sand, apply primer from a can, dry and paint.
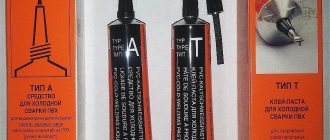
3. Small holes can be sealed using cold welding.
The process of its use is similar to standard welding.
4. Polyester resins with a hardener, intended for body work. We clean the holes, degrease, dilute the resin and smear the place where we plan to build the cage.
We impregnate the prepared pieces of fiberglass, which we cut in advance and apply two layers.
Dry for a day. Next, fry the fiberglass over gas to remove paraffin.
Cut out according to the template and apply in two layers. We do the same process on the reverse side.
Then we putty everything, prime it, apply joint sealant, prime it again and paint it. By the way, you can paint and prime using spray cans.
It is worth noting that all methods of patching holes are suitable for those places where there is no load on them.
Installation of galvanizing and riveted connections
Processing holes in the bottom of a car with galvanized metal is quite common. The main material required for this is iron sheet. Before installation, it should be secured with self-tapping screws and lubricated with mastic. It is best to use an anti-noise bitumen mixture. The galvanized sheeting is then laid and bolted in place using a drill. Then you need to treat the area with special means and level the entire surface. When everything dries and the structure is fixed, it should be coated with paint.
Decoding the symbols on the buttons and connectors of the radio
https://youtube.com/watch?v=xug-dOUT16E
Another reliable option for filling holes is to make rivet joints. Using this technology, large and small holes can be eliminated. To do this, the damaged area is cut out and the edges are cleaned of paint and rust. Next, steel rivets are cut out, since they are least susceptible to corrosion. Then the part is applied and secured with these rivets. When the structure is completed, the entire area is painted.
Pneumatic riveter
So, there are several ways to repair holes in the bottom of a car without welding. You can use any method described in this article. Choose exactly the option that you can implement. And remember, it is possible and very pleasant to carry out any task on your own.
How to Seal a Hole in the Bottom Without Welding
the simplest and most cost-effective option. material: degreaser (any), primer in a can. 2 years ago I made a reservation in the video, it’s polyester resin.
Answer to the question. Year ago this video shows how to remove a rotten part of a car without welding. 3 years ago This video was created using the TVclip video editor (tvclip.biz/user/editor) 2 years ago Repairing a body with polyester resin, without welding. 3 years ago FIRST part you can look at this link tvclip.biz/video/LIUL0mP_Vek/video.html For questions about purchasing this.Year agoHow to repair a hole using POLYESTER resin and fiberglass #painting #paintingcar #how topaint #garage.4 years agoAviation technologies.How to rivet a car. Video from a subscriber.Year agoAn experiment with a continuation!8 months agoOka car.Year agoHow to repair HOLES on
Soldering a metal patch
Soldering a metal element to a damaged area is a way to seal holes in the bottom or any other part of a car when you can close a small hole. To repair a machine using this technology, you must have the following tools:
- a piece of metal sheet;
- powerful soldering iron;
- flux or rust converter;
- putty;
- primer.
Materials in the car
So, first, the area that needs to be repaired is cleaned, paint, rust, and dirt are removed. Next, it is treated with flux and degreased. Then measurements are taken and a metal piece of the desired shape is cut out. Such an element will completely seal the hole, and the edges will overlap. When the part for the patch is ready, it is attached with a soldering iron. Then the edges of the patch are treated with flux. Finally, it is worth treating the area with putty and priming it. When the surface is dry, paint and a protective layer are applied.
This method of filling holes in the bottom of a car is the most popular. Experts note the durability of the soldered patches, since the connection is quite reliable. In addition, this method can be used to seal a hole of any size. In general, soldering a patch is quite simple, and even a beginner who does not have much experience in car repairs can handle it.
Sequence of actions when sealing holes in the bottom
Using a soldering iron
There is another way to repair a hole in a car body without welding. A soldering iron is required here. First of all, we clean the area from rust. We make the patch from a sheet of metal (you don’t need to worry too much about this; an ordinary can of auto chemicals will do).
It is important that the patch is slightly larger than the holes and also completely covers them.
Additionally, you can coat the metal surface with anti-corrosion compounds - this will increase the quality of our repairs. Then we service the edges of the patch, after which, using a fairly powerful soldering iron, we solder it with a continuous seam.
Next, you should check whether it turns out that the patch protrudes somewhat above the body. If there is a protrusion, we eliminate this deformation with several gentle blows of the hammer. We remove various dents with putty (it is important that its layer reaches no more than 2-3 mm, otherwise the material will crack). Before filling, clean the surface with a metal brush.
In order for the putty to adhere well, it is important that abrasive marks (small scratches) appear on the patch.
The next step is primer. Here it is necessary to complete everything as quickly as possible to avoid the possibility of rust occurring in the future. It is best to first apply a thin layer of phosphate primer, and when it dries, another two or three layers of acrylic two-component composition (the interval between applications should be about 5-10 minutes). Everything dries in about 3-4 hours; if there is infrared heating, you can reduce the procedure to 20 minutes.
Work technology
The rivet connection method is the fastening of two or more metal sheets using cylindrical rods with heads at the ends. Holes are pre-drilled in the parts to be joined. A rivet, with one head made in advance, is inserted into the hole and the second head is formed. The heads of the rivets pull the sheets together and prevent them from being torn off. The rod of this fastener prevents the lateral mutual displacement of parts and is subject to shearing forces.
Rivet joints are used in body production:
- for securing sheets (of light alloys most often);
- for securing parts made of plastic materials;
- when assembling frames.
During repairs, this method is most often used to replace corroded body cladding when welding is unreliable. Riveted joints are especially common when repairing floors - the damaged area is replaced with a new panel. A properly executed rivet seam is as strong as a welded seam.
Cold methods of sealing holes in metal
There are two ways to repair holes in the underbody of a car without using hot work.
- Using composite materials - various types of polymer resins in combination with a reinforcing filler and a curing reaction accelerator. With high-quality surface treatment, in addition to restoring mechanical strength, they play the role of inhibitors - retarders of chemical and electrochemical corrosion reactions;
- Installing sheet material patches onto rivets.
General technological rules
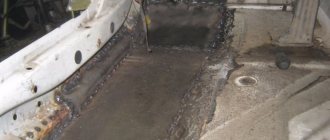
Holes in the bottom are usually discovered from the outside, when inspecting the car on a pit or lift. Signs of through corrosion are local swellings, which, when you try to pick them out, crumble into dust.
If you find such troubles, you need to open and remove the pie of heat, noise and waterproofing on the floor in the cabin in the entire area where the sheet of iron forming the floor is welded to the power elements of the body - thresholds, tunnel and others. Then you will see the whole picture of the damage and will be able to take preventive measures in those places where corrosion has not yet become through.
Hole in the bottom of the car
Before the actual process of sealing the holes, you need to take measures to slow down the corrosion process (stopping it is an unattainable ideal to strive for). To do this, all rags of iron are removed, and the edges that have residual strength are treated with sandpaper and a wire brush until shiny. The cleaned surface is treated with rust converters. For example, the “Tsinkar” composition. Work is being carried out inside and outside.
The work makes sense if the total surface of through holes does not exceed 15% of the floor area.
Fixing pinholes
If the source of through corrosion has a diameter of no more than 1 centimeter, it can simply be covered with a two-component polymer composition. Poxipol glue or a cold welding kit similar to plasticine gives good results.
A small hole makes it possible to use so-called cathodic electrochemical protection. Find an aluminum rod, make a rivet out of it and fill the hole with it. Within a radius of 20 cm from it, corrosion will stop. True, the rivet will gradually collapse on its own. But this may take five years.
Repairing large-scale damage
In this case, you will have to take care to restore mechanical strength. If the hole is on a flat area, then there is no point in messing around with epoxy and fiberglass.
A truly durable composite material is obtained only with absolutely precise adherence to technology - mixing proportions, drying mode and much more. Use ready-made material of this kind, for example, textolite. Having a thickness of 3 mm, it is not inferior in strength to sheet iron. The plate can only be installed with epoxy glue, but it is better to use a combined connection using rivets. The latter should be made of aluminum, then they will play the role of cathodic protection.
Patches on the bottom of the car
Long holes at the joints with power elements are eliminated with patches made of sheet iron or aluminum. They need to be bent according to the shape of the joint so that the width of the contact zone with the still living material is at least 2 cm. They are installed on aluminum rivets; the use of an epoxy compound would be useful. Especially if sheet metal is used. After all, you cannot know exactly its composition and in which direction electrochemical corrosion will go - whether it will destroy the patch or the body. The polymer resin will act as an inhibitor.
How to repair holes in a car body without welding
An alternative to this development of the situation may be to repair the hole in the car body yourself. First, you need to prepare to seal the hole in the car body. To do this, you need to go to the nearest car market or auto parts store.
We will need materials for working with the paintwork and metal panels of the car body: – sheet metal; – fiberglass and epoxy glue; – high power soldering iron; - sandpaper; – a hammer with a wooden head or a hammer and a wooden spacer; – acid rust converter; - White Spirit; – putty, automotive enamel; – two-component acrylic primer; – two-component acid (phosphate) primer. Next, the place on the car body is prepared where a through hole has appeared due to natural corrosion. It is necessary to thoroughly clean the surface at a distance of several centimeters around the hole in the body panel using sandpaper.
Repair of the VAZ-2110 underbody without welding
With any body repair, first of all, it is necessary to carry out an external inspection of the hardware, identify and note for yourself which areas are in poor condition and need repair or replacement. The condition of the bottom metal is determined in different ways:
- using a hammer and a core - if you think that there is rust in a certain area, you need to lightly hit the metal, check if there is rotten iron under the anti-corrosion coating;
- try to jack up the car on each side - if the thrust pads are rotten, this will be noticeable when you try to jack up the car;
- press in different places on the floor of the car - weak, rotten iron will bend under your feet;
- try to move the front seats back and forth in the cabin - problematic movement of the seats also often indicates the poor condition of the metal.
Any repair of sills and underbody using a non-welding method is not professional, and craftsmen consider it only a temporary measure to properly restore the condition of the body; a welding machine is indispensable. When repairing the bottom without welding, patches and new body elements are not welded, but installed on rivets or self-tapping screws (bolts), preparation and all other work is carried out in the same way as during traditional body repair using a welding machine.
Repair of large-scale damage
If the bottom of the car is rotten over a large area, then it is necessary to restore the strength elements of the floor and restore strength. In addition to metal, composite materials are often used - textolite and other combinations. The method of performing the work is similar to applying galvanized patches. If the affected area is flat, there is no need for epoxy adhesives. Standard rivets and self-tapping screws will do.
It is worth remembering: if the area of the affected bottom exceeds 60-65% of the total size of the machine floor, restoration work is considered ineffective. A complete replacement of a part from a similar car using a welding machine will be required.
Types of rivets
Made from malleable metals. The most common are rivets made of aluminum and its light alloys, mild steel, brass, copper and others. There are types:
- simple;
- special.
Simple ones have a solid core. The factory head can be cylindrical, round or countersunk (flat). These fasteners are used when there is good access to both surfaces of the sheets being fastened, because a pneumatic or hand hammer is used to form the second head.
Special rivets have a tubular rod and the factory head has a hole in the center. The second cap is obtained by pulling and then tearing off the mandrel (rod with a thickened end). The result is a head in the form of a thick shoulder. The second method is to push the cylindrical rod, as a result of which the inner shoulder expands and transforms into an outer one. Special ones are used in cases:
- the back surface of the joined sheets is inaccessible or difficult to access;
- for bonding metal to laminated plastic parts;
- for fastening decorative parts.
Method for filling holes using putty
In the area of the hole in the bottom, the damaged coating, that is, the old layer of paint, should be removed, the metal should be cleaned, and treated with a special preparation - a rust converter. Then the working surface is degreased and primed. Next, prepare a putty solution of uniform consistency. For greater efficiency, fiberglass is added to it (most often with large elements). Then the composition is carefully applied to the damaged area. This is perhaps the most important part of the job. It is necessary to seal all the holes, cracks and microcracks that may arise around it. Application of the solution should occur in several stages, allowing each new layer to dry.
Sealing with putty
To achieve maximum fixation of the putty on the damaged area, a backing is applied to the reverse side. It does not allow the solution to spread, but acts in the area that needs to be repaired. If the hole in the bottom of the car is large enough, this repair method can also be used with auxiliary elements. Instead of a lining, a metal mesh is installed in the damaged area. Therefore, the putty is evenly distributed over it, filling the entire space. After the solution has completely dried, this area is treated with automotive paint putty. Then the damaged area is painted and a protective film is applied.
Putty for cars
How to repair a hole in a car body in three ways
In addition, it is important to eliminate through holes with your own hands only if they are not too large.
Otherwise, you will have to order a professional service. Contents As a rule, holes most often appear on the bottom of the car.
And in this case, everything around is thoroughly cleaned, car cosmetics (rust converter) and many other kits are used. Degreasing and priming are also required. Automotive putties The technology of direct application of putty, without the use of a patch, involves application from the back side of the lining area.
In this way, it will be possible to significantly achieve maximum fixation of the composition. You can use a metal mesh instead of a lining as such.
These are even sold in stores, you can make them yourself, etc. The putty must be evenly distributed over the surface, filling the entire space of the hole.
Rivet seam
Regardless of the type, when repairing, it is necessary to use rivets of the same material as the sheets being fastened. Aluminum fasteners will gradually deteriorate if they are used to rivet brass, copper, corrosion-resistant or ordinary steel. In a more humid atmosphere, this process will be more noticeable, since electrolytic pairs are formed.
Important parameters of rivet fastening are the distances from the edge of the sheet to the center of the rivets and the pitch size (the distance between the axial axes of adjacent fastening elements mounted along the same line - the seam). The pitch size is a multiple of the fastener diameter and depends on the purpose of the riveted part. For the example above, with a diameter of 4 mm, the length of the riveting rod is 8 mm. The step size is 40 mm. From the edge of the sheet to the axis of the seam - 8 mm. In some cases, when repairing a body, they focus on the spot welding step and mark the installation of fasteners using it.
Installation procedure for simple rivets:
- The sheets are fastened with bolts through 5 - 6 holes drilled for rivets. Mismatched holes are processed by re-drilling or by reaming.
- The fastener is installed with the head to a thinner sheet.
- The head of the fastener is mounted on a massive anvil. Use a riveting stand for round heads - this will protect the head from deformation.
- A mandrel is placed on the riveting rod and struck several times with a hammer. The sheets should be pressed towards the cap.
- The upsetting mandrel is removed and blows are made along the axis of the fastener rod. As a result, the fastening element, crumpling, first fills the hole and then forms a blank for the closing head.
- The edges of the stave are struck at an angle, forming a head.
- A riveting mandrel is installed on the head and the formation is completed. When riveting fasteners with countersunk heads, as a result of flattening with a hammer, the metal crumples and fills the countersink.
- The mounting bolts are removed and fasteners are installed in their place.
Installation of special rivets:
- Item 1 for simple fastening elements.
- The rivet is inserted into the hole, and a rolling rod is inserted into the broaching device.
- The head is pressed forcefully against the sheets, which are pressed together.
- The tensioning device is activated until the fastener rod comes off.
- P.8 for simple ones.
Application for riveting the piercing rod:
- In most cases, the piercing rod is driven in with a hammer. During operation, it is necessary to control the tightness of the sheets adhering to each other, applying force near the riveting head.
- The head is pressed against the sheets under the action of advancing the piercing rod (it is struck with a hammer).
For mechanical installation of simple rivets, a pneumatic hammer is used. Short successive blows lead to the formation of the head. When using fasteners made of aluminum and light alloys, pneumatic guns are used to form the head in 1 blow. Special rivets are installed mechanically if the rolling rod is of the pulling type.
Defects during riveting:
- occurrence of simple rivets;
- a thickening forms between the sheets - as a result, the size of the head decreases;
- poor flaring of special fastener elements is a consequence of insufficient length;
- the mobility of the rivet in the hole is a consequence of the large gap between the hole and the inserted fastener, which does not extend enough to fill the gap.
Drilling holes for rivets
The hole is drilled with a diameter slightly larger than that of the riveting rod. However, you should strive to obtain the smallest gap, since in this case:
- simple fastening elements have less bending potential;
- special ones roll better.
In practice, during repairs, the diameter of the hole is determined by the size of the available drills. For small diameter rivets used in tinsmithing, the total clearance should be within 0.5 mm. If possible, the hole should be processed - remove burrs from the inner surface that were formed during drilling.
Before drilling the sheets, select the length and diameter of the rivets. For example, for mounting a 1.0 mm sheet on the floor of a body with a metal thickness of 0.6 mm, the diameter of the fastening element will be approximately 4.0 mm. If special rivets are used, the sheets being joined may be thicker than is acceptable for simple ones. This applies if the fastening elements are subject to low forces. Body trim sheets are subject to vibration loads, torsional and bending stresses that arise when the vehicle moves on an uneven road. They make the fastener “play.” Since in the case of large forces it is necessary to take the diameter of the fastening element larger than the calculated one, then for the above example the diameter will be 5.0 mm.
The length of the rivets is selected depending on their type. In simple ones, it is determined by the length of the rod. Therefore, the length of the fastening element is calculated as the sum of the thicknesses of the parts being connected and the thickness of the metal required to fill the gap between the hole and the riveting and to form the head. When forming a round closing head, a rod length equal to 1.5 times the diameter is added to the total thickness of the sheets. To determine the dimensions of special fasteners, use tables supplied by manufacturers.
General technological rules
A sign of the active process of metal decay is the formation of local bubbles. You can find them on an inspection hole or lift. When you try to tap a hole, its edges begin to crumble into small pieces. This is a clear sign of impending renovation.
If a defect is detected, it is necessary to open the layer of insulating material in the interior. The area of the “pie” to be removed should be one and a half to two times larger than the most problematic area. This is due to the fact that the hole needs to be cleaned further than the edges. Ideally, it is recommended to remove the trim and seat where repairs are to be carried out. This way you can evaluate the entire picture of damage and localize new areas of corrosion.
Corrosion is like a fungus; it spreads over the entire area of the metal. To do this, rotten pieces are removed, the surface is cleaned until a shiny layer appears. In practice, cleaning can go far from the main focus. Example: a hole of 1-2 cm requires grinding up to 15-20 cm around the perimeter.
After restoring an entire layer of metal, it is necessary to treat its structure with corrosion inhibitors - converters. Treatment is carried out inside and outside.
Method for filling holes using putty
In the area of the hole in the bottom, the damaged coating, that is, the old layer of paint, should be removed, the metal should be cleaned, and treated with a special preparation - a rust converter. Then the working surface is degreased and primed. Next, prepare a putty solution of uniform consistency. For greater efficiency, fiberglass is added to it (most often with large elements). Then the composition is carefully applied to the damaged area. This is perhaps the most important part of the job. It is necessary to seal all the holes, cracks and microcracks that may arise around it. Application of the solution should occur in several stages, allowing each new layer to dry.
To achieve maximum fixation of the putty on the damaged area, a backing is applied to the reverse side. It does not allow the solution to spread, but acts in the area that needs to be repaired. If the hole in the bottom of the car is large enough, this repair method can also be used with auxiliary elements. Instead of a lining, a metal mesh is installed in the damaged area. Therefore, the putty is evenly distributed over it, filling the entire space. After the solution has completely dried, this area is treated with automotive paint putty. Then the damaged area is painted and a protective film is applied.
Putty for cars
How to repair a hole in a car body without welding: the best ways
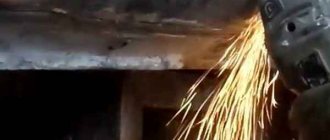
First of all, you should remove the rust using an angle grinder or any other suitable equipment.
Next, we cut out the patch from aluminum, and then attach it to the body using masking tape.
We apply a thin layer of fiberglass putty (here it is important not to touch the tape, because then you will have to remove it).
When the putty sticks, peel off the tape and putty the remaining areas. It is important that the layer is as thin as possible, without tubercles or other irregularities.
When everything is dry, sand everything using coarse sandpaper or a sander. Having achieved a flat and smooth surface, apply a second ball of putty - automotive putty. We wait until it dries and level it again.
Then the surface is primed (do not forget to cover the areas that do not require painting with film).
Weldless auto repair options
Car body repairs without welding are considered unprofessional, since this is not the product of numerous scientific research. There are several ways.
General requirements: the damaged area is removed with a grinder or chisel. Anticorrosive and zinc are applied and degreased. Next, the holes are sealed with paint putty, creating a surface of a suitable shape, and painted.
Puttying a car
The material used is fiberglass with the structure:
- small;
- average;
- large.
The coarse fiber composition is suitable for repairing minor damage. Applicable when they are located near structural pockets. The composition of the lining is fixed, placed on the inside. Puttying is a budget option, but it is not very reliable.
A layer of putty is applied to the cleaned, primed metal surface. First inside, then the surface is worked. After the starting layer has hardened, the second layer comes on. Drying is done at room temperature.
The use of aluminum/brass mesh makes it possible to repair significant damage. The hole is covered with a mesh and secured with tape. After puttying and processing, the tape is removed.
Fiberglass + synthetic glue
Large damages are repaired with fiberglass. The adhesive is epoxy or polyester resin. Fiberglass fabric is applied in several layers, each overlapping the previous one by 2 cm.
Everything is coated with adhesive. Fabric sagging is eliminated by installing linings. Drying is in progress. This option is suitable for minor damage.
Soldering
A method for removing significant body damage. The metal patch is pressed against the body and connected with solder. Flux will give strength. Solder and flux are selected based on metal alloys. They work with a high-power electric soldering iron.
Negative points:
- high cost of solder;
- low strength.
The metal patch should cover the hole without a gap. The initial stage is tinning the surface. The protruding overlay is hammered down. Next - puttying and painting.
Rivets
Option for repairing large damaged areas and replacing parts. The method is preferable to welding when repairing the bottom. The damaged area is removed and a new piece of metal or part is placed. They are riveted with steel rivets, diameter - 5 mm, for load-bearing elements - 6 mm.
Before placement, the rivets are treated with an anti-corrosion substance. A riveter is required.
Other methods
The bottom is repaired with galvanized sheets using bolted connections. The damaged area is removed with an angle grinder. Cut out 2 pieces of galvanized metal - for the top and bottom. The floor is coated with bitumen mastic on both sides. Galvanization is also processed.
Mount the lower component, securing it with self-tapping screws. Long ends are removed. Install the upper component. Fastened with M5 bolts. The fasteners go along the perimeter to avoid bending of the sheets.
Repair of box-shaped body elements without welding equipment is carried out by drilling holes. Then the tool is inserted and the fault is corrected. The hole is sealed using any of the above methods.
Car body repair without welding: do-it-yourself repair, video
Watch this video on YouTube
Rivet seam
Regardless of the type, when repairing, it is necessary to use rivets of the same material as the sheets being fastened. Aluminum fasteners will gradually deteriorate if they are used to rivet brass, copper, corrosion-resistant or ordinary steel. In a more humid atmosphere, this process will be more noticeable, since electrolytic pairs are formed.
Important parameters of rivet fastening are the distances from the edge of the sheet to the center of the rivets and the pitch size (the distance between the axial axes of adjacent fastening elements mounted along the same line - the seam). The pitch size is a multiple of the fastener diameter and depends on the purpose of the riveted part. For the example above, with a diameter of 4 mm, the length of the riveting rod is 8 mm. The step size is 40 mm. From the edge of the sheet to the axis of the seam - 8 mm. In some cases, when repairing a body, they focus on the spot welding step and mark the installation of fasteners using it.
Installation procedure for simple rivets:
- The sheets are fastened with bolts through 5 - 6 holes drilled for rivets. Mismatched holes are processed by re-drilling or by reaming.
- The fastener is installed with the head to a thinner sheet.
- The head of the fastener is mounted on a massive anvil. Use a riveting stand for round heads - this will protect the head from deformation.
- A mandrel is placed on the riveting rod and struck several times with a hammer. The sheets should be pressed towards the cap.
- The upsetting mandrel is removed and blows are made along the axis of the fastener rod. As a result, the fastening element, crumpling, first fills the hole and then forms a blank for the closing head.
- The edges of the stave are struck at an angle, forming a head.
- A riveting mandrel is installed on the head and the formation is completed. When riveting fasteners with countersunk heads, as a result of flattening with a hammer, the metal crumples and fills the countersink.
- The mounting bolts are removed and fasteners are installed in their place.
Installation of special rivets:
- Item 1 for simple fastening elements.
- The rivet is inserted into the hole, and a rolling rod is inserted into the broaching device.
- The head is pressed forcefully against the sheets, which are pressed together.
- The tensioning device is activated until the fastener rod comes off.
- P.8 for simple ones.
Application for riveting the piercing rod:
- In most cases, the piercing rod is driven in with a hammer. During operation, it is necessary to control the tightness of the sheets adhering to each other, applying force near the riveting head.
- The head is pressed against the sheets under the action of advancing the piercing rod (it is struck with a hammer).
For mechanical installation of simple rivets, a pneumatic hammer is used. Short successive blows lead to the formation of the head. When using fasteners made of aluminum and light alloys, pneumatic guns are used to form the head in 1 blow. Special rivets are installed mechanically if the rolling rod is of the pulling type.
Defects during riveting:
- occurrence of simple rivets;
- a thickening forms between the sheets - as a result, the size of the head decreases;
- poor flaring of special fastener elements is a consequence of insufficient length;
- the mobility of the rivet in the hole is a consequence of the large gap between the hole and the inserted fastener, which does not extend enough to fill the gap.
Soldering a metal patch
Soldering a metal element to a damaged area is a way to seal holes in the bottom or any other part of a car when you can close a small hole. To repair a machine using this technology, you must have the following tools:
- a piece of metal sheet;
- powerful soldering iron;
- flux or rust converter;
- putty;
- primer.
Materials in the car
So, first, the area that needs to be repaired is cleaned, paint, rust, and dirt are removed. Next, it is treated with flux and degreased. Then measurements are taken and a metal piece of the desired shape is cut out. Such an element will completely seal the hole, and the edges will overlap. When the part for the patch is ready, it is attached with a soldering iron. Then the edges of the patch are treated with flux. Finally, it is worth treating the area with putty and priming it. When the surface is dry, paint and a protective layer are applied.
This method of filling holes in the bottom of a car is the most popular. Experts note the durability of the soldered patches, since the connection is quite reliable. In addition, this method can be used to seal a hole of any size. In general, soldering a patch is quite simple, and even a beginner who does not have much experience in car repairs can handle it.
Sequence of actions when sealing holes in the bottom
Behind the wheel
This method is quite simple and fast, but it does not solve the problem for long, since the water, sooner or later, will cause the bottom area to begin to bubble under the new coating.
Therefore, I advise you to use the second method. Second method The second option is based on sealing the hole with a metal patch. To do this, you need to cut the required piece from any metal, and it must completely cover the hole. After this, you need to solder this patch using a powerful soldering iron and flux. Before you start soldering, you should thoroughly tin all the edges of the patch; after soldering, do not forget to rinse all treated areas with flux.
You should also tin the surface itself on which you will solder the patch. After finishing soldering, you should definitely check whether the patch protrudes too much. If it still protrudes, you need to make several precise light blows with a hammer until the patch is level with the surface and even slightly lower.