Author:
Yulia Roshchina, specially for www.EquipNet.ru Photos from the sites nw-technology.ru, avek.ru, syntezndt.ru, mirndt.ru
The main task of any control system is to identify defects and determine the limits of strength and reliability. Defects can arise as a result of errors in design, production or operation: casting defects, fatigue failure, atmospheric corrosion, wear of mating parts, defects in coating, defects in permanent metal joints, and so on. In each specific case, special techniques are used to determine the degree of influence of the defect on the quality of the product: how much the reliability, performance characteristics will decrease, how the terms and operating conditions will change, or whether the defect is critical and the item cannot be allowed for use. There are two main groups of tests: destructive and non-destructive testing.
Destructive testing methods
Destructive testing serves to quantify the maximum load on an object, after which destruction occurs. The tests can be of a different nature: static loads allow you to accurately measure the force on the sample and describe in detail the deformation process. Dynamic tests are used to determine the toughness or brittleness of a material: these are various types of impacts during which inertial forces arise in parts of the sample and the testing machine. Fatigue tests are repeated loads of small force, up to destruction. Hardness tests measure the force with which a harder body (such as a diamond hammer tip) is driven into the surface of a specimen. Wear and abrasion tests determine changes in the surface properties of a material under prolonged exposure to friction. Comprehensive tests make it possible to describe the basic structural and technological properties of the material and regulate the maximum permissible loads for the product.
To determine the characteristics of mechanical strength, tensile testing machines . For example, WEB 600, manufactured by TIME Group Inc.: it is capable of developing a force of 600 kN. Technological testing machines, such as IA 5073-100, IH 5133, IH 5092, produced domestically, are used for testing wire twisting, sheet metal extrusion, wire bending, and so on.
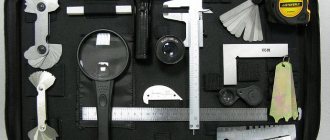
There are several methods for determining the hardness of a metal: according to Vickers, when a tetrahedral diamond pyramid is pressed into the surface under a load of 5, 10, 20, 30, 50 and 100 kgf. Then the print is measured along the diagonals of the square, and the hardness number is determined from the table. Machines for determining hardness - hardness testers . For example, IT 5010 is a machine for determining Vickers hardness.
When testing hardness using the Rockwell method, the sample is smoothly loaded to 98 N (10 kgf). Then an additional load is given to a maximum value of 490 N (50 kgf) - 1373 N (140 kgf). After reaching it, the number of hardness units of the sample is displayed on the device indicator scale. One of the most common Rockwell hardness testers is the TR 5006 M. Among the machines designed for fatigue testing is the MUI-6000 (supplied by North-West Technologies).
Mechanical tests of welded joints and their types
The following types of research are especially important for understanding the properties of materials:
- Tear control . These tests are carried out in full compliance with all established standards and regulations. With their help, the limits of elasticity, elongation and contraction, and temporary tensile strength of metals are determined.
- Control for static bending . This type of test allows you to determine the angle of deformation, as well as the total work expended on it.
- Impact test . This also makes it possible to determine characteristics that are extremely important for metals. These tests measure the specific work that must be expended to destroy the material being tested.
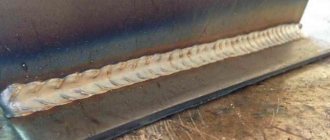
All destructive types of mechanical tests of welded joints are aimed at identifying those characteristics and requirements for indicators, which are indicated in many standards and technical conditions.
Cost calculation
Non-destructive testing methods
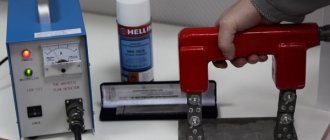
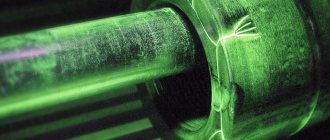
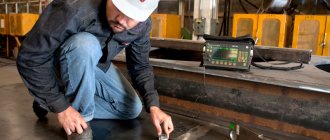
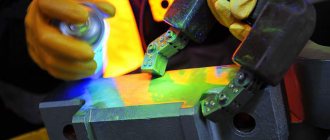
If destructive testing methods are applied only to control samples to determine general mechanical properties, then non-destructive testing serves for mass control of product quality. The operation of non-destructive testing devices is based on the principles of changing the properties of an object in the presence of defects. These are ultrasonic flaw detection and thickness testing , radiography , magnetic particle and capillary testing , eddy current testing , optical-visual testing and others. For example, ultrasonic flaw detection equipment measures the difference in the transmission of ultrasound depending on the thickness and density of the metal. Thickness gauges 26MG, 26MG-XT, 26XTDL, 36DLPLUS, produced by Panametrics, are used to determine the remaining wall thickness of pipes, boilers and other structures subject to wear. 36 DL PLUS is a modern digital pulse-echo portable contact thickness gauge that allows you to measure the thickness of even objects that can only be approached from one side. It is used in energy and mechanical engineering to measure the wall thickness of pipelines, pressure vessels, boilers and other objects.
One of the common methods of non-destructive testing is eddy current . It is based on measuring eddy current disturbances when an electric current is injected into a sample. Even the slightest crack or cavity in the metal, pitting corrosion or thinning is immediately detected in a change in eddy currents. Modern eddy current flaw detectors are used to monitor the landing flanges of wheel disks, a number of fasteners of aircraft structures, detect cracks near fastening holes, as well as display C-scans of fastening holes, and monitor multilayer corrosion in the automotive, aviation and aerospace industries. Eddy current inspection equipment includes instruments from Zetec, which allow a wide range of inspections of various aircraft structures, engine components and wheels. For example, MIZ®-21SR is a multi-mode eddy current flaw detector and bond tester. It is a lightweight, portable instrument that uses two eddy current flaw detection techniques to detect non-bonding, delamination and density anomalies. In addition, MIZ®-21SR has functions for measuring conductivity and thickness of coatings. All information is displayed on the display with high resolution and image clarity.
Factors affecting the quality of welded joints
In addition to the execution of the seam and adherence to technology, the strength characteristics of the welded joint are also associated with other factors:
- Quality of welded material. Failure of the metal to meet the required characteristics, even if the weld is made correctly, can negatively affect the strength of the connection.
- No less stringent requirements are imposed on the consumables used in welding work. The use of low-quality additives or electrodes will not allow making a correct, strong connection due to the appearance of fragility, fragility, etc. in the structure of the metal itself.
- The equipment used for welding work must have adequate power and be applicable to the required technology (for example, argon arc welding).
- The reliability of the connection of parts (their quality of penetration) can only be achieved with the correct choice of welding modes (polarity and current).
- Preparing the workpieces themselves for welding is an equally important operation. Even a slight deviation in the shape of the edges of the joints can significantly reduce the quality and disrupt the shape of the seam.
Recommended Articles
We recommend articles:
- Gas shielded welding: the essence of technology and a guide for beginners
- How to weld seams: we understand the secrets of welding techniques
- How to weld thin metal: a guide for beginners and professionals
All of the above points should be taken into account when planning work, especially if this concerns important and critical structures.
X-ray control
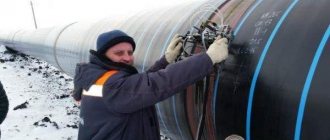
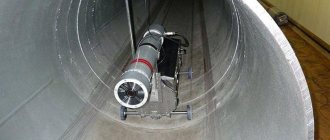
This method is usually used for flaw detection of large welded metal structures exposed to the corrosive effects of the atmosphere: pipelines, supports and load-bearing and any other metal structures. X-ray machines can be stationary (cable and monoblock type), portable, or mounted on crawlers. Crawler is a self-propelled, remote-controlled robot carrying an autonomous X-ray complex. It is intended for quality control of welded joints of pipelines. Such a device, upon command from the outside, moves in the pipeline, stops and takes an x-ray. The crawler exposure device operates completely independently. Some X-ray machines require exposure and development of special film, while others reflect information directly in digital form.
Among the X-ray inspection equipment, it is necessary to mention the products of Sintez NDT CJSC, which is part of the UNITEST group of enterprises. Stationary devices of the Vityaz series are manufactured as a monoblock, with a glass X-ray tube. Their cost is relatively low. The “Bastion” series are cable-type devices; they use a metal-ceramic tube, which ensures reliability and a long service life, but they are more expensive. As a rule, stationary devices are used to control materials or finished products; they differ from portable devices in their high stability of current and voltage parameters and a minimum of ripple. Portable X-ray machines of the RPD series, from the same manufacturer, also provide options for working in harsh climatic conditions, in the Far North. In this case, the power and control unit is mounted in a metal case, protection category is IP65. Panoramic X-ray tubes of the SXT series are installed on the crawlers. They provide the highest possible rigidity of the radiation spectrum with high efficiency; the devices are powered by a crawler battery. The SHT equipment is equipped with a system of forced air cooling of the anodes by fans.
Today there is no one universal method that would allow one to measure all the properties of a metal product at once. Therefore, quality control methods are used in a complex: at the stages of development and manufacturing - destructive, during operation - various non-destructive ones. The choice of a specific control method depends not only on the specifics and purpose of the metal structure, but also on numerous external factors, which are certainly taken into account by specialists.
Destructive and non-destructive types of testing
To control the quality of construction work, different types of control are used to identify different types of violations. Formally, procedures can be divided into 2 categories - destructive and non-destructive testing.
Destructive testing: scope, features, methods
Destruction of a control sample is a method that allows one to identify significant defects in building structures. The method is used primarily for metal structures and is intended for testing welded joints. After testing, the control sample cannot be restored, while the rest of the batch is considered to have passed the test. We see that this method is not only expensive, but also unreliable - since random control is carried out.
Destructive testing checks such characteristics of building structures as strength and resistance to external influences, and mechanical performance is assessed. Testing is carried out by a testing laboratory . The following types of tests are used:
- mechanical (static stretching, impact bending and others);
- metallographic (micro- and macrostructural methods);
- hydrotesting.
The destructive testing technique depends on the material and design of the product.
Non-destructive testing: areas of application, characteristics and types of tests
Non-destructive testing includes various types of measurements. Not only functional but also operational characteristics are tested. For example, they measure the density of materials, dimensions of building structure elements and other parameters. The testing process is often carried out without human intervention: automation allows you to avoid errors associated with the human factor. However, the evaluation of the results is carried out manually, since it is necessary to take into account specific conditions.
Non-destructive testing is an element of the quality control system at all stages of construction: from design to reconstruction. The method is used everywhere, since the cost of research is relatively low, these costs are offset by extending the service life of products and structures. For example, according to standards, the quality of railway tracks is checked at least 30 times a year using special devices - flaw detectors. This increases operational safety and detects faults at an early stage of their occurrence.
The methodology and methods of non-destructive testing are regulated by standards. To measure one indicator, several methods can be used simultaneously, which increases the accuracy of measurements. Research not only adds to the information, but is also used to verify the validity of the results. For rapid diagnostics of the condition of building structures, express quality assessment using complex methods is used.
Despite its obvious advantages, non-destructive testing has a limited scope. It is not used at the research and design stage. The main advantages of non-destructive testing include accessibility: it is carried out in real conditions and does not require laboratory simulation of benches. Research requires training of qualified personnel and ensuring safety precautions. To carry out radiation and dosimetric monitoring, specialized personnel training is carried out, compliance with regulations and sanitary standards is required.
Summing up, we can conclude that it is necessary to comprehensively apply non-destructive and destructive testing methods in construction, during the operation of technical devices, mechanisms, and equipment at hazardous production facilities.
