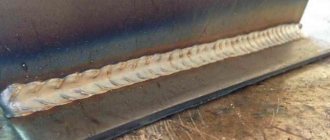
Magnetic quality control of welds is a non-destructive method. The flaw detector checks finished joints and overlaps. Applicable to all types of welded joints. The flaw detector detects minor foreign inclusions: cracks, fistulas, pieces of slag, and other defects. The use of magnetic field dispersion methods is limited; for magnetic control, the metal must have a certain structure and the ability to be magnetized. Magnetic particle, magnetographic, and induction flaw detection are used only for monitoring welds on ferromagnetic alloys - carbon and low-alloy steels alloyed with cobalt, zinc, and manganese.
Content
- The essence of magnetic flaw detection, its methods
- Magnetic particle inspection method (magnetic particle flaw detection)
- Magnetic particle testing technology
- The effectiveness of magnetic particle flaw detection
- Flaw detectors for magnetic particle testing
- Video: magnetic particle flaw detection using luminescent concentrates
- Magnetographic method for monitoring welded joints
- Magnetographic inspection technology
- Efficiency of magnetic testing
- Magnetographic flaw detector and magnetic tape
What parameters are used to select magnetic powders?
non-destructive testing
- particle size. Determined using Coulter impedance meters or an equivalent method. Particles in suspensions should have a size of 1.5–40 µm. For dry powders, as noted above, the diameter reaches 30, 40 microns or more;
- concentration. Remains at the discretion of the manufacturer and is indicated on the packaging;
- color. It is better to select in contrast with the background surface - that is, with the object of control itself. Or - use the above-mentioned contrast paint;
- heat resistance. The maximum permissible temperature is again indicated by the manufacturer. The magnetic powder must withstand it for at least 5 minutes without losing its performance;
- fluorescence coefficient and its stability. Relevant for fluorescent indicators, the glow of which becomes noticeable in the ultraviolet spectrum. To check these parameters, the material is tested twice using a UV lamp and a brightness measuring device. First, the indicator substance is uniformly illuminated with ultraviolet light, after which the brightness of the glow is measured. The second value is divided by the first - this is how the fluorescence coefficient is calculated. And to ensure its stability, the procedure is repeated after 30 minutes. If the coefficient has decreased by no more than 5%, then everything is in order;
- foaming An abundant amount of foam interferes with normal work with the material;
- viscosity of the dispersion medium (if magnetic powder is used as a concentrate for preparing a liquid suspension). At a temperature of 20±2 ˚С, dynamic viscosity should remain within 5 mPa*s;
- influence on corrosion and pH factor. The chemical composition of modern indicators is balanced in such a way as to prevent corrosive and erosive effects on the surface;
- durability. The so-called long-term fatigue tests of magnetic powders are carried out in installations for magnetic particle flaw detection or in mixing devices - steel drums with a centrifugal pump. The latter ensures forced circulation of particles (for 5 seconds with the valve open and the same amount with the valve closed). Then wait 2 hours and test the indicator on a reference sample. If detectability and other indicators remain the same, then the product can be safely used for intensive work;
- environmental friendliness (no sulfur, halogens), etc.
register
The essence of magnetic flaw detection, its methods
Magnetic flaw detection is one of the methods of non-destructive welding testing. The essence of magnetic methods for testing welded joints is to identify scattered magnetic fluxes that appear in magnetized products if they contain various defects. Magnetized materials can be iron, nickel, cobalt and some alloys based on them.
Magnetization of a product can be achieved if, by passing current through it, a magnetic or electromagnetic field is created around the product. The simplest way to obtain a magnetic flux is to pass a current with a density of 15-20 A/mm through the turns of a welding wire wound in turns around the product. The number of turns is usually 3-6. It is recommended to use direct current to magnetize the connection.
The principle of identifying a defect in a weld is as follows. The magnetic flux, passing through the welded joint and encountering a defect on its way, begins to bypass it due to the fact that the magnetic permeability of the defect is significantly lower than the magnetic permeability of the base metal, and the electric current, as is known, follows the path of least resistance.
As a result of this, part of the magnetic flux lines is displaced by the defect to the surface, forming a local scattered magnetic flux, see figure:
Magnetic leakage fluxes can be recorded in different ways. According to the recording method, magnetic testing methods are divided into magnetic particle testing method (magnetic particle flaw detection), magnetographic testing method and induction testing method.
Visible light and fluorescent light
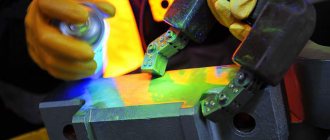
Lighting is one of the most important parts of magnetic particle control. Fluorescent particles are easily visible under ultraviolet light. It is the best choice for automatic or semi-automatic magnetic inspection. However, even here the surface must be cleaned of chips and dirt in order to achieve the best result.
For ordinary particles, daylight or artificial light is used. White light, such as that used in halogen lamps, is the most efficient and helps minimize the light fluctuations seen in natural light.
Dry or wet suspension particles for magnetic testing.
Dry particle magnetic testing is best used when looking for small cracks near the surface. However, if the test is performed on parts with paint or rust, they can reduce the sensitivity of the test, but still allow you to obtain the desired result.
Wet magnetic particles are when the particles are applied by brush, they are retained within the liquid carrier, providing even coverage and highlighting leakage. This non-destructive testing method provides optimal contrast with the surface, which shows us greater detail than just dry particles. This method is especially suitable for smooth surfaces, since these particles settle on rough surfaces.
Magnetic particle inspection method (magnetic particle flaw detection)
As the name suggests, magnetic particle testing is performed using magnetic powder. There are two methods of magnetic particle testing: dry and wet.
In the case of dry magnetic particle flaw detection, dry magnetic powder (iron filings, scale, etc.) is applied to the surface of the welded joint. In the case of wet magnetic particle flaw detection, magnetic material is applied in the form of suspensions of magnetic powder with kerosene, oil, and soap solution.
Under the influence of electromagnetic stray fields, powder particles move evenly over the surface of the welded joint. Above the weld defects, magnetic powder accumulates in the form of rollers. Based on the shape and size of these rollers, one can judge the shape and size of the defect found.
Magnetic particle testing technology
The magnetic particle flaw detection method includes the following technological operations:
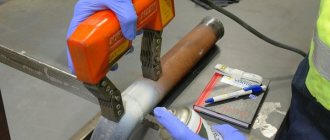
1. Preparing the surface of the welded joint for inspection. Surfaces must be cleaned of dirt, scale, welding spatter, sagging and slag after welding. 2. Preparation of the suspension, which consists of dynamic mixing of the magnetic powder with the transported liquid 3. Magnetization of the controlled product 4. Applying the suspension or magnetic powder to the controlled surface 5. Inspection of the controlled surface of the welded joint and identification of areas where powder deposits are present 6. Demagnetization of the welded joint .
The effectiveness of magnetic particle flaw detection
The magnetic particle flaw detection method has good sensitivity to thin and minute weld cracks. It is easy to implement, gives clear results, and does not take time.
The sensitivity of the magnetic particle method may vary in each individual case. This depends on the following reasons:
1. The size of the powder particles and the method of its application 2. The magnetic field voltage acting on the welded joint 3. The type of current used (alternating or direct) 4. The shape and size of the defect, the depth of its location, as well as how the defect oriented in space. 5. On the method and direction of magnetization of the connection 6. On the quality and shape of the controlled surface
Using magnetic testing methods, planar defects are best detected: welding cracks, lack of fusion and lack of penetration, if their largest dimension is oriented at a right angle (or close to a right angle) relative to the direction of the magnetic flux.
Round-shaped defects (pores, cavities, non-metallic inclusions) may not create sufficient diffuse flow and are the worst to detect during inspection.
Flaw detectors for magnetic particle testing
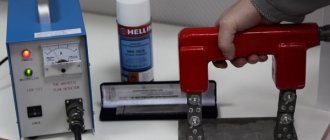
Flaw detectors for this testing method include current sources, devices for supplying current to the test surface, devices for magnetizing the surface (solenoids, electromagnets), devices for applying magnetic powder or suspension to the surface being tested, and current (or magnetic field strength) meters.
Magnetic particle flaw detectors are divided into stationary, mobile and portable. Stationary flaw detectors are widely used in factories and other enterprises with large-scale production of various products. Among them are such models as UMDE-2500, KhMD-10P, MD-5. Such equipment allows you to control the quality of welded joints of various shapes. They are capable of providing high inspection productivity - from several tens to several hundred products per hour.
Common, mass-produced models of portable and mobile flaw detectors are PMD-70 and MD-50P. Portable flaw detector for magnetic testing PMD-70 is widely used for testing welded joints in the field. A mobile flaw detector model MD-50P is most often used to inspect massive large-sized welded joints in sections.
Video: magnetic particle flaw detection using luminescent concentrates
Surface conditions
Before starting magnetic testing, rough surfaces must be inspected and appropriate measures taken. Particles can accumulate too easily on rough surfaces, resulting in an undeserved negative rating. Thin coatings of paint and other similar treatments will not interfere with testing provided they are applied evenly and uniformly.
Magnetographic method for monitoring welded joints
Magnetographic testing is one of two magnetic testing methods. The essence of this method is to magnetize the controlled surface of the weld and the heat-affected zone, and simultaneously record the magnetic field on magnetic tape. Next, the information recorded on the tape is read using special devices included in the magnetic flaw detector.
The magnetographic control circuit is shown in the figure on the left. Positions in the figure:
1-weld seam; 2-defect in the weld; 3-magnetic film; 4-magnetizing device;
Magnetographic inspection technology
The method of magnetic testing of a welded joint includes the following technological operations:
1. Cleaning the surfaces being tested from slag, welding spatter and other contaminants 2. Applying a demagnetized magnetic tape to the weld seam and pressing it with an elastic rubber band 3. Magnetizing the controlled connection. Magnetization is carried out under optimal conditions, which depend on the type of magnetizing device, the thickness of the controlled metal, and its magnetic properties. 4. Interpretation of flaw detection results. To decipher the results, the magnetic tape on which the magnetic field was recorded is placed in the reading device of the flaw detector and defects are detected based on the signals on its screens.
The magnetographic testing method is used, in most cases, to check butt welds made by fusion welding. Most often, such control is used for flaw detection of welded joints of main pipelines. The maximum possible metal thickness that can be controlled by this method is 20-25mm.
Efficiency of magnetic testing
The effectiveness of magnetic inspection in detecting defects is approximately the same as that of magnetic particle inspection. Factors influencing the effectiveness of the method are the size and shape of welding defects, as well as their spatial orientation and depth of location. The reading ability of the flaw detector head and the recording ability of the magnetic tape also affect.
Magnetographic testing can easily detect planar welding defects (these are various cracks in the metal, lack of penetration and lack of fusion), as well as various chains of non-metallic inclusions and slag. Defects located perpendicular to the movement of the magnetic flux are best detected, and those that have a spherical shape - pores, cavities, etc. - are the worst detected.
It was experimentally found that the magnetographic testing method with a very high degree of probability makes it possible to detect planar defects if their vertical size is equal to 8% or more of the thickness of the welded joint.
The effectiveness of this control method is significantly influenced by the height of the weld, its shape and surface quality. If the weld reinforcement is removed, then the sensitivity of magnetography to the above defects reaches 5%. Spherical defects are much more difficult to detect. They are detected if their height is 20% or more of the joint thickness.
The high productivity of magnetic testing is its main advantage over magnetic particle flaw detection. Recording on magnetic tape occurs without any preparation, and the time it takes to read and play back is negligible.
Magnetographic flaw detector and magnetic tape
A special magnetic tape is used to record magnetic fields during magnetographic testing. The basis for the manufacture of magnetic tape is lavsan or triacetate with tiny ferromagnetic particles applied to them. There are different types of magnetic tapes, which differ in their physical and mechanical properties and can be used at different temperature ranges.
Recordings made on magnetic tapes are deciphered using magnetic flaw detectors. They differ in the method of indication, and depending on this, they are divided into flaw detectors with pulse and television indication (video indication).
In a flaw detector with pulse indication, pulses are displayed on the screen of the cathode ray tube. They have different amplitudes, and its value characterizes the size of the defect in the vertical direction.
For flaw detectors with video indication, the magnetic relief of stray fields is displayed on the monitor in the form of a regular magnetogram of individual sections of the welded joint. The display process is similar to the image on a TV, hence this display method is called “television”.
In practice, such flaw detectors are used as MD-9, which has a pulse indication method, and MD-11 with television image. There are also types of flaw detectors with double indication. These are the most advanced devices of such models as MDU-2U, MD-10IM, MGK-1.
Where are magnetic inspection tests used?
Magnetic inspection is used from components in axles to high performance racing cars, magnetic particle testing is used to detect defects in parts before they are used, and is also used in weld inspection. Improper execution of a control method is a major source of testing failure. Understanding the main problems inherent in magnon control allows you to avoid many mistakes when carrying out it. Therefore, it is important to contact qualified specialists and non-destructive testing laboratories.
REQUIREMENTS FOR PREPARATION FOR CONTROL
Designation of welds
1.1. When preparing an object for testing, a thorough visual inspection should be carried out in order to assess the condition of the controlled surface, as well as detect cracks, undercuts, nicks, corrosion pits or traces of erosive wear.
If the surface of the part does not have discontinuities and its roughness does not exceed RA £ 10 microns, or if the surface is covered with a thin layer of scale that is firmly adhered to the metal, then it is enough to wipe such a surface with a rag and, if necessary, degrease it.
If there are peelings in the scale layer or the surface roughness of the part exceeds RA > 10 µm, then instead of cleaning with abrasive wheels (mechanical cleaning), it is advisable to apply a primer coating with quick-drying paints and varnishes, aluminum powder with binding additives or solutions based on liquid glass.
The coating is applied with a brush in one or two layers or by spraying. The color of the coating should be in sharp contrast with the black powder, then it will not be difficult to inspect the part for the presence of magnetic powder indicator rollers.
The thickness of the primer coating should not exceed 20 - 30 microns (this corresponds to approximately two to three layers of paint when applied with a brush), since as the thickness of the coating increases, the sensitivity of the method decreases.
After applying the primer coat, the product must dry. During incoming inspection, it is allowed to carry out MTD on the factory coating.
1.2. Test parameters, used flaw detection materials and equipment, qualification of flaw detectorists, types of magnetization, sensitivity levels, safety precautions must comply with GOST 21105-87 “Non-destructive testing. Magnetic particle method."
1.3. Checking the performance of magnetizing devices (flaw detectors) and the quality of flaw detection materials is carried out using standard samples of enterprises, which can either be specially manufactured or selected from among rejected parts with defects, the dimensions of which correspond to the accepted level of sensitivity. The inspection regime is considered stable if the number and length of cracks detected remain constant over multiple inspections.
1.4. The illumination of the controlled surface must be at least 1000 lux. When using luminescent powders, inspection is carried out under ultraviolet irradiation from a source with a wavelength of 315 - 400 microns. In this case, the UV irradiation of the surface must be at least 2000 lW/cm2 (200 relative units according to GOST 18442-80).
Verification and calibration of magnetic particle flaw detectors
non-destructive testing equipment
- maximum value of pulse current, duration and pulse repetition rate;
- errors in current measurement by the device itself;
- determination of the mechanical properties and microstructure of sheet, section, shaped, and strip metal products, including sheets with non-magnetic coatings and pipes made of electrical, alloy, and carbon steel. The magnetic control method as one of the areas of structuroscopy is regulated by GOST 30415-96;
- duration of current flow in the solenoid in a state of residual magnetization and holding force. This effect occurs due to the so-called self-induction, when even after turning off the power, a damped current flows in the coil;
- duration of demagnetization;
- duration of current and pause in the “current-pause” mode;
- detecting ability - the ability to identify discontinuities when using magnetic suspensions of appropriate quality.
laboratories
Where to buy a magnetic particle flaw detector
| Research and production. Founded in 1989, certified according to the international standard ISO 9001:2015. For manual inspection, you can buy a universal magnetic particle flaw detector MDM-2, modular MD-M, pulse MD-I, and also equipped with two magnetization coils DUCAT-300 from the Kropus Research and Production Center. In addition, the line includes solutions for automated control in production - SM-20, SM-20N and SM-30. The center’s powerful technical base allows us to develop individual solutions for specific tasks. Contacts of the production site of the SPC "Kropus" in Noginsk, [email protected] |
| Research and production. As the official distributor of Magnaflux GmbH, the entire line of mobile devices ITW Tiede GmbH is presented here - Ferrotest 10, 20, 40, 60, 80, 100, GWH 15, 30, 40, Isotest 60E, 100E, etc. You can also select and buy here and a stationary magnetic particle flaw detector: both universal (for example, Ferroflux 1000 and Universal 600 WE) and specialized - for testing springs, crankshafts, couplings, small and large diameter pipes, railway wheel pairs, etc. AVEK also has its own development - the MAG-Inspect Universal installation. Contacts of the central office in Yekaterinburg: +7 (343) 217-63-84, |
| Scientific and industrial. The main product for the MPD method is the stationary installation MDS-09, developed in-house for testing products up to 900 mm long, up to 210 mm in diameter and weighing up to 100 kg. The production base of the enterprise is located in Balashikha. You can contact NPK "LUCH" by phone +7 (498) 520-77-99 or by mail |
