Selecting and purchasing a two-post lift is only part of the work that needs to be done before you start using it in your car service. An important issue remains the installation of the lift. 90% of our clients trust us with the installation, but some decide to handle this task themselves. Especially for those who decided to install a lift in their garage or garage, we have written a small cheat sheet.
Next, we will show the sequence of actions that must be followed to install the lift:
1. Determine the installation location of the two-post lift, its most convenient location for work. We check that electricity is supplied to the installation site.
2. Unpacking and checking components. The easiest way to ensure that all the details are available is to use your passport. Just look into it and check everything on the list.
There are two foundation options:
- According to the manufacturer's passport. A screed with a thickness of at least 200 mm is poured around the entire perimeter of the room.
- Filling the cabinets. Pouring pedestals for lift posts measuring 1m*1m*1m. This option is used if it is impossible to make a screed around the entire perimeter of the room.
If the floor screed is filled with concrete grades 150, 200 or 250, we recommend using chemical anchors. Chemical anchor – epoxy resin based adhesive.
After pouring the screed or cabinets, you should wait, according to GOST, 28 days. The drying time of chemical anchors depends on the following factors: temperature, humidity, concrete density, groundwater conditions.
4. Installation of two post lift:
- We install the lift struts vertically opposite each other.
- We attach a moving bar (floor plate) between the posts.
- Next, use a level to level the racks horizontally and vertically.
- We fasten the stand to the concrete with a wedge anchor, which is included in the delivery kit. A hole is drilled in the concrete in accordance with the diameter of the anchors. We drive an anchor into this hole and clamp it with a torque wrench.
- We remove the moving frame (floor plate) and stretch the cables from the left column to the right one and vice versa, in accordance with the diagram in the lift’s operating instructions.
- We connect the hydraulic hoses to the cylinder in both racks. We put the moving bar back.
- We put the lifting legs on the carriages and secure them with a locking pin.
- We hang the engine on the rack and attach it with bolts. We connect the hydraulic system hose to the engine.
- We connect the lift to the network and fill the barrel with oil.
- We start the lift by pressing the lift button. For smooth operation of the lift, it is worth raising the legs 1-2 times to the maximum height, all the way.
Problems that may arise while working with the lift and their solutions are described in the table below.
Different carriage heights
Adjust cable tension and tighten nuts
The carriage fixation system does not work
Open the column protection and check the locking lock. Adjust or use machine oil.
The motor does not work
Turn off the power. Inspection and replacement must be carried out by qualified electricians.
Does not lift or moves very slowly when descending
Clean the release valve or replace if necessary.
Leak in hoses
Use self-adhesive tape and tighten the nuts.
If you cannot solve the problem yourself, contact customer service.
Extraneous noise when ascending and descending
Lubricate the moving and contacting elements inside the columns with lubricant. Lubricate the cables and pulleys with machine oil.
The convenience of using a garage depends on the size of its internal space. The room should have enough space for servicing the car, placing various tools, mechanisms and spare parts. Correctly calculated ceiling height in the garage is necessary for the safe operation of the car.
SNiP states that the ceiling height in the garage must be at least 2000 mm and does not limit the choice of a higher value. The lower limit may well satisfy any owner of a passenger car whose average height is 1540 mm. But you won’t be able to feel comfortable in such a room.
A garage is not only a place to park a car. It is repaired and serviced here. In garages built into residential buildings, cargo transported in the vehicle is constantly loaded and unloaded. In this case, the trunk must open completely and not touch either the ceiling or the elements of the automatic gate.
When choosing the ceiling height in the garage, it is necessary to take into account the factor of the future. Let's assume that today you are the owner of a car and a sectional garage door. After some time, your financial situation has improved and a decision will be made to replace the passenger car with an SUV, and for ease of entry and exit, it is necessary to replace the sectional gates with automatic ones. The height of the jeep and the space for mounting elements of the new type of door will require sufficient ceiling height in the garage. In order not to spend money on restructuring, it is better to foresee the likely development of events in advance.
Read also: What is the frequency of checking power tools?
Design and operating principle
Some models provide for quick replacement of linings or spacers on the ends of lifting arms. Branded equipment comes with several options for the shape and length of the arms. The pads can also be purchased separately. For example, if on old cars jacks are welded behind the thresholds.
The basic design consists of the following elements:
- two metal supporting columns;
- adjustable paws (grips) with rubberized pads and spacers;
- hydraulic pump;
- Electrical engine;
- upper or lower jumper;
- synchronizing cable.
During operation, the electric motor drives the hydraulic pump shaft. Increased pressure is generated inside the closed circuit. When the corresponding valve opens, oil enters the hydraulic cylinder through the hoses, which raises the arms that keep the vehicle suspended. Having raised the machine to a comfortable height, the hydraulic motor is switched off. As soon as the hydraulic motor stops working, the paws are secured with a set of protective mechanical devices.
There are two types of drive systems - electrohydraulic and electromechanical. A distinctive feature of the first option is the saving of electrical energy, the absence of extraneous noise during operation, and the efficiency of the lifting and lowering cycle. The main working elements are an engine with a hydraulic pump and two hydraulic cylinders. Hydraulic fluid is supplied through special hoses.
The electromechanical drive is equipped with one or two motors mounted on racks. The location can be upper or lower (at the base). If there is one electric power unit, the transmission of force from the column holding the electric motor is transmitted by a belt or chain drive to another column. Which two-post lift to choose in a particular case is a matter of budget and customer needs. But when operating electromechanical drive equipment, it is necessary to regularly check the condition of the screw-nut connection.
It is strictly forbidden to operate the lift where the bearing nut is devoid of lubricant or the volume of lubricant is insufficient for safe operation. Severe wear on a nut or screw increases the likelihood of the vehicle falling off its feet. It is possible that the equipment will not be able to lift the car to any height.
Two-post - the best option for small businesses
Affordable, reliable, repairable, and low maintenance. Therefore, they are popular and permanently installed in repair areas of many service stations. Electromechanical models that expired their declared service life more than 10 years ago are still working properly. But the majority prefer hydraulic equipment: even in second-rate versions, it is faster than mechanical systems, consumes less electricity, allows you to quickly lower the car if the electricity is lost and, in addition, is constantly upgraded by the manufacturer.
PGN 2 4.0 – from 75,500 rubles
A classic version of a four-ton lift with a three-phase, 2.2-kilowatt motor.
Confirmed advantages include the thickness of the metal on the racks and base elements, and full-size hydraulic cylinders. But this is only for models produced before 2015-2016. More than that, nothing unambiguous can be said about the models that Stankoimport sells. Because complaints about leaking hydraulics and extraneous knocks when the carriages are raised and fixed appear unsystematically. As a rule, replacing the internal seals of a hydraulic cylinder relieves the user of problems with the tightness of the hydraulic system for several years.
Please note: advertising promises from 3 years ago contain references to how much the metal thickness of PGN 2 4.0 differs from competing samples. Today, the official resource does not provide such information. And the difference of 50 kg between the old and new weight clearly explains why this happens.
Video review of the installation and launch processes of PGN 2 4.0:
PULI PL4.0-2B T4 – from 89,856 rubles
Electro-hydraulic lift with bottom synchronization and asymmetrical arms.
Here are the cables that align the position of both beams and the hydraulic circuit hose - between the racks, at the bottom. Covered with a metal casing-threshold.
The paws are different:
- shape – front with an angle, rear straight;
- maximum length – front 1045mm, rear 1228mm;
- minimum turning radii - front 705mm, rear 828mm.
The advantage of this variation is the five-millimeter walls of the stand and 16-millimeter platforms at the base, which is indirectly confirmed by the 680 kilograms of weight. There is automatic locking of the paws - the locking elements snap into place as soon as the car begins to rise.
The issues are the same as for all two-post hydraulic lifts assembled under contract manufacturing in the Middle Kingdom - oil seals are leaking, there are no seals where the rod passes through the lifting beam, “original” limit switches break haphazardly.
Problems with rubber bands are immediately visible and can be solved with the help of a repair kit. With some experience in carrying out the work, it takes no more than 3 hours. But the knocks of the beam are quite quiet and attract attention only when the suspension is diagnosed by ear. It is often more profitable to simply know about such a source of extraneous knocking than to try to get rid of it now, once and for all.
Video review of the PULI PL4.0-2B T4 lift:
AE&T 4t 220V T4 – from 91,983 rubles
Four-ton lift with two hydraulic cylinders, a cable system for synchronizing the position of carriages and a single-phase motor.
The advantages of single-phase equipment are obvious where it is not possible to connect a three-phase network, and the main traffic flow is made up of small cars. Under these conditions, the 2.2-kilowatt motor does not overload the network, and the design retains its original geometry longer.
Only manual unlocking of security locks is provided. That is, in order to lower the car, the mechanic must go around it. Even with a little workload, this moment is very annoying. In addition, owners of new lifts are often faced with shortages - when there are no spacers for the foot stops and traditional leaks.
Please note: once repaired, a hydraulic cylinder takes longer to maintain than with “original” rubber bands. Therefore, during a performance test, a clean rod determines the good condition of the used equipment. And visible violations of the geometry of the posts, beams, and feet indicate that such a lift will not work correctly.
Video review of AE&T 4t 220V T4 in operation:
Nordberg n4120a 4t – from 102,839 rubles
A typical 4-ton lift with an electro-hydraulic drive based on a 3-phase motor. The paws are asymmetrical, the unlocking of the locks on each rack is different.
Robust design, reliable hydraulic cylinders and insignificant problems with the electrical part allow sellers to offer not only service, but also warranty obligations - everyone only has a one-year warranty, and problems with hydraulics begin, on average, after 3-4 years. The equipment is common, so there are no difficulties with repairs or repair kits.
Keep in mind that it is best to choose a used version of the n4120a from the existing models. When disassembled, it is extremely difficult to identify signs of fatigue in moving parts and elements of a metal structure. With regard to repainted equipment, it is even more difficult - if it was painted, then there was deep damage to the “original” coating. That is, it will be necessary to periodically fight corrosion.
Video with installation details and operation of the Nordberg n4120a 4t lift:
Specifications
The technical parameters of each lift are indicated in the operating instructions. Below are the basic parameters of an average lifting device.
- Load capacity: from 3000 to 5000 kg.
- Maximum lifting height: 190-211 centimeters (electro-hydraulic models), 199-206 centimeters (lifts with electromechanical drive).
- Duration of a full lifting-lowering cycle (from zero point to full nameplate height and back): 31-54 seconds (electrohydraulic models), 40-50 seconds (lifts with an electromechanical type drive).
- Maximum pick-up height: 8-13.3 cm; 8.5-19 cm for electrohydraulic and electromechanical devices, respectively.
Overall garage height
Since legislative acts define restrictions on the construction of any buildings, the height of the garage is also regulated. The total height of the garage is the height from the foundation to the highest point of the roof. The maximum permissible height of the garage above ground level is ten meters. Often this figure changes downward, depending on the presence of various factors:
- the location of the garage is outside the city or within its boundaries;
- distance from the garage to the neighbor’s property or house.
Thus, if you retreat 30 centimeters from the border with the neighboring property, then the maximum height of the garage building at this point cannot exceed 3 meters. Different situations are allowed, so the permitted denominations are determined based on the situation. If a neighbor disagrees with the height of the garage, a claim may be filed against them. The final decision is made by the judiciary.
To avoid such conflicts, before constructing a garage building, you should check the maximum permissible height with local authorities.
Asymmetrical and symmetrical lifts
Manufacturers produce lifting equipment in one of two design options: symmetrical and asymmetrical.
The specificity of the symmetrical layout is to increase the stability of the machine when held on lifting legs. The device in question is suitable for servicing a large vehicle with a large mass.
The asymmetrical design is aimed at vehicles with a wide base. The location of the racks is deployed closer to the rear. The length of the front legs is shorter than the hind legs. The maximum load capacity is up to three tons.
Four Post Car Lift
These systems have a large load capacity. They are widely used in truck service stations. Models in this group are differentiated by their load capacity and platform length. With dimensions up to 5000 mm, the unit is suitable for passenger service stations.
Among the advantages are the ability to repair long-wheelbase vehicles, low price, simplicity and reliability, and the ability to use a lift for trucks. Among the disadvantages are the size and the inconvenient jumper.
Frame and frameless design
The design can be framed or frameless.
Frame models are installed directly into the floor. The connecting element is the floor frame. The main area of application is rooms with low ceiling heights.
The frameless model is mounted directly to the floor. The foundation is subject to increased requirements in terms of reliability and safety margin. When arranging the foundation, it is necessary to use cement grades with an increased strength number (often M500). Frameless models have a reduced paw height at the lowest point. This allows you to lift a car with low ground clearance.
Plunger equipment
These units are widely used in work related to the maintenance and repair of trucks and passenger cars. There are lifts with one, two and four plungers. There are platform models or equipped with paws. There are also floor-mounted models. But systems mounted in a special recess in the floor are more common. These are popular hydraulic machine lifts.
The load-bearing part is located on the upper end parts of the plungers. This scheme makes it possible to carry out work and at the same time approach the car from any side without obstacles. Among the advantages of this equipment are a high level of reliability, ease of use, smooth ascents and lowerings, noiselessness, and a wide range of models. These units can be easily combined with camber adjustment stands. Among the disadvantages, one can highlight only the high price, as well as the complexity of the installation process.
Locking method
To prevent the occurrence of distortion during operation of the lift, a set of special cables is used that synchronize the lift. The parameters of the cables are selected by the manufacturer so that they can withstand the rated load (the maximum weight for which the device is designed) and critical stress (from 30 to 70% above the maximum permissible weight). This is necessary to ensure the safety of personnel.
There are two blocking options. Some models have a set of electromagnetic stops that allow you to remove the lift by pressing one button. Mechanical analogues, in turn, also come in two types. The first involves pressing and holding the lever, which simultaneously removes the right and left carriages from the stopper. The second option is to separately pull out the stoppers from the carriages. It must be remembered that electromechanical lifts are completely devoid of stoppers.
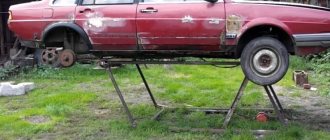
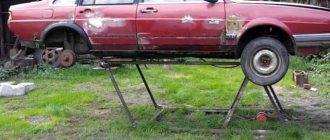
DIY pit hydraulic jack
Amateur and professional car repairs require specialized equipment, which definitely includes a traverse. This highly specialized pit jack provides tremendous assistance to mechanics at service stations and workshops.
In the household segment, this equipment is much less common, and can only be found in the garages of true car enthusiasts. The professional orientation and cost of tens of thousands of rubles make such a lift not the most cost-effective purchase, but if you wish, you can make a hydraulic pit jack with your own hands, from scraps of rolled metal.
Required tools:
- Welding machine
- Grinder (angle grinder)
- Drill
We will not list measuring instruments, a file, a vice and other auxiliary tools, without which a process of such magnitude would not be complete. If you decide to take on such a serious project, then you have such useful little things.
Required materials:
Angle 63x63x5 For the support platform (2 pcs / 900 mm, welded into a square with a continuous seam) For the upper part of the carriage (2 pcs / 674 mm) For the base for the rollers (2 pcs / 350 mm)
Profile pipe 40x40x4 Add. reinforcement of the supporting platform (630 mm) Guides (2 pcs / 300 mm) Profile pipe 50x50x4 - for guides (2 pcs / 120 mm)
Channel 10P For the sides of the lift carriage (2 pcs / 350 mm) For the base of the carriage (674 mm)
Timing tension rollers – for moving the structure along the pit (4 pcs)
As a lifting device, in this design you can use any bottle jack of suitable lifting capacity.
All materials and sizes are presented as an example and do not claim to be absolute truth. Everyone designs to the best of his ability, from what he has, and as he sees fit. This example shows that for such a width of the pit it is possible to make it using such elements. Based on this, you can make it your own, simplify or modernize it. It all depends on the skills and goals.
To increase convenience and increase functionality, you can equip your homemade hydraulic jack with adjustable legs that extend from the support platform. Since the paws will take on the entire load, they must be made of a thick-walled profile, from 5 mm, and fit into the support area without visible play. If desired, you can make convenient grooves for soft stop pads from a thick-walled pipe or other suitable metal part.
How to install
Before carrying out installation work, measurements of the room are taken to ensure the compatibility of the dimensions of the two-post lift for the service station. When determining the area, the craftsmen take into account the average size of the cars that will be repaired, and the remaining amount of free space for comfortable access to components and assemblies under the bottom.
Regulatory requirements require maintaining the distance between the lift and the wall panels at one meter. To service passenger vehicles, it is necessary to allocate 7 meters of space in the room, for freight and passenger transport - 8-12 meters.
Before installing the columns, the floor surface is cleaned of dust and construction debris using a pneumatic gun. After applying the markings, marks are made in the concrete base and holes 12 centimeters deep are drilled into them. Next, anchor bolts are installed through the steel base and driven in with a hammer. The nuts are tightened using a torque wrench. The tightening force is specified in the operating instructions.
Then the vertical installation of the supports is carried out, checking the symmetry of the placement of the racks. When connecting parts, you need to ensure that the fasteners are tightly tightened. After completing this procedure, the device is connected to the power supply, a test lift is carried out without load, and then under load, hanging the car on its feet and lifting it three times - to the minimum, medium and highest height. At the same time, the pressure level in the hydraulic fluid supply system is checked.
After installation, you must remember that extraneous sounds - crunching, creaking, crackling - are unacceptable. After checking, you can start using the lift on an ongoing basis.
What to consider when choosing ceiling height
The ceiling height inside the garage is calculated directly from floor to ceiling. It is also necessary to provide for the presence of flooring in the garage. Perhaps at the moment there are funds only for a gravel covering, and later there are plans to convert it to another covering, then the height to the ceiling in the garage will decrease.
- When calculating the ceiling height, the presence of a lift and lamps inside the room is taken into account, since these circumstances significantly reduce the ceiling height in the garage, especially when the trunk is open;
- The optimal ceiling height in a garage intended for cars should be at least 2 meters. If you plan to store freight vehicles in the garage, the height automatically increases to 3 meters.
- If possible, it is better to increase the ceiling height by 30 cm, just like the garage door.
- The ideal solution for covering a garage is a single-pitch or gable roof without an overlap; it can significantly increase the ceilings in the room.

