Today, drywall is very popular. It is used to level walls, create partitions and decorative structures. GKL is mounted on a metal profile lathing, the individual elements of which are fastened with special self-tapping screws. At the same time, their caps sometimes interfere with the tight fit of the plasterboard sheets. To avoid this, a drywall cutter is increasingly being used.
What it is?
This tool began to be used in construction not so long ago. Most ordinary users and home craftsmen have little idea what a cutter for a drywall profile is, how it works, and on what principle it works.
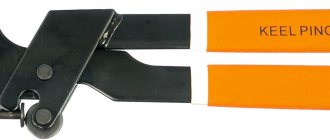
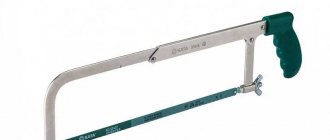
Externally, the tool resembles pliers: it has 2 handles, one of which has a bracket attached to the end. A cutting element (punch) is installed on the second of them. The principle of operation is also very simple: 2 profiles are combined, the connection point is placed between the bracket and the punch, the handles are pressed, and a hole appears on the metal (it is also called a groove), which holds the profiles in a given position. Some devices on the reverse side press the protruding edges tightly, some do not.
Using a cutter for metal profiles: positive aspects and purpose of the device
Installation of a metal profile frame is an important step in cladding various surfaces or creating new interior partitions. To fix the guides together, the best option is to use a cutter, since it can significantly speed up construction work. This device has many positive qualities due to its design features. They look like this:
Types of cutters
There are 3 types of cutters for metal profiles for drywall:
- regular manual;
- reinforced;
- professional.
They are all designed the same, but have some differences. First of all, this is the load for which they are designed and operating conditions.
Manual cutters are small in size. They fit comfortably in one hand. Most often, this type of tool is used by home craftsmen. Their safety margin is quite enough for small repairs in an apartment, and they cost much less than their professional counterparts.
Reinforced cutters are most often purchased by small construction teams. These tools are made from stronger alloys. They also differ slightly in design: they usually have a removable punch, which is easy to change if it gets dull. Thanks to this, the tool will last longer.
USEFUL INFORMATION: Shelves in a plasterboard bath: for tiles, painting and mosaics
Professional tools are usually used for large volumes of work. They are larger and more massive than their analogues, more powerful, and can penetrate thicker profiles. Of course, such a cutter costs much more than its “brothers”. There is no point in purchasing it if you plan to build one partition.
These features must be taken into account when choosing a tool. The most popular at the moment are reinforced cutters.
When choosing a suitable device, you need to pay attention to several more parameters:
- Thickness of the metal being pierced. For example, 0.55 mm is the standard thickness for manual models; a reinforced cutter is capable of making a hole in a profile 1.5 mm thick.
- Hole diameter. Varies from 2 to 5 mm depending on the choice of interchangeable bits that come with the tool.
Drywall profile cutter - a tool for quickly connecting profiles
Partitions, ceilings, and false walls are often built from plasterboard. And it is mounted on a frame made of metal profiles. A significant part of the time is spent on installing this very frame. A metal profile cutter allows you to reduce time without losing quality. This is a hand-held tool that joins two profiles in seconds.
What is a sheet metal cutter?
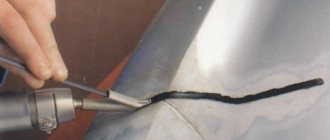
A cutter or punching pliers is a hand-held tool for joining sheet metal products. The connection occurs due to the formation of a through hole in the parts being connected.
The parts to be connected are fixed by bending the resulting metal petals.
That is, to connect sheet metal products using a cutter, no fasteners or additional actions are required.
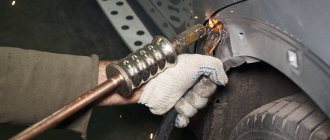
We placed the working part of the tool in the right place and pressed the handles. The metal breaks through, its pieces bend. All. Due to the fact that the metal is “pierced”, another name for this tool came to be - a profile punch.
The same tool can be found under the name “pliers for connecting HA profiles.” This is exactly how some manufacturers position it. There are other names - perforation, profile hole punch.
This is already from the jargon of builders and home craftsmen.
Metal profile cutter: roller type device
Externally, a cutter is the same pliers, but with long handles and an unusual structure of the working part. Like regular ticks, they have two jaws, but they are different in shape. On one side there is a stop, on the other there is a punch. A punch is a protruding part that makes a hole in metal. The stop is a thickened part with a hole into which the punch fits.
Photo of how the cutter works. He makes a through hole in the parts to be connected and bends the metal petals
The shape of the working part is designed so that the metal petals that are formed when making a hole are slightly bent. This ensures reliable fixation of the products relative to each other. The hole shape is usually rectangular, but can be square or round. Rectangular is preferable because it gives a more “rigid” connection.
Pros and cons of using cutters
This type of instrument is not very popular yet. It’s difficult to name the reasons, because the thing is really good. Especially for those who install plasterboard systems, and for home craftsmen, this is also a necessary thing. What are the advantages:
- Fast and reliable connection of profiles. The speed of installation of the frame under drywall increases significantly. The principle of operation is simple: insert the parts to be joined between the jaws, squeeze the handles, move, repeat. And so on as many times as required. Punch for drywall profile. This is also what this instrument is called.
- No need to use fasteners. This saves time and money.
- The tool is hand-held, so no electricity is needed. You can work on any objects.
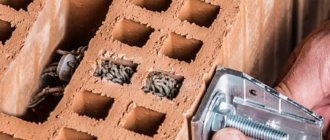
- There is no protrusion at the junction of the profiles. When mounted with rivets or self-tapping screws, the head protrudes above the surface of the profile. Self-tapping screws have more, rivets have less. This prevents the sheet of drywall from laying flat without bending. When using a cutter, the bends remain on the “wrong” side of the profile. The front is obtained without protrusions. The sheet lies flat, which reduces the time for putty and its consumption. For installing drywall, the absence of protrusions is definitely a plus
Few of those who have tried to work as a cutter return to self-tapping screws. Although, I must say, there are some. Sometimes in difficult places, the connection is “grabbed” with a self-tapping screw, then a cutter is used, and the self-tapping screw is unscrewed. But these are those who like to play it safe. With some work skill, additional fixation is not required.
Flaws
Now about the cons. Using a plasterboard profile cutter really saves time. But the tool is manual and requires the application of muscle force.
With large volumes of installation, namely structures made from profiles, fatigue quickly accumulates. And by the end of the working day, the speed of work drops.
The better the tool, the less effort is required, but it is still needed. And this is a minus.
The second drawback is the difficulty of disassembling. To separate the two profiles, you need to bend the metal petals. It takes more time than when unscrewing screws. But less than when removing rivets. It seems that these are all the difficulties and disadvantages of working with a cutter.
Not everywhere you can crawl up and make a cut. Then you have to use screws and a screwdriver
There is another drawback, which is due to the shape of the working part. Some components - jumpers, clamps - are simply impossible to “reach” with a cutter. The punch won't fit in there. There are models with very large “windows”, but they are not very good for regular connections. For professionals, having several different models is normal, but for home use it is clearly overkill.
Self-tapping screws or notches
It has already been said that when using cutters the sheet lies flatter. And this is a clear plus in favor of the expanded connection. The second unconditional plus is saving time. The third is the lack of consumables.
The disadvantages of joining GK profiles with a cutter include insufficient fastening strength. Self-tapping screws are more reliable. Perhaps, but the strength of the frame is needed only until it is sheathed with gypsum boards. And it will be enough, even if you make only one fastener for each connection. But it’s up to you to decide which is better - a cutter or self-tapping screws.
The assortment of cutters in our stores is not so large, but in large construction stores you can see about a dozen different models. What are they? First, there are models for sheet metal (pictured below).
They have a very small gap in the working part, which is also called a “window”. For sheet metal cutters, this window is only about a centimeter wide.
Any metal will fit there, but the profile for drywall is only a guide (PN) or rack-mount (PS) with small shelves. And then there may be problems.
A cutter for a metal profile should have a larger “window” in the working part
If we talk about models for connecting drywall, they have a larger “window”. It is made in the form of a square, rectangle or with rounded corners.
The larger the window, the easier it will be to fasten rack profiles with any shelf width. But then the size of the “head” increases, which is not always convenient.
Professionals simply have several different tools, and for repairs and household use they choose something in between.
This is already a tool for professionals - with holes of different sizes and shapes
There are also different shapes of holes: rectangular, round, square. They come in different sizes. The thicker the metal, the larger the punch (or bit) required. There are models with replaceable punches, and there are rotary ones.
For rotary or revolving ones (pictured above), the attachment is changed by turning a wheel with bits of different shapes and sizes. If you plan to work with sheet metal often, this is a good thing.
For occasional use, such luxury is unnecessary.
You can fasten profiles near the ceiling and floor with a regular tool, but it is more convenient to work with a special
There is also a cutter for metal profiles for convenient fastening of profiles under the ceiling or near the floor. Their handles are not a continuation of the working part, but are installed at an angle. Some (Ultra Profil EDMA) are at an angle of 90°, others are at 45°. This tool further speeds up the work when creating frames for suspended ceilings.
One-handed and two-handed and principle of operation
It is also worth remembering that there are one-handed and two-handed models. One-handed ones have a return spring that opens the handles after the tension is removed.
Working one-handed is far from easy. Especially on good profiles made of normal metal. So often one-handed ones are still operated with two hands. In this case, the procedure for working with the cutter for KG profiles is as follows:
How the cutter works: it pierces both profiles, bends the edges inward
- We set profiles by level.
- With your left hand we fix them in the desired position.
- Tool on the right. We bring its working part to the desired point, compress it until the bit hits the metal.
- We remove our left hand (the profiles are “held” by the cutter), and squeeze the handles with both hands.
Two-handed work is different in that the handles are at such a distance that you can’t even grab them with one hand. Well, they are also designed to connect thicker metal.
How to choose a cutter for a metal profile
Perhaps the most difficult thing is choosing a specific cutter model. They are divided, as usual, into household and professional. The difference in price is more than noticeable. The cheapest and most acceptable quality ones can be purchased for about $10, normal ones from $20-30, and really good ones can cost $100 or more.
Profile cutter for drywall: which one to choose
What is the difference? In work resource and ease of use. This means that the more expensive ones use more durable and expensive metals, rubber and plastic for handles, etc.
They have a more complex design of the working part; there is a mechanism that reduces the force required for connection. In general, there is something to pay for.
But nevertheless, for periodic work, for the home, you can find quite good and functional specimens in the cheap segment.
The difference in the working part between a regular inexpensive cutter and a professional one
When choosing a cutter for a profile from any category, look at the following parameters:
- Maximum thickness of fastened parts. Please note that the total thickness of metal that this tool can penetrate is indicated. That is, if 1.2 mm is indicated, this means that you can take two sheets of 0.6 mm or 0.8 mm + 0.4 mm, but not two sheets of 1.2 mm.
- Shape and size of the “window”. Rounded corners make work easier.
- The presence of a roller that pushes the punch. Such models are more expensive, but require much less effort.
- The case is free of defects, cavities, cracks, massive and heavy.
- We evaluate ergonomics. The handles should be comfortable, with stops.
- It is ideal if the handles have rubberized inserts. Otherwise, you will have to work with gloves - there will be calluses.
- The handles can be grasped with one hand when extended.
For professionals, such a tool is a godsend, but for amateurs and home craftsmen the price is too high
And it is very desirable that the company be well-known. Although, there are also nameless “Chinese” ones that are very good for home use.
Benefits of using a cutter
Installation of profiles using a cutter is noticeably different from the classical method, which involves the use of self-tapping screws. The advantages that this type of fastening has:
- savings on consumables - self-tapping screws;
- no additional tools (drill, screwdriver) are required for installation;
- profiles are not deformed;
- there is no risk that the screw will go too far;
- no need to waste time on marking;
- a hole is punched much faster than a self-tapping screw is screwed in;
- the holes have smooth, neat edges, nothing sticks out of them;
- no dents on the frame;
- does not consume electricity;
- The connection is reliable, but if necessary, it can be quickly and easily disassembled.
Many builders, after working with a cutter, abandon self-tapping screws, since the process of assembling a metal frame is significantly accelerated and simplified.
Advantages and disadvantages
The cutters can have very different shapes depending on the manufacturer.
The cutter is a device for fastening profiles together. Many people have mixed views on him. The majority agrees that it is necessary; a minority considers this method of fastening to be very unreliable. Let’s understand the situation by showing what positive qualities a profile cutter has.
- Saves time. But really, with such a tool the work goes much faster. Using rivets or screws for metal takes much longer.
- After using the cutter, there are no burrs, dents or roughness left on the profile surface on the front side. As a result, the drywall will lie evenly on the frame. If you fasten it with self-tapping screws, the drywall will protrude slightly at the fastening point due to the thickness of the cap.
- Saving money on fasteners. You will not need to buy small metal screws to fasten the guides with them. There is also no need to buy anything extra for the tool itself.
- Easy to use. Working with the tool is simple and intuitive. You just need to have enough force to apply pressure on the handles.
- A high-quality drywall cutter creates a reliable fastening. Such a unit can withstand not only a sheet of drywall, but also much larger loads.
I would like to immediately dwell on the negative aspects. The last paragraph talked about a quality tool, but not all of them are like that. Cheap cutters can make weak notches that are easily loosened, which leads to weakening of the fastening. Sometimes more expensive cutters also do this. Therefore, before choosing a tool, you need to make sure that it makes the correct cuts. In this case, there is no need to spare money.
Notchers that can be used to perform work with one hand are more expensive than two-handed ones.
Do not forget that the cutter serves to temporarily fix the profiles before the frame of them is covered with plasterboard. Some consider it as a means by which the frame can be firmly secured. This opinion is wrong.
How to use the tool
Using a cutter for a metal profile for drywall will not require any special skills or special abilities from its owner. The frame elements are connected very simply:
- profiles are aligned relative to each other and fixed in the desired position;
- the handles of the cutter are moved as far as possible in different directions;
- the ear is placed so that the connection point is between the lip and the cutting element;
- the handles are squeezed sharply, as a result the punch makes a hole in the profile;
- the handles are again moved apart and the tool is moved to the side or removed.
USEFUL INFORMATION: Installation of gypsum boards on the ceiling: technology, design, cost
Thus, the profiles are connected to each other.
Disadvantages of installing a profile using a cutter
With all the advantages, there are also disadvantages. Many professional models have a high cost, so not all builders decide to purchase them so as not to increase costs. If used frequently or/and incorrectly, the device fails—the return spring breaks. This will require expensive and time-consuming repairs.
The scope of application of the cutter is limited to connecting metal profiles to each other. It is better to work with the tool while wearing gloves to protect your hands from calluses.
What tool do you use to fasten the gypsum board profile?
Self-tapping screws
Cutter
Tips for use
A cutter is a very simple and undemanding tool, however, it also requires proper care and compliance with certain rules:
- most cutters are designed for a total profile thickness of no more than 1.5 mm;
- you can’t make breakthrough breakthroughs;
- hitting is also prohibited;
- The cutter must be placed strictly perpendicular to the plane of the profiles being pierced;
- you cannot make a breakdown in the place where the profile is built up or joined;
- The hinges need to be lubricated periodically.
A profile cutter for drywall is a simple and convenient tool. Even a beginner can assemble a frame with its help.
Advantages and disadvantages
Using a cutter during installation of a metal profile for plasterboard has a number of advantages:
- Speed . If you make holes with a drill or by screwing screws into the profile, it takes quite a lot of time. Using a cutter reduces the time it takes to make one hole to a fraction of a second.
- Accuracy . The tool allows you to make a neat, even hole without deforming the profile. Often this cannot be achieved when using a drill or screw. The hole deviates from the required position and becomes slightly inclined. Metal often wrinkles (especially true for soft aluminum profiles).
- Evenness . The front side of the metal profile frame remains absolutely flat. When connecting with screws or bolts, this cannot be achieved - the head always remains on the surface.
- Economical . Using a drill or screwdriver involves the consumption of electrical energy. The cutter is a completely mechanical tool. This allows you to save on electricity. There is also a saving in the absence of the need to purchase additional fasteners (for example, screws).
- There is no need to hire an assistant . Often, when assembling large structures made of metal profiles, a second person is needed to hold the material while drilling. When using a cutter, the need for it practically disappears - all the necessary actions can be performed alone.
Despite the large number of advantages, the tool has one significant drawback. The connection made using it is not as reliable as installation using screws. The fact is that the thread of the screws better resists the tensile load. An absolutely smooth connection made by a cutter is much less reliable.
Due to insufficient fastening reliability, the cutter is used as a temporary solution or in combination with screws. Especially if the drywall will experience significant loads. For example, when covering a wall, it is recommended to fasten the main connections with screws, and use the cutter only on the transverse ones.
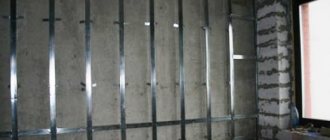
About plasterboard structures
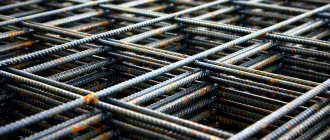
All plasterboard structures are built from four main types of profiles: rack and guide profiles for plasterboard partitions and guides and ceiling profiles for plasterboard ceilings. In cross-section, the profiles for gypsum craton are shaped like the letter P; accordingly, the profiles have one wall and two shelves. The guide profiles, both for ceilings and partitions, have even shelves. In rack and load-bearing ceiling profiles, the profile flanges have bends to strengthen the structure.
Profiles are connected in two ways:
- Using a special tool called a cutter;
- Using metal-to-metal screws. Self-tapping screws are marked as LN, these are piercing screws and LB drilling screws.
In terms of construction, plasterboard profiles are a technologically advanced material and can be connected in very different ways. Some connection methods can be classified as standard, and they are indicated in the technological maps of profile manufacturers. The second part of the connection methods can be called non-standard.
To purchase pliers for fastening profiles, you need to decide on the types and types offered to us by manufacturers.
- the thickness of the fastened profiles should not exceed one and a half millimeters;
- jerks and impacts during work are unacceptable;
- the center of the punch during installation must be perpendicular to the surface to be fastened;
- moving parts of the tool are regularly lubricated with machine oil;
- It is undesirable to touch the joints of the profile - this will cause nicks to appear on the tool.
Knipex Germany manual models from 6700 rubles;. To purchase pliers for fastening profiles, you need to decide on the types and types offered to us by manufacturers. By design, cutters are as follows: Manual - reliable, ideal for beginners in repair. They look like pliers with a long handle. When the pliers are brought together, a groove is formed - the profiles are fastened together. These pliers are brought together with two hands, less often with one. That is, to work with the tool for a long time, endurance and physical strength are required. Pneumatic are more professional cutters, which are a system of levers that allows you to simultaneously punch several holes. A pneumatic drive is capable of developing quite a large force with little force applied by a person. This type is classified as a desktop cutter (work is performed in a horizontal plane). The main advantage of the models is the availability of a punching kit with diameters from 2 to 10 millimeters (0.1 steps). There are also manual models , more compact and easy to use, for punching one hole in any position (vertical, horizontal). Machine tools – used primarily in industrial production. They are equipped with a pneumatic or electromechanical drive. They can operate in automatic or semi-automatic mode. Also, cutters can be special or universal (punching holes in profiles of different thicknesses).
To purchase pliers for fastening profiles, you need to decide on the types and types offered to us by manufacturers.
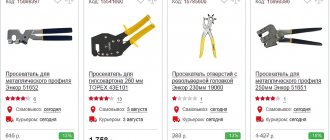
Manufacturers and prices of cutters
The following brands of cutters for connecting profiles are very popular among builders:
- Tsentrinstrument (Russia) – manual models from 300 rubles;
- Matrix (China) - average cost 614 rubles (simple manual model);
- Topex (Poland) - the average cost of manual models is from 1100 to 1470 rubles;
- Knipex (Germany) – manual models from 6,700 rubles;
- Stanley (USA) - a reinforced model from the leader in the production of hand tools with the ability to squeeze with one hand costs 7,500 - 9,200 rubles.
Despite the differences in price, the cutters are the same in operation. The choice mainly depends on the preference of the company and financial capabilities. More expensive professional models, of course, are more durable than their cheap counterparts. Buyer advice:
- If you plan to use it regularly, it is better to purchase a professional model.
- For a one-time repair, a cheap model from a lesser-known manufacturer is quite suitable.
The cutter is easy to use—spread the handles apart and sharply close them together. The hole is ready.
Tool structure
The profile cutter consists of the following parts:
- two extended handles;
- working part. On one side it has a working head with a bat. On the other side, jaws with a hole for a bat are attached to it;
- connecting parts. They are located between the jaws so that the bit influences the front part of the part. This includes the punch and die. They are the ones that most often need to be replaced during the operation of the tool. You can buy a set of these elements with different parameters (size and shape) at once, so as not to run to the store every time.
Note! It is not recommended to replace the punch or die frequently. This can lead to rapid breakdown of the seat and, as a result, malfunction of the entire tool.
The device of the cutter
Often, a manual cutter for connecting profiles has a straight head. Here only one bit is inserted into the slot. But there are tool models equipped with a turret head. It is a type of drum on which bits with different diameters are attached. The equipment is easily changed by turning the drum. The hand tool is designed to be used with one hand. It is much easier to work with than a stapler.
How to make a cutter yourself
If you know that a gypsum board structure will be a one-time use of a cutter, or you are simply sure that it is more profitable to build such a tool yourself, you can try it.
The tool is basically similar to a wrench used by mechanics. Its main components are springs and a cutting part. To make it more convenient to work, the cutter is equipped with a handle and a rotating mechanism.
So anyone with experience in assembling simple tools can make such a useful device with their own hands. Of course, do all this while keeping safety rules in mind.
The handle can also be made of wood, however, the surface must be perfectly smooth so as not to leave splinters when working. A metal handle is a great option.
The tool works using a sleeve that is attached to the base of the handle. The hinges are located on the back of the holder, all of them are necessary for the operation of the cutter.
Most popular types
Popular models of this tool have reliably proven themselves in the building materials market. It is worth characterizing those of them for which the demand is very high.
Models of cutters:
- Knipex cutter model kn-9042340. Durable mechanism using thick-walled material. A good choice for not too long work.
- KNAUF cutting pliers. The simplest, perhaps, model of a cutter. It consists of only three parts: a punch, a bracket with a fixed handle, a movable handle with a corresponding transmission mechanism. In this case, simplicity speaks in favor of the tool - the mechanism of action is simple, concise and very convenient in practice. This cutter is ideal for frequent use.
- Cutter pliers "KB Prok". It also features a simple design and strong mechanical connection, which means the flares are great for long-term use. This cutter is made of structural steel.
- Cutter brand EDMULTRAPROFIL. These mites are of particular interest to professionals. It is noteworthy that the cutter can be purchased complete with interchangeable punches for materials of different thicknesses. The device has a bracket adjustable in profile depth and two special screws. The pliers are made from high quality structural steel.
There are, of course, other models of cutters, perhaps not inferior to the above. Before purchasing, tell the seller for what purpose you are purchasing profile pliers. Depending on how long and how often you plan to use the cutter, the seller will select the appropriate product for you.
Recommendations from experts
A cutter for connecting profiles is a fairly easy-to-use tool. But there are certain nuances here, knowing which you can not only extend the life of your purchase, but also make it much easier for you to work with it. The list of recommendations given by experts includes the following points:
- immediately buy a set of replacement parts. This will save time on their purchase and subsequent replacement;
- The weak point of the cutter is the rubber covers of the handle. They need to be replaced as they wear out;
- when the springs come out, it is better to contact a specialist to prevent final breakdown;
- do not skimp on your purchase, as repairing the product can cost much more than its original price. A good and expensive tool will last much longer than a cheap analogue;
- It is better to choose models from trusted manufacturers. This way you will definitely buy something worthwhile;
- Take care of the tool, replacing worn parts in a timely manner.
Following these recommendations will help you maintain the functionality of the divider for many years, enjoy your purchase and the results of its work. Knowing what to look for will make it easy to choose a profile cutter. Thanks to him, your repair will be high-quality, convenient and fast.
Profile mode for drywall at home
Instructions for choosing a profile for plasterboard structures