Home / Electrodes
Back
Reading time: 2 min
0
2068
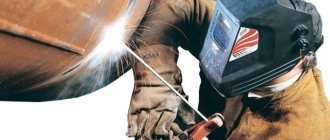
Nowadays, welding work with polymer compounds is no longer a rarity. Companies produce soldering irons for working with plastic materials in different cost categories.
There are soldering tools suitable for experienced welders and for those just starting to work with polymers. For small household work, anyone can purchase an easy-to-use device and electrodes for it.
The key element in welding plastic and other types of polymers is the plastic electrode (rod). Without this welding part, it is difficult to create a reliable weld joint.
What are plastic electrodes for welding polymers and how to work with them will be discussed below.
- general information
- Tips for selecting rods
- Principles of application
- Conclusion
Alex-Merc › Blog › How I solder bumpers and any plastic
I was always amazed when I saw how people, instead of the way I do it, drill holes and “darn” the bumper.
Let’s say this: Or using improvised means:
And even with humor: (here I give a lot of pluses to the creator of this masterpiece!)
Well, I do this (using the example of a towel holder) -
We will need a soldering iron with a tip like a simple screwdriver. As a last resort, such a flat soldering iron tip is made from any tip using a hammer. It is advisable to have plastic for soldering. First, we bring the crack together and seal it somewhere in the middle and on the edge. Next, from the beginning of the crack, we begin with a soldering iron perpendicular to the crack, sticking the soldering iron tip into the plastic at a right angle (the middle of the crack, of course, the middle of the tip), at a distance of a couple of millimeters. A kind of washboard is formed.
Next we smooth it out with a soldering iron. If the plastic goes deep during soldering, add the prepared plastic for soldering. And so on throughout the entire crack, all its rays. If possible, do the same on the reverse side.
If it is soldered on both sides, then the plastic usually does not burst even when hit in this place - it bursts nearby, in another place, but not at the solder seam. I can state with full responsibility that the bumper I soldered during the accident did not burst along an old crack. In the same way, I soldered the central triangle of 2 parts onto the 190, the upper half and the lower (the owners of the 190 will understand me, but for the rest - an air duct made of thin plastic and a “beard” with a heavy radio, an ashtray, heating controls hangs on it) - along the seam, despite on thin plastic, it didn’t burst, it burst in the places of 2 bolts securing the beard at the bottom of the triangle, after about a year. Of course, ideally everything is sanded for painting and painted. If you don’t suffer from clubfoot, it’s completely unnoticeable. But even a soldered seam, in my opinion, looks much nicer than holes with fishing line... Of course, it’s up to you to decide with your bumpers... And in the case of Tanya, the fishing line needs to be more visible there... For Tanya’s memory)))
Source
Plastic electrodes for welding and soldering
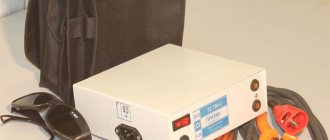
Nowadays, welding and soldering of polymers is not such a rare thing. Manufacturers produce soldering irons for plastic in all price categories and for all categories of craftsmen: from beginners to professionals. Now everyone can buy a simple soldering iron and plastic electrodes to carry out minor repairs at home or at a neighbor’s.
Plastic artificial electrodes or rods are an essential component for soldering artificial polymers. Without them, you can form a seam, but it will be difficult and of poor quality. In this article we will briefly describe what electrodes for plastic parts are and how to use them in your work.
general information
How often have you had to take your car to a workshop to have the bumper repaired? If you are an avid car enthusiast, then probably more than once. Perhaps you have not gone into the details of repairs before. Therefore, we want to draw your attention to this. After all, bumpers are made of plastic. And plastic welding electrodes are the main characters of our article. After reading this, you will be able to do your own bumper repairs in the garage.
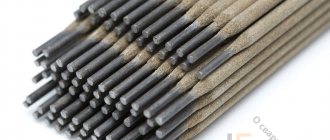
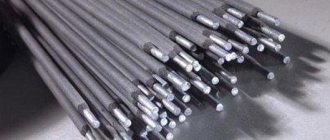
So, a plastic electrode (also known as a plastic rod, plastic wire, electrodes for repairing bumpers, and a dozen other names) is a thin oblong rod made of artificial polymer. Available both individually and in reels. Single rods are more convenient for home soldering than coils.
Tips for selecting rods
Plastic rods are available in various colors.
Specialized companies produce plastic wire from different types of polymer compounds. Quite often you can find ABS wire or polypropylene electrodes.
These are the two main, but not the only varieties. The number of types of plastic rods corresponds to the number of types of polymer compounds used for parts.
This fact has a simple explanation. For high-quality soldering of polymer products, it is necessary to use an electrode of the same composition as the part.
How to choose?
Manufacturers make plastic electrodes from a wide variety of polymers. The most commonly used are so-called ABS rods or PP rods (the main component is polypropylene). But the types of plastic rods do not end with these two varieties. There are as many types of plastic electrodes on the market as there are varieties of plastic itself.
There is a simple explanation for such great diversity. To solder a part made of any polymer, you must use a rod of the same material. Simply put, if a part is made of polypropylene or HDPE, then the electrode must be made of polymer or HDPE, respectively.
Also, when choosing a plastic electrode, pay attention to the thickness and cross-section of the rod. The thickness of the rod should match the diameter of the outlet hole on your soldering iron and match the size of the joint. If you choose a rod that is too thick, it may get stuck in the soldering iron when melting. And if you choose too thin, then it may fall out of the joint if it is wide enough.
Also, electrodes for welding plastic can have different cross-sections. Take a closer look: some rods are round, others are triangular, and others are completely flat. Each section is intended for specific work. The round section is universal and can be used for most types of plastic soldering. Only the resulting seam must be smoothed using a rubber roller. The triangular rod has proven itself well when soldering parts joined at an angle. A flat rod is suitable if the parts are joined in the same plane. Then you won’t have to smooth the seam with a roller, as is the case with round bars.
How to use?
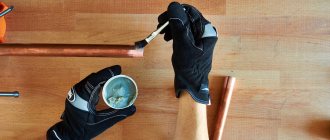
Welding with plastic electrodes is quite simple even for a beginner. You need to start by cleaning the surface from dirt and traces of oil. For cleaning, you can use various devices: from sandpaper and a file to a grinding machine. It all depends on the degree of pollution. Cleaning is necessary to improve the quality of soldering. On a cleaned surface, the seams are much better and more durable.
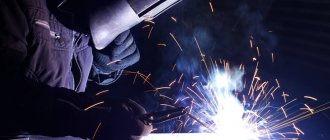
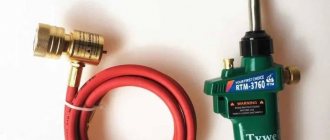
Now look at what kind of soldering iron you have. Most likely, this is a welding extruder with a hole for a rod. Insert the electrode into the device and turn it on. Then you need to wait until the rod heats up, attach the extruder nozzle to the joint and press the rod feed button. It will be fed to the joint in molten form, and you will only have to guide the soldering iron in the desired direction.
If you are using a less professional tool (for example, a welding gun), then take the rod in one hand and place its end against the joint. Take the hairdryer in your other hand. Turn it on and start heating the rod evenly so that it begins to melt. Further steps are the same as for soldering with an extruder.
The soldering electrode should not melt too quickly or too slowly. Try to experimentally determine the optimal speed of melting and guiding of the rod. The seam should be formed evenly. When soldering, feed the rod with little force. So that it presses slightly against the joint. Then the seam will fill more evenly.
There is a high chance that during soldering you will not use up all the rod, and excess may remain on the joint surface. To remove excess, warm it up and cut it off with a utility knife.
What are electrodes for soldering plastic and how to use them correctly?
Any repair that is performed when using an electrode for soldering plastic products is considered high quality. Thanks to their use, the welding is strong, almost like solid plastic, and sometimes looks even better than the factory specifications provided by the manufacturer.
An important quality when welding is the skillful placement of the strip by the master in such a way that the part is as efficient as possible and does not interfere with other spare parts of the equipment being repaired.
When might electrodes be needed for soldering plastic?
Almost all structures made of thermoplastic plastic can be repaired using flat electrodes.
For example, plastic electrodes are used for:
- bumper repair;
- body parts or decorative trims;
- headlight housings;
- various tanks and containers into which gasoline or other necessary liquid is poured;
- repair of parts in the car interior;
- other plastic products made from polypropylene.
Features of these electrodes
Flat electrodes are strips of different sizes, made from modified plastic through chemical and secondary processing. This material has high resistance to rupture or external damage, has good ductility, and high adhesion to many plastic copolymers.
Strength may be low due to the characteristics of the material used in the production of plastic parts, as well as the active oxidation process if the temperature increases. The structure ages, which provokes early damage.
Many machine parts made of plastic, thermoplastic or polymer can retain their function when frequently melted. Thanks to this, most spare parts in a car can undergo a thermal process during repair work.
Some of the most popular types of plastic used in mechanical engineering are:
Any experienced craftsman who has at least once soldered plastic using an electrode knows that these materials are repairable.
Features of using flat electrodes
Repairs with flat electrodes are long-term and are performed for the entire service life of the plastic part, without any significant restrictions. The coefficient of thermal expansion of the PE material corresponds to a similar parameter of the material of the part being repaired, for example, a bumper or headlight housing for which it is intended. In some cases, it is possible to restore missing pieces of plastic (potholes, abrasions on a wheel or asphalt) with PE by fusing one layer onto another. PE contains no impurities harmful to human health. When heated, the product emits no more harmful substances than ordinary polypropylene and its copolymers. However, it is better to work in a ventilated area. The low price of PE (22, 30 and 38 rubles) allows you to save significant money when welding a bumper or repairing a headlight.
Overview of flat electrodes
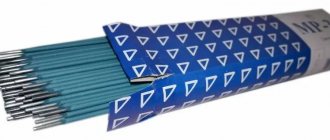
There are several main types of electrodes used in the plastic soldering process. They are often designated by Latin letters: A, B and C. The classification of electrodes is divided only by thickness and width. The standard length is 200 millimeters.
The electrode of group “A” may include strips measuring 1x15. They are used for the front parts of the structure or internal seams of spare parts, where the thickness reaches 4 millimeters.
Flat electrodes of type “B” are available in welding rods in size 1.3x18 for repair work on bumpers. They can also be used to weld a crack or fracture located on the outside of a structure with a thickness of no more than 6 millimeters.
Electrodes of type “C” combine strips of dimensions 1.5x20. They can be used as reinforcing reinforcement for seams that bear increased load during operation of various spare parts. The wall thickness should not be more than 10 millimeters.
In addition to the listed operating methods, these types of soldering electrodes can be used to build up broken parts in plastic products or to patch up any resulting hole.
Thanks to this classification, you can quickly and accurately select the required strip for a specific wall size.
For example, a bumper can be repaired with a flat strip from group “A” or “B” only where the wall is no more than 3 millimeters. Otherwise, there is a risk of deforming the spare part when the surface cools down after the work has been completed.
P Pros and cons
Flat electrodes have a significant number of advantages and a small number of disadvantages. The only thing that can be attributed to the latter is that it is necessary to control the welding electrode for welding plastic so that it does not overheat and can hold the fastener for a long time.
- Electrodes are not limited in time, that is, they have no expiration date.
- They have high strength due to the special structure of these parts. This can be seen when the bumper is damaged again; the crack does not appear at the seam site, but nearby on the plastic, which cannot be repaired.
- The parts are easy to use. They are single-component. To work with them, you only need to clean the surface and heat the flat electrode to the required melting temperature.
- These parts also have good elasticity. Thanks to this property, the part can be placed in places where it is quite difficult to reach, and initial cunning fastenings of cracks that have appeared can be made.
- When using flat planks, the quality of the repair will be high, and the result itself will last for a long time without any additional maintenance conditions.
- In special situations, you can restore missing parts of the plastic using flat strips. This is done by laying one layer on top of another, forming the shape necessary for restoration.
- The parts in question do not contain harmful substances that can harm health. However, you should not neglect the advice regarding timely ventilation of the room.
- The cost of any type of planks is minimal. This allows the specialist to save an impressive amount, which allows him to spend money on more expensive parts. There is a discount for bulk purchases of parts. Each specialized store can have it individually.
- The flat electrode covers most of the surface near the part where the seam needs to be welded. Thanks to this feature, the loads from the broken area are evenly distributed to the intact parts. This also gives extra strength to the mount.
- If you follow the correct technology for the welding process and operation of the strips in question, then, with sufficient experience and skill of a specialist, you can significantly expand the capabilities, allowing you to maintain the original strength of the material.
- There is also a ratio of the coefficients of thermal expansion of the material between the strip and the repaired part.
How to work with flat electrodes?
If you have the task of welding several pieces of plastic together or carrying out repair work on a plastic product, soldering will be the easiest and cheapest option. For these purposes, you will need welding equipment and a flat electrode for it.
Rebuilt bumpers are some of the easiest parts to weld together.
In general, the operating principle is as follows:
The flat electrode is divided into certain types to make it easier to use. Each type is used for a specific thickness, and before you start using the equipment to perform a particular task, you need to know all the intricacies of the electrodes.
Source
What else you should know about the product
Polypropylene electrodes, subject to the correct technology for welding plastic bumpers and other car parts made of plastic, open a wide field for creativity to a master with the appropriate skills. It is possible, for example, to create an entire bumper from PE of any shape fused together: the question is the feasibility of such a solution. Flat electrodes are made by deep processing of recycled plastics, i.e., the starting material for their production is mainly old bumpers, housings, trims, etc. Ultimately, this leads to a second, new life for used plastics and mitigation of the waste load on nature. The shelf life of PE, subject to storage conditions, is unlimited.
Communities › Kulibin Club › Blog › Soldering bumpers
Today I will tell you how I repair ABS plastic bumpers
So the topic is quite hackneyed, but still it looks like it will be useful to someone. In this post I will explain how to solder a bumper if there are not enough pieces
There are a lot of effective ways of soldering and gluing bumpers; I solder them the old fashioned way, reinforcing them with fine brass mesh
I do not recommend using steel meshes because they are subject to corrosion. I also ask you not to start discussions on the topic of meshes and the different structures of the material. I know that you solder with a nano-soldering iron and your soldered seam is stronger than the bumper itself, unfortunately I don’t have a nano-soldering iron, and I have already soldered more than one bumper that was soldered without reinforcement... apparently the craftsmen were crooked)
In general, here is patient number 1, the bumper from Lancer 10 has already been repaired in these places without reinforcement
Everything is simple with it, we clean the future seam of paint, then solder the outer seam with a soldering iron, aligning the parts to be soldered evenly (we solder approximately 50% of the thickness of the bumper). Do not keep the soldering iron in one place for a long time, as you can burn the plastic and spoil its properties in places where you get craters, solder plastic from the same bumper, cut off earlier from the invisible part of the bumper in the form of an electrode
Then we turn it over, clean the dirt in the seam area and where we will lay the mesh. Using the same soldering iron and a wide flat screwdriver, we also solder the mesh to about 50% percent of the thickness of the bumper. It is not necessary to solder the mesh along the entire seam, usually it is enough at the beginning and at the end of the seam, but I play it safe and solder it along the entire seam, also carefully solder the mesh plastic with the reverse side can be overheated and deformed, thereby causing waves to form on the outer part of the bumper, which will cause you a lot of trouble later. The mesh needs to be soldered 1-2 cm wide. You can also heat the mesh with a hairdryer and press it with a flat object, but I use a soldering iron, it’s more convenient for me.
I also had the task of soldering the fog light mounts and making sure it held tightly
Since the soldering area is not large, I decided to reinforce the fasteners on both sides, which ensured reliable fastening of the fog light to the bumper
Now let's move on to patient No. 2: Priora bumper, navigator body kit.
Here things are pretty bad, but not critical... since almost all tuned bumpers made of ABS plastic that I have seen, this plastic is very thin and fragile
So we have a bumper with a missing piece
Also, the owner of the bumper, if possible, collected the pieces and brought them to me.
After which we assemble this mazaika into a single whole and immediately solder the pieces; I don’t glue the pieces with anything now and do not fix them, but immediately set them straight and holding them with my left hand or a clamp, I solder the seam
Having soldered all the parts together, we notice that in some places there are not enough pieces of plastic, but this is not a problem)
We turn the bumper over and lay out the mesh that we will solder
We solder the mesh using the method described above, the bumper was only three to four times thicker than the mesh itself, which created extreme inconvenience and we had to weld additional thickness to this place
Now the bumper is reinforced, we turn it over again and in places where there were no pieces we see the mesh.
We make electrodes from the same bumper, cut off from its invisible part
And using a hair dryer or the same soldering iron, we fuse plastic onto the mesh from the front part and also from the inner part!
Then we sand the front part of the bumper to be repaired using sandpaper and a block.
Next, we putty as little as possible and clean the block in the same way.
After this, you need to prepare the surface for primer, prime, wash, and if necessary, prime and wash again. I don’t prepare or prime for painting; I sprayed the remaining primer on the seams so that the painters could just see all the craters
Well, that's all, good luck to everyone, I also welcome when comments are written on my blog, there is a similar post =)))