Pipes made from a symbiosis of metal and plastic are produced for the construction of intra-house highways. The new products made it possible to assemble a water supply and heating system yourself, without involving plumbers. Pipelines serve for a long time, are installed extremely simply and quickly, without creating problems even for inexperienced craftsmen.
By installing metal-plastic pipes yourself, you can save a lot of money, preserving the family budget for more important expenses. To install them, a home craftsman only needs to stock up on an easy-to-use tool, patience and knowledge, which we are ready to share with site visitors.
We will tell you everything about the specifics of using metal-plastic products and methods of connecting pipelines assembled from them. The article describes in detail the negative and positive aspects of their use. Here you will learn how to install trouble-free systems.
Features of metal-plastic products
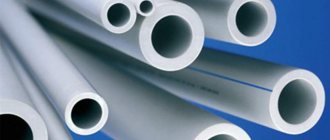
Metal-plastic (metal-polymer pipes) are composite products for the production of which various types of materials are used. Such elements have an attractive appearance, good wear resistance, elasticity, and strength.
Metal-plastic pipes are distinguished by high consumer qualities (strength, flexibility, resistance to high temperatures and aggressive substances), as well as an aesthetic appearance
Typically, a pipe consists of five layers. A durable polymer, usually cross-linked polyethylene, is used as a supporting base. It makes the inner surface smooth, protecting it from blockages, and also contributes to the strength of the product.
An adhesive is applied to the core, on which aluminum foil that stabilizes the pipe is attached (it also prevents the ingress of oxygen). The connection is secured by butt or overlap welding.
The design of a metal-plastic pipe involves the use of five layers of different materials: two layers of polyethylene, two layers of glue, a layer of aluminum foil
The fourth layer is also applied with glue, to which the outer covering is connected - white polyethylene, which provides protection to the product and gives it an aesthetic appearance.
How to repair
Before you begin repairing a metal-plastic pipe, you need to determine the location of the leak, turn off the water supply and dry the pipe, as well as clean it of grease, dust and other contaminants.
Repairs can be carried out using one of the following technologies:
- Bandage as a temporary repair method. You need to take a rubber pad, apply it to the leak area and secure it.
- Temporary methods also include a flange into which a rubber gasket is installed.
- Using sealant, you can reliably seal cracks and leaks, but this composition will also deteriorate over time.
- Epoxy glue - the leak area is coated with it, then a layer of bandage or cotton fabric is applied, after which another layer of glue is applied. The entire area must dry for 11 hours, and then the water supply can be restored.
Most often, repairs are made at the joints, that is, at the fittings. You can simply tighten the junction of the elements, but if the leak does not stop, then the joint will have to be dismantled. Here the possible causes of malfunctions are:
- damage to the rubber sealing rings - such elements are not repaired, but replaced;
- if the pipe has an uneven cut, then it needs to be leveled and recalibrated;
- If the brass body of the fitting bursts, the fitting is completely replaced.
When installing new fittings, you can lubricate the joints with silicone - this provides additional waterproofing.
Technical characteristics of pipes D 16-20 mm
Here are the data typical for metal-plastic pipes of common diameters (16 and 20 mm):
- The wall thickness is 2 and 2.25 millimeters, respectively; The thickness of the aluminum layer is 0.2 and 0.24 mm.
- One running meter weighs 115 and 170 grams and holds a volume of liquid equal to 1.113 and 0.201 liters.
- The thermal conductivity coefficient is 0.43 W/m K, the expansion rate of metal-plastic is 0.26x10⁴ per 1 degree Celsius, the roughness coefficient is 0.07.
- When the material breaks transversely, the strength coefficient is 2880 N.
- The strength of the connection between the adhesive layer and the foil is 70 N/10 sq. mm, the strength coefficient of the aluminum welded layer is 57 N/sq. mm.
- Metal-plastic pipes can operate even at +95o C, briefly withstanding temperatures of +110-130o C.
- Within the temperature range from 0 to +25o C, the system operates at a pressure of up to 25 bar, and at +95o C it can withstand a pressure of 10 bar.
- The tightness and integrity of the metal-plastic pipe is broken under a load of 94 bar (at +20° C).
With proper installation and compliance with operating rules, products made of metal-polymers can last 50 years or more.
Service
Even metal-plastic pipes have their own service life. It is believed that it is 50 years. This statement may be true, but over 50 years you will need to carry out maintenance of the water supply system at least several times. You can do this yourself without disturbing utility workers.
Even if the installation is carried out according to all the rules, leaks may form at the fitting connections over time. There may be several reasons for this:
- Rubber sealing rings are quickly destroyed, especially by hot water, so they often need to be replaced. In this case, the fitting is unscrewed and the ring is changed. It is better to put a silicone seal.
- Fitting. The adapter itself may also burst. In this case, simply replace it with a new one.
- Pipe. Perhaps during installation the cut was made unevenly and the sharp ends led to leakage. In this case, the product is cut again, flared and installed in place. If the pipe itself suddenly bursts, it is not repaired, but replaced entirely.
If you are not sure that you can install the pipes yourself, it is better to contact a qualified plumber. After all, if leakage from pipes ruins the repairs you just made, it is unlikely to give you pleasure. Although, as practice shows, most people successfully cope with the independent installation of metal-plastic pipes.
Areas of application of metal-plastic elements
Pipes made of metal polymers are widely used in the construction of individual houses, in industrial construction and agriculture.
The main areas of their use are:
- transportation of liquids, gaseous agents;
- laying drainage systems, water pipes, heating;
- in structures involving the transfer of compressed air;
- supplying heating components to radiators, installing heated floors;
- installation of air conditioning circuits;
- protection and shielding of wires (primarily power);
- construction of irrigation systems.
Metal-plastic is not recommended for use:
- when organizing central heating systems with the proposed construction of elevator units;
- in places with an assigned fire safety level “G”;
- with the expected supply of hot liquid in the pipeline with a working pressure >10 bar;
- in rooms where it is planned to place sources of thermal radiation with a surface temperature of over 150 degrees C.
In addition, it is undesirable to use metal-polymer pipes in safety, signal, overflow, expansion circuits and in fire-fighting water supply systems.
Metal-plastic products are widely used in private and industrial construction. This photo shows pipes used for laying heating systems
Tools needed to install a plumbing system
- Wrenches: adjustable and open-end. Used for tightening nuts in compression fittings.
- Scissors for cutting pipes. Without their use, cutting the material into the required pieces with smooth edges becomes much more difficult.
- Sanding paper is necessary to clean the cuts from small roughness.
- Calibrator. With its help, the cut is restored to its original roundness, lost during the cutting process.
- Press pliers are required for manual crimping of press fittings.
- A construction hair dryer is used to heat pipes before bending.
Three main methods of pipe routing
The wiring of metal-plastic systems can be carried out using different methods, each of which is selected based on the feasibility and possibilities of further access to the system.
Option #1: hidden
In this case, all pipes and connections are hidden deep in the wall under the finishing materials. Only fittings and bends for connecting plumbing fixtures are exposed outside.
The hidden installation method involves installing the structure in the wall, where recesses are specially prepared for pipes, after which the surface is sealed
When using this installation method, the interior design is preserved, in addition, masking communications protects them from accidental damage.
This option has several disadvantages:
- Laying channels for pipes requires a complex and labor-intensive gating process. After laying communications, the surface must be restored again.
- This method is not suitable for load-bearing walls, where gating is prohibited by regulatory documents.
- Quite a high cost associated with additional work.
This method is best used when renovating a bathroom. It is not advisable to install a hidden installation in an already decorated room, since this will require complete dismantling of the wall covering (cladding, plaster).
Option #2: open
If for some reason the pipes cannot be hidden in the wall, they can be laid along its surface. This option is more convenient for visual inspection of joints, which allows, if necessary, to quickly clean the area or replace a component.
With the open method, pipes are laid along the surface of the wall, which allows for control of connections and reduces the cost of work
Open wiring can be used in rooms that have already been renovated, since the installation will not harm the design of the walls. The advantages of this method include its ease and lower cost of work than when laying internal communications.
Option #3: combined
In this case, the pipes are laid along the surface of the unfinished walls, after which they are covered with boxes or false panels. This is a rather complex method, since it requires the perfect fit of decorative elements into the interior, which can also be used as drywall, tiles and other materials.
How to bend a metal-plastic pipe
Often when installing metal-plastic pipes, it becomes necessary to bend the pipe. This can be done by hand or using a spring. It’s easier and faster to work with a spring, but you have to buy one (it’s inexpensive). The spring is inserted inside the pipe and bent in the required direction. The pipe follows the bend, the spring is removed. It is easy to bend metal-plastic pipes with a spring - no great effort is required, the actions are easily controlled, and it is possible to correct the result.
What’s good about this method is that you won’t be able to squeeze the walls, which happens when you apply excessive force manually. It is also impossible to make a sharper bend (with a radius less than the minimum) and compress the walls at the bend, narrowing the flow section.
Spring for bending metal-plastic pipes
You need to bend MP pipes by hand gradually. Take it with your hands on both sides of the bend (at the same distance from the center of the future arc), with your thumbs supporting the pipe from below. In this position, begin to lower the edges down, while at the same time pressing upward with your thumbs.
Manual bending of metal-plastic pipes
With this method, sometimes the pipe loses its geometry due to excessive efforts. This negatively affects its throughput. Such areas cannot be installed in water supply or heating. To avoid such situations, the bend area is heated. This can only be done with a hair dryer. Open fire must not be used. Heated plastic is easy to bend. At the same time, it does not compress (the main thing is not to overdo it).
Methods for bending MP pipes
Another way to avoid deformation is to pour sand inside. It will not allow the walls to shrink.
Wiring diagrams for bathrooms and bathrooms
For plumbing work carried out in bathrooms and toilets, three layouts of metal-plastic pipes can be used. For private houses, the most rational option is to use a collector.
Efficient collector system
A reliable and practical option that involves connecting each object to a central pipe through a supply pair. This allows the faucet to regulate or turn off the water supply to each specific plumbing fixture.
With parallel wiring, each plumbing fixture is equipped with its own water line and its own shut-off valve. All branches come out of one device - the collector
All control devices are located in a compact manifold, which is placed in a space specially designated for them (cabinet).
Supply pipes with a minimum of connections do not require special control, which allows for hidden installation. The disadvantage of this option is the rather high cost, since for each connection you will need to purchase a special shut-off valve. Since such a system is quite complex, work must be done carefully and carefully.
In collector water distribution, control devices and shut-off devices are installed on the pipe supplying water to the collector
An important advantage: if a separate item (washing machine, faucet) fails, there is no need to completely disconnect the bathroom from the water supply - just turn off the necessary shut-off valve.
Serial connection system
This option involves connecting each plumbing item to the main pipe using a separate tee. It is more suitable for bathrooms with a minimum number of objects (washing machine, common faucet).
Sequential wiring, shown schematically in the figure, is recommended for use in rooms with a small number of objects that are alternately connected to pipes using tees
A sequential scheme can be implemented after finishing work has been completed in the room, using an open laying system. The assembly process is quite simple: the pipe is laid from one object to another, and at the same time the supply element is removed from the tee.
This option requires minimal financial costs. It should be taken into account that if there are a large number of liquid intake points, the pressure may not be enough, and the system will function with difficulty or even fail completely.
Wiring system with pass-through sockets
The connection of plumbing fixtures is similar to the serial one, but instead of tees, sockets are used. This scheme is usually used only in individual houses, since it requires laying long pipes, as well as installing an additional pump that will help provide the required water pressure.
When performing connecting work with metal-plastic pipes, several important nuances should be taken into account:
- When developing a design, it is desirable to provide a minimum of connections.
- It is important to use pipe and couplings made from the same material.
- It is better to use thermal insulation for the pipeline to prevent condensation from settling.
- It is necessary to provide free access to metering devices, filters, and detachable connections.
Compliance with the rules will allow you to create a reliable system that can last for many years.
Where to start replacing the water supply
Pipe installation begins with markings. You can sketch out a plan of the apartment on paper and mark where the water supply will go. This will allow you to accurately determine the amount of material, fittings, adapters and tees. You can do it even simpler: make markings and the necessary calculations directly on the walls. You won’t need to constantly look at the drawing, everything will be right before your eyes.
Please note that the liner must be double: hot and cold water. Then you can make additional outlets only for cold water, for example: to the toilet or washing machine.
Important! The water supply system is replaced in the entire apartment at once. This will eliminate joints between metal-plastic and metal pipes, which will greatly simplify doing the work yourself.
After all the measurements have been made, you need to prepare the necessary tools. For metal-plastic products this set is minimal.
You will need:
- A set of wrenches (including an adjustable one), a hammer drill and pliers.
- Buy a calibrator. You will need this tool to flare pipes.
- Special scissors. Unlike metal, plastic is quite easy to cut with your own hands; you don’t even need to make any special efforts.
After this, you need to turn off the water supply. If you live in a private house, then there will be no special problems; you just need to turn off the inlet valves. In apartment buildings, the entire riser will have to be closed. Therefore, it is necessary to warn your neighbors in advance and call a plumber. By the way, you will need a housing office worker to replace the inlet valves near the apartment. If the installation can be done by yourself, then the valves should only be changed by a professional. Then the old water supply in the apartment is dismantled and work can begin.
USEFUL INFORMATION: Filter for removing iron from water: the need to filter water from iron
Layout of sewer pipes
The work of installing sewer metal-plastic pipes has its own characteristics.
Sewer distribution made of metal-plastic has a number of features. In this case, it is important to use pipes of larger diameter, and also take measures to organize the slope of the pipeline
In this case, to ensure smooth drainage of wastewater and prevent blockages, it is important to comply with the following requirements:
- Maintain a slope (0.02-0.03 of the entire length of the structure) towards the drain manifold.
- It is prohibited to install bends at an angle of 90 degrees when installing structures.
- The need to install special tees with removable covers (revisions) in areas before turns that are prone to blockages.
- When installing the system in a hidden way, it is important to leave viewing windows opposite the revision.
- When assembling a system, it is important to leave a reserve intended for thermal expansion of the product.
For sewer installation, it is necessary to use pipes whose diameter ensures easy passage of wastewater.
For toilets, it is recommended to use products with a diameter of at least 100 mm; for bathtubs and sinks, 50-75 mm is sufficient.
Non-standard connections: with metal pipes, transition to a different diameter
When replacing plumbing or heating, it is often necessary to combine metal and metal-plastic. Most often this happens at the outlet from the riser. In this case, the metal pipe is cut at a certain distance - 3-5 cm, and a thread is cut on it. Next, a fitting with a union nut (collet) or internal thread is screwed onto the thread. Further installation of metal-plastic pipes proceeds according to conventional technology.
Some types of fittings that can be used when switching from metal to metal-plastic
The fitting is selected according to the diameter of the metal pipe, and the thread on the adapter must be internal - the external thread is cut on the pipe. This connection requires sealing. Wrap with flax and coat with packaging paste or simply use fum tape.
The connection of two pipes of different diameters occurs in exactly the same way. All you need is an appropriate adapter fitting with nuts/nipples of the appropriate diameter.
Rules for installation of metal-polymer structures
When laying metal-plastic systems, it is important to be guided by the following provisions:
- When laying hidden pipelines from this material, it is important to provide removable shields (hatches) that are free of sharp protrusions. They provide access to compression fittings.
- It is important to lay systems through building structures using sleeves whose internal diameter is 0.5-1 cm larger than that of the pipe. The gap that forms between the elements must be filled with soft, non-flammable material that allows the pipe to move in the longitudinal direction.
- When laying metal-plastic plumbing or heating systems, it is important to avoid damage to the surface of the elements, including scratches or cuts. To unpack the bay, it is better to avoid sharp objects and mark the structure with a pencil or marker.
- Installation of the structure can be carried out using a support or suspension, which are usually present in the range of manufacturers of metal-polymer pipes. They help to attach products to the wall, while metal parts are installed with spacers made of soft material.
All stages of operations must be carried out carefully and carefully, since metal-plastic elements are sensitive to ultraviolet radiation and mechanical damage. External installation of such structures is appropriate only in places where there are no such factors.
Installation of crimp (press or push) fittings on MP pipes
Installation of metal-plastic pipes using compression fittings requires special pliers. There are manual ones and there are electric ones. Any are equipped with a set of linings for different diameters. Manual ones, of course, are cheaper. You don’t have to buy this equipment—you’ll only need it once. It is much more profitable to rent.
Press fitting for MP pipes
The press fitting consists of two parts - the body itself and the compression sleeve. Before connecting metal-plastic pipes, the cut is prepared. It is the same as when using compression fittings, but the chamfer is removed only from the inside. The following is the procedure:
- A sleeve is placed on the pipe.
- A gasket is installed on the fitting to prevent electrochemical corrosion.
- The tube is put on the fitting until it stops. There is a hole on the fitting body in which the edge of the pipe should be visible.
- Take pliers in which suitable pads (of the required diameter) are installed. The pliers are installed close to the edge of the fitting, connecting the handles of the press together and crimping the part. As a result, two concave stripes should be clearly visible on the sleeve. Their depth should be the same. After crimping, the fittings can rotate around the pipe.
That's all, the installation of metal-plastic pipes using a press fitting is completed. Such a joint can withstand pressures of up to 10 atm, which is sufficient for most systems. Not suitable only for heating systems of houses with several storeys. more than 16. Their system pressure may be higher.
Tools and materials for laying pipes
Laying metal-polymer systems requires a minimum of devices and materials, but it is better to choose high-quality devices and pipes.
Pipeline installation accessories
To create a structure made of metal-plastic, a very modest set of tools is enough: a pipe cutter, a simple pipe bender, press pliers, a sliding and spanner wrench.
To install a metal-plastic system with your own hands, you need a minimum of tools, which can be purchased in a set or separately from a construction supermarket.
To separate measured sections of pipe from the coil, it is advisable to stock up on a pipe cutter designed for cutting metal-plastic pipes. Since metal-plastic is a fairly malleable material, it can be cut with a hacksaw or even a sharp knife.
However, ideal perpendicularity of the lines, without which it is difficult to obtain a tight connection, can only be achieved by using a special cutter.
Different types of wrenches are important for installing and assembling threaded connections on pipeline fittings. If absolutely necessary, you can get by with one spanner, but for comfortable work it is better to use two spanners and one adjustable wrench.
A gauge is an important tool for creating an accurate and tight connection between a pipe and a fitting: it allows you to center the cut plane and chamfer the inside of the product.
The pipe bender allows you to change the configuration of the element, so you can save on corner fittings. It is especially important to have this tool if the design involves a large number of angular mates.
Before starting work, we advise you to familiarize yourself with the rules and specifics of crimping metal-plastic pipes.
What materials will be needed?
To lay the pipeline, it is important to stock up on the following components:
- pipes (coils, measured sections);
- various fitting options (bends, tees, corners), with the help of which individual sections of pipes are transformed into a single system;
- fastening elements - dismountable clamps and clips, with the help of which metal-plastic structures are fixed to supporting surfaces, most often on the wall.
It is important to select all the necessary materials and tools in advance so that you can carry out all the work smoothly.
This article will introduce you to the range of metal-plastic products for pipeline assembly.
Installation of metal-plastic pipes using compression fittings
Compression fittings consist of several parts. The base is a cast body with threads. There is also a ferrule that secures the piece of pipe to the fitting and a union nut that clamps the connection. An important part is the O-ring, which ensures tightness.
This installation method is good because it does not require any special equipment. The second advantage is that the connection is detachable and, if necessary, the fitting can be replaced. If it fails or there is a need to change the pipeline configuration. And it's very convenient.
But there is also a drawback: from time to time, a leak occurs on the threads. It can be fixed simply by tightening it half a turn. But because of this, all connections must be accessible and cannot be bricked up. Also annoying is the need to check whether it leaked or not. Not everyone likes it.
This is what compression fittings look like
The range of fittings is wide: angles, tees, crosses, adapters (from one diameter to another). And all this with different angles, in different diameters.
Installation of metal-plastic pipes on compression fittings begins with removing the union nut and ferrule ring and checking for the presence of a rubber seal. After this, the assembly actually begins:
- The nut and ring are put on the pipe.
- The section is pulled onto the fitting until it stops. The stop is indicated by a special small protrusion-shoulder.
- The ring is also stretched until it stops on the fitting.
Before tightening the nut - The union nut is tightened. First, by hand, the connection of the metal-plastic tubes is tightened using two keys. One holds the fitting body, the second turns the union nut.
That's all, the installation process of the compression (screw, threaded) fitting is completed. There is only one caveat: if you fill the system with antifreeze, change the gaskets immediately. The ones that come with the kit will leak with anti-freeze very quickly. Use paronite or teflon ones. Only they can ensure tightness. In general, for systems with antifreeze it is better to use press fittings. They definitely don't leak (if crimped correctly).
Pipe line marking
Before starting work, it is important to think about how the pipes will be placed.
When developing a scheme, it is advisable to:
- Draw pipeline lines directly on the walls of the room where it is planned to be laid, which helps visualize the structure.
- As a starting point, use the connection point of the pipe to the tap or radiator, which must already be installed before installation begins.
- Minimize the number of tees and crosses that affect pressure stability, and also minimize the number of other fittings.
- For corner laying of metal-plastic pipes, you can use a pipe bender or corner fittings.
- All connecting elements should be provided with free access, since threaded fasteners need periodic tightening to avoid leaks.
The installation of connecting elements must be carried out after completion of calculations and marking of the structure.
How to attach to walls
When the pipeline is laid open, it must be fixed to the walls in some way. Usually special plastic clips are used for this. They are single - for laying one pipeline thread. Typically used for plumbing installations. There are dual ones - most often they are installed for heating - supply and return in two-pipe systems run in parallel.
Clips for mounting metal-plastic pipes on the wall
These clips are installed every meter (as often as possible). A hole is drilled in the wall for each, and a dowel of the required type is inserted (selected depending on the type of material from which the walls are made). A large load is not expected, but plumbing and heating look much more attractive if everything is laid out evenly, as if on a ruler.
Conclusions and useful video on the topic
In the video below, plumbers will tell you how to correctly and quickly install structures made of metal-plastic pipes:
Using the right methods and quality components allows you to create durable metal-plastic systems that will last for a long time without leaks, repairs or unnecessary material waste.
You can talk about how you installed and connected metal-plastic pipes in the block below. Please comment on the information we provide. Ask questions, share useful information and thematic photographs.
Example of water supply system layout
First, we draw a water supply layout plan. This can be done on a piece of paper, marking the necessary fittings. Please note that installation of taps requires installation of a fitting with a thread at the end. Taps are needed on taps to household appliances and plumbing fixtures, to heating radiators. This makes it possible to turn off devices without shutting down the entire system. The type of thread and its size are selected depending on the type of tap used.
An example of a water supply system using metal-plastic pipes
Also, transition fittings are needed before and after the meter (water or heating depends on the type of system). Having drawn a detailed plan, put down dimensions on all areas. Using this drawing, you calculate how much and what you need. Fittings can be purchased strictly according to the list, and it is advisable to take pipes with some reserve. Firstly, you could make a mistake when measuring, and secondly, in the absence of experience, you can spoil some piece - cut off less than required or crimp incorrectly, etc.
Agree on the possibility of an exchange
When purchasing everything you need, agree with the seller that you can exchange/return some fittings if necessary. Even professionals often make mistakes with them, and even more so those who decide to do the wiring of a plumbing or heating system from metal-plastic with their own hands. No one will take the rest of the pipe back from you, but fittings will easily be taken back. But to be sure, keep the receipt.
Sometimes it is more convenient to use collectors. They allow you to connect several consumers in parallel. There are collectors for plumbing and for heating (when installing heated floors)
When and how to start work
When you get home, lay out the fittings and proceed: installation of metal-plastic pipes in the summer can be done immediately, in the winter you need to wait some time (12 hours) until all the elements warm up to room temperature. It is advisable to cut one piece of pipe of the required length at a time. It's a little longer, but you definitely won't get confused. Further actions depending on the selected type of fittings.
Heating installation with metal-plastic pipes is done only with press fittings
After completing the installation of metal-plastic pipes, the pipeline is checked. If it is a water supply, just open the tap at the inlet. This must be done gradually and smoothly. The system will immediately begin to fill with water. If nothing leaks anywhere, you did everything right. If any connections are leaking, they must either be redone if press fittings were used, or tightened if the assembly was based on crimp connectors.
If a heating system was assembled from metal-plastic pipes, before starting it must be pressurized - tested with high pressure by pumping cold water into the system. If the test was successful, you can do a test run of the heating.
Installation process
As we said above, most negative reviews about metal-plastic pipelines are associated with errors made during installation of the system. Therefore, before starting the actual installation, you need to study the manufacturers’ recommendations and read the instructions for installing the heating circuit from the products in question.
Before installation begins, a diagram of the future highway is drawn up. The location of the threads and other necessary components is placed on the house plan. After this, they calculate the volumes of materials that will be required to solve the problem.
The step-by-step installation looks like this:
- A piece of pipe is cut off with scissors.
- The calibrator is used to align the inlet pipe for connection to the fitting.
- The press fitting is mounted and clamped using crimping pliers.
If you have purchased high-quality metal-plastic pipes, it is permissible to use a spring pipe bender. In this case, the minimum bending radius must be carefully observed. It directly depends on the cross-sectional index of the product.
Application area
Due to the technical characteristics of metal-plastic, the material has found application in pipelines for cold and hot water supply, as well as sewage.
It is used for various heating systems:
- Underfloor heating device "warm floor".
- Connection to wall-mounted radiator radiators.
- Heating of soil in closed greenhouse complexes and greenhouses.
- Water heating device for swimming pools.
- Laying protective screens for power cables.
- Compressed air supply.
Metal-plastic products can be found in air conditioning systems and in transport routes for the movement of gaseous and liquid substances.
Expert advice
How to bend a metal-plastic pipe
There are many bending methods. Any of them gives a large bending radius and slightly reduces the strength of the pipe. It’s easier and more beautiful to cut and solder two pieces using a corner.
Ideal bends are obtained using a pipe bender or a Volnov machine.
How to attach to walls
Any store sells ready-made inexpensive fasteners for pipes of any running diameter - so-called clips, attached to the wall with dowels (6x40 for concrete walls, 6x60 for plastered brick or cinder block; gas and foam concrete). Clips can be double or single. You can also use homemade metal brackets (for those who like extra work).
The fasteners should be placed no further than 1 m from each other (even more often for hot water and heating).
