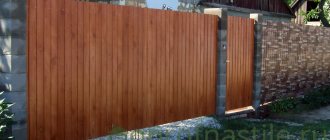
A fence gate is an entrance door through which site owners and their guests can enter the yard. Special attention is paid to its design. The entrance should look neat and beautiful, be convenient in size for passage, easy to open and close freely.
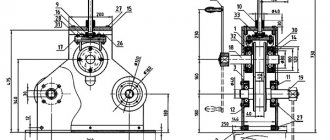
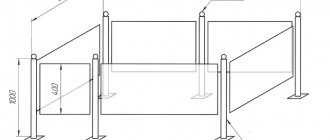
Wicket element diagram
At the same time, we must not forget that the gate is a continuation of the fence, so the color and materials must be harmoniously combined. The range of frame and cladding elements allows you to assemble and install the gate yourself.
Types of gates made from corrugated pipes
Gates and wickets look seamless and harmonious when they are made of the same height in the same artistic style. According to the type of filling, products are forged, metal-welded, open and closed. The choice depends on the characteristics of the site, the architecture of the house, as well as the task performed by the fence.
All types of gates are united by the basic principle - professional pipe
Forged is a welded frame, the space in which is filled with openwork from forged elements and a metal rod. They are made in open and closed types. You can order a ready-made standard gate or one made according to an individual project. The price of typical forged products depends on the complexity of the design and ranges from 1100–3500 rubles. for 1 sq. m.
External view of the structure with forging elements
The price of a product made according to an individual project is more expensive, 12,000 rubles. for 1 sq. m depending on the complexity of the work. Advantages: appearance, service life, reliable fencing. Disadvantages: cost, heavy weight.
The structure made of corrugated sheets looks like a frame covered with corrugated sheets. The space is filled in two ways. The first is that the corrugated sheet is screwed on top of the frame. The second method is to insert the sheet inside the frame.
The frame is made from a 40x20 mm profile pipe; for rigidity, jumpers from a 20x20 mm profile are welded inside.
Option for a door made of profiled sheets
The design is rigid and convenient for attaching corrugated sheets. Pros: the product is lightweight, the price is low, installation is simple. Cons: careful handling is required so as not to damage the corrugated sheet; installation of a rubber seal is required so that the finished product closes silently.
Closed welded gate - a metal sheet 1.5 mm or 2 mm thick is welded to the frame, resulting in a durable structure, which is decorated with patterns of forged elements or creates strict shapes. Due to the metal sheet, the structure is heavy, the weight of the product 1x2.5 m is approximately 70 kg.
An example of creating a forged welded model
The manufacturer offers a finished product with a kit that includes bolts, canopies, and eyes; its cost is 13,000 rubles. Additionally, you can purchase pillars 80x80x3 mm, 3 m long, for 1,300 rubles. Pros: reliability, long service life. Cons: high price and heavy weight.
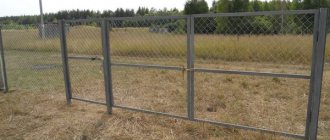
An open type of gate in which the space is filled with a 3–6 mm wire mesh curved for rigidity. The parts are painted in a special way in several layers, the product is guaranteed for 20 years. A 3D mesh gate is installed together with similar fencing systems.
The entrance group made of a three-dimensional mesh allows you to fence off the area from unauthorized entry
The price of foreign-made fencing is 10,000 rubles. per product 2x1 m. Pros: easy installation, light weight, modern look, long service life. Cons: high price.
Varieties
Depending on the location, there are two types of doors for the site:
- Garden gates. The canvases are not massive.
- Input. Massive door panels, the main task of which is to protect the territory from the penetration of strangers.
Depending on the design, gates are of two types:
- Arches. They can be decorated with metal elements - branches, leaves, bunches of grapes, birds, apples, etc.
- Classic rectangular designs.
The main division of wickets relates to the materials from which they are made:
- Wooden. The very first door blocks for private areas. Canvases can be made from individual bars, slats, solid wood, plywood, and particle boards.
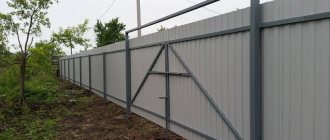
- Made from corrugated sheets. A modern version of gates for a summer cottage. Corrugated sheeting is often used to make fences and gates.
- From chain-link. Gates, which are rarely installed at the entrance to the site. They are often placed between the vegetable garden and outbuildings.
- Forged. Massive gates that are suitable for protecting your own territory and decorative decoration. To prevent them from rusting due to rain, they are coated with an anti-corrosion compound.
A separate group includes designer gates, which can be made from different materials and old metal tools.
Wicket made of corrugated sheets (Photo: Instagram / a2aofhouse)
Building design
Gates are usually made swinging.
The gate consists of supports in the form of pillars and a door leaf on a frame, which is fixed to the posts using canopies. To close, locks are installed. The pillars are made of brick, steel, reinforced concrete or wood. Inside monolithic and stone supports, embedded parts made of thick metal, angles or rods are inserted in order to weld a gate frame made of corrugated pipe to them.
The door is made as a separate passage in the fence or combined with a gate. In this case, the frame of the gate is placed in one of the leaves. If there is a sidewalk in front of the yard, the opening is made inward so as not to disturb pedestrians. In this case, the size of the leaf is taken into account so that there is a distance for the sash to fully swing open.
Hinged or sliding
The first option is considered an inexpensive design that is easier to cook and install. Such a gate does not require a base to install guide beams; it does not need a counterweight or roller elements. The swing system is combined with the gate and saves space at the entrance. At the bottom, the canvas is cut to height in areas with heavy snowfall. This way, the resulting snowdrift does not affect the opening.
Sliding schemes are more complicated, since guide girders are often placed at the bottom and require a level foundation. There are options with a device for cantilever movement of the leaf, in which the beam is hung so that it does not limit the height of the span, and the rollers are placed inside the sash frame. Automation is installed on swing and sliding systems.
Self-installation procedure
Posts for a wooden gate
First, install the posts. Dig a hole up to one meter deep and add 15 cm of crushed stone to the bottom. The vertical support is placed plumb, secured with crushed stone, or broken brick can be used. Fill the hole with concrete. The frame can be fixed to the post on the seventh day.
To properly make a gate, take welding and a square pipe 40 x 20 mm with a wall of 3 mm. Measurements for the frame are made at the installation site between the embedded parts.
Operating procedure:
- cut off two transverse elements and two posts;
- the crossbars are welded to the embedded parts, having first checked the horizontal position;
- racks are welded to them at an angle of 90°, the seam is made along the perimeter around the pipe;
- check the squareness and attach the hinges.
The canopies are placed vertically, placed on the same axis, the lower one is attached first, then the upper one. After this, the tacks that held the canvas in a vertical position are removed, and the sash should open. For rigidity, braces are installed in the gate frame, which are also made from a square. At the location where the lock is installed, reinforcement is made from a pipe.
The open ends of the pipes in the product are welded, sealed with silicone, or suitable plugs are found. Next, the metal is ground at the welding points, primed and painted.
Preparatory work and drawing development
It is clear that any work begins with preparatory activities. During construction, the first thing that needs to be done is to develop a detailed drawing. It will be possible to calculate the amount of material required. As a basis, you can take ready-made projects that are freely available on various Internet resources, or you can make your own based on your preferences. It is important to take measurements exactly in millimeters, this will avoid errors when creating the design.
The drawing will not only help you make a gate from a profile pipe faster and easier, but will also make it possible to save money. A correctly developed diagram clearly shows how much material will be needed to make a structure from a profile pipe, and there will be no need to buy extra. Also, the presence of a detailed diagram reduces the time for manufacturing a gate from a corrugated pipe.
Below you can see several options for diagrams for the manufacture of this building. They can become the basis for a future structure, to which you can add your own details. In this matter, it all depends on personal preferences, and the drawing can be supplemented with other elements.
When the schematic design of the gate from the profile pipe has been made, the rolled metal pipe should be prepared for work. If these are not new products, then they should be cleaned of corrosive formations with a grinding disc.
If these are new products without rust, then before welding they must be degreased with a simple solvent used to dilute paint.
Then the rolled pipe for the gate from the profile pipe is cut into pieces of the intended length. For a rectangular inlet hole, it is recommended to cut metal professional material in pairs. So the blanks for a structure made from a profile pipe will have the same length.
Dimensions and shape
For a solid gate, a profiled pipe with a cross section of 60*60*3 mm is used as pillars. In this case, it is better to choose thicker walls, as this will affect the durability of the structure. For the frame, a rectangular pipe 40*20*2.5 mm is usually used. The strength of this pipe is sufficient for medium wind loads. For light wind loads, you can take a 2 mm wall, but it will be more difficult to weld. Anything thinner than 2.5-3 mm must be welded in a special mode, and this is far from easy. If the winds are stronger, you can either increase the wall thickness, or use a larger cross-section: 40*30 or 40*40, even 40*60.
Wicket - device, dimensions
The height of a gate with an upper crossbar is usually about two meters, without a crossbar - from 1.2 m. Low ones are usually made in internal fences that delimit a site or in translucent low fences. For solid high fences made of corrugated sheets, wood, or flat slate, the height at the fence level is more typical. The width of the gate is minimum 90 cm, optimal is 100-110 cm. These dimensions are based on practical considerations, since in winter or autumn it will be inconvenient to walk through a narrow gate with a width of 70-75 cm in outerwear, and it will also be difficult to carry any items if necessary. those are big things.
It’s also worth talking about how deep to bury the pillars. The standard solution is 15-20 cm below the freezing depth . Based on this value and adding the height of the gate to it, supports are made.
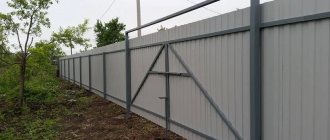
Additional jibs increase rigidity
Using a shovel or a drill, make a hole in the ground, at the bottom of which a bucket of medium-fraction crushed stone is poured. Then the pole is installed, set vertically, covered with crushed stone (or broken bricks) and filled with concrete mortar. When the solution has gained at least 50% strength (after 7 days at a temperature of +20°C), you can attach the gate frame.
Tools required for work
Tools for installing a gate
For excavation work, use a bayonet shovel or crowbar. Sand, crushed stone, and cement are transported using stretchers or buckets and mixed in a concrete mixer. A small volume of the mixture can be prepared manually in a trough, stirred with shovels. To weld a gate from a profile, welding is required; consumables are purchased for it.
Other tools:
- tamper for crushed stone, sand, electric vibrator for concrete;
- grinder with a grinding and cutting wheel for metal;
- electric screwdriver and drill;
- level, square, plumb line, 5 m tape measure, core.
An angle grinder (grinder) is used to cut off the parts of the frame and diagonals, and using a grinding wheel to clean the welds from scale. In different cases, you may need other tools, such as an ax, to cut roots in the ground.
Selection of material
The appearance of the entrance group determines the choice of building materials for support pillars and lining of the panels. You can weld a gate from a round pipe, but it is inconvenient to attach hinges to it, and difficulties arise when connecting the corners of the frame. The square section avoids such difficulties.
The internal filling is made of mesh, artistic forging, this structure looks openwork and opens up an overview of the internal space of the yard. Corrugated sheeting is used more often due to the wide choice of colors and patterns to resemble stone and wood.
For the canvas, cellular or monolithic polycarbonate is used, and sandwich panels are installed. Sometimes forged elements are combined with wooden filling.
Characteristics of professional pipes
All profile pipe products have the following main characteristics:
- affordable cost;
- reliability and durability in use;
- light weight;
- a significant degree of resistance to mechanical stress and corrosive processes.
Every home craftsman, if desired, can make a gate from a profile pipe with his own hands without the help of a craftsman, which does not require professional knowledge and skills. You just need to confidently use a drill, welding machine, or grinder. You will also need to draw a simple drawing.
For the designed structure, you should purchase high-quality building materials. But before you go shopping, they develop a detailed drawing of a gate made from a profile pipe with all dimensions.
Cost and weight
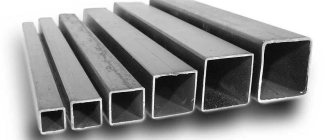
The price of the pipe depends on the size and wall thickness. Products are produced in square and rectangular shapes. The dimensions of the profile shelves are 10–180 mm. Wall thickness 1–14 mm. For private construction, a profile pipe with a thickness of 1 to 4 mm is used; it is durable, lightweight, and the round counterpart is 20% heavier.
Types of professional pipes for creating a frame
The most popular profile for building a gate from a profile pipe at home:
- For the posts and frame of 3D gates, a pipe of 60x30 and 60x40 mm with a wall thickness of 2 mm is used. The approximate cost is 128–140 rubles per linear meter.
- To make a large open-type frame, a 50x25x2 mm pipe is used. The price, depending on the region, averages 110 rubles.
- The 40x20x2 mm profile is the most common for products of this type. It is used for products made of corrugated sheets, as well as metal sheets. The price of a pipe per meter is 78 rubles.
- To facilitate the design, a 40x20 mm profile with a wall thickness of 1.5 mm is used. The price of one meter is 75 rubles. Jumpers for rigidity are made from a 20x20x1.5 mm profile, the cost is 40 rubles. per linear meter.
The rectangular shape allows for greater convenience in attaching the facing material.
Thanks to its rectangular shape, the pipe has natural stiffening ribs, which makes it durable and can withstand heavy loads; this is the advantage of profiles over their round counterparts.
How to make a gate from a profile pipe - do-it-yourself installation
When arranging a fence, many owners of summer cottages prefer to install gates with a wicket made from profile pipes. You can make such a metal structure yourself. In addition, a high-quality gate made from a profile pipe can become a decoration for your dacha.
Welding the gate frame
When preliminary calculations have been made and the material has been purchased, you can proceed to creating a frame for the gate.
- Before welding a gate from a profile pipe, prepare the place. A metal table with a flat surface is the best option for work. The table is set horizontally, all irregularities are smoothed out with a grinder. This is necessary to ensure that the product is level in the horizontal plane.
- The material is cleaned of rust and debris using a grinder with a grinding wheel. It is better to clean the workpieces separately, since this is more difficult to do in the finished product.
- The prepared material is cut to size. The blanks are cut at an angle of 45 degrees. Such welded seams look aesthetically pleasing, and moisture does not get inside.
- To get an evenly cut workpiece, use a stationary cutting angle grinder with a degree scale or manually mark it using a corner. When cutting, make sure that the workpiece lies flat and the grinder is perpendicular to the surface.
- Before assembly, all metal parts are primed. A gate made of a profile pipe must be treated on all sides so that rust does not appear when moisture gets in.
- The prepared frame blanks are placed on the work table, tightly joined, and the diagonals are checked.
- Make neat tacks in three places to fix the structure, check the dimensions again.
- If the dimensions and diagonals are normal, the structure is turned over to the other side and the blanks are welded together. This is done so that the structure does not go astray in the horizontal plane. Then they turn it over to its original position and finish scalding the joints. After the frame of the gate is ready, the welding areas are polished and filled with decorative elements or metal sheets.
The finished product is primed and then painted.
Lock mortise
The gate experiences temperature changes, exposure to humidity and atmosphere. A special feature of the lock is a narrowed bar and a short distance from it to the axis of the lock.
Every entrance gate needs a lock. There is a wide choice of locks: from padlocks to electronic ones. But most locks are mortise, they are reliable, and have many degrees of protection. When manufacturing the frame, a 40x20 mm profile pipe is used, which is suitable for installing a mortise lock.
For convenience, the lock is cut in when the frame is not yet welded and it is easy to work with the workpieces. On the 40th shelf, 90 cm from the bottom, mark the opening for the lock on the inside and outside.
Arranging a place for a mortise lock
For cutting, take a small grinder, set a circle of small diameter, usually used circles. The markings are made from the center of the profile with a margin of 1 mm on each side.
First, longitudinal cuts are made in the profiled pipe. Then small transverse cuts are made in a small circle at both ends and in the middle. The middle cut is made diagonally, this makes it easier to cut through the plank. Then use a screwdriver to pry the plate off in the middle. Clamp the edge with pliers and break the two halves in turn. Cut out on both sides, inside and outside. You can watch the video at the end of the article for more details.
When assembled, the structure should look like this:
Painting
Painting is an important part of the job. Paint protects the metal from corrosion and gives it an attractive appearance. Particular attention is paid to preparing the product for painting. The metal is cleaned of rust. It is better to do this at the preparatory stage of assembly, then you will not have to manually remove rust from hard-to-reach corners.
Coating metal surfaces with paint
The workpieces are wiped free of dust and degreased with a cloth soaked in solvent so that the painted surface is free of dust particles. To thin the paint and primer, use solvent 646 or 647. After dilution, begin priming the product.
This is a preliminary treatment of the metal with an alkyd primer, which smoothes the surface and ensures good adhesion to the paint. Now they produce 2 in 1 paints, which are used without a primer.
Painting with a spray gun significantly reduces the consumption of protective composition
It is better to paint the product with a spray gun, then the paint will spread evenly in a thin layer. You need to paint twice. The first layer is applied to level the surface, and then partially covers all unpainted areas. Paint the second time after the first layer has completely dried. The paint gives shine and lasting color.
The cost of the Russian primer GF-21 weighing one kg is 151 rubles. Finnish Tikkurila costs 500 rubles. per can weighing 0.9 kg. Primer consumption 70–100 g per 1 sq. m.
Appearance of the domestic primer GF-021
The cost of Russian-made paint is cheaper than its foreign counterpart. PF-115 enamel, 0.9 kg can, costs 200 rubles, and Finnish Tikkurila of the same weight costs 1100 rubles. Paint consumption 100–150 g per 1 square. m.
Note. Try not to let the paint drip. Apply the first thin layer, and after drying the second. Smudges and thickly applied paint do not look attractive on the finished structure.
Installation of a gate
We move on to the final work - installing the gate. Please note that at the welding stage, the loops that cover the paintwork are fixed. Before you begin installing the frame and gate, you need to install the support pillars. For this purpose, use a tube with a diameter of 60 x 60 mm. The element is buried into the ground up to 70 - 100 cm, this is enough to ensure the stability and strength of the structure.
Advice! At the bottom of the post, parts made of metal sheet are attached, like a sole. This will provide additional stability and simplify the leveling task.
Take measurements and dig holes to immerse the supports. Align the elements strictly level, checking the vertical position of all sides. Place temporary spacers, mix the concrete mixture and pour it into the recesses.
After the concrete solution has hardened, proceed to fixing the canopies. Take another person to help, since this is a critical stage, it is necessary to maintain clarity and coherence in the work. Attach the gate made of the profile pipe to the supports in the position in which it will hang on the gate. Make marks for the awnings and attach the missing elements using a welding machine. Sand the seams with a sanding wheel. At the end of the work, cover the pillars with primer and paint.
Cladding works
The wicket frame is covered at the final stage. Profiled sheet metal, which is used for wall decoration, is suitable for the design of the structure. The choice of corrugated sheets is presented in various colors.
Select durable fasteners - hardware. The color of the side for the rivet can also be very diverse, just like the profiled sheet.
Place the sheet against the metal frame, drill holes around the perimeter at intervals of 20 cm. After that, proceed to fixing the profile sheets to the frame. At the last stage, hang the gate on the frame and check the quality of opening and closing, install the lock and handle. Use forged parts as decoration. They can be purchased ready-made or made to order. A gate made from a forged profile looks very attractive against the background of the overall fence design.
It’s very easy to do the sheathing for the gate yourself. But there is no need to rush in this matter. Patience and accuracy should not be discounted. If you haven't had to do this work yourself, there's no need to be upset. Everything will work out correctly if you correctly measure the required sheets of material and act without undue haste.
Additional benefits
In addition to being cheap and durable, a fence made from welded reinforcing bars has other advantages. For example, it can be successfully integrated into the overall ensemble of the estate with similar rods near the balcony, window bars, and porch railings. For the same purpose, a decorative technique such as a single color scheme is used. A metal fence is easy to paint and fits well into the overall color of the design. The color can be chosen to match the facade of the house or the metal roof tiles. But not necessarily. For example, the patina on metal parts gives the fence a special charm.
This is what a fence decorated with patina looks like.
If the architecture of the house has arched window shapes and semicircular balconies, then such lines can be repeated in the design of the fence. It’s not easy, but what a wide field for creativity and manifestation of the owner’s wonderful taste. Together with a thoughtful landscape design, everything can be decorated, for example, in the style of the Middle Ages. It's very fashionable now.
Installation of swing gates with a wicket
Independent construction of this type of gate with a wicket is simple and is carried out in stages:
- First, draw a drawing and determine the amount of materials required.
- When using old pipes, they are cleaned with a grinder and a grinding wheel, or regular sandpaper can be used.
- If pipe products were purchased recently and have not yet rusted, then they must be degreased using gasoline or paint thinner. The products can also be painted.
- Cut and mark the purchased materials. If the gate has a rectangular shape, then the corrugated pipes are cut in pairs.
- Using a hole drill, they make recesses for installing support pillars.
- The bottom of the grooves is covered with crushed stone, which will become like a pillow for the supports. Then the entire structure is concreted with a mixture of cement, crushed stone and sand in a ratio of 1:4:2. Two days are allowed for the solution to harden.
- Next, you need to weld the gate frame from the profile pipe as accurately as possible with your own hands. This must be done in such a way that all the existing corners and diagonals of the structure are the same in size.
- Then you need to weld the hinges to the support posts, and then to the gate frame.
- When the cleaning of the welding effects is completed, they begin to grind the surface, after which it is treated with a primer and wait until it dries.
- Apply paint to metal.
- Profiled sheets are attached to the finished frame with self-tapping screws. They can be placed from the outside or from the inside of the frame - it depends on the personal preferences of the owners of the site. If you plan to decorate the gate using forged elements, then the sheets are fixed exclusively from the inside of the gate frame. When wooden boards are used for finishing, they are first coated with varnish. Forged products are welded to the gate frame.
Decoration
The design is chosen by the owner of the site depending on his own wishes. Popular options:
- Decoration of the canvas with forged elements. They can be welded to the main frame.
- Painting corrugated board or euro-fence. Before carrying out work, you need to clean metal surfaces from dirt, rust, and plaque. To increase adhesion, it is recommended to treat the metal with fine-grain sandpaper.
- An interesting option for a garden gate is to fill the inner space of the canvas with various tools.
- Decorating the top bar with decorative rods in the form of pointed peaks.
In order for the canvas to last longer, the seams must be coated with anti-corrosion compounds.
European picket fence (Photo: Instagram / cabinlife2019)
Advantages and disadvantages
1. Considering the budget pricing policy for profiled materials and their availability in stores, the first advantage can be called low cost. A gate made from a profile pipe will cost you little compared to products made from other materials.
2. With proper processing and subsequent care of such a door, the material will be resistant to corrosion.
3. The door is the most used place of the entire structure, so the fact that products made from profile pipes are durable and will serve you for a long time is no less important.
4. Profiled pipes are light in weight, which will lighten the structure frame and allow you to quickly and effortlessly install the gate.
5. To manufacture and install the structure, you do not need special knowledge and skills. It is enough to be able to handle tools such as an angle grinder and a welding machine and do a little drawing. You will also need knowledge of working with soil, which boils down to digging holes for supports.
6. Another factor why private sector owners prefer structures made from profile pipes will be their reliability.
7. Also, real aesthetes can create their own design using a variety of materials.
1. One of the disadvantages is the lack of sound insulation. Therefore, your yard will be protected from prying eyes, but not ears.
2. If you cannot guarantee that the gate will not be subject to any mechanical influences, then you must be prepared for the fact that any damage can lead to metal corrosion.
Among other things, the following advantages stand out:
- The cost of the source material is quite understandable for every summer resident.
- Long service life of the finished structure.
- Very easy to make and install.
- The profile pipe construction is quite reliable.
- There is always the opportunity to diversify the design, for example, to use forging elements.
Features of care
Rules for caring for homemade structures:
- Once every 3 months, re-coat the joints of individual elements and metal surfaces with anti-corrosion compounds.
- Renew the decorative coating once every 6 months.
- Elements of the canvas that have collapsed due to rust must be replaced with new ones.
When erecting a fence along the border of your own property, you need to take care of making a gate. It must match the style of the fence to create a visually consistent picture. If you want to save money, you can assemble the door leaf yourself. Various materials are suitable for this, which have certain characteristics.
Photos of beautiful gates
Making a gate that is not ordinary, but beautiful is not so difficult. And this does not always require expensive materials. What is always needed is imagination. Then even a bicycle, a shovel, a knot or a pickaxe is a material for exclusive design.
For pets))
For houses in a modern style, gates need appropriate
From a variety of materials... even from knots
Wood and forged elements - a win-win combination
The main component is fantasy
A stencil changes even the simplest fence
Make a couple of cutouts in the boards... the original wooden gate is ready!
Visiting fairy tales
Bicycle, wheels, shovel - all materials for making gates
To the fence made of Euro picket fence
A small fragment - a cat made of plywood
Original design from the courtyard Sources
- https://ZaborSebe.ru/vorota/kalitka-iz-profilnoj-truby-svoimi-rukami.html
- https://StrojDvor.ru/krupnye-konstrukcii/kalitka-iz-profilnoy-truby/
- https://TrubaNet.ru/izdeliya-iz-trub/kak-svarit-kalitku-iz-profilnojj-truby.html
- https://zabor-pro.ru/kalitka-iz-profilnoj-truby.html
- https://domsdelat.ru/okna_i_dveri/kalitka-iz-profilnoj-truby-svoimi-rukami-osobennosti-sozdaniya-i-poshagovaya-insturkciya.html
- https://passaz-okna.ru/dveri/kak-sdelat-kalitku-iz-profil-noy-truby-shema-i-poshagovyy-montazh-svoimi-rukami.html
- https://ZaborStroj.ru/kalitki/delaem-kalitku-iz-proftruby
- https://stroy-okey.ru/house/zabor/kalitka-iz-profilnoj-truby-i-profnastila-svoimi-rukami/
- https://stroychik.ru/zabor/kalitka-svoimi-rukami
