A water tank is useful in every household, private home or country house. Storage containers can be used for irrigation and reserve supplies for household needs. Containers are made from different materials - plastic, polypropylene. But for many years, a metal container has been considered the most durable and reliable. It can be round or rectangular, with or without a lid.
Buying a water tank for the dacha is not a problem, but with amateur welding skills, each owner can make a metal container for the dacha or home on their own. It is important to note that very often finished products are made of thin steel, and therefore do not last long.
If you make it yourself, you can choose thicker sheets of material and then the tank for watering your garden is guaranteed to last for many years.
DIY concrete water container
- Water container at the dacha - photo ideas
- We will not deny that water storage containers are needed at any summer cottage.
- During the first year of owning a summer cottage, my husband and I suffered greatly from the fact that we had to constantly carry water in buckets from a water tower located 500 meters away from us.
- After some time, we had a suitable container for water at the dacha - a 250 liter blue plastic barrel.
- Water storage tank at the dacha
Why is such a container needed?
Watering from a barrel using a submersible pump
There are several reasons why such water should not be used. The main one is its low temperature. The water in the tap has a temperature of 18-20°C. For watering most crops, it is recommended to use water whose temperature differs from the air temperature by no more than 2-3°C. Since in summer the air temperature is often above 25°C, the difference is too large and the root system of the plants will be injured.
The second reason is the presence of impurities in tap water. The most unpleasant additional component of water is the residual chlorine used to disinfect water at filtration stations. Even the levels of chlorine content in water, considered safe by modern standards, are unacceptable for watering plants. Chlorine leaves the water over time, evaporating into the atmosphere, but it takes some time for this to happen.
The influence of other negative factors is significantly less. Traditionally, tap water contains a relatively high concentration of calcium and magnesium salts, but they have virtually no effect on the life of plants.
To get rid of the harmful effects of these factors, it is necessary to use water for irrigation that has been previously settled in a container in the open air for several days. A similar technique is used in both amateur and professional agriculture. In the latter case, large-volume containers are used to settle water, including even artificial reservoirs.
How to weld a metal water tank on your site
Most people living in apartment buildings have a very vague understanding of the problems and concerns of private home owners. For example, the independent process of manufacturing a water storage tank from steel can become a reason for an ironic smile from an apartment resident. Although in fact, the possibility of welding a steel water tank with your own hands is an interesting and relevant question for many.
So, which approach should you choose, weld the tank yourself or order a ready-to-use tank?
Of course, you have the opportunity to seek the help of professionals. Prepare a competent drawing of the structure for them, and the water tank will be made in accordance with your wishes. If you don’t want to spend time drawing up a drawing, you will most likely be offered several types of designs to choose from. This is all great, but you will have to pay accordingly for quality work. In this regard, many homeowners opt for the second option - making the tank themselves. It's not very easy, but the real savings and moral satisfaction are worth it.
Types of washbasins
It may seem that you can make a washbasin for your dacha with your own hands only of the simplest design. In fact, even a novice master can create a comfortable and very beautiful washbasin using the simplest tools. The degree of comfort is determined by the design of the structure.
By your own choice, you can give preference to one of the most common models:
- hinged (with a pressure spout or tap),
- on a stand that can be easily carried and installed anywhere on the site, even where there is no suitable support,
- "moydodyr" - a structure with a cabinet in which a container for collecting waste water is located,
- heated products.
If you need to choose or without it, then our review article will help you with this.
And the characteristics that the popular and inexpensive one has are presented in other material on the site.
We also have instructions on how to do it. Selection of materials and sequence of work.
The main condition for high-quality cleaning is filter media
The working container is selected so that all the necessary filling fits into it. A variety of components are used for absorption: artificial and natural. The latter have higher filtration capabilities. These include:
- sand from a river or quarry;
- gravel;
- zeolite;
- Activated carbon.
For initial rough cleaning, cotton fabric materials or even paper are usually used. According to hygienic requirements, they are very impractical: they are constantly in a humid environment, subject to rotting, and an unpleasant odor appears. The very structure of such filters contributes to almost instant contamination, which requires frequent replacement.
Painting the container
To paint metal tanks that will be exposed to high temperatures and high levels of humidity, different painting compositions can be used:
- Cetra. Paint that can withstand extreme heat and moisture. Suitable for painting containers and pipelines outside and inside. Protects metal surfaces from rust formation.
- Ethyl silicate paints with zinc powder. Before use, the paint must be mixed thoroughly.
- Lead iron-containing dyes. The compositions are resistant to prolonged exposure to moisture and heating up to 300 °C. Protect metal surfaces from rust formation.
- Anti-corrosion enamels with zinc filler. After they are applied and dried, a durable film is formed that can withstand intense mechanical stress.
- Heat-resistant water-dispersion coloring compositions. Withstands heating up to 120 °C. Suitable for painting the inside of water containers.
- Epoxy enamels. Withstands temperature changes within the range of -50–+120 °C. Do not collapse under the influence of moisture.
Stages of painting metal surfaces:
- Use a stiff metal brush to clean the surfaces of the tank from dirt and deposits.
- Remove dirt with a rag and degrease metal sheets.
- Coat surfaces with primer.
- Apply paint.
To reliably protect the metal surfaces of the tank from rust, they should be coated with special compounds before priming. The most effective are considered:
- insulating agents that form a durable film;
- passivating compounds that slow down the rusting process;
- protectors with metal particles;
- special formulations with orthophosphoric acid.
Paint for metal (Photo: Instagram / sunny_stroy)
Making your own containers from tires
If you can’t purchase a water container for a small amount, but you don’t want to spend a lot of money, you can create the design yourself.
A storage tank can be made from scrap materials that are available on the farm or they can be borrowed free of charge from neighbors or friends.
For example, you can use old tires. It is advisable that these be tractor tires, since they have a larger diameter.
Initially, the location where the structure will subsequently be installed is determined. This space is leveled, after which they begin to create the main structure, following the step-by-step instructions:
- the upper inner part is cut off from the tire;
- the cut tire is laid out on the prepared place;
- prepare a solution by combining sand and cement in a 3:1 ratio, adding water until the mixture has the consistency of thick sour cream;
- the solution is poured onto the bottom of the tire, leveling the surface;
- the tire with the solution is covered with polyethylene and left for a week (polyethylene performs protective functions, preventing the negative effects of rain);
- After a week, the film is removed and the volume is filled with water.
Washstand made from a plastic bottle
If you are thinking about how to make a washbasin in your dacha with your own hands, quickly and easily, a design made from a plastic bottle will be the optimal solution. You can create such a design in a few minutes at virtually no cost. Such a washstand will serve perfectly until you build a more advanced structure, and maybe it will be in demand in the future.
The general principle for creating such washstands is the same - a plastic bottle is suspended and fixed vertically with the neck down
. Such a bottle can be filled through the neck, but to do this the bottle will have to be removed from the support. If rigid fixation is provided, the bottom of the container can be cut off. In this case, it is better to equip the washbasin with a top cover (for example, made from a cut-off bottom part) to prevent dust and debris from entering the water.
Variations usually concern the water supply device.
- The simplest outdoor washbasin for a dacha is a plastic bottle with a hole in the lid, and an ordinary nail with a blunt point is placed in it
. The nail cap is inside the bottle, and the diameter of the hole is larger than the diameter of the nail, but smaller than the diameter of its head. Thus, in a free position, the head of the nail is pressed against the hole, blocking the outlet of water. If you need to wash your hands, just lift it by pressing the free end of the nail from bottom to top. The advantage of the design is its simplicity, however, there are also significant disadvantages. For example, a nail that is constantly in water quickly rusts. In addition, using such a pressure device is not always convenient. The model may well work as an outdoor washstand for a dacha, but it is difficult to wash dishes with its help due to the inconvenience of the drainage part and the small capacity.
- a regular “original” lid with a hole in the side
as a drainage device . When such a cap is completely screwed on, the hole is blocked by the neck of the bottle. By partially opening the lid, you free the hole, and water begins to pour out of the washbasin. The inconvenience of using this design lies in the difficulty of regulating the intensity of water supply. The advantage, like the previous option, is the simplicity of the device. - You can make a more comfortable outdoor washstand for your dacha with your own hands from a plastic bottle by equipping the neck of the container with a small tap
. It can be purchased or removed from faulty equipment (washing machine, etc.). It is not difficult to fix the tap on the neck using electrical tape.
Advantages and disadvantages of the material
This material has advantages due to which it has gained the greatest popularity in the construction of swimming pools:
- Polypropylene is easy to process. This feature allows you to create bowls of different shapes, which means you can implement any design solutions according to your own drawings and diagrams. The pleasant shade and structure of the material blend harmoniously into the surrounding landscape.
- When welding the joints of polypropylene parts, a reliable waterproofing layer is provided, which does not require additional processing and sealing.
- When installing pool equipment (lighting, filter devices, hydromassages and nozzles), there is no need to make sealing layers, since these devices are installed directly into polypropylene.
- Pools made of this material do not require external finishing. Polypropylene is waterproof and has a smooth surface, giving it a ready-to-use appearance.
- A structure made of this material, placed in a prepared pit, does not require the installation of a retaining frame or formwork. To do this, it is enough to strengthen the sides of the pool bowl with a concrete mixture.
A polypropylene pool can be used without finishing
Polypropylene is safe for children
Polypropylene, being a very convenient material both in processing and in operation, still has some disadvantages:
- The material is susceptible to ultraviolet radiation, which can cause the color of the coating to fade.
- Welding seams requires special equipment and some skills in working with polypropylene.
Welding stainless steel at home and more
When welding stainless steel, you need to take into account some features of the alloys:
- high coefficient of thermal expansion, stainless steel parts must be folded with a gap;
- high thermal conductivity of stainless steel, so as not to create a high temperature in the working area, workpieces with a carbon content of less than 0.2% are preheated, the welding current is reduced by 20%;
- high resistance of stainless steels, the metal heats up quickly, so special electrodes 35 cm long are selected for welding work;
- When heating chromium-nickel stainless steel, heat-resistant films of oxides of alloying elements are formed, which makes the welding process more difficult, and the working area must be cooled.
It is necessary to weld stainless steel at home, taking into account the characteristics of steel, otherwise the connection will turn out to be of poor quality.
In order to properly weld stainless steel, a number of works must be carried out before carrying out work:
- the workpieces are first cleaned of dirt and dust, the oxide layer is removed from the surface to a metallic shine with a brush, fine file or sandpaper;
- edges thicker than 4 mm are cut with a grinder or cut at an angle;
- stainless steel thicker than 7 mm is preheated, the temperature depends on the grade of steel;
- the parts are laid with a gap, its size is determined from the reference book.
Before welding the seam, the joint is clamped in several places so that the parts do not move during work.
Welding stainless steel with coated electrodes
The MMA electric arc method is most often used for stainless steel if there are no special requirements for the connections. When choosing electrodes, they are guided by GOST 10052−75. The standard specifies how to cook stainless steel alloyed with chromium, nickel, iron, and refractory metals. Electrodes are divided into two groups.
Rods with the main type of coating, which includes calcium and magnesium carbonates, are used to cook alloyed metal with reverse polarity, connect them to “+”. Rutile coating contains titanium oxide; such rods are used with current of any polarity, connected to the “+” and “-” contacts.
They splash less and stick less often.
Semi-automatic welding of stainless steel
The MIG technology with the supply of carbon dioxide into the melt area will help to weld stainless steel with high quality using filler wire. The semi-automatic device ensures uniform supply of the additive to the working area. The wire is selected according to the type of alloy - the main alloying component.
They produce a copper-plated additive, a powder additive with a channel filled with flux, and an aluminum additive. A rectifier or inverter is used as a current source. The arc is created in much the same way as in electric arc welding. The “+” contact is connected to the burner, through which it reaches the wire feeding mouthpiece.
Simultaneously with the wire, a gas mixture is supplied, forming a protective atmosphere.
Semi-automatically cooks parts:
- up to 4 mm (short arc);
- thicker than 4 mm using the jet transfer method.
Pulse welding with minimal melt pool spatter is applicable to stainless steel of any thickness.
Manual and semi-automatic in argon environment
TIG (manual) and MIG (semi-automatic) technology is used to work with thin stainless steel and involves the use of tungsten refractory electrodes to create an electric arc. Argon supply begins before the arc ignites and ends 20 seconds after extinction.
Cold welding under high pressure
The technology is based on the ability of alloys to convert kinetic energy into thermal energy. When compressed, the internal structure of the steel changes with the release of energy, and the stainless steel becomes plastic.
One layer is pressed into another to form a diffuse layer. Welding of stainless steel is carried out using one-sided or two-sided pressure. Special stamps are installed on the presses.
The results are very neat point or linear connections without scale, cracks, or internal stresses in the working area.
Resistance welding of stainless steel
Current is supplied to two non-consumable electrodes made of non-ferrous alloys, and the workpieces are placed between them. When current is applied, the electrodes are compressed with force.
Stainless steel is welded only in the contact zone, the arc pierces the parts through and melts. Manual welding pliers are used for welding thin stainless steel up to 2 mm.
Thicker workpieces are connected using devices with amplifiers so that the contact zone can be pressed. A point the size of the electrode area is formed.
Laser beam
For stainless steel, the point and seam method is used. Parts can only be butt welded. When joining workpieces with an overlap, residual stresses are created in the working area.
The melt pool is limited due to the lightning-fast impact of the beam. Stainless steel heats up instantly, the seam is strong and fine-grained. The melt completely fills the joint.
Laser welding is rarely used in everyday life due to the high cost of the equipment.
Plasma welding
The principle is based on the ionization of gas under the action of an arc in a special chamber - a plasmatron. The electric field is created using a refractory tungsten electrode. The directed plasma flow quickly melts the workpieces at the joint to a high temperature. There are two types of equipment:
- manual, the second contact for arc formation is a metal part;
- automatic, an arc is created between the electrode and the chamber wall.
Thin workpieces up to 3 mm are welded using manual plasma, and up to 160 mm thick using automatic plasma. The edges are pre-cut, but the seam is welded immediately, in one pass.
Manufacturing materials
The shower tank can be metal made of galvanized sheet steel, stainless steel or carbon (black) iron and plastic. In order to consciously choose the best options, you should familiarize yourself with the real comparative table of manufacturing materials.
| Material of manufacture | Advantages | Flaws |
Stainless steel | Almost unlimited service life. But this advantage is unlikely to be critical for shower buildings in suburban areas. | Technological complexity of production. Professional tools and the ability to weld with stainless steel are required. Another very unpleasant drawback is the high price. |
Cink Steel | Service life up to fifty years. The tank is lightweight and can be installed even on fragile supporting structures. | Complexity of manufacture, you need to have special tools and skills for soldering. In terms of cost, they occupy an average position. |
Black (carbon) iron | For most cases, the best option both in terms of price and performance. | They require periodic cleaning of the inner surface; the paint layer on the outer surfaces should be restored. |
Ordinary plastics | They are cheap and there are no problems finding containers. | They are afraid of negative temperatures and harsh ultraviolet radiation. |
UV-resistant plastics | The service life is several decades. | Not all users are satisfied with the price. |
Plastic tanks for summer showers
Experienced practitioners advise making a shower tank from used plastic or metal containers. Such containers are easy to find, and in most cases you won’t have to pay anything.
Metal water tanks
For one washable one, up to 40 liters is enough; depending on the number of family members, you can calculate the optimal sizes. For information, it is worth saying that when manufacturing shower tanks, industrial companies base it on a calculation of approximately 20 liters per person; 40 liters allows you not only to take a shower, but also to fully wash yourself without the need to save water.
How to choose a tank for a summer shower
Recommendations
There is no need to follow any serious rules for operating a metal tank. If it is located on the street, you need to make a flat base for it. After performing bath procedures, you need to rinse the container from the inside and wipe the surfaces with a dry cloth.
Metal tanks are used for different purposes. They are installed in bathhouses for hygiene procedures, inside residential buildings for storing drinking water or technical fluids, and in gardens for irrigation. The tank can be purchased at a specialized store or assembled yourself from sheet metal.
Welding stages
At the initial stage of welding, boards must be placed under the corners of the sheet, which will serve as the bottom. It is important that the thickness of the substrate is the same. This will give an even plane along the entire length and in the corners of the structure.
During the welding process, it is necessary to constantly check that the sides do not extend beyond the base. You can immediately grab all sides together, then weld them to the base.
The sheets should fit tightly to each other. The next stage is the final welding of the seams. Welding can be done inside the tank or outside.
There should be no lack of penetration. Self-welding takes about 7-8 working hours.
It is recommended to make the structure rigid. To do this, use squares inside the tank and on the outside. To drain the water, a pipe with a control valve is welded into the lower part.
You definitely need to put aside your laziness and check the structure for leaks . After completing the work, you should prepare a chalk solution and apply it to the seams from the inside.
When it dries, use a cloth soaked in kerosene to go along the seams of the tank from the outside. Purpose: identifying “lack of penetration” clogged with slag. It only takes a few minutes to control.
If the liquid does not appear, then everything is fine. If stains appear, the problem area should be boiled again. It is best to check and re-weld immediately before painting.
Installation can be done on pre-laid bricks, but it is better to use a stand. Next, fill the tank with water and observe for several days: no liquid appears on the walls of the structure.
Made of stainless steel and aluminum
When making a stainless steel tank yourself, it is recommended to use 1.1-2 mm metal. To prevent swelling of the filled structure, expansion tanks must be installed to protect against excessive pressure.
You can use food or technical steel as a working material. It is clear that food grade stainless steel will cost more.
Common welding methods include working with tungsten electrodes in argon or ground electrodes. A semi-automatic argon welding option using stainless wire is possible.
Aluminum tanks can be welded independently, but the process involves fulfilling a number of technical conditions that are only subject to specialists:
- it is necessary to calculate the dimensions of the water tank;
- choose the right grade of stainless material;
- calculate the wall thickness to avoid swelling of the structure;
- when using a hatch or roof, determine its type;
- determine the presence of partitions, frame and edging;
- possess welding skills.
Much in this process depends on the welding machines used and the skill of the welder. If welding is done incorrectly, microscopic cracks may appear, through which liquid will leak over time.
Typically, water storage tanks are made from stainless steel. It is better to order containers for a bath made of stainless steel from a permanent production facility. There is no need to paint them, because when heated, the paint will evaporate, polluting the air and water.
Principle of operation
Any plastic container functions simply. Waste accumulates in it and gradually settles. In the sludge that has settled to the bottom, natural decay processes begin - anaerobic bacteria begin to work. As a result, a characteristic smell appears near the sewer drain - this is one of the obvious disadvantages of such a system.
As the tank fills, the liquid and bottom sludge are pumped out using sewage disposal equipment. To save on calling specialists, you can install a structure with several sections that allow the water to settle several times and be purified as much as possible. From the last container, the liquid flows by gravity to the filtration field or into a filter well with a reliable natural filter at the bottom (sand, crushed stone, peat, etc.).
Filtration into the ground is prohibited if the wastewater contains harmful chemical impurities or fecal matter. The entry of hazardous substances into the soil can cause infectious diseases or poisoning among residents of the house.
STOCKING... WATER
Any garden or personal plot, as a rule, gives a return and pleases the owner with a sufficient amount of... water. If there is a natural spring or central water supply nearby, then the problem of irrigation is simplified, but in most cases you cannot even rely on a source. In hot summers, when it rarely rains, water consumption increases sharply, and wells and boreholes can no longer cope with the increased load. In such cases, it becomes necessary to have a supply of water on site. And here the question arises: how to store it?
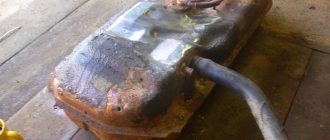
If possible, you can purchase a medium-sized tanker or something similar, but this is still not a solution. In addition, over time, the metal rusts, polluting the water. It is much more practical and affordable to make a tank from concrete, and make it underground so that it does not take up space on the site.
Where to start construction? First, it is necessary to determine the location and size of the future storage facility. Considering that the construction is quite labor-intensive, you should not lay very large dimensions. Practice shows that the most optimal volume is 3.5...4 m 3.
So, when a place has been chosen and the contours of the pit have been drawn on the surface of the earth, they begin to dig it. In this case, it is necessary to periodically monitor the verticality of the walls and the correct shape in plan. After excavation work is completed, the pit is prepared for concreting. This work is not difficult; However, there are some peculiarities in the installation of formwork. It is best to use formwork from several parts, and not install it at once to the entire height, since in this case the concrete mass may freeze and voids may form. It follows from this that the height of part of the formwork must be chosen such that it is possible to compact the concrete manually. Usually it is 500...600 mm. A simplified formwork can be done by driving stakes into the bottom of the pit at the walls, behind which sheets of iron are placed.
The thickness of concrete walls is determined from the strength condition:
where σр is the design stress, kg/cm 2 ; σ - permissible stress, kg/cm 2;
where D is the diameter of the tank, cm; ɣ—specific gravity of water, kg/cm3; h—internal height of the tank, cm; t—wall thickness, cm.
For example, let’s take a tank with a diameter of 1.6 m and an internal height of 2 m (volume 4.35 m3), σ р = 5 kg/cm2, then:
Underground tank:
1 — ring (steel), 2 — “glass” (reinforced concrete), 3 — sand, 4 — blind area (concrete).
With a triple safety margin, the wall thickness is equal to 10 cm. We made this short excursion into theory not by chance. The fact is that often there are containers obtained by simply plastering the walls of the pit with concrete. They do not last long if they do not fail the first time they are filled with water. Typical places of destruction: the bottom of walls, the bottom or joints with the ceiling. In the latter case, the reason is the incorrect design of the ceiling: the blind area protruding beyond the contour of the tank serves as its support on the ground. When filled with water, the weight of the tank sags, and the upper part hangs on the blind area, like on a base plate, after which it comes off. From this it follows that the blind area must be performed as shown in the figure - without connection with the “glass”.
After installing the formwork, reinforcement is placed in the resulting space between it and the ground (any scrap metal can be used) and concrete is poured.
The poured concrete mixture hardens in a day or two; then the formwork is rearranged.
After the walls of the “glass” are erected, the formwork is removed and the bottom is poured. The final stage in processing the internal surfaces of the tank is the so-called ironing. It consists of plastering with cement diluted with water to the consistency of sour cream. This solution can be applied with a brush. A layer thickness of 2...3 mm will protect the container from water filtration.
The overlap is carried out taking into account the above recommendations. The formwork for this operation is made suspended.
The dimensions of the above-ground part of the storage facility are selected within the range of 600...700 mm in height and 500...550 mm in diameter. It can be camouflaged as a well of the appropriate style, then the entire structure will become an architectural addition and decoration of the garden plot.
During operation, the underground container must be periodically completely emptied of water and cleaned - otherwise, like any body of water, it will become polluted.
L. KOURDELYAS, p. Terny, Nikolaev region.
Correct operation
Homemade septic tanks require regular inspection and maintenance just as much as industrial models of treatment plants.
Repair work may be necessary if the drain is clogged. Overflow and sewer pipes will need to be cleaned. For such work it is better to hire a professional plumber. To avoid problems with clogging, it is necessary to periodically add biological preparations containing special cultures of bacteria to the storage container, which are capable of breaking down fat plugs and deposits.
Maintenance includes:
- Regular pumping out of the contents of the container. The frequency depends on the intensity of use of the sewer system and the volume of septic tanks. Usually this is from one to three pumpings per year using special equipment.
- Insulation of the lid during the cold season, which speeds up the processes of decay and wastewater treatment.
- And, of course, you must follow the simplest rules - do not dump large mechanical waste and hygiene items into the sewer.
How to make a washbasin for your dacha with your own hands (video)
When installing such an outdoor washbasin, it is very important to remember that the main requirement for operation is installation under a roof or a special canopy, which will protect the device from precipitation. It is strictly prohibited to use so-called “temporary structures” for connection.
The quality of a country holiday directly depends on the availability of basic plumbing fixtures, which include outdoor washbasins. With the right choice of such a device and its proper installation, you can make your stay as comfortable and convenient as possible.
Wood construction
To create a wooden tank prepare:
- wooden beam;
- bricks;
- polyethylene film;
- boards;
- geotextile insulation;
- self-tapping screws
As soon as all materials are available, you can begin constructing a wooden structure according to this plan:
- first level the site;
- bricks are laid around the perimeter of the site;
- timber is laid on the bricks;
- the wood is attached to the frame with self-tapping screws;
- OSB boards are laid on top of the prepared structure and secured with self-tapping screws;
- a frame is created from the boards, securing them to the sides of the prepared wooden base;
- OSB sheets are screwed to the installed side boards;
- the interior of the wooden structure is covered with geotictile;
- lay the film on top (its size should be such that it extends beyond the edges of the wooden box);
- two boards are nailed crosswise from the top of the container to provide additional stability to the structure;
- if the tank has a large volume, wooden spacers are secured to the outside of the structure.
How to make a garden washbasin with your own hands
Washbasin made from a 5 liter bottle
This option, based on a 5-liter bottle, as well as wire, an awl and a candle, is perfect for hygiene procedures on the go:
- light a candle and heat the awl;
- make about ten holes in the lid, distributing them as evenly as possible;
- Use an awl to make a couple of parallel holes in the middle of the container and thread the wire;
- pour water to the middle and screw on the lid;
- turn the bottle over and hang it on a driven nail or branch.
The disadvantage of this design is the risk of capsizing in strong gusts of wind, as well as the possibility of filling only half with water.
Wooden washbasin Moidodyr
“Moidodyrs” belong to the category of serious structures
, and can be represented by various modifications. Such a stationary device is quite difficult to move, so it must be installed in a previously prepared and carefully selected, permanent place.
To make it yourself, you need to use a cabinet, a sink and a tank with a water tap. Wooden "Moidodyr" can have different dimensions.
The dimensions of the square cabinet are 50x50 cm. The rectangular design has dimensions of 45x50 cm. The sides, back and door are made of moisture-resistant plywood.
You can make a structure from 2.5x15 cm boards. In the vertical blanks you need to make eyes for arranging tenons.
They are made using a milling cutter, cutting grooves 2.0 cm deep and 8.0 cm wide. Tenons are installed on the end parts of horizontal blanks using a circular saw. The parts are assembled into a single structure and securely fixed with galvanized screws. Sheet plywood can be glued or fixed with small nails.
A water tank is installed between the side walls in the upper part. The floor should be made of slats measuring 2.0 x 4.5 cm. At the final stage, a door with a handle is fixed, which will simplify the operation of Moidodyr. It is recommended to carefully sand the finished structure, paint it, and then install the sink.
If necessary, in this design, PVC panels are used instead of moisture-resistant plywood, thanks to which an outdoor washbasin can become not only a necessary plumbing fixture, but also a real decorative element for a personal or garden area.
Washbasin with heated water (video)
Outdoor washbasin made from a canister
To make such a functional plumbing fixture, in addition to the container, you will need to prepare:
- water supply tap;
- nuts for clamping;
- drive;
- a couple of rubber gaskets.
You need to drill or cut a hole in the purchased plastic container. The squeegee is installed in a drilled hole in the container. Then the gaskets are put on the squeegee on both sides and clamped with nuts. At the final stage, the tap is attached, after which the container is filled with water.
When installing such a washbasin, it is necessary to provide high-quality drainage
, which will transfer wastewater to a cesspool. If it is not possible to arrange a drainage system, then you can use a bucket to collect used water, or place the washbasin above the ground, sprinkled with a layer of gravel, which in this case acts as drainage and prevents the formation of puddles around the washbasin.
Plastic containers
Plastic containers and barrels are increasingly popular because:
- their cost is much less than that of their stainless steel counterparts;
- plastic barrels can be purchased in various sizes;
- their designs do not require additional tightness;
- they do not rust;
- barrels do not require priming or painting the surface;
- The plastic case has a high level of resistance to temperature changes.
Containers can be made of plastic. Food grade plastic has additional benefits:
- high level of strength;
- high frost resistance;
- high level of reflection of ultraviolet rays.
Thanks to these features, the water in such containers does not spoil for a long time.
Most food-grade plastic barrels are equipped with holes the diameter of which allows taps to be installed in them.
Plastic barrels can be vertical or horizontal. Also very popular are Eurocubes, which are placed in a metal frame for additional strength and stability.
Mounted models from canisters
If a do-it-yourself summer washbasin at the dacha made from bottles does not meet the needs of the family even with temporary use, you can install a larger model made from a plastic or metal canister, or even a bucket. To do this, cut or knock out a hole in the container into which the tap is installed.
If necessary, for better tightness, first install a squeegee into the hole knocked out in the canister, providing it with rubber gaskets on both sides. The position of the squeegee is fixed with nuts on the outer and inner sides of the canister. A crane is installed on the drain.
During installation, it is important to ensure the tightness of the joints
. If you choose a canister model, you should take into account that the drainage volume will be larger, which means you should think about drainage.
The following options are possible:
- a container for collecting liquid installed under the washbasin,
- drainage ditch,
- drainage channel to, etc.
If the site has permeable soil into which water drains easily, you can allow the liquid to soak into the soil. In this case, it is recommended to fill the space under the washbasin with gravel, crushed stone or expanded clay for better drainage.
Film pond
Some summer residents are eager to learn how to make a small pond on their summer cottage using film.
The process of creating such a pond is also simple and is quite accessible to anyone. Subsequently, such a pond can be decorated, turning it from a banal water storage tank into an interesting landscape element.
Before you start creating a pond from film, you can watch a video that shows step-by-step actions.
You can also study the step-by-step instructions and subsequently follow them:
- first dig a suitable hole (shape and depth may vary);
- the bottom is covered with crushed stone, compacted, covered with sand and compacted again;
- then geotextiles are laid on the bottom;
- It is recommended to keep the film purchased in the retail chain for 2 hours in direct sunlight;
- the film is laid out along the bottom of a dug pit (if it is not possible to purchase a single piece, individual parts of the film are glued together using special glue);
- the film covers not only the bottom of the pit, but also its side parts;
- the pond is filled with water to at least a third;
- after three hours, add water so that the total amount does not exceed two-thirds;
- after another three hours, add water, filling the prepared container completely;
- the ends of the film are cut off;
- the outer boundaries of the pond along its perimeter are decorated.
In this article, we looked at only the most affordable ways to make a water container with your own hands in the country. They are not the only possible ways to conserve water. For example, a concrete container will be much stronger and more durable, but it is difficult to manufacture and entails additional costs. You will also need skills in preparing and using concrete mortar.
Related publications
- Read
- Read
- Read
- Read
- Read
- Read
Types of containers
By the way, containers for storing water can be purchased at specialized retail establishments. In this case, you will be able to quickly solve the problem without making any physical efforts. But in this case you will need to incur financial expenses. If you don’t want to throw away the money you’ve earned, but there is a need for additional water supplies, then you can make a container for collecting and storing water yourself.
Homemade containers, as a rule, are made on the basis of suitable materials, which will be:
- Plastic.
- Metal.
- Wood.
Each of these options will involve the use of appropriate tools, as well as performing actions exactly according to the instructions. Water containers can also vary greatly depending on the purpose. If water is required to water the garden, the reservoir must have a sufficiently large volume. Owners of dacha-type plots often try to make an outdoor shower. Water is also important for its normal functioning. The reservoir for collecting water mass can be small or medium-sized, depending on the family members who will plan to take the water procedure every day. In some cases, the purpose of purchasing or constructing an additional water tank will be to provide a supply of water for drinking. Additional requirements can be put forward for such containers, since it is important to maintain the cleanliness and potable properties of the water.
Choosing a location for installation
Almost always, the location of the storage tank depends on the purpose of use.
So clean water needs to be stored in good quality tanks installed directly near the house. This water can be used as drinking water, for washing and washing dishes, etc. Containers can be filled in several ways - from a water supply, a standpipe, a well, etc.
It is more rational to install containers for watering the garden directly on its territory. They can be used as a backup irrigation system or as part of a drip irrigation system.
Tanks for storing rainwater have a narrow direction, so they are installed near the drainpipe. The material from which they are made does not necessarily have to be of high quality. The accumulated water can be used for various purposes - for watering the garden and ornamental plants, washing, washing the car, etc.
Application options
Storage tanks are relevant in places where there are interruptions in water supply. Indoors, water tanks are most often installed in a horizontal position.
The tanks are used to store rainwater and tap water. With their help, you can organize an outdoor shower or keep them for fire safety purposes so that you can extinguish the fire.
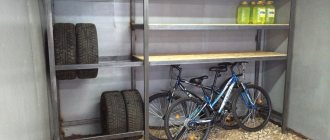
They can store water for watering plants, gardens and vegetable gardens. Often round tanks are installed in a bathhouse to store water. There are many designs that can be round, rectangular or other shapes.
It is important to understand what the tank is for. If it is used inactively, the water in it promotes the growth of algae and microorganisms. Moreover, if the container is constantly located in an open area under the sun's rays.
Therefore, choosing the volume of the tank is one of the main tasks before starting its manufacture. Ferrous metal tanks must be primed and painted to prevent them from rusting.
Review and details
Metal containers
Structures made of metal are often used to store masses of water. To create them, different metals are used depending on the purpose for which water collection is planned. If it is important to keep drinking water in reserve, high-quality stainless steel is selected for the manufacture of a metal tank. Even from this capacity, new demands are put forward:
- Cutting into the plumbing edge.
- Installation of a protective mesh on the hole.
- It is necessary to have a ventilated hole that will be tightly closed with a lid.
This design allows you to maintain the quality of drinking water. Twice a year, such a tank must be cleaned, and it can be used with disinfectants. To facilitate the process of washing a metal barrel, a hatch of sufficient diameter is installed on the side. Such a hatch will be equipped with seals in order to ensure a normal degree of tightness. Owners of dacha-type plots are still striving to purchase or even make metal tanks in order to store water, which they plan to use in the future for technical needs:
- Solutions to household problems.
- Collecting water from rain.
- Watering the garden.
In such cases, I take any metals as a basis. By the way, most summer residents install metal barrels specifically to collect water after rain. This solution will significantly save on water consumption. There is also an excellent opportunity to buy any barrels, even those that were previously used. It is important that toxic chemicals are not stored in them until such time.
Plastic containers
Plastic containers, as well as barrels, are increasingly popular because:
- Their price is much lower than that of their stainless counterparts.
- Plastic barrels can be purchased in different sizes.
- The structure will not require additional sealing.
- They are not subject to rust.
- The barrels will not require priming or painting the surface.
- Plastic cases have an excellent level of resistance to extreme temperatures.
Do-it-yourself water containers can be made of plastic, and food-grade plastic will have additional advantages:
- High level of frost resistance.
- High level of strength.
- High level of reflection of ultraviolet rays.
Due to these features, the water in such containers does not spoil for a long time. Most food-grade plastic barrels will have holes, and their diameter makes it possible to install taps in them. Plastic barrels can be horizontal or vertical. Eurocubes, which are placed in a metal type sheathing for an additional degree of strength and stability, are even more popular.
How to make containers from tires with your own hands
If you can’t buy water containers for a small amount, but you don’t want to spend a lot of money, you can make the design yourself. The storage tank can be made from scrap materials that are available on the farm or they can be borrowed free of charge from friends/neighbors. For example, you can even use old tires. It is advisable that these be tractor tires, as they have a huge diameter. Initially, you should determine the place where the structure will be installed in the future. This space should be leveled, and after that you can begin to create the main structure, following the step-by-step instructions:
- The top part of the inner type needs to be cut off from the tire.
- The cut tire should be placed on the prepared area.
- Prepare a solution by combining cement and sand in a ratio of 1 to 3, adding water until the mixture has a creamy consistency.
- The solution should be poured onto the bottom of the tire; it is important to level the surface.
- Cover the tire with the solution using polyethylene and leave it for a week (polyethylene will perform protective functions and will also prevent the aggressive effects of rain).
- After a week, the film should be removed and the volume filled with water.
Making such a reservoir is not difficult, but here you should remember the fact that water from such a container can only be used for technical purposes. A great advantage of such a container is that the accumulated mass of water in it will quickly heat up.
Wooden structures
To make a wooden tank, you should prepare the following:
- Self-tapping screws.
- Geotextile type of insulation.
- Boards.
- Polyethylene film.
- Bricks.
- Wood beam.
As soon as all materials have been prepared and delivered to the site, you can begin constructing a wooden structure according to this plan:
- First you need to level the site.
- Bricks should be laid along the entire perimeter of the site.
- Beams should be laid on top of the bricks.
- The wood must be attached to the frame using self-tapping screws.
- OSB boards should be laid on top of the structure, which has been prepared in advance, and secured (also with self-tapping screws).
- Make a frame from the boards, secure it to the sides of a pre-made wooden base.
- OSB sheets should be screwed to the side boards that are already installed.
- The interior of the wood structure is covered with geotikstyle.
- Place the film on top (its size should be such that it goes beyond the edges of the wooden box).
- It is important to nail two boards crosswise on the top of the container to provide an additional degree of structural stability.
- If the tank is of large volume, it is necessary to secure wood spacers on the outside of the structure.
Water should be poured into a pre-prepared tank. The pressure should not be large to allow the polyethylene film to be smoothly leveled under water pressure and pressure.
Film pond
How to make a water container with your own hands? Some summer residents are trying to learn how to make a small private pond on their summer cottage using film. The process of making such a pond is also simple, and also quite accessible to everyone. Subsequently, this pond can be decorated and turned from a very ordinary water storage tank into a non-standard landscape element. Before you start creating a pond from film, you can watch a video that shows all the step-by-step actions. You can also study the step-by-step instructions and follow them in the future:
- First you need to dig a suitable hole (the depth and shape may vary).
- The bottom should be covered with crushed stone, compacted, and also covered with sand and compacted again.
- Next, you need to lay geotextiles on the bottom.
- It is recommended to keep the film purchased from the retail chain for 2 hours in direct sunlight.
- The film should be placed on the bottom of a dug pit (if you are unable to buy a whole piece, and the individual film parts should be glued together using a specialized adhesive composition).
- It is important to cover not just the bottom of the pit with film, but also the side parts.
- It is important to fill the pond with water at least 30%.
- After three hours, water should be added so that the total amount does not exceed 60%.
- After another three hours, it is important to add water, filling the prepared container completely.
- It is important to trim the film ends.
- Decorate the outer boundaries of the pond around the entire perimeter.
So, we have already looked at all the most accessible methods of making a water container with your own hands in the country. They will not be the only possible method of storing water. For example, a container made of concrete will be much stronger and more durable, but it is difficult to manufacture and will entail additional costs. You will also need skills in preparing and using concrete mortar.
Creating a wireframe
To create the frame, a metal mesh with a rod thickness of at least 1.8 mm and a cell size of 50×50, 50×70 or 50×100 mm is used.
It is better not to use mesh with a polymer coating; it is softer and does not hold its shape well. We roll out a roll of metal mesh on the lawn and press it on both sides with something heavy. To find out the length of the mesh for trimming, you need to multiply the desired barrel diameter by Pi (3.14). For example, for a container with a diameter of 0.9 m, a mesh length of 2.83 m will be required (0.9 * 3.14 = 2.83). Add 10 centimeters for overlap. The height of the container should be less than the diameter to ensure good stability. If you want to make a high container, you will need to dig in 4 posts that will keep the structure from collapsing.
Cutting the mesh is done with metal scissors or pliers. To prevent the mesh from collapsing immediately when cutting, there is a little trick: cut the outer rods at the very end.
Connecting the mesh into an oval shape is done by bending reinforcement bars or using plastic ties.
Tags
for water under the water with its constant water supply. that water can under the water with its source of water. storing water can additional water storage storing water can for water can make a container for the Capacity you will need the container you need there will be a container under Types of containers Capacities from Capacities from Make containers from Varieties of containers case container for water. A tank for an additional water tank of a metal tank is selected a similar tank is required a wooden tank should be If the tank is prepared a tank should be a regular tank for with your own hands with your own hands for with your own hands. with your own hands for with your own hands can with your own hands. with your own hands with your own hands.
literswater supply pumpproducts
The water container is made of concrete rings.
It is necessary to make a container for water on the site, at least 4 cubes. I’m considering different options, but so far it seems easiest to me to make it from ready-made factory concrete rings.
The design is something like this. We dig a hole 2.5x2.5 to a depth of 2 meters (maybe a little less). Next, fill the bottom of the pit with concrete with reinforcement - the pouring thickness is 200 mm. We bring two rings with a diameter of 2 m and install them in a hole on a flooded area; we also install the top cover. Next, we add concrete to the bottom - inside and outside the ring to seal the bottom. We insulate the rings from the outside and the seams between the rings, fill them with soil, make a superstructure over the top cover and a hatch.
Do-it-yourself monolithic septic system installation
Work on the construction of a septic tank is carried out in a given sequence. A trench with a standard slope is dug in advance. This is necessary to determine at what height the pipe will connect to the receiving tank. The construction of a monolithic concrete structure takes more than a month, including the time required for the concrete to harden. It is better to do all the work with assistants.
Development and preparation of the pit
First, dig a hole with straight walls or as smooth edges as possible. The soil is removed manually or using machinery. During work, regularly check how smooth the edges and corners are. To do this, use a construction corner and a laser level.
The extracted soil is evenly distributed throughout the site or transported beyond its boundaries. When the hole is ready, the bottom is lined with plastic film, and you can use sections, the main thing is that they completely cover the soil. Polyethylene provides waterproofing and helps to rationally use concrete, preventing overuse. The edges of the film are fixed with bricks; the joints do not need to be sealed.
Construction of formwork for pouring the mixture
Before installing the formwork, reinforcement is performed. The strength of the septic tank depends on how well this work is done, since the water will exert strong pressure on the walls of the tanks. Wire or a ready-made mesh is used as reinforcement, positioning it so that the distance to the walls of the pit is 7 cm. After pouring the concrete, the wire will be in the center of the monolith.
The next stage is floor reinforcement. The distance from the bottom to the mesh should also be 7 cm - in this case, the maximum fastening effect will be achieved. When the frame is ready, it is put aside and the formwork begins. 2 boxes without a bottom are made from bars and plywood and each is inserted into a container. In this case, the reinforcement frame will be located between the formwork and the film, and the partition will be between the two boxes.
- 1.7x1.7 m – for the first tank;
- 1.7x0.85 m - for the second.
When the formwork is installed, the overflows are installed. It is important to do this work before concreting, otherwise you will then have to gouge holes in the concrete, and the structure may become deformed.
Installation of overflow pipes
To make overflows, you will need pipes. One is placed on the sewer pipe through which wastewater will flow out of the house. The end is brought out into the receiving chamber through a hole cut in the plywood. The pipe is directed so that the drain hole is turned down. It is attached to the pipe using a rubber seal and sealant.
A pipe is inserted between the two containers, securing it in plywood on both sides. After installing the pipe, pipes are put on its ends, turning them with the drain holes down.
Preparation and pouring of concrete solution
The thickness of the monolith should be about 15 cm, so the solution is made strong. 3 parts of sand-gravel mixture and 1 part of cement are poured into the mixing container, water is poured in and the required amount of plasticizer is added with constant stirring.
It is recommended to complete the pouring in one day so that there is no delamination in the finished concrete, which could shorten the service life of the septic tank. You can start pouring from the floor or walls - the strength of the structure does not depend on this.
After completion of work, the monolith is left for 28 days for final hardening. Perhaps the concrete will harden earlier, but it’s better not to rush. While the poured mixture dries, it should be covered with polyethylene or moistened sawdust. This is necessary to prevent the concrete from cracking. Also, during the hardening period, it is important not to allow the poured mixture to freeze. When the cement stone becomes lighter and acquires an even gray color, the formwork is removed.
Upper ceiling device
Installation of the upper ceiling begins with the construction of the frame. It is a structure made of metal corners laid in a given order. Longitudinal corners 3 m long are laid as follows: 2 at the edges, 2 closer to the middle. The transverse corners are placed perpendicular to the longitudinal ones to form a lattice. The distance is taken taking into account the size of the hatches.
The structure needs to be fixed, so holes are drilled in the longitudinal corners and secured to the concrete with anchors. The transverse elements are fixed with screws or special bolts.
Square elements are cut out of flat slate and placed on the grid. The sides of the squares should be such that they fit between the corners. The joints are sealed with molten bitumen.
It is better to make the hatches adjacent, although this is not necessary. They are fenced around the perimeter with boards, and additional formwork is installed around the ceiling. Holes are made in the slate sheet, which is located above the second chamber, and labor is inserted into it for ventilation. After this, they begin to fill the ceiling over the entire area.
To apply the solution, you can use not ASG, but sand by sifting the sand-gravel mixture. Then the ratio of cement and sand will be 1:64. The formwork is removed after 28 days, when the concrete has hardened and completely hardened. After this, the septic tank is insulated and buried, periodically compacting the earth.
Manufacturing of manhole covers
The septic system must be equipped with hatches. They are needed to prevent debris from getting through the holes. Also, thanks to the hatches, the drains do not freeze in winter. It is better to equip the hatch with two covers, with the inner one made of wood and the outer one made of metal.
The wooden cover is made from boards or plywood and bars. It would be better if it was removable. A layer of insulation is laid on it. The metal lid is made from a corner and a sheet of iron. First, the rim is welded, then a square of the required size is cut out of the metal and its edges are processed with an angle grinder. The rim is attached to the concrete base using anchors.
Canopies are welded or attached to the lid, with the help of which it can be opened and closed. Then it is mounted in a permanent place, attached to the rim. Fastening method - welding or bolts.
Plastic barrels
A very common option for making a tank for a shower stall, it has good physical strength. It is allowed to use both new and used ones. The volume can be different, from 50 to 1000 liters. There is no need to use large containers for showering; it is enough to have a volume of 50–200 liters.
Plastic water tanks: a variety of shapes and sizes
There are two general requirements for all plastic containers:
- Manufacturing material: UV-resistant plastic. It is quite difficult to find such containers, and they are not cheap;
- must have a dark color, preferably black. Plastic must be painted with mineral paints when preparing polyethylene for pressing. Most plastic barrels are blue or white. Why is it recommended to have containers made from colored plastic? Because paints on the surface of plastic will not last long; within one summer they will fall off. The reason is not only the low adhesion coefficient, but also the high temperature expansion values. And all dyes react negatively to changes in the linear dimensions of the painted surface.
Step-by-step instructions for making a plastic tank
If you have an old plastic barrel, you need to wash it thoroughly. The container can be considered clean only when various odors have completely disappeared. For installation in a vertical position, a frame and a base must be made; the stop is located over the entire bottom area. To reduce wind loads, it is better to place the barrel on its side, but then problems arise with sealing the lid.
Tanks for summer showers made of plastic: horizontal and vertical arrangement
How to seal the lid
Step 1. Thoroughly wash the joints between the lid and the barrel, remove oily stains, dust and dirt.
Step 2. Try on the lid, check if it fits tightly around the entire circumference. If necessary, level the cover. To do this, heat the deformed areas with a hair dryer, place the lid in its place on the barrel and press firmly. The lid is held in this position until it cools completely. Wear gloves and follow safety precautions.
Step 3. Degrease the surfaces again and carefully lubricate with special glue. If you have a machine for welding plastics, great; such a seam has a strength of at least 90% of the strength of the base material. If you don’t have a device, use glue.
Hot stapler (plastic welding device)
Step 4. Wait for the adhesive to dry completely. The time depends on the brand of glue and drying conditions.
Step 5. Reapply glue where the lid meets the barrel and let it dry again. Don't rush, don't make mistakes.
Step 6. To increase the strength of the connection, lubricate the joint again and wrap it tightly with clean plastic wrap. Tighten the film on top with soft wire.
Instead of wire, it is permissible to use a clamp
If you have little experience in such work, then do not rush to install the barrel on the shower stall; first check it for strength and tightness. Everything is fine - cut a small hole in the upper part, connect the fittings and the shower head. If leaks are discovered and cannot be eliminated, place the barrel in a vertical position.
How to make inserts into plastic barrels
Not as simple a question as it might seem. The fact is that it is near the insert that points of increased tension in the material are formed; over time, microcracks appear, which increase until complete destruction. As a result, the barrel has to be completely replaced; repairing such leaks is very difficult. And after repairs, no one can guarantee that problems will not appear again in the same place or near it in a few weeks.
For high-quality insertion you will need a drill with a set of drills of appropriate diameters, rubber gaskets, bolts and metal plates. The insert is made not only for the shower head, but also for supplying water and draining excess.
Practical advice. Use silicone hose for all connections. It is not afraid of frost, is resistant to UV rays and, which is very important for plastic barrels, is soft and does not create additional loads on the connection unit.
Non-reinforced silicone hose 20 mm
Step 1. Buy tank inserts. They consist of washers, rubber seals, fittings and nuts.
Tools and materials for making a barrel with a tap
The number of taps depends on the number of pipelines connected to the barrel, and the diameter is selected taking into account the size of the nominal diameter of the hose. Additionally, you will need a faucet coupling, a faucet, a shower head, and a float from an old cistern. If you plan to install additional automation fittings, then at the same time buy elements for fixing it to the plastic barrel. It is advisable to use quick releases to connect/disconnect the hose; they make the process of caring for the country shower tank much easier.
Quick release connectors
Step 2. Prepare two metal plates for each insert, approximately 5x10 cm in size, at least one millimeter thick. It is due to them that the area will significantly expand, taking static loads from the connected water supply fittings and dynamic forces that arise when turning on/off the shower head or water supply shut-off valves. Be sure to remove any sharp corners on all sides of the plates with a cylindrical grinder.
Step 3. Drill a hole in the center of the plate for the insert, for two plates you will need two holes, sand off the sharp corners and burrs after the drill.
Step 4. Drill a hole in the barrel; the location must meet the requirements for the placement of the insert and its specific purpose. It is quite difficult to drill a hole in a round plastic barrel; the drill constantly “runs away”, especially with a large diameter.
Practical advice. Drilling holes will become much easier if you use simple recommendations.
Hold a small nail in the pliers and heat it with a lighter until a red glow appears.
Without giving the metal time to cool, very quickly, in a pre-marked place, melt a small hole in a plastic barrel with a hot nail, possibly a blind hole.
Take a drill with a diameter of approximately 2 mm and drill a through hole. The mark you make will hold the drill in the desired position. This will be the center, then you can continue working with a large diameter drill.
Drilling a hole in the wall of a barrel
Step 5. Use sandpaper to remove all burrs around the perimeter of the hole; they should not interfere with the hermetically installed metal strips.
Hole for tap installation
Step 6. Bend the metal plates along the radius of the barrel. Use any available devices for this. There is nothing to worry about if you fail to bend the plate perfectly, but it is advisable to strive for such a result. The more accurately the radii coincide, the larger the contact area, the less the load per unit area, the more efficient the device.
Step 6. To completely guarantee the absence of leaks, lubricate the surface of the plates with any glue or sealant; you can do the same operations with inserts.
Step 7. Install all the elements in place, the metal plates should be on both sides of the container. You will need an assistant to fix the nut; it is difficult to do this alone. But it all depends on the size of the container. Remember that standard mortise nuts have left-hand threads; screw them counterclockwise.
How to screw a faucet into a plastic container
Constantly monitor the position of the plates, do not allow them to rotate and change the original correct position.
Tap embedded in a barrel
Hose connected to faucet
Using the same algorithm, the holes for all inserts are reinforced. Don’t be lazy to make reinforcements; it greatly increases the service life of the country shower tank. Next, a faucet, hose, quick connector, or other equipment for the tank is fixed to the thread.
Recommendation for the location of the shower tank
How to install a drainage system, watch the video.
Final Tips
The shower tank option should always be thought through before construction begins, and not vice versa. If your shower is temporary, then you shouldn’t waste a lot of effort and money on making a tank. You can find options for using fuel tanks from cars and trucks, large cans, milk cans, etc. for these purposes. Professionals recommend paying attention to the efficiency and, of course, the designer look of the shower. The tank should not be conspicuous, but should perform its tasks “invisibly”.
And one last thing. In everything you need to maintain the optimal ratio of cost and quality. You have a stationary shower that you plan to use on cool autumn days - think not only about electrically heating the water in the tank, but also about thermal insulation. It should be removable and installed only in cases where the sun's rays are no longer enough to heat the water to the desired temperature. It is best to use foam boards; they are quickly installed and removed and can be used for several seasons. The price suits all consumers. For a water seal for a shower in the floor, please follow the link.