Wire is considered a universal material from which you can create a huge number of crafts. Craftsmen and craftswomen use different types of wire in their creative work, combining it with other materials (beads, scraps of fabric, plasticine).
A creative approach allows you to create original crafts in the form of three-dimensional figures, interior elements, various brooches, and toys. Even children, without any experience at all, love to create beautiful, unique things using this material.
Due to its properties, simplicity and ease of use, wire has become a favorite for home creativity among adults and children.
Wire and decorations
Wire is the most important material that you can find in craft stores. It comes in different colors and textures, but as a rule, the base copper color is the most affordable.
This is what we recommend using for your first works, and only then moving on to more expensive color ones. Also, keep in mind that you can complement your crafts with any decorations, for example, beads, beads and any other material.
In addition to regular wire, you can find flat wire of various widths, twisted and even plastic threads. Usually preference is given to copper, since it is an extremely malleable, soft metal. Children and toddlers will enjoy fiddling with chenille wire because of its slight frills.
Bracelet
There are many options for making wire bracelets.
The simplest would be a bracelet made of wire in a colored braid. It’s easy to use one or two contrasting colors for the job.
Operating procedure.
- After preliminary measuring the wrist, you need to cut two pieces of the same length from the wire.
- In the middle, the first piece is tied with a regular knot, without tightening it.
- The second piece of wire is passed through the knot and tied in the same way. Tighten both knots.
- The edges are decorated by wrapping one tail around the other very tightly.
- A loop and a ring are formed from the remaining tails. This will be the bracelet clasp.
It’s easy to glue a beautiful bead into the knotted center.
When creating wire jewelry, beads are actively used. Beads are strung on wire, creating original decoration elements. To connect individual parts, the wires are twisted together.
Using copper wire, craftsmen create unique ethnic jewelry. Various stones, beads or seed beads are inserted into the elegant frame.
Let's get started
In order to understand the principle of making crafts and feel how metal behaves in your hands, we recommend trying something simple first. Three-dimensional figures require a lot of skill and preparation, as well as high material consumption.
Weaving philosophy
If a person becomes interested and suddenly gets the idea of weaving crafts from wire, for simplicity there are step-by-step diagrams. They facilitate learning that has long been completed by others. You just have to work hard.
Day after day, gaining experience. Remembering mistakes. What can't be done and what can be done. Successful cases recorded in memory will accumulate, and it will suddenly become clear what was not clear before. Complex wire weaving techniques will be mastered.You have to be able to wait. Leadership in such creativity is not spontaneous. This is luck, luck mixed with patient calm.
Wire teaches a person to treat everything with philosophical detachment. And at the same time - with creative inspiration.
Christmas tree
To create this decoration, which can serve as a unique gift, you will need very little effort. Make a base from copper wire by twisting it in a spiral. To prevent it from “walking” in different directions, help yourself with pliers, starting from the outer radius and moving towards the center. The more turns you make, the more stable your structure will be.
Next, make a trunk extending from the center two centimeters in height and begin to make volumetric turns, reducing their radius towards the top. The New Year tree can be decorated with tinsel and other decorations, giving it a festive look.
We make our own hairpin using the Wire Wrap technique
Today I want to show you the process of making a very simple, but at the same time elegant hairpin using the Wire Wrap technique.
I myself have not worked in this technique for a long time and am trying to master jewelry making more, but it was this technique that pushed me to such an interesting activity, who knows, maybe this master class can inspire you to new ideas!
Materials:
1. Wire 1.5 mm (piece 24 cm). 2. Wire 1 mm (pieces 14 - 1 piece, 5 cm - 2 pieces). 3. Wire 0.4-0.6 mm (pieces 65 +/- 10 cm - 1 piece, 50 cm +/- 10 cm - 1 piece). I buy thick wire in regular electronics stores, they are usually called “Energon”, “Electric” and so on. Thin wire can be found there, I take it from network wires. Inductors will also come to your rescue. 4. Beads, I took one glass one for the center and for the outer decoration of the pin, copper beads or just metal copper-plated beads 2 mm and 3 mm. You can buy beads in sewing stores and specialized jewelry stores.
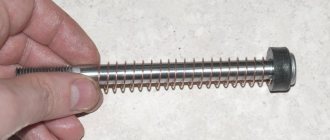
The wire base of the pin should be beaten with a hammer. To make it clear how thick it should be, I offer for comparison the workpiece that was just made and the exact same one that was beaten.
Keep in mind that as you beat the wire, it will bend and elongate. This is where pliers will help you. Try to straighten the wire carefully right away; there is nothing difficult about it.
I shorten the ends that are stretched with wire cutters to exactly the length to which they stretched.
Side details. To make them, use two pieces of wire 1 mm thick, each 5 cm long. There should be two of them, and they are exactly the same. Bend and hit slightly, 2-4 medium blows are enough.
Top piece, only 1 piece needed. Performed in the order shown in the photo instructions.
The finished part must be carefully bent in different directions and the turns and the top loop must be beaten off, just a little, 2-4 gentle blows.
You need to try everything on and see if it fits.
Now assembly. We take a piece of wire 0.4-0.6 mm and 65 cm long and begin to tightly wrap the main part, making several turns, put the side part on top, as in the photo, and wrap both pieces.
The top piece should be centered. Like the side parts, it needs to be placed on top of the base and wound in the same way.
The central bead needs to be threaded onto the wire exactly in the middle, and it can immediately fit normally. If you need to slightly adjust the location, don’t be alarmed. During the installation process you will understand how to position it.
The finished piece, we move on to decorating with beads.
In this case, we use wire 0.4-0.6 mm 50 cm, 4 beads 3 mm and 8 beads 2 mm.
The finished stud, now it needs to be patinated (oxidized) with ammonia and then polished.
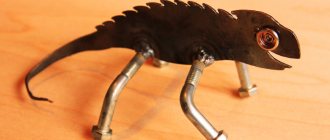
Chameleon
The advantage of chenille wire is that even the simplest designs take on an unusual and intricate look. The chameleon will be made of several parts, one of which is the head.
Take a knitting needle and use the sharp end to make a small number of turns. From the head there should be a straight part of the wire equal to the future length of the body.
Next, make two pairs of legs and start making the body, similar to how it was for the caterpillar, leaving a small piece for the curved tail.
The next step is to pass the legs through the coils of the body and bend them, then insert the head into the body and secure a straight wire at the base of the tail - the chameleon is ready.
Step by step training
For children, step-by-step training in the art of creating crafts is recommended.
Fluffy wire crafts and master classes involve creating individual parts, and then combining the elements into one large and complex figure.
During introductory classes, it is easy to teach a child how to make simple figures from chenille, a starfish, for example.
A starfish is easy to create by bending a piece of wire into the desired shape.
A more complex version of individual lumps connected into one figure is more difficult to work with, but also more interesting. The toy needs to be glued with black eyes, bringing it to life.
Having mastered the production of individual parts, it is not difficult to create complex structures. For convenience, experienced craftsmen advise preparing a craft diagram in advance so as not to get confused.
Making crafts from chenille wire with your own hands is a simple and very exciting creative process.
Beautiful flower
Beautiful works are not always difficult to make; for example, a flower is an ideal compromise of simplicity and an attractive image. There can be a lot of design options, and almost all of them relate to the design of the petals.
The stem is made of three parts - the base, on top of which there may be a bead, and leaves. For the petals, cut small pieces of metal thread and secure them at the base to give the future flower a colorful look.
Additional effects
Aging gives a special highlight to jewelry made using the Wire Wrap technique.
This effect is achieved using chemical reactions.
- Patination - a blue, green, emerald patina (patina) appears on the product.
- Blackening - similar to patina, but other reagents are used for it, a black coating appears.
- Etching - the necessary part of the metal is removed from the surface, and the design acquires volume.
Butterfly
Butterfly is also a simple work, which can be complicated with experience using beads, seed beads and more ornate shapes. The wings can be either hollow or contain elements of the ganutel technique.
First, make the body of a butterfly, onto which you already string a head with antennae and wings, or prepare two identical halves, subsequently fastening them with a piece of wire.
Required Tools
To work with any type of wire you will need a basic set of tools.
- Ruler made of wood or plastic.
- Side cutters for separating elements.
- Nippers with working platforms of different shapes.
- Scissors.
- Tweezers.
To fasten the elements, use a universal adhesive with good characteristics.
Toy soldiers
To entertain your child, you can try making a soldier with him. Having understood the principle of work, he will subsequently be able to independently engage in creativity.
For this craft you will need plastic wire of various shades. Using white, prepare the frame by sketching out the arms, legs and head.
There is no need to achieve an exact match to the original. Think about what position your soldier will be in; he may be on the move, in combat readiness, or drawing a weapon from a holster.
Use different colors to indicate items of clothing - pants, jacket, helmet and boots. The final touch will be the manufacture of weapons, which must also be done schematically.
Aluminum as art
Aluminum is quite flexible, but at the same time durable, so it is used to make souvenirs and decorations.
Aluminum wire produces:
- candlesticks;
- framework;
- hot coasters;
- napkin holders;
- decorative trees and flowers;
- baskets.
Decorative elements for the home made in 2D format look interesting. To do this, make a life-size sketch, then lay out wire along it. You can connect the parts by wrapping the ends or securing them with loops.
You can make a bracelet, earrings, a pendant - such jewelry not only pleases the eye, but brings satisfaction to the owner who made it with his own hands.
We invite you to familiarize yourself with DIY crafts from fabric scraps
Wire toys for the New Year will be useful in any home:
- star;
- angel;
- snowman;
- bell, etc.
Heart on a stand
Take children's wooden cubes for the base of our future craft, and then think about what shape will stand on it - it could be a heart or letters that form one word.
Make a long base with a simple curve at the top. Drill a small hole and insert our work there.
"Bee"
To create a bee you will need yellow and black chenille.
Note!
- Christmas crafts - how to make them yourself? 150 photos of the best themed crafts
- Crafts made from stones: creative options for crafts made from stones + step-by-step instructions for making your own, methods and schemes of work
Crafts from disks: a step-by-step master class on how to create them yourself, creative ideas for crafts of varying complexity + simple patterns for beginners
Operating procedure.
- Measure a black piece 10 cm long, make the yellow one 6 centimeters longer.
- Make a striped body of a bee from blanks of two colors, and make an insect head from the remainder of yellow chenille.
- Twist antennae from two 5 cm long pieces.
- The contour of the wings is obtained by bending along the contour of the black wire.
- Glue on the black beads for eyes, screw on the antennae, and secure the wings on the back.
Tree
Crafting a tree from wire is extremely easy to make, but it will require a considerable amount of material and time from you. The base can be placed in a decorative vase or in any other place. The trunk is made by twisting a large number of metal threads into a single whole, into which branches are subsequently woven.
Instead of leaves, use beads or decorative stones. Although this work does not seem difficult, practice on simpler things before making it.
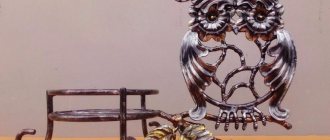
Original cup for pens
This model demonstrates an example of the combined use of materials: beads and wire. Step-by-step instructions for creating crafts:
- Prepare an ordinary paper or plastic cup.
- Make a small hole in the bottom into which to thread the tip of the wire.
- Start wrapping the cup around the outer surface with wire.
- After the first three or four turns, they begin to thread the beads onto the wire.
The actions performed - decorating with beads and winding wire on the base - are carried out alternately to the upper edge of the cup.
Pendant
Any stone wrapped in an ornate wire frame turns into a beautiful handmade pendant. Just look at the photo below and understand how beautiful it can be with the right approach.
Beaded Christmas tree toys
Crafts using this technique are created by children starting from primary school age.
Note!
Mushroom craft - reviews of ready-made DIY crafts + step-by-step instructions and diagrams for children (180 photos)- Crafts from toilet rolls: step-by-step instructions for creating crafts. Master classes with simple work schemes (140 photos)
- Crafts from corrugated paper - step-by-step master classes on how to create crafts from corrugated paper with your own hands + photo diagrams
Beads of different colors are strung onto a wire frame, creating a pattern. These could be Christmas trees, stars, snowmen, Santa Claus mittens, etc.
Tips for work
Looking at the photos of wire crafts, you may notice that there are one or two techniques per job. This decision is made by the masters for a reason and allows them not to overload the final result.
Do not combine chenille and copper wires in your crafts, as almost always the result will not be what you expect. If you have such a desire, or have unused material left, resort to the help of works presented on the Internet.
Use a soldering iron only when it is rational to use it, for example, it can be used to divide a thick wire into two parts or connect a piece of metal thread if it is impossible to attach it to a craft in any other way.
Historical background: where did the wire wrap technique originate?
The history of wire twisting technology dates back to the period of Ancient Egypt. Several thousand years BC. in Sumer, wire was used to create decorations with which the ladies of the court framed their hair. Later, this type of needlework reached Europe.
Originally, wire was made by cutting a sheet of metal, after which a thin piece of metal was twisted. Now it is obtained through the process of drawing technology. This is an ancient technology that dates back to the sixth century BC. in Persia, and only in the Middle Ages did it become known in European countries.
Steel wire was especially popular, as it was used for the manufacture of military equipment, harnesses, and was also used in fishing. Nevertheless, wire continued to occupy a major place in the sewing craft in the Middle Ages; gold and silver wires were made.
The heyday of the drawing industry began in the 16th century. A mechanical drawing machine was invented in England. Its creator was Rudolf of Nuremberg. Then drawing production fell into decline, as gold embroidery ceased to be at the peak of popularity.
In America, its own drawing production arose at the end of the 19th century; before that, Germany and England were suppliers of wire. By the end of the century, the drawing industry had become popular again. All kinds of fences, baskets, household items and other goods were made from wire.
Nowadays, wire weaving is one of the most popular trends in decorative and applied arts; it has its fans in all corners of the world.