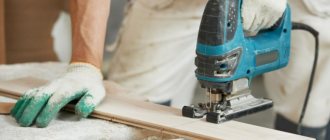
The application of paint and varnish material to a surface has certain features, the observance of which determines the overall quality of the applied coating. When working with a pneumatic spray gun, you should adhere to the established sequence of actions to ensure the best result, without smudges, streaks or peeling of the material. If you have started paint spraying procedures, but do not yet have experience in carrying them out, this publication will help you understand the technology of the process and will bring your work closer to a professional level. We hope that the presented theoretical basis will become a good basis for your further development in the field of painting.
Surface preparation
Before figuring out how to paint correctly with a spray gun, you should pay attention to an earlier stage of work. Surface preparation before painting is of fundamental importance in the entire process, on which the reliability of the adhesion of the material and the final appearance depend. Despite its importance, the preparation process is quite simple and requires only a little attention.
A good surface for painting should be washed (not greasy), sanded and dry. If there is dirt or grease on the element being processed, the density of adhesion of the paintwork material to its surface will be minimal, which will lead to easy abrasion of the material and the formation of bubbles. Sanding with fine-grained sandpaper forms tiny grooves on the surface, and at the same time levels it to an almost ideal (for the human eye) state. Light roughness allows the paint to penetrate into the “pores” of the element being processed, which significantly increases the strength of the gluing. Excess moisture, such as dirt and grease, does not contribute to the overall picture and causes the applied material to peel off.
We strongly recommend that you take the surface preparation stage seriously, as 80% of success depends on it.
Introduction
This article talks about what transmission welding is, how to properly join pipe elements, what equipment settings are needed, and how to reliably fill a seam.
By studying the data provided, you can understand how transmission welding of pipes occurs and how to achieve seam quality with this type of welding.
By welding “through” or “through” the root of the seam, the welder welds pipes with a gap between the parts. This gap must be through, that is, have a gap.
This technology is suitable for pipes up to twelve millimeters in diameter. However, in rare cases, large-sized pipes are also processed. Parts that are ready for processing are called “coil”.
The term "through" is also used for connecting pipes subject to radiographic inspection. During this test, rays are directed at the metal, which “transparent” it.
Thinning paint
Not all paint and varnish mixtures are a finished product suitable for spraying with a spray gun. Most compositions are a concentrate that requires additional dilution with a more fluid liquid (solvent or water for water-based paints). Information about mixing proportions is often indicated by the manufacturer on the container, but the optimal viscosity can be selected experimentally.
Most solvent-based paints can be thinned to a ratio of 4 to 10 (solvent/paint). Water-based compositions are recommended to be diluted no more than 1 to 10 (water / paint). The products offered are very diverse, and each material has its own characteristics. In order not to make the mixture too liquid, reducing the quality of its application, it is recommended to add solvent in small portions. Not all paints and varnishes and solvents can be mixed successfully. For example: painting with hammer paint with a spray gun requires dilution with xylene or solvent, and when using other compounds, its characteristic texture disappears. You can check the viscosity of the paint using a viscometer or an ordinary wooden stick and a little idea of the required thickness. The optimum density can be determined by test sprays. If the drops do not stretch into an even film, but retain the shape of the smallest tubercles, then the mixture requires more dilution. The mixture ready for spraying should have a fairly liquid consistency, reminiscent of fatty kefir.
To avoid clogging the spray nozzle, the diluted mixture should be passed through a special filter or nylon stocking in advance.
How to make a homemade knife sharpener
All homemade knife sharpeners solve the main problem - they allow you to accurately maintain a given angle of inclination of the block to the blade, which is very important for obtaining a good cutting edge. There are very simple devices, and some are a little more complex, but they allow you to work with greater comfort. Choose according to your taste.
Some of the options are from improvised means
A simple device for sharpening knives
Essentially this is a holder for sharpening stones. Everything is elementary: two triangles made of wood, which are connected by pins with wings. A block is clamped between the corners at the required angle. You can set the angle using a protractor, a special program on your smartphone, or using the rules of trigonometry (right triangle).
Knife sharpening device - abrasive holder
When sharpening on such a device, the knife must be kept pointed strictly vertically at all times. It's much easier than holding it at a certain angle.
The same idea has another embodiment: on a reliable basis, make movable holders into which bars are inserted and secured in the desired position. The corporate prototype is pictured below.
Holder for whetstones when sharpening a knife
A homemade device for sharpening knives is made of wooden blocks. It turns out to be light, so that it does not move from its place, it needs to be fixed with something. To avoid holding with your hand, you can use clamps.
Rotating holders allow you to set a given angle, and then fix it with the help of “wings”
Such a device for sharpening knives, of course, makes the work easier, but it is still quite difficult to maintain the angle: you must constantly control the verticality of the blade. Such a habit can be developed over time, but starting is difficult.
Device on wheels
An interesting version of a manual knife sharpener with a fixed block and a wheeled cart on which the knife is mounted. It is made on the basis of sharpeners for knives, chisels and planes. This device also works well with a knife, but you need to get used to sharpening a rounded edge.
Homemade tool for sharpening knives on wheels
In this version, as in manual sharpening, the block is stationary, but the blade of the knife, mounted on a movable trolley, moves. The angle is set by the height of the bar relative to the platform on which the blade is mounted. The peculiarity of this device is that the table must be level. It can be a tabletop made of natural stone, or you can put glass on a regular table.
In the version presented above, the angle changes slightly, which is usually sufficient for sharpening similar types of knives - kitchen knives, for example. If necessary, the design can be improved by adding holders (pictured below).
Improved model
All this is implemented very simply, as it resembles a regular construction set: strips with holes in them, everything is assembled with bolts and screws.
There is also a device to ensure the immobility of the block.
To fix the bar
The advantage of this whole design is that it is easy to unfold the knife while maintaining perpendicularity on the rounded area, and it is also very easy to handle on the other side: you need to turn the cart over. For this purpose, four pairs of wheels were made.
Homemade manual machine for sharpening knives
Slightly more complex and much more convenient homemade devices, which are made on the basis of well-known branded devices. They have an adjustable platform on which the knife is fixed. The site is set at a given angle. The block is mounted on a movable rod attached to the stand.
One of the branded knife sharpening devices
Self-made devices in some ways repeat the design presented above, but there are some differences. There are many options. Let's give some.
Option one: a fixed platform on which the blade is fixed
This device is made from leftover laminate (chipboard can be used), two steel rods with a diameter of 8 mm and a movable fastener.
General view of the device for sharpening knives
This design has a fixed base, to which a platform with a knife lock is attached on regular hinges. The near edge of the platform can be raised at some angle convenient for work. But otherwise she is motionless.
On a vertically mounted steel rod there is a movably mounted latch, in which a loop is attached to the side. A rod is inserted into it, on which the block is fixed. This loop is a simple, but not the best solution: there is no rigid fixation, which means the angle will “walk.”
Loop into which the second rod is inserted
Particular attention should be paid to the bar lock. An emphasis is placed on the rod at some distance from the edge (about 30-35 cm). This will be a permanent fixture. The second one is made movable; it is fixed after installing the bar using a screw and a thread cut into the body of the holder. The second option is to cut a thread on the rod and tighten the installed bar using a nut.
Knife holder - one or two steel plates mounted on a movable platform. They are fixed movably using screws and wings. Having loosened the fasteners, insert the knife blade and clamp it. It is very difficult to move it. Then, installing a pin with a fixed bar in the loop, adjust its height so that the required angle is set.
Setting the angle
You can, as in the photo, make templates with the required angles and ensure that the planes match. After the crossbar is secured, you can work - move the bar in the desired direction.
This device for sharpening knives works well, but you can only move the abrasive along the blade when sharpening a kitchen knife. Classic sharpening - movement perpendicular to the cutting edge. This can be achieved on the straight part of the blade. If the blade is short, this will be almost perpendicular, but on a rounded part on a fixed holder this cannot be done. And all such devices “suffer” from this drawback. Once again: they are an excellent option for sharpening kitchen knives (below is another good option from the same series).
Option two: with a movable platform and a magnetic holder
In this version of a homemade device for sharpening knives, the problem of previous sharpenings is solved. Here the frame remains motionless, which sets the angle of movement of the bar. The bar holder moves freely along a guide set at the desired angle. The knife is mounted on a movable table. You can, as in the presented version, make a magnetic holder, or you can make a regular one from a metal plate and “lambs”. Move the table so that the movement of the abrasive is perpendicular. Actually, everything is in the video.
One clarification: in this case it is very important that the surface on which the table with the attached knife moves is horizontal and level. You can put glass or use a polymer tabletop (marble will also work).
Safety requirements
The operating principle of a pneumatic spray gun poses virtually no risk of serious bodily injury, but poses a more hidden threat to the eyes and respiratory organs.
Paint mist generated during tool operation easily penetrates into the lungs and other unprotected areas, causing serious damage to health. LMCs based on organic solvents have an accumulative effect, which means that their sediment cannot be removed from the body. Safety precautions when working with a spray gun boil down to the use of protective elements and preparation of the room. The main protective equipment of a painter:
- Respirator mask (or half mask) with a filter.
- Safety glasses (if half mask) with a tight fit to the face.
- Painting overalls. If the painting process becomes your daily activity.
The room where the material is sprayed must be dry and well ventilated (no draft). The surface should be installed at an obtuse angle in relation to the light source (or vice versa, the light in relation to the surface). Thus, the smallest unevenness of the layer will be noticeable. Painting should be done outside in dry, windless weather.
Forming a coating
After the powder paint is applied, the product undergoes the next process - coating formation. It consists in straightening the applied composition. As a result, a film forms on the coating, hardening and cooling of the applied layer occurs.
The baking process is carried out using melting chambers or, in the case of doing the coloring yourself, in a conventional oven.
The temperature should be around 2100C. This procedure lasts one quarter of an hour. It is advisable to maintain a stable temperature regime in the paint shop, but there is no special prohibition on opening the oven. After the required time has passed, the product is removed from the chamber and cooled naturally.
It should be remembered that heated metal is softer than in its normal state. Therefore, it should be placed so that it is not accidentally subjected to mechanical stress or deformed.
It should be noted that coatings that are painted with powder paint are of high quality and degree of resistance to mechanical abrasion. This coating will last a long time. In addition, the powders that are used for application to metal and other surfaces themselves have high-quality properties.
As you can see, the DIY dyeing technology is not at all complicated and it is quite possible to do it. The main thing is to follow all the advice while working and not skip the preparatory stages.
Powder coating of wheels (1 video)
Application of powder paint (20 photos)
Test Spray
Having prepared the surface, paint, room and protective equipment, it’s time to move on to painting.
If you have previously had positive experience working with a spray gun, you can proceed to the main surface. If there is no previous experience or it is unsuccessful, it is recommended to carry out a series of test sprays on waste paper (cardboard, newspaper) in order to calibrate the air supply, material and torch size (so that the spray gun can work most effectively). Calibration of a pneumatic spray gun is a rather delicate process with many features, to which we have dedicated a separate topic on our website. If you want to make your work easier and get a decent result, we recommend that you read the detailed guide “ How to set up a pneumatic spray gun
».
Essentially speaking, you must obtain the correct shape of the spray torch (an elongated oval) by rotating the tool's controls. This process, with commentary, is clearly demonstrated in the video below.
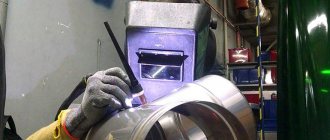
Semi-automatic pipe welding
In order to do the job efficiently, it is necessary to take into account many small but important characteristics.
- Current strength.
- Voltage.
- Diameter and wire feed speed.
- Polarity and other characteristics.
The principle of semi-automatic welding is almost identical to arc welding. But it is worth paying special attention to setting up all the equipment. If all settings correspond to the peculiarities of the technological process, then the seam will be smooth and almost invisible.
Painting technology
Mastering a spray gun as a tool for high-quality and even painting of surfaces is primarily associated with practice and experience. The theoretical part includes the most important rules necessary for beginners to correctly understand the basics of the painting process, which will become a solid foundation for honing professional skills. Listing the main features of how to use a spray gun with a compressor, we can highlight 4 fundamental points:
- The distance from the nozzle to the surface varies from 15 to 25 cm. The optimal figure may vary depending on the spray gun spray system: HP (20-25 cm), HVLP (10-15 cm) and LVLP (15-20 cm). Experienced painters, as a measurer, use their hand, whose size is 20 cm (on average).
- The technology of painting with a spray gun is based on the correct position of the tool during spraying. In relation to the surface, the device should be positioned straight. If the spray gun tilts during operation, the distribution of paint in the spot will be uneven.
- It is necessary to pull the trigger of the tool, opening the paint supply, 10-15 cm before the start of the surface to be treated. Otherwise, the edges of the product will be painted poorly or, on the contrary, excessively (depending on the speed of drawing). You should also stop spraying by moving the tool 10-15 cm from the opposite edge of the part.
- Painting should be done overlapping, starting a new line about half or a third of the previous one. It is better to do this from top to bottom, from left to right.
The speed of movement of the spray gun during operation depends on the thickness of the paint and your requirements for layer thickness. The average spray speed is 1 m in 2 seconds. Excessive delay can cause smudges, and fluctuations in driving speed will affect the uniformity of the paintwork. Confidence in movements appears only through experience, but getting a decently even layer at an amateur level can be achieved even by an ordinary user, without experience with the instrument.
It is better to paint in several layers, where the first one is applied with quick movements (spraying), and the subsequent ones are smoother.
In addition to the basic rules for operating a spray gun, there are certain features of working with different types of surfaces in different positions.
Vertical surfaces
The simplest method of painting is when the straight surface to be treated is installed in a vertical position. In this case, spraying occurs in horizontal movements, from the top of the part to its bottom edge. In this work, it is enough to adhere to the standard rules outlined above. For a more visual representation of the process, we recommend watching a short, informative video on how to use the spray gun correctly. If the surface is wooden, it is better to arrange it horizontally with fibers, which will ensure better absorption of the mixture into the texture.
Horizontal surfaces
The standard design of a pneumatic spray gun with a lower or upper tank does not allow it to be used in a 90° inclined position (the paint will not go into the nozzle).
In such cases, vacuum tanks or airless types of devices are used, where paint is supplied under pressure through a hose from a container standing on the floor. If you have a pneumatic spray gun and are tasked with using it to cover the roof of a car, its trunk and other surfaces, you should do this as follows. We start from the far edge, and use straight spray lines to move to the nearest end of the part. In this case, the tool can be slightly tilted, which is an exception to the rule (if the tank is not vacuum). We attach a video where painting horizontal surfaces with a spray gun is clearly demonstrated.
Ceilings
The process of whitewashing or painting ceilings requires the use of a stepladder or tool extension. Since the working distance of a pneumatic spray gun (from the nozzle to the surface) does not exceed 30 cm, and a strong tilt is not desirable, it is not advisable to use it for such tasks. The most suitable type of spray guns for painting the ceiling are airless devices, which can be equipped with a special rod that allows painting without the use of stepladders, ladders or scaffolding.
When painting the ceiling with a spray gun, you should start from the corner and use small, horizontal lines (no more than a meter), overlapping and uniformly spraying the paint over the surface. The material should be applied in at least 3 layers. The video below clearly demonstrates how to use a spray gun with a mini-compressor (similar to a pneumatic one) when painting a ceiling.
Complex figures
In addition to ordinary, flat surfaces, the type of work painters do sometimes throws up unusual objects to work on. Pillars, grilles, shaped parts and other elements with many edges require special treatment when painting.
If an object has sharp edges, paint them first.
Next comes coating the sides. If a round tube or pole is painted, the process occurs in 4 stages (according to the cardinal directions): the northern side is processed first, then the western, then the southern and finally the eastern. The main thing is that the painting goes in a circle. Painting three-dimensional objects requires more care than working with a straight surface. The tool should be moved smoothly, trying to follow the curves as accurately as possible. At first glance, this activity may seem quite complicated, but if you have an understanding of how to use a spray gun and basic experience, you can easily get a very decent result.
Vertical manual milling device
Of all the hand-held power tools, the router is perhaps the simplest from a design point of view. Its equipment is attached directly to the electric motor shaft (spindle), i.e., torque is transmitted without the mediation of gears, belts, etc. Thanks to this, the cutter easily gains high speed.
The router body, also called the “head” or simply the “head,” moves up and down along guide rods that are rigidly mounted on a support platform. When the operator presses on the handles, the head goes down; when the pressure is released, the springs return it to its original position.
A milling cutter is secured to the motor shaft (spindle) using a collet clamp. When the head is lowered, the cutter smoothly plunges into the workpiece material to a given depth, the latter being adjusted using a stop. When the tool is subsequently moved horizontally, the sharp edges of the cutter drill out the groove.
1. Collet clamp for attaching the cutter. 2. Support platform 3. Stepped milling depth limiter. 4. Grip handle. 5. Vertical stop.
6. Handle for fine adjustment of milling depth. 7. Cutter speed regulator. 8. Milling cutter body with installed electric motor. 9. Accidental activation lock button. 10. Knob for fine adjustment of the rip fence.
11. Parallel stop. 12. Tightening lever. 13. Router on/off button. 14. Parallel fence adjustment screws. 15. Guide rods.
Cleaning the spray gun after use
Having figured out how to properly paint with a spray gun so that it is even, and having carried out the required work, all that remains is to clean the device from any remaining material and put it aside until the next “combat” task arises. To maintain the performance of the tool and effectively use it in subsequent work, it is necessary to keep it clean. Since paintwork materials tend to dry out, clogging all possible holes, it must be removed from the internal channels of the spray gun as quickly as possible. This is quite easy to do. You will need a solvent, a small container and a brush (preferably).
Washing process steps:
- Disconnect the spray gun from the compressor (mains) and drain the remaining paint from the tank by pressing the trigger.
- Remove the filter tank, rinse and set aside.
- Unscrew the air cap with the nozzle and immerse it in a container with solvent for 5-10 minutes.
- Carefully remove the needle and use a brush (brush) and solvent to clean the opened channels.
- We clean the outer casing of the device and put all the parts together. Before screwing in the air cap, it is recommended to apply a thin layer of special lubricant to its threads to prevent the elements from sticking together.
article from the Rating section
- 0
Power tools Pneumatic tools Painting tools
Save this page on your social media. network and return to it at any time.
ADD A COMMENT
Types of gas cylinders
There are various types of gas cylinders. They differ in:
- material of manufacture: composite or metal;
- volume: from 100 g to 50 l.;
- filling: propane, butane, hydrogen, nitrogen and other gases;
- purpose: household, automotive, industrial, etc.;
- connection method: threaded, collet, valve, pierced.
To build a homemade product from a gas cylinder, it is better to use a metal container with a maximum volume of 50 liters. This will allow you to get the most out of your device.
Advantages and disadvantages
Powder coating has many positive properties, among which the most notable are:
- Simplicity of the process. If you exclude the need to use special equipment, then the event is not particularly difficult. For work, a ready-made powder is used that does not require mixing or tinting. Application occurs quickly.
At the moment it is possible to select any color and shade of the powder composition - Time to get the result. After powder treatment, the product is placed in the oven for a period of no more than 30 minutes, and after a short cooling, the work is considered complete.
- Environmental friendliness. The resulting coatings and coloring powder are completely safe for the health of others. The surface does not support combustion and does not emit toxic substances at high temperatures.
- Reliability and durability. The resulting layer has a single structure that has good adhesion to the base. This ensures wear resistance and a long service life.
Compared to using conventional paints, dry spraying is much more economical and of higher quality.
But with all the advantages, the method is not without its disadvantages:
- Mostly metal structures are painted. This is due to exposure to temperatures from 150 to 250 degrees.
- Although the range of colors is wide, you cannot do the tinting yourself. We use exclusively ready-made compounds in our work.
- Metal products with complex shapes are difficult to paint.
- Coating defects can only be eliminated by complete repainting. Tinting dry paints at home is absolutely impossible
On a note! Using the powder method is indeed very rational, but in design terms it is inferior to other options. Although currently there are special mixtures with different visual and tactile effects.
Without high-quality equipment, it is impossible to achieve high-quality results
Video description
This video shows how to clean rust from metal.
Chemical cleaning or etching is suitable for degreasing the surface before powder coating of metal products. Sulfuric, nitric or phosphoric acids are used as a reagent. Phosphating is similar to priming. When treated with a special composition, a phosphate film is formed, which improves adhesion.
Coloring
For these purposes, a special room is equipped - a chamber - with a forced air suction system. Large-sized products are painted in walk-through type chambers, and small parts are painted in dead-end type chambers. A special gun sprays the color. The step-by-step process looks like this:
- Powder paint is poured into a special hopper and mixed there with air. The proportions are adjusted using valves.
- A mixture of paint and air passes through a spray gun with a high-voltage source, acquiring a positive charge.
- The process of spraying paint onto the product occurs.
- The last step is extraction to remove loose particles. Entering a special bunker, they are again sent through the painting cycle.