Many beginners are interested in the question of how to work with an electric planer. At first glance, there is nothing complicated: plug it into a power outlet, press a button, move it back and forth across the surface, removing chips. However, during the first attempts, the result is not always impressive.
Electric planer device.
When purchasing a tool, you need to check its functionality, completeness and appearance. It is worth paying attention to the sharpening quality of the installed knives. If the kit contains spare knives, you need to check them too. The cutting edge should be smooth, sharp, without gouges or bends. All other settings should be checked at home in accordance with the manufacturer's instructions.
Checking and adjusting the position of the front plate
All adjustments to the tool must be made in the off state. The plug must be unplugged from the socket, otherwise you can not only damage the electric planer, but also cause serious injury.
Table of main parameters of electric planers.
When checking the position of the knives, the front plate must be set to the minimum planing depth position using the standard adjustment knob. Place the electric planer on a flat, hard surface with the drum facing up.
To check, you can use a metal ruler or a piece of window glass of suitable dimensions. The drum with knives should be rotated until one of the knives is in the upper position, above the drum axis. The ruler or glass must be laid on the slabs along the plane. The surfaces must be in the same plane.
If the control device on any of the plates is tilted, you need to check the position of the front plate and adjust it. Such a defect occurs during long-term operation of the tool without maintenance. The internal cavities can become clogged with wood dust and small shavings. Excessive force on the depth adjustment handle displaces it from its original position.
To eliminate the defect, you need to remove the handle, the front plate, clean the cavities from dust and chips, and lubricate them. Place the plate in place, check the installation using a ruler, secure the handle, checking that the dial matches the index mark.
How to properly set up and use a plane?
- Device and purpose
- Stages of preparing the tool for work
- How to use?
- Safety regulations
Proper adjustment of the plane guarantees high-quality and safe work. To achieve a good result, it is important to follow all stages of preparation for work, adjust the installation angle of the hand plane knife and other parameters. This is what we will talk about today.
Adjusting the position of the cutting edge
Adjustment of the position of the knives is carried out according to two parameters:
- height of the cutting edge relative to the back plate;
- the size of the protruding part of the knife for planing quarters.
Layout of the drum with blades.
Having installed the ruler or glass, you need to rotate the drum, controlling the gap between the knife and the device at the edges of the slabs. The edge of the knife should lightly touch the tool without lifting it. If the knife clings to the device or does not reach it, the position must be adjusted.
Typically, knives are secured with a special wedge with expansion bolts. Using an 8 or 10 wrench, you need to screw the bolts into a wedge until the bolt moves freely. Then, using the installed eccentrics, align the height of the cutting edge with the device. Tighten (unscrew) the mounting bolts and check the position again. The desired result can be achieved after several repetitions of this operation.
At the same time as adjusting the height of the cutting edge, you need to control the protruding part of the quarter planing knife. The optimal size should be indicated in the manufacturer's instructions. On most models it is 1 mm. The size is set by moving the knife left or right along the axis of the drum. It is important to set the size correctly. It should be the same on all knives. This can be achieved by using a feeler gauge of a certain size or by measuring the distance with a caliper (a caliper with a protruding back) from the edge of the knife to the drum. After adjusting the first knife, you need to move on to the next ones. The operation for all knives is performed similarly. If a knife cannot be installed in the required position, you need to remove the wedge and check the eccentrics for integrity and free rotation.
The adjustment must be completed by checking the free rotation of the drum and the fastening of all knives.
How to use?
Each master has his own style of work, but the general features are the same.
- Planing must be done smoothly, without jerking . You need to stand to the side of the workbench with one leg forward.
- You need to plan along the direction of the grain. If the workpiece is wide, it is better to first move the plane diagonally and then level it flat. To do this you need to use a special ruler.
- The workpiece must stand still. Vibrations are not allowed.
- If the tool is clogged with chips, then they need to be pushed down through the “mouth”. If this does not work, the chips are pushed upward with a sliver. You cannot use metal objects for this purpose, as they will damage the sharpening of the blade. For this reason, the plane cannot be placed with its sole on the workbench.
- Some craftsmen hold the plane at a slight angle in the direction of planing. This improves the quality of processing, but accelerates wear of the sole.
The main thing when working is to follow safety precautions.
Preparing for work
The tool can be used in two positions:
Plane sharpening angle diagram.
- stationary position: the electric planer is attached to a rigid, stable surface;
- portable: the tool is moved manually along the workpiece.
Many models come with special clamps and a bracket for the start button. In a stationary position, it is more convenient to process short-length lumber, which can be moved along the tool alone. It is advisable to process long workpieces with a portable electric planer.
The wood must be dried; raw lumber is poorly processed. The board must be firmly secured to a hard surface. The part should not sag under the weight of the plane and shift during operation in any direction. When processing side surfaces on a workbench, it is advisable to install them on special fastenings that protect them from bending and movement. In the area of rotation of the drum with knives there should be no metal elements (brackets, nails, screws) on the surface being processed or fastening elements. Hitting the metal will leave a gouge in the blades, and a protrusion will form on the surface being treated. The knives will have to be sharpened, removing a thick layer of metal, or replaced.
Planing with an electric planer
A separate condition for correct and safe planing of any structures with electric planers is the rigid fixation of the workpiece being processed.
Only after the workpiece being processed is clearly fixed, you can start planing it. First you should start with rough processing. For this, sherhebel is often used. When using scherhebel, movements should be directed not along, but across the fibers. Otherwise, you may cut off too much wood.
Subtleties of working with an electric planer
After finishing processing the surface of small workpieces with Sherhebel, it should be cleaned first with a single, then with a double plane. If you are dealing with long workpieces, such as bars, then it is better to use a jointer or semi-jointer. Movement on the surface must be directed not against the grain, but along it. This is the only way you can get the most even and smooth surface of the wood.
Planing
Surface treatment
An electric planer can perform three operations:
Scheme of options for sharpening a plane knife.
- chamfer at different angles;
- select quarters on blanks;
- plan surfaces.
The main purpose of the tool is to plan surfaces of various lengths and widths.
When working, the plane must be placed on the surface of the workpiece with the front plate so that the knives do not touch the surface. Press the start button, after picking up speed (the sound stops changing pitch) begin moving the plane along the surface. The tool must be held strictly parallel to the surface being processed, the movement must be uniform, without jerking or stopping. When starting to move, you need to increase the pressure on the front part, and when exiting the surface to the rear part. The plane should work smoothly, without vibration. If strong vibration occurs or the sound changes during operation, you need to turn off the tool, determine and eliminate the cause of the abnormal operation.
The depth of the passage must be set depending on the processing purposes. If you need to change the size of the workpiece, you can use the maximum size. When leveling the surface, it is advisable to work with a shallow processing depth, achieving the required quality in several passes.
Also, the depth of processing depends on the material. Hard rocks should be passed several times at shallow depths to avoid overloading the tool.
Included with electric planer
When you install a separate side stop on the electric planer (it is usually supplied as a kit), you can perform folding . The stop, fixing the tool at a certain distance, must touch the workpiece.
Folding boards
Folding a board
The depth of folding depends on the number of passes with a plane over the workpiece. The more passes, the deeper the rebate.
After planing, remove the knives from the electric planer, wash them with kerosene and place them in a separate box until next time.
Additional tool features
To remove chamfers, you need to use a special triangular groove cut out on the front plate of the plane.
The tool should be positioned with the groove at the angle to be processed, launched and moved along the part while maintaining the tilt. The first pass is made along the slot; subsequent passes, if necessary, are carried out in the usual manner.
To make quarters on a plane, you need to install an additional stop to limit movement away from the direction of movement. The second stop, limiting the depth of the quarter, is located on the side surface. The stops must be set to the required dimensions. The distance should be measured from the angle of the cutting edge of the knife in the upper position. The quarter selection is performed in several passes. If the vertical surface of the quarter turns out to be steps, it is necessary to increase the protrusion of the knives beyond the side surface of the plane.
A wide surface of lumber can be processed in several passes. Processing should begin from the left edge, setting the adjustment to the minimum depth. The next pass should be performed offset to the right by about a third of the length of the knives. In this way you need to go across the entire width of the workpiece. If the quality is unsatisfactory, repeat the surface treatment in a similar way.
Hand electric plane
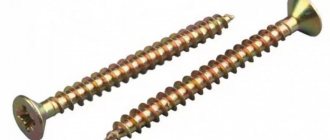
Electric planer knives
The first electric plane was released by Makita. Today it is difficult for a master to imagine life without this incredibly useful tool.
How to adjust an electric planer
Adjustment of electric plane knives should be carried out according to the situation using a special adjustment mechanism, which is located on the front handle of the electric plane. By rotating this handle, we achieve the required amount of release of the knives (0-2 mm); they should be positioned evenly, parallel to the bed. Excessive release makes work difficult and puts additional stress on the plane motor.
Sharpening electric planer knives
Sharpening the knives of an electric planer is carried out similarly to a mechanical one. The main sharpening difference between an electric planer and a mechanical planer is the number of knives. There are two of them here.
Knife sharpening
Guys, you know what...
In an electric planer, knives should be changed strictly in pairs, using one set. This will help avoid the appearance of imbalance. And it will not only spoil the quality of planing of the workpiece, but can also damage the power tool.
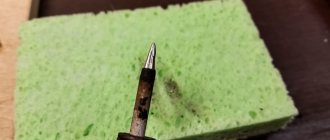
Finishing the knife on the belt
Like a straight razor, a plane knife, after sharpening on a block and a whetstone, can be further sharpened using a leather belt. To do this, apply polishing paste to the knife and run it back and forth along the belt a couple of times. This removes any remaining burr.
A little training
Since the need for a plane does not arise as often as before, many home craftsmen lack the skills to use it. It is unlikely that you will be able to carefully process the surface of the part with a plane the first time. Therefore, it is worth practicing on substandard boards first to gain the necessary confidence. Only after gaining some experience can you use a plane for finishing parts and finished products.
Chamfering workpieces
An electric plane can also be used to quickly and easily chamfer a piece of wood. For this purpose, the device has a special V-shaped groove.
The plane is installed with a notch on the corner of the part and is driven along the length of the workpiece without changing the angle of inclination. Subsequent passes can be made without using the notch on the sole.
An electric plane is indispensable for professional or amateur woodworking. This tool will greatly simplify the processing of lumber and turn the work into a real pleasure.
Safety when working with an electric planer
When used correctly, an electric planer will help you quickly complete large amounts of work, but if handled carelessly, it can also cause serious injuries. As mentioned above, the workpiece must be securely secured before starting work. Otherwise, there is a risk of it being pulled out and injuring the worker or other people nearby. During any inspections of cutting edges or adjustments of knives, be sure to completely turn off the power to the electric planer by disconnecting the electrical cord from the network. Any accidental start can leave you without fingers. Start processing the surface by first turning on the plane and allowing the knives to reach maximum speed until they touch the board. If you put the electric planer aside to check the surface you are working on, place it only on its side. The electrical cord should not have significant kinks or tangles during operation. The electrical insulation must not be damaged, all current-carrying structural elements must be reliably insulated.
In the video below you can watch tips on working with an electric planer (click on the triangle to view):
Sources
- https://2lzz.ru/elektroinstrument/elektrorubanok/kak-pravilno-rabotat-elektrorubankom
- https://stroy-block.com.ua/byttehnika/535-elektrorubanok-opisanie-i-priemy-raboty.html
- https://allremont59.ru/instrumentyi-materialyi/technika-instrumenti/kak-pravilno-ispolzovat-elektrorubanok.html
- https://pro-instrument.com/ruchnoj/kak-rabotat-elektrorubankom.html
- https://russkaya-banja.ru/instrumenty/126-rabota-elektrorubankom.html
- https://odnastroyka.ru/kak-strogat-elektrorubankom/
- https://tehnika.expert/dlya-remonta/elektrorubanok/kak-rabotat-instrumentom.html
How to use a plane correctly
Not everyone knows exactly how to plan correctly - regardless of the type of plane. Planing is performed in the following order:
Selecting the future front side.
You need to visually determine the best side - the smoothest and with the fewest defects. The presence of curvature – initial – is also assessed. Additional can be added during processing - removing layers reduces the structural strength of the workpiece.
Securing the workpiece.
The workpiece must be installed in a fixed state - otherwise how to process it? With one end you can rest it against the stop. Clamp the other end or sides. Vices, clamps, and clamps will come in handy.
Processing with a plane.
Removal of the wood layer required in depth and geometry. Movements should not be done backhanded, but carefully and confidently. The pressure applied to the tool is constant along the entire trajectory of contact with the surface being processed. Only when leaving the chip removal zone does the pressure transfer slightly to the rear handle. The plane is not lifted from the surface until the blade leaves the workpiece. Otherwise, the target surface may be damaged.
Periodic check of flatness.
When processing any surface, it is necessary to regularly inspect the result. The point is a possible departure from the intended form and the appearance of excessive depth. You can always remove the excess, but you can’t build up the removed layer.
Periodic check of curvature.
In addition to flatness, you can pay attention to the state of curvature. If a thin workpiece is being processed, the curvature may become critical or unacceptable. To do this, standard surfaces (rulers, bars) are taken and applied to the resulting surface.
Checking perpendicularity.
The execution of the second and remaining faces is most often necessary perpendicular to the first. A square is used for control - pressing it tightly and high-quality lighting will indicate the need to adjust the angle.
Marking of treated sides.
Sometimes the master forgets what each side is intended for. An inconspicuous mark will help you not to forget even after a long time.
Obtaining the required thickness.
The thickness is marked with measuring instruments or a thicknesser on parallel edges (front and back). When processing, in addition to approaching the specified value, special attention should be paid to the parallelism of the edges.
Obtaining the required width.
The width is measured relative to the resulting front end. Marking is carried out using a surface thicknesser, a height gauge, or simply a ruler at small intervals. Planing is carried out with regular control of the resulting width.
The closer the workpiece becomes to the required result, the more often it is necessary to check compliance. Otherwise, a moment will come when the layer will be removed unnecessarily and it will be difficult to restore the surface.