Engraving on metal always attracts the eye. This trade has fed artisans since ancient times. And today it has not lost its relevance. Craftsmen can turn everyday objects into real works of high art by decorating them with fancy miniatures. Sometimes you can see entire paintings of considerable size, made by engraving artists. And few people know that absolutely anyone can do this business.
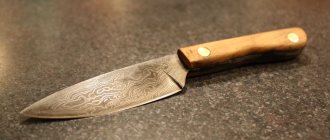
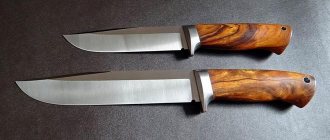
Photo 1. Souvenir engraved hunting knife, an ideal gift that can be given to hunters.
Do-it-yourself engraving can become a profitable and interesting business if you really want it.
You can decorate small metal objects using engraving yourself at home. This activity will arouse the respect and envy of friends and acquaintances. In Zlatoust, thousands of craftsmen practice this craft at home. Engraved items are expensive. A saber costs approximately 300 thousand rubles, a hunting knife costs up to 100 thousand (photo No. 1). Agree, this is good money. How to make engraving on metal at home with your own hands? For this lesson you need to prepare the simplest equipment that can be found in any house, in any apartment.
What is the best way to engrave on a watch, on a pen, on plastic?
You can use engraving on almost any material - this primarily depends on the design technique you choose. For example, regular engraving on fabric using a Dremel is impossible - diamond drills are not designed for this material. However, with a laser engraver you can transfer any design, even onto the thinnest canvas, without damaging it.
Laser engraving is used to draw on absolutely any surface and is often used for advertising purposes. Logo inscriptions are often written on tokens, spoons and cups.
A laser device is also suitable for manual work, but in most cases a mechanical Dremel is preferable. It is easier to learn and costs several times less.
How to engrave on metal?
In order to make a beautiful inscription on an axe, dirk or knife, you will need an engraver with a special metal bur. There are several options for applying a pattern to such material - with and without chemical tinting (blackening).
The use of additional chemicals for tinting or grinding metal is used during mechanical engraving with a drill or a special cutter. But working with a laser tool does not require this - specific melting and coloring of the metal occurs here using a laser.
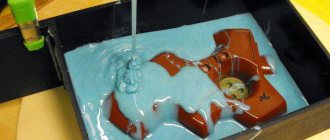
Engraving on aluminum at home can be done without the help of special tools. To work with this metal, the etching method is often used - a special treatment using a chemical solution and electric current.
Let's start experiments
Decorative patterns using the engraving method are applied to plates, knives, pistols, sabers, medals, cups, and apartment numbers. All patterns and inscriptions are preserved almost forever and do not require expensive and rare consumables or special equipment for execution. The design can be applied to steel, aluminum, brass, copper, and metal alloys. The method does not pollute the environment. It is impossible to wash off or erase the drawing using conventional methods and means.
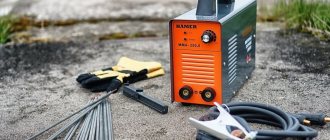
It is recommended to start by applying simple inscriptions on cutlery. Relatives and friends may appreciate such a gift. You need to prepare for work (photo No. 4).
Photo 2. Engraved wedding rings, the wedding date and the initials of the bride and groom are usually written on them.
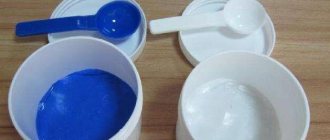
- Nail polish that my wife doesn't really need.
- Toothpick with sharp tips.
- You may need an ordinary match.
- Salt.
- Charger for car battery. It can be successfully replaced by charging from a mobile phone.
- Glass or porcelain dishes in the form of a glass, mug or jar.
- Nail polish remover.
The work is done in this order:
- Take a spoon and cover it with nail polish. The entire surface must be varnished very carefully, otherwise there will be defects in the work.
- Using a match or toothpick, a pattern, name, or other image is scratched through the layer of varnish.
- Pour 2 tablespoons of salt into a glass glass or jar. Some people add a spoonful of salt and a spoonful of soda.
- Water is poured into the vessel, the salt is thoroughly stirred until completely dissolved.
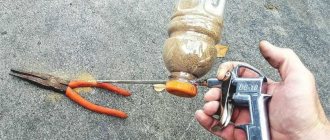
- We connect a car or other charger with the positive terminal to the product being processed, and the negative terminal to any metal object that will be placed in a vessel with water. This item could be another spoon, a piece of thick wire, or a metal plate.
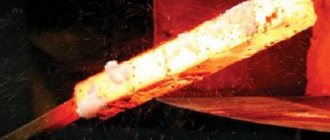
- The rectifier is connected to the network. Almost immediately, an etching reaction will begin in the glass with darkening of the liquid. It lasts 1-5 minutes. It depends on the magnitude of the current. The product is checked periodically. After reaching the desired etching depth, it is removed from the container.
- The varnish is washed off with nail polish remover. The result should look something like this (photo No. 3).
Photo 3. Personalized engraved spoons and, interestingly, engraving can be done on various metal objects in a simple home environment.
In this way you can process any metal objects at home. If you make an inscription with varnish, it will be convex on the etched background. For better quality work, it is recommended to purchase a special tool - an engraver. It can operate from the electrical network and from built-in batteries. The kit usually comes with drills of different shapes. They can work on glass, plastics and other materials. Engraved wedding rings are an excellent gift for newlyweds (photo No. 2). But you can do this yourself only when you are completely confident in the result of the work.
Laser, engraver or electrolyte: which is better to choose?
With all the abundance of techniques, most often for do-it-yourself engraving they use a mechanical machine - an engraver. It is perfect for signing a Parker pen, making a beautiful frame for a mirror, or making a dedicatory inscription on a knife. To do this, it is enough to know which attachment can be used for a particular material. For example, to engrave a knife with your own hands, you should use a special metal bur. You determine in advance what kind of inscription will be on your knife using a stencil or transfer it from a sheet of paper.
In addition to mechanical action, you can use chemical etching to decorate a knife. But you won’t be able to engrave a lighter using this method - the object must be completely immersed in the electrolyte. And during the reaction, there is no guarantee that the contents of this item will not explode (rather the opposite). Therefore, when choosing which engraving to do, choose a mechanical or laser model.
General technology
The technique can be manual or mechanical (various equipment is used).
It is also divided into line and armor:
- The line engraving technique is performed by applying contour lines and strokes to an object. Metal carvings are not deep, affecting only the surface of the object;
- Defensive, otherwise called three-dimensional, mechanical deep technique allows you to achieve a three-dimensional pattern. See photo.
Incisive engraving is performed with a special tool – a graver.
If you ask yourself how to make it yourself and where to buy these tools, then the answer is simple: this tool is sold in the same stores where you can find various art supplies.
The finest lines are made with a Messer-Stichel. If you need to make parallel lines, they are made with a rap pen.
Photo:
To perform high-quality work, this tool must be sharpened; for this, a fine-grained whetstone is used, which is pre-moistened with water or oil.
The graver is brought “to readiness” with a leather product (you can take an old belt) coated with chromium oxide.
Manual processing of small items at home requires the presence of a special pillow; you can easily make it yourself: take two pieces of fabric of the same size (round or square), sew them together along the edge, stepping back from it a little, but you need to leave a small gap in order to so you can pour sand inside.
The prepared form is turned inside out, dried sand is poured in, and the remaining hole is sewn up.
The cushion engraving tool is ready.
How to properly hold the instrument in your hand?
This should be done as if you were holding a regular ballpoint pen: the index finger should be on top of the blade (that’s what the metal part of the cutter is called), and the thumb should hold it on the side.
Work must be done on your own.
In the case when you need to change the direction of the pattern, unfold the pillow with the object on which the element is being applied, but do not change the direction of movement of the hand.
What else is useful to know about incisors?
To do your own engraving at home, it is advisable to first practice so that the carving turns out beautiful in the end.
IMPORTANT TO KNOW: Composition and application of alloy steel
It is better to purchase a set of tools: it is better to apply rounded lines with a square section of cutters, and it is better to make straight lines with a round section.
During work, burrs very often appear, which cannot be avoided, but they can be removed with the help of a scraper.
You can make the scraper yourself. To do this, you will need a file, from the edges of which you need to grind off the notch.
Before application, the surface must be cleaned with fine sandpaper and polished. A special polishing paste is used for polishing.
The paste can be easily replaced with chromium oxide (oil paint). The surface of the object must be thoroughly and vigorously rubbed. The paste is ground with a thick piece of leather.
Do-it-yourself glass engraving: features of working at home
Glass engraving is a fairly common way to decorate glass furniture and mirrors. In this case, thin openwork patterns reminiscent of frost are applied to the glass surface. On an industrial scale, patterns on mirrors or glass products are made using a laser cutter. Undoubtedly, they look very impressive, especially if the item is backlit, but they have a significant drawback - they are stereotyped. If you want a truly original plexiglass product, arm yourself with a diamond drill, silver powder and patience. For a beautiful drawing, you should first draw the main lines, sprinkle them with powder and complete the drawing by detailing it.
What is the procedure
Engraving is one of the ancient methods of finishing metal surfaces. Initially, it was used to add sophistication to household items, after which things were passed on from generation to generation. Despite the fact that this is an ancient art, today it is actively used for both personal and public purposes (decorating streets, city monuments, etc.).
Previously, painting was carried out exclusively by hand, without the help of special equipment. Now, for this purpose, various devices and devices are used that make it possible to create any pattern, inscription or picture. Depending on what is used to engrave on metal and how exactly to engrave (choice of technique), different results are obtained. Therefore, it is worth familiarizing yourself with the available methods, since each of them has its own characteristics.
Do-it-yourself engraving on leather
You can apply a beautiful ornate inscription to a diary, passport cover or belt in a special workshop or do it yourself. However, for beginners, making a complex pattern will be extremely difficult - the technique of engraving on leather requires precise movements and a huge amount of patience. Therefore, before starting complex multifaceted work, it is worth paying attention to training. This way you can master the skill of operating special tools - knives of different sizes and different degrees of sharpening.
You can combine skillful engraving on leather with stamping and embossing - it looks very impressive and looks organic. However, it is worth considering that all these techniques are only suitable for working on natural leather - the substitute has a more fragile and delicate structure.
DIY wood engraving
This type of wood decoration is most often done using an engraver. To work, you will need a special type of graver, punch, cutter, laser or mechanical engraver. They have different shapes and diameters, for drawing lines of different thicknesses and depths. Engraving on a wooden object also requires a certain amount of caution and composure - even when working with a stencil, you will not have insurance against careless movements.
When working on wood, it is also very important to do the background filling correctly - it should convey the transition from light to darker shades with maximum accuracy. It is better to do this using a medium-thick bur and without unnecessary pressure - this way you will get the most believable picture.
Engraving pen
Manual engraving at home requires: - A graver - A metal workpiece - Something solid to hold the metal workpiece, possibly a vice
For beginners, we recommend using a softer metal, such as copper or aluminum, as a workpiece.
A shtikhel is a rod, usually 120 -130 millimeters in size. The tip of the gravel is cut at a certain angle and sharpened. The second tip is inserted into the handle, usually wooden. Engraving pens come in various shapes and differ in the width of the working surface. If you don’t have this tool, you can easily make it yourself if you have the right materials. To make a graver you need tool steel. The metal used in ball bearings and springs is excellent here. To make a cutting surface, you need to use a cutter, a needle file, a file, cutting it into thin strips. The best material to make an engraving pen is P18 steel. You can also make a graver from circular saw blades. Then we sharpen the workpiece at an angle, which will allow us to make a notch of the required width. If we talk about the handle of a wooden pen, then it must be made of hardwood, with a width convenient for the master to hold in his hand. The mushroom shape is, in our opinion, the best option.
Do-it-yourself stone engraving
Making an engraving on stone is a very painstaking and difficult task. This is usually done using a TPU (milling and engraving machine). A special cutter is inserted into it, which continuously rotates and makes the desired pattern in the stone.
Most often, this stone processing technique is used on granite. This is explained by the peculiarity of this stone - a smooth and even surface. However, it is completely unsuitable for beginners, as all the irregular and uneven lines will be visible on it. Sea pebbles with a flat, smooth surface are best suited for training. These are usually stones made from soft sedimentary rocks that can be easily machined.
In addition to the cutter and stencil, you must use special safety glasses when working with this material, as stone fragments can damage your eyes.
Features of certain types of decoration by engraver
Nowadays, do-it-yourself keyboard engraving is very popular. The thing is that most high-quality imported computer devices do not have a Russian font. This is what is most often applied using a thin needle and drill. With some experience, you can easily make your keyboard special and individual.
Also, using a Dremel and a wood bit, you can make an elegant personalized engraving on a gun, or rather on its butt. This will help you not only make your weapon beautiful, but also recognizable (which will be very useful if it is lost or stolen).
This type of decoration, such as engraving, is used to apply memorable inscriptions to gifts and other significant items.
Engraving is most often done for memorable dates, anniversaries and weddings. What engraving to do on wedding rings is a question that worries many newlyweds. After all, such decor solves two very important problems at once - it makes a standard ring individual and seals the young union with a meaningful phrase (or just a date). However, it is worth remembering that you can only engrave the inside of the ring and only after you have decided on the exact size.
For a friend (or girlfriend), you can make a beautiful engraving on a diary or notepad. This is possible provided that the cover is made of genuine leather - only on it, with the help of thin blades, you will get a real work of art. You can also do laser engraving, where instead of a knife, thin lines are made with a laser. Working with such an installation is quite simple, but requires special skills (and the device is quite expensive). Therefore, if you do not want to do this professionally, use simpler tools.