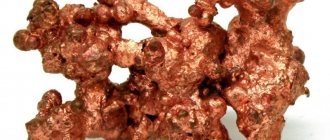
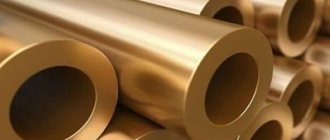
Bronze patination. Metal-plastic
Oxidation and patination of copper, brass and bronze.
05.09.2009
Oxidation and patination of copper, brass and bronze.
Some chemical reactions lead to the formation of oxides and oxides, i.e., oxygen compounds, on the surface of metals. This process is called oxidation.
Often, chemical elements, interacting with a metal or alloy, contribute to the appearance of sulfur or chloride compounds. The process of forming such compounds is called patination.
If you dip a metal product into the prepared solution, it literally changes color before your eyes. A sparkling metal product takes on the appearance of an antique product in a few seconds.
Most chemical compounds that are used for patination and oxidation of metals are toxic and dangerous to humans. Therefore, they need to be stored in vessels with ground-in stoppers, and all work involving the release of toxic and flammable vapors and gases should be carried out in a fume hood. The cabinet doors should be slightly open.
Before changing the color of the metal, it is necessary to carry out some preparatory operations. The item is cleaned and degreased, washed well and dried in sawdust. Metal art objects and coins should never be wiped with a towel. A towel wipes off fragile patina films that are not secured with varnish; moisture remains in the deep reliefs; the fabric gets caught on high protrusions and can bend them. Sawdust quickly and evenly draws water away from the metal surface.
Patina from gray to black
Preparation of sulfuric liver: To prepare sulfuric liver, you need to mix one part of powdered sulfur with two parts of potash in a tin can and put on fire. After a few minutes, the powder will melt, darken and begin to sinter, gradually acquiring a dark brown color. (By the way, sintering of the patination mass gave the name “liver” in the old days - from the words “furnace”, “sinter”.) During sintering, sulfur vapors can ignite with a weak blue-green flame. Do not knock down the flame - it will not deteriorate the quality of the sulfur liver. After about 15 minutes, stop sintering. For long-term storage, crush the sulfur liver into powder and place it in a glass jar with a tight lid.
Method #1 Applies to: Copper, sterling silver, and bronze or brass (light tint). Does not work on nickel silver. Colors: On copper and silver - a range of shades from purple/blue (difficult to obtain) to brown-gray, gray, black. On brass and bronze - only soft golden.
A durable and beautiful patina forms on the surface of copper treated in an aqueous solution of liver sulfur.
When making a solution in 1 liter of water, add 10-20 g of liver sulfur powder. The patina obtained on metal with a solution of sulfur liver is durable and beautiful, deep black in color. But such intense coloring is not always necessary. Sometimes, to give an antique look to a copper product, it is enough to apply a light gray patina. Pour 2-3 g of table salt and 2-3 g of sulfur liver into a liter of water. Dip a copper plate into the solution. After the required gray color appears, rinse the plate with clean water and dry.
Method No. 2 To blacken a copper item, prepare a saturated solution of copper sulfate, add ammonia to it until the mixture takes on a bright transparent blue color. The copper item being processed is dipped into this solution for a few minutes, then removed and slightly heated until it turns black.
Method No. 3 The copper item to be blackened is first cleaned with fine sandpaper, after which try not to touch its cleaned surface with your fingers. It is then either immersed in a liquid solution of platinum chloride or moistened with it using a brush. This solution, if it does not have an acidic reaction, is slightly acidified with hydrochloric acid.
Method No. 4 A very durable blackening of copper products is obtained by immersing them in a saturated solution of copper metal in nitric acid and then heating it slightly.
Patina red-brown
An aqueous solution of zinc chloride and copper sulfate colors copper red-brown. Mix one part copper sulfate with one part zinc chloride and dilute in two parts water. A few minutes are enough for the copper to acquire a red-brown color. After washing and drying, wipe the metal surface with oil.
Patina from light brown to black
Blackening of the metal is observed when copper is patinated with ammonium sulfide. 20 g of ammonium sulfide is diluted in a liter of water. The product is dipped into the resulting solution or poured on top and wiped with a brush. The work is carried out in a fume hood. Sulfur ions present in an aqueous solution of ammonium sulfide interact with copper ions. Black copper sulfide is formed. The intensity of the patina on the metal can be of different shades, from light brown to black. The color is adjusted by changing the heating temperature of the plate before patination.
Patina light brown
Grams per liter: sodium dichromate - 124 nitric acid (density 1.40 gcm3) - 15.5 hydrochloric acid (1.192) - 4.65 ammonium sulfide 18% solution - 3-5 applied with a brush immediately after preparation, rinse off after 4-5 hours and repeat after drying 2 times, polish with a dry cloth.
Dark brown to warm black patina
Grams per liter: ammonium persulfate - 9.35 sodium hydroxide - 50.0 for 5-25 minutes in a bath with a solution heated to 90 -95 degrees. rinse, dry, repeat 2-3 times
Olive to brown patina
Grams per liter: Berthollet salt - 50*70 copper nitrate - 40*50 ammonium chloride - 80*100 for 10-15 minutes in a bath with a heated solution to 60-70 degrees. the resulting films have mechanical strength and corrosion resistance
Patina brown-black
Grams per liter: ammonium molybdate - 10 ammonia 25% aqueous solution - 7 solution must be heated to 60 - 70 degrees
Golden patina
Grams per liter: copper sulfide - 0.6 sodium hydroxide - 180 milk sugar - 180
a solution of alkali and lactose is prepared separately and only then poured together, boiled for 15 minutes and copper sulfide added. place the product in a heated to 90 gr. solution for 15 minutes.
Patina golden brown with crimson tarnish and moderate shine
After cleaning copper coins, you can create an artificial patina on them by placing 50 g of copper sulfate and 5 g of potassium permanganate per 1 liter of water in a solution, heating it to a temperature of 70-80C and holding it there until the desired color is obtained.
Green patina
The surface of copper, brass or bronze products can be painted green in various ways.
Method No. 1 The surface of things using a sponge is first lubricated with a highly diluted solution of copper nitrate with the addition of a small amount of table salt. Then, when the item dries, it is lubricated in exactly the same way with a solution of 1 part potassium oxalate and 5 parts ammonia in 94 parts weak vinegar. Let it dry again and again lubricate with the first solution; then, after drying, again with a second solution, etc. alternately until the coloring acquires the proper strength. Before lubricating, the sponge soaked in the solution should be squeezed out firmly so that it is damp, but not wet. After painting the surface, rub the items thoroughly with hard hair brushes, especially in the recesses and crevices. After 8-14 days of work, a brownish-greenish color is obtained.
Method No. 2 Things are rubbed in several stages with cloth soaked in crude oleic acid (a product obtained at stearin factories). On the surface of things, a dark green layer of copper oleic acid is first formed, which, under the influence of oxygen and air moisture, gradually turns into lighter green copper carbonate. The process is significantly accelerated if oleic acid is first infused on copper shavings for quite a long time, and after each lubrication with such acid, after the lubricant has dried, the items are lightly sprayed (no more than a few drops!) with an aqueous solution of ammonium carbonate.
More:
ABOUT BLACKING BRONZE Anyone who designs and/or manufactures optical devices themselves knows that the best material for their metal parts is bronze.
However, bronze, especially the best varieties for optics, which contain a relatively large amount of zinc, have a serious drawback - they do not perceive blackening well or do not perceive it at all. The coating that can be obtained using common methods (anodizing, chemical patination) is more suitable for decorative purposes - it turns out glossy, not strong enough and durable. The method of blackening bronze described below gives a matte, durable and durable coating; suitable even for detachable connections - threads, bayonets. This method is a modification of the well-known bituminization procedure. The innovation is that during the coating process the product is exposed to prolonged exposure to bright light. Natural bitumens have some photosensitivity. Photography pioneers even tried to use them as light-sensitive materials. Under the influence of light, bitumen is compacted and strengthened, increasing wear and chemical resistance, while maintaining some elasticity. The coating can be applied at home without any special precautions. Expensive or specially available materials are not required. For those interested, the coating procedure is described in detail below. You will need: 1. Natural bitumen varnish (“Kuzbasslak”, BT-5100, etc.); 2. Solvent based on ethyl acetate (646, 647, etc.) or pure ethyl acetate, but it is more expensive and does not significantly improve the quality of the coating; 3. Clean glass jar; better - a suitable sized quartz glass vessel; 4. Clean, grease-free ceramic tiles. You can use kitchenware, but it will leave dark marks on it that will be difficult to remove; 5. Wire hook and tweezers (or pliers with long sharp ends - “duckbills”); 6. Household, new, latex or plastic gloves. Surgical ones are not suitable - they are sprinkled with talcum powder; 7. Hard toothbrush with synthetic bristles; 8. Several toothpicks; 9. Kitchen cleaning powder with microabrasive (cheap varieties; say, “Gala”); 10. A piece of aluminum foil for baking and tape. DURING THE PROCESSING PROCESS, YOU MUST NOT TOUCH THE PRODUCT WITH YOUR FINGERS. It is not advisable to even handle it with gloved hands. It is best to get used to performing all operations with a tool that must be degreased. Application technology: 1. Prepare a solution of varnish in a solvent in advance, in a ratio of 1:20 to 1:5 by volume. The thickness of the finished coating varies from 6 to 20 microns, and the color - from 50% gray to almost black. The remaining properties of the coating do not change significantly. 2. The finished part is moistened generously under running tap water and sprinkled with cleaning powder. Then carefully and diligently, with pressure, wipe with a toothbrush. Particular attention is paid to threads, internal corners, grooves, grooves and depressions. Deep holes, blind and through, are wiped with the soaked tip of a toothpick, and then the remaining (possibly) wood fibers are carefully removed from there with its sharp end. On sharp edges of a part, wherever possible, chamfers should be provided during design. The purpose of the operation is to create a rough microrelief on the surface of the part. Bronze, as you know, is a eutectic alloy, the different components of which have different wear resistance. 3. The part is thoroughly washed under running water to remove any remaining powder, wiping it with the same brush and toothpick. Then rinse intensively in distilled water. Water from defrosting the refrigerator or condensation draining from the air conditioner is suitable. 4. Next, the part is dried on a ceramic tile. Drying should be carried out as quickly as possible, under a stream of hot air from a hairdryer at full throttle, so that dust does not have time to settle on the part. 5. Then the part is lowered into the varnish solution with the “insignificant” surface (i.e., the one that does not receive light during operation; most often this is the end of the part) to the bottom. The container with the varnish solution and the part is tightly closed. 6. On one side of the vessel with the varnish solution and the part, stick foil with tape - it will play the role of a reflector, ensuring uniform illumination. If it is possible to monitor the vessel during the exposure, it should be rotated at least 5-6 times during the exposure; then a foil reflector is not needed. 7. The vessel is exposed to bright sunlight for at least 12 hours. You can, say, early in the morning or in the evening put it on the south window or on the balcony, and remove it in the evening. 8. After exposure, the part is removed from the solution and carefully inspected. Precipitated dark lumps visible to the eye are carefully removed with the same toothbrush or the tip of a toothpick, but in no case with your fingers or sharp metal objects. Then the part is intensively rinsed in the same varnish solution, holding it with tweezers or platypuses. 9. The part is placed on a newly washed and degreased ceramic tile with the same “insignificant” surface down and placed in the oven of the kitchen stove turned on “at full” or in a muffle furnace. The “baking” temperature must be no less than 250 degrees/C; the oven should be set to 320-350 degrees. 10. Baking is carried out for 2-2.5 hours. DO NOT OPEN THE Oven or Oven DOOR while doing this! At the end of baking, the stove or oven is allowed to cool to room temperature, and only then can you open the door and remove the part. The coating is ready. The outer surfaces of the coating part can be painted. The paint lays down evenly and forms a dense, smooth layer. In this way I blackened a new “tail” (for the 4/3 mounting flange) for the SOLIGOR lens and two adapters for the same mounting for the M42x1 thread. No noticeable deficiencies were found during operation. Does not glare, does not peel, does not wear out on the thread or on the bayonet. The only thing that should be taken into account is that when applying a coating of maximum thickness, give an appropriate allowance when preparing drawings. Modified on 10/31/2013 08:53 by Ilan
How to create a patina effect on bronze metal with your own hands
The patina effect on bronze metal can be achieved by painting the base with a special compound or translucent dark varnish. The patina is applied with a brush to cover the depressions with a thick layer, giving them a dark shade, and making the high points lighter.
High relief points of the product are coated with light bronze paint
Bronze handles are polished during use when they come into contact with your hands. They become lighter and shinier.
To create this effect artificially, use a semi-dry brush or foam sponge. The tool is dipped in a small amount of paint. Pass along all protruding areas of the pattern.
After coating, the product is dried and varnished to prevent rapid abrasion and accidental mechanical damage.
How to make a golden patina on silver with your own hands
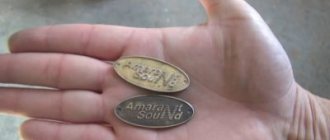
Silver coins with patina look beautiful. If they are stored in a special leather album, silver sulfide is formed under the influence of hydrogen sulfide. Patina can be gold, yellow, crimson and even black. If a silver coin has copper in it, it may develop a green patina.
After some time, changes will begin to occur. The coins will be covered with a golden patina
To obtain a golden patina on silver at home, do it yourself as follows:
- Vitriol (50 g) and potassium permanganate (5 g) are added to distilled water (1 l).
- The resulting solution is brought to 80 degrees and silver coins are dipped into it.
Do-it-yourself patination of forged products
Before changing the color and covering forged products with a protective film at home, they are cleaned, degreased, coated with primer and paint.
Patination of forged parts can be done with the following paints:
- Alkyd. Cover large outdoor items.
- Textured. They give the forged material a roughness and matte finish.
- Molotkovs. Visually “break” the craft into fragments. It is advisable to use forged products painted with a hammer only indoors. Such decorative elements will harmoniously fit into the avant-garde style of the apartment.
- Powder. They are of good quality and can last a long time. A special advantage is the low cost. Forged furniture can be powder painted only if it has not been welded or mounted before.
- Electrostatic, which have the best quality, but a high price.
After painting the forged elements with the main color, they are dried and covered with patina.
Patination is carried out in contrast:
- The dark base color is diluted with light colors.
- The light shade is patinated with dark tones.
- Metal with a textured structure is completely treated with patina.
- Quite smooth parts are not completely patinated - only some patterns, handles, curls.
Do-it-yourself patination of forged products at home is done in various ways. Patina can be applied with a brush, using gloves, or by performing artistic painting.
In the first method, a small amount of coloring agent is scooped up with a dry brush and passed over the surface in different directions. This action creates the effect of noble metal peeking out from under the base color.
In the second method of patination, gloves are put on your hands and the patina is taken. Apply it to the surface, placing accents in the right places.
When performing artistic painting on forging, several types of patina with different shades are used. When applied, the metal is visually given shape and volume.
Do-it-yourself patination of metal to look like gold
To create a patina on gold-colored kitchen handles, follow these steps:
- Mix milk sugar (180 g) with copper sulfide (0.6 g) and alkali (180 g).
- The resulting solution is heated to 90 degrees.
- Place brass handles in a warm solution for 15 minutes.
Over time, the products will acquire a beautiful golden hue.
After the transformation is completed, the fittings are rinsed with water and attached to the kitchen furniture