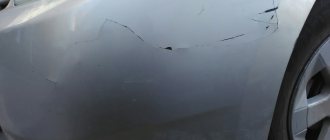
The provisions of GOST 30242 provide for the division of all existing defects in welding production into six groups. The first of them consists of various kinds of cracks - flaws in the form of a longitudinal tear in the metal at the junction. They are formed under the influence of stress that is formed after welding the workpieces, or as a result of external mechanical influence. Operation of a structure with such damage sooner or later leads to its destruction.
A crack is an unacceptable defect and must be fixed without fail. Defects of this kind form both on the weld and around it within the zones where the thermal effect remains. They can be detected by visually monitoring the quality of the connection. To examine the nature and extent of the damage in more detail, you can use a magnifying glass with high magnification. With its help, microcracks are also detected.
Crack formation during welding
A crack is a discontinuity caused by local rupture of a weld, which may occur as a result of cooling or stress.
A microcrack is a crack that has microscopic dimensions, which is detected by physical methods at no less than 50x magnification. Depending on the temperature at which cracks form, they are conventionally divided into hot and cold. Hot cracks in steels occur at temperatures exceeding 1000 °C, and cold cracks at lower temperatures. Cracks are the most serious defect in a welded joint and, as a rule, cannot be eliminated. Hot cracks are brittle intercrystalline fractures of the weld metal and heat-affected zone that occur in the solid-liquid state during the crystallization process, as well as at high temperatures in the solid state. They are tortuous, have a dark color when fractured, are highly oxidized, and spread along the grain boundaries. According to modern concepts, hot cracks are caused by two factors: the presence of liquid layers between grains during crystallization and shortening deformations.
In the range of melting and complete solidification temperatures, migration of impurities and contaminants occurs into the intergranular spaces. The presence of a liquid phase, impurities and contaminants between the grains reduces the deformability of the weld and heat-affected zone. The uneven linear and volumetric shrinkage of the weld and the base metal during cooling leads to the emergence of internal stresses, which cause the appearance of micro- and macroscopic cracks both along and across the weld.
The reasons for the formation of hot cracks during welding are:
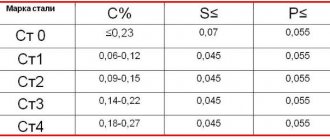
a large amount of harmful impurities (especially sulfur and phosphorus) in the metal of the workpieces being welded;
the presence in the weld metal of elements that form chemical compounds with a low solidification temperature (chromium, molybdenum, vanadium, tungsten, titanium) that disrupt the bond between grains;
rigid fastening of the workpieces to be welded or increased rigidity of the welded unit, making it difficult to move the workpieces when cooling.
Cold cracks are local inter- or transcrystalline fractures of welded joints that form in the metal when it cools to relatively low temperatures (usually below 200 °C) or when the finished product sits. Cold cracks in the seam and transition zone are located at any angle to the seam - in the fracture they are light or with weak tarnish colors and occur mainly during arc welding of low-alloy steel of large thickness. Most often, cracks occur in the transition zone due to incorrect welding technique or incorrectly selected filler material. To prevent the formation of cold cracks, use:
calcination of fluxes and electrodes before welding;
preheating of welded workpieces to 250-450 °C;
conducting the welding process in a mode with optimal parameters;
applying stitches in the correct sequence;
slow cooling of the product after welding;
carrying out softening annealing immediately after welding to relieve residual stresses.
Common causes of cracks, both hot and cold, in the seams of welded joints are:
too high rigidity of connections;
The weld size is too small for the given joint thickness;
non-compliance or incorrect choice of welding technology;
defects in the weld;
t improper preparation of the joint for welding;
unsatisfactory quality or incorrect choice of electrode type;
the use of increased values of welding current, which can lead to the appearance of coarse-grained, embrittled sections of the structure;
high content of carbon or alloying elements in the base metal, not taken into account when choosing a welding technology.
To prevent the formation of cracks in the seams of welded joints, it is necessary:
develop metal structures and welding technology that eliminate the use of joints with high rigidity;
when welding products of sufficiently large thickness, increase the size of the welds;
do not allow narrow beads when welding, weld with a full-size seam in short sections of 200-250 mm;
choose the sequence of welding seams in such a way as to leave the end sections of the connection unwelded for as long as possible, so that they have the maximum possible mobility;
ensure continuity and good fusion of welds;
in some cases, provide preheating of the parts being welded;
Assemble the connections with the same gap required by the technology; if necessary, use tightening assembly devices to equalize the gap;
when welding, do not allow welding modes that are too high in terms of welding current;
if possible, make the weld seam multi-pass, since single-pass seams can be more fragile, and in multi-pass seams, each previous layer is annealed;
fill the groove immediately after completing welding of the root of the seam, since the area of the root seam is most often exposed to stress.
Didn't find what you were looking for? Use the search:
Best sayings:
Only sleep brings a student closer to the end of the lecture.
And someone else's snoring alienates him. 8944 – | 7614 – or read all.
95.47.253.202 © studopedia.ru Not the author of the materials posted. But it provides free use. Is there a copyright violation? Write to us | Feedback.
Disable adBlock! and refresh the page (F5)
very necessary
Reasons for the formation of cold cracks during welding
For cold cracks to form, three components are required:
1. The microstructure of the metal in the weld or in the heat-affected zone is highly sensitive to hydrogen. For example, the martensitic structure, or lower bainite structure, has good sensitivity to hydrogen, and it is formed during the welding of high-strength steels.
2. In the heat-affected zone, the presence of diffusion hydrogen is necessary, penetrating into the heat-affected zone from the weld metal.
3. The presence of tensile stresses in the heat-affected zone is necessary.
In general, the main cause of cold cracking during welding is hydrogen. Hydrogen can penetrate into the weld from the electrode coating, flux, or the environment. Hydrogen may also be present in shielding gases or contaminants on the welding wire or weld edges.
If there is rust on the welded edges, then it becomes an active source of hydrogen for the weld. In manual arc welding, the most common “supplier” of hydrogen is the electrode coating.
Lack of fusion and lack of penetration: causes
Lack of penetration and lack of fusion
Defects - lack of fusion and lack of fusion - are the lack of connection between the base material and the metal of the welded joint.
Non-fusion occurs at high speeds of the welding process and current strengths of more than 15000C. To prevent non-fusion, it is necessary to reduce the welding speed, reduce the time gap between the formation and filling of the groove, and thoroughly clean the welding area from oils and contaminants. Non-fusion can be located:
- at the root of the weld;
- on the side;
- between the rollers.
Lack of penetration occurs due to the inability of the molten metal to reach the root of the weld. There may be several reasons for lack of penetration:
- insufficient welding current;
- electrode movement speed is too high;
- arc length increased;
- the bevel angle is too small;
- distortion of welded edges;
- insufficient gap between edges;
- incorrectly selected—increased—electrode diameter.
- slag getting into the gaps between the edges;
- inadequate choice of polarity for this type of electrodes.
Lack of penetration is a very dangerous and unacceptable welding defect.
Mechanism of cold crack formation
The effect of hydrogen on a welded joint can be temporary or permanent. Temporary influence appears when the welded joint is tested immediately after welding is completed, or shortly after it. In such cases, certain difficulties may arise, especially when monitoring and assessing the plastic properties of the connection. Samples, even at small bend angles, may already have surface cracks.
Such cracks appear due to the diffusion of hydrogen into places where pores or slag inclusions are formed, as well as in the case of the transformation of atomic hydrogen into molecular hydrogen. After hydrogen transforms into a molecular state, high gas pressure arises in places where it accumulates, and this causes the appearance of shiny pores in the metal.
The transition of hydrogen to the molecular state occurs at low temperatures, less than 200°C. At elevated temperatures, hydrogen in welded joints is in an atomic state.
The permanent influence of hydrogen includes its effect on the formation of cold cracks. The tendency of a metal to form cracks is primarily due to its hardenability or embrittlement, which is the result of structural transformations.
Zones along the boundaries of primary grains can be damaged as a result of various processes, not necessarily due to exposure to hydrogen. This can occur when some of the sulfides or carbides dissolve and, as a consequence, the precipitation of sulfides and carbides from solid phases. This process reduces the strength at the grain boundaries. And when transitioning to a molecular state, hydrogen exerts strong pressure on these zones, which can cause the formation of cold cracks.
Classification of defects.
For various reasons, defects in welded joints can occur, which have a significant impact on the quality and strength of welded structures. All defects today are usually divided into several groups, namely:
- External defects: external defects include various cracks, undercuts and craters, which significantly reduce the strength of the structure.
- Internal: internal defects are usually classified as various inclusions, weld porosity, and lack of penetration.
- Through: cracks and various missing.
Very often, defects arise due to a direct violation of welding technology or low qualifications of the welder himself or incorrect selection of materials. I would also like to note that often the cause may be equipment malfunction or poor quality of the materials themselves. Therefore, the causes of the defect need to be understood in detail, this will help eliminate the possibility of their occurrence in the future.
How to prevent cold cracks
The risk of cold cracks can be reduced by eliminating the harmful effects of hydrogen. This can be achieved by using certain welding techniques:
1. To prevent the formation of cold cracks during welding, it is necessary to protect the welded joint from exposure to hydrogen. To reduce the risk of hydrogen entering the weld metal, it is necessary to dry the electrodes or flux at a temperature of 300-350°C for several hours before welding.
2. You also need to keep in mind that the welding wire is pickled in hydrochloric acid. Becomes a source of hydrogen. And if, when assessing the weldability of steel, the appearance of cold cracks becomes probable, then it is better, if possible, to refuse such wire.
3. Heating the welded joint after welding greatly promotes the removal of hydrogen from the weld metal. The subsequent heating temperature is recommended within 100-200°C, and the duration is from 30 minutes to several hours. This depends on the type of steel and the thickness of the metal being welded.
When welding high-strength structural steels, the recommended heating temperature is 100-150°C, heating time is 30-60 minutes. When welding metals with a thickness of more than 40 mm, the duration of subsequent heating must be ensured for 3-5 hours. In the case when very thick steels are welded (for example, 200, 300 or 400 mm), it would be advisable to repeatedly interrupt the welding process and perform subsequent heating.
Hot and cold cracks during welding
Content:
According to GOST 30242, all defects are divided into six groups. The first of them belongs entirely to cracks. A weld defect, called a crack, is a discontinuity in the form of a metal rupture. At the point of formation, a source of stress appears, which during operation of the product will lead to further destruction.
Therefore, the crack is considered an unacceptable defect and must be eliminated. The place where cracks form is both in the weld itself and in the heat-affected zone, where the thermal effect remains. It is not difficult to see this defect upon visual inspection. To clarify the appearance and size, you can use a magnifying glass with high magnification. It must be used to detect microcracks.
Types of cracks
There are two types of cracks: the first is called hot or high-temperature, and the second is called cold or low-temperature. Each of them has a gradation based on other characteristics. Hot and cold cracks during welding are divided according to direction - longitudinal, transverse, can be radial or located in the crater of the bead. Hot cracks form in metal at a very high temperature - more than 1000°C, and for cold cracks a lower value of 200-300°C is sufficient.
Hot
Hot cracks are, by definition, fractures of an intercrystalline nature. The color of the fracture is dark and the shape is sinuous. Oxidation is severe.
Reasons for the formation of hot cracks during welding:
- Deformations caused by shortening.
- Liquid layers between grains.
- The inability to move parts for proper cooling, which occurs when they are fixed too tightly.
- Disruption of bonds between grains due to the presence of elements with a low solidification temperature.
- Presence of impurities and inclusions. Sulfur and phosphorus are especially influential.
Hot cracks during welding have the following sequence of formation:
- after heating stops, the hot metal begins to cool gradually;
- at a certain temperature, crystals begin to form in the weld, between which there are layers in liquid form;
- an increase in stress occurs, leading to a decrease in the deformability of the seam and the area around it.
As a result of unequal shrinkage of the seam and the welded material after cooling, internal stresses arise, causing cracks to appear in different directions.
Cold
Cold cracks during welding form in the body of the seam itself and nearby. They are located in the longitudinal and transverse directions at any angle to the seam. The fracture has a light shade. The appearance time is the cooling period of the parts. Cracks can appear starting at a temperature of 300 °C, which is why they are called cold in contrast to hot.
The most common places for cold cracks to appear are the root of the weld and the place where the bead and the metal being welded meet. This type of crack can appear not only on the surface, but also inside the metal. Their length may be short. Internal cracks are more difficult to detect.
Cold cracks do not have as strong branching as hot cracks. Their disclosure is also smaller. When reacting with oxygen in the air, their color turns brown or bluish. High-strength and low-alloy steels are the most vulnerable.
Cold cracks during welding - causes:
- The connection of the parts being welded is too strong.
- Small electrode diameter that does not correspond to the thickness of the parts being welded.
- Failure to comply with welding technology.
- Increased carbon content.
- Cooling too fast.
- Presence of internal stresses.
- Wrong choice of electrode.
If possible, situations where cold cracks form during welding should be avoided.
Types of deviations of the shape of the outer surface of the seam from the specified values
The following defects are considered to be defects in the shape of the weld:
- Continuous undercuts are continuous indentations located on the outer part of the seam bead. If undercuts are located on the root side of a single-sided weld and are formed due to shrinkage along the boundary, they are called shrinkage grooves. Undercuts are common surface defects that are caused by too high an arc voltage when welding fillet welds or by inaccurate electrode guidance. In this case, one of the edges melts more deeply, which leads to metal flowing onto the part in a horizontal position. There is not enough metal to fill the groove. When welding butt seams, undercuts are rarely formed. If the welding speed and arc voltage are too high, double-sided undercuts usually occur. The same type of defect occurs in automatic welding if the processing angle is increased.
- Excess of convexity in a butt or fillet weld is an excess of deposited metal on the face of the welds in excess of the required value.
- If an excess of deposited metal in excess of the established value is located on the reverse side of the butt weld, then such a defect is called excess penetration. A variation is local excess melting.
- If excess deposited metal flows onto the base metal, but does not fuse with it, then such a defect is called overlay.
- Linear displacement occurs if the surfaces being welded are parallel, but not at the same level.
- Angular is the displacement between two surfaces when they are located at an angle that differs from the required one.
- Natik is formed from weld metal that settles under the influence of gravity. Natik is formed in horizontal, overhead, bottom welding positions, in corner joints and lap joints.
- When burns occur, the metal of the weld pool follows, forming a through hole. The causes of burn-through may be contamination of the surface of the base metal or electrode.
- Incomplete filling of the edge groove occurs due to a lack of filler material.
- If in a corner joint one leg is significantly larger than the other, then a defect of excessive asymmetry occurs.
- Uneven weld width.
- An uneven surface is the uneven shape of the seam reinforcement along its length.
- A root weld concavity is a shallow groove on the root side of a weld that is formed due to shrinkage.
- Due to the occurrence of bubbles during the solidification of the metal, porosity is formed at the root of the weld.
- Recovery. This defect is a local surface roughness in the recovery zone of the welding process.
Crystallization
Crystallization is a process involving the formation of crystals. This occurs when a metal changes from a liquid to a solid state. This is exactly what happens when welding metal products.
This process in the weld leads to deformation of the metals and the formation of cracks. What types of cracks form during crystallization of a weld? Hot ones, which have the second name crystallization, can appear in a metal weld at the last stage of crystallization. In this case, the temperature is close to solidus, when the last drops of liquid metal disappear.
Prevention of cracks
There are certain measures that reduce the likelihood of various types of cracks:
- Reducing the rigidity of the connection of welded parts.
- Select the width of the weld commensurate with the thickness of the parts.
- The value of the welding current must correspond to the recommended type of connection. Exceeding will result in overheating.
- Select welding wire with low sulfur and carbon content.
- Observe the angle of inclination of the electrode.
- The seam should not be too narrow.
- Application of a multi-pass welding method. Single pass seams are less durable.
Precautionary measures
To prevent hot or cold cracks from forming during or after work, you need to remember a few simple rules and stick to them.
Reliable fixation of the elements during operation will ensure uniform temperature distribution in the product.
It is also worth considering the wall thickness of the metal part and selecting a seam according to it: if the seam is too small in relation to the part, problems will most likely arise.
In addition to the seam, select the welding mode (from temperature to the direction of the electric field), and the angle of inclination of the rod.
Prepare parts and materials before work. Parts need to be thermally treated, and electrodes must be selected taking into account the type of welding, element material and temperature.
You should not buy cheap electrodes, this can affect the accuracy and uniformity of the seam. Do not overheat or exceed the amperage for the selected type of welding.
In order not to provoke the appearance of hot deformations, you must first of all pay attention to the instructions for working with specific steels or alloys.
In addition, it is important to increase or decrease the width of the seam in accordance with the expansion or contraction of the cross-section of the product. The seams must be solid.
