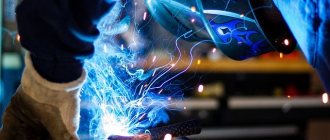
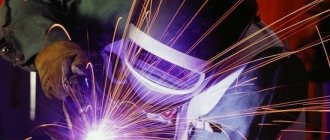
Welding electrodes and welded joints can be located differently in space. And the choice of this very position will depend not on the personal preferences of the master, but on the welding technology, the type and characteristics of the metal, as well as other factors (for example, inaccessibility of the welding site).
Being in different positions, almost any direction of the welded joint is possible, and a number of features follow from this. For example, the execution of horizontal bottom seams can be entrusted to an entry-level welder. But ceiling vertical seams can only be done by a master of his craft. In short, there are many nuances, which we will talk about in this article.
Welding position
Each type of work requires its own spatial position, and some complex metal structures require completely different spatial positions.
The position of the seam during welding can be bottom, horizontal, vertical and ceiling. Let's look at each of them in more detail.
Down position
The lower position is often found in the work of beginners, since they are usually tasked with welding simple metal structures. There are no strict quality requirements for welding in the lower position. In the lower position, welding of butt and fillet welds is possible.
Requirements for welds
The quality of welds is assessed by non-destructive and destructive testing methods. The first includes ultrasound and x-ray scanning of the seams. Such checks are carried out at particularly critical joints subject to high loads.
During destructive testing, seam samples are checked for tension and fracture, based on which the following is assessed:
The required level of each characteristic is specified in the welding drawings.
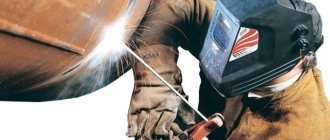
Electrode position
The position and movement of the electrode when welding is also very important. Let's give a simple example. You need to weld the bottom seam. In such situations, the quality of the weld largely depends on the amount of slag formed during welding. Slag can either ruin your work or help improve the quality of the welded joint; you just need to control this process. And the correct position of the electrode just helps to monitor the amount of slag, increase or decrease its amount.
There are three types of electrode position during welding: forward, backward, and straight (or 90 degrees). Let's take a closer look at each type.
Forward angle welding
Forward angle welding is rarely used in manual arc welding. This is due to the fact that during welding, slag forms and accumulates in front of the electrode, making welding inconvenient. In addition, the slag will interfere with the stable burning of the arc, and the quality of the weld will deteriorate. But this position is justified if you are welding in a hard-to-reach place.
Backward angle welding
Backward miter welding is used when butt or fillet welds need to be welded. In this position, the slag is forced out of the weld pool, which is generally good. In this case, the welded joint crystallizes very quickly.
At 90 degrees
A very interesting situation. Thanks to it, the welder can quite accurately control the movement of slag, directing it to the welding zone in the required quantity. This is very good for a welded joint. But you need to make sure that the slag does not end up in front of the electrode. If this happens, change the position to "angle back" and change the direction of the slag.
Many beginners ask what is the universal or best angle of inclination of the electrode when welding. There is no answer to this question. Only during work can you accurately determine which position will be optimal. Or it may happen that during the course of your work you will have to change positions from one to another several times.
The provisions described above apply to the formation of a welded joint using manual arc welding. If you plan to work with a semi-automatic or automatic machine, then you will need to take into account the characteristics of the protective gas used.
What is needed to operate an inverter
An inverter-type welding machine or power source necessary to create a welding arc. There are a huge number of different manufacturers and brands of inverters, of course, prices for inverters vary significantly.
However, the operating principle of all inverters is the same; differences exist in the current-voltage characteristics and quality of the equipment.
To get started you need:
- Welding machine;
- Electrodes;
- Mask;
- Welding gaiters;
- Workwear (robes) and safety shoes
- Welder's hammer
- Metal brush
If you decide to try yourself for the first time, choose inexpensive materials and tools. For training, a mid-price welding inverter (which can be rented), 3 mm electrodes and a Chameleon mask are suitable.
Required Tools
For welding work you need a set of tools and special protection.
This is the welding machine itself, electrodes, hammer and brush. The diameter of the electrodes depends on the material to be worked on. Don't forget about protection. To protect your eyes, a welding mask is a must, and you should also wear thick clothing, suede gloves, and durable shoes. Devices that convert alternating current into direct current are also useful - this is a rectifier, inverter or transformer.
Basic mistakes
Let's look at the main mistakes that beginners make when welding RDS:
- Rush. There is no need to rush to move the electrode, the metal must melt, so get used to slow, calm movements.
- Inability to distinguish slag from metal. Often, beginners think that they have welded the joint, but after knocking off the slag, there is a lot of lack of welding in it. The fact is that when welding, it seems that the joint is filled with liquid metal - in fact it is slag. Liquid metal looks white through a filter, and slag looks red.
- Trembling hand. A hand support will help to achieve a constant gap between the tip of the electrode and the workpiece. Never hold your hand suspended, otherwise the electrode will stick. You can rest your hand on the table or knee.
- Do not immediately beat off the slag. (although I really want to check the quality of the connection). Let it cool a little. This way you will not damage the seam, and flying hot slag that gets on your skin will not cause a burn.
Let's sum it up
Having learned to work with welding equipment, it will be possible to solve many everyday problems that often arise when working in the country or in the garage. Beginners should pay special attention to the polarity of welding parts of different thicknesses with an inverter.
By understanding how to properly configure the equipment and choose an electrode, you will be able to obtain high-quality seams on any product. Be sure to pay attention to the forward and reverse polarity of connecting the welding inverter.
When welding thick parts, direct polarity is used when welding with an inverter, and for thin parts, reverse polarity is used.
Sources
- https://moiinstrumentu.ru/kak-varit-svarkoj.html
- https://WikiMetall.ru/spravochnik/kak-nauchitsja-varit-jelektrosvarkoj.html
- https://mrmetall.ru/kak-pravilno-varit-jelektrodami-nachinajushhim-jelektrosvarkoj/
- https://sovet-ingenera.com/santeh/svarka/elektrosvarka-dlya-nachinayushhix.html
- https://kak-sdelano.ru/instrumentyi/cvarka-invertorom-dlya-nachinayushhix
- https://instrumentiks.ru/sovety/svarka-invertorom
- https://tokar.guru/hochu-vse-znat/svarka-elektrodami-kak-pravilno-varit-nachinayuschim.html
- https://svaring.com/welding/teorija/azy-svarki-elektrodami
- https://www.svarbi.ru/articles/kak-varit-svarkoy-elektrodami-dlya-nachinayushchikh/
- https://tutsvarka.ru/vidy/svarka-invertorom-dlya-nachinayushhih
Safety precautions + possible defects
The welding process must not only be correct, but also safe. Losing your eyesight or getting a major burn are some of the many dangers that await a person who decides to take the path of a welder in the Russian Federation.
Precautionary measures:
- inspection of instruments for mechanical damage;
- grounding;
- regularly checking the connection between the workpiece and the contact;
- high-quality cable insulation;
- humidity not more than 75%;
- use of masks, gloves and other personal protective equipment;
- presence of a fire extinguisher near the workplace.
Now about the defects. For a novice welder, punctures during training are par for the course. Knowing the reasons for certain distortions, a person will be able to prevent the occurrence of such situations, therefore, the risk of being in a disadvantageous position is reduced significantly.
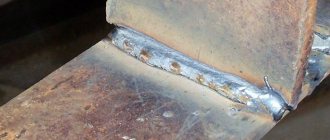
An ideal seam is neat in appearance, with the same thickness and height along its entire length. If there are jambs, in 80% of cases they will be visible immediately. Let's take a closer look at the most common defects.
| Defect | Cause |
| Lack of penetration | Occurs when the rod moves at high speed along the seam, or due to incorrect voltage calibration in the circuit. |
| Undercut | Groove along the seam. Occurs due to the electric arc being too long. Correction during the welding process requires adjustment of the amperage. |
| Burn-through | Holes in the welded surface at the seam site. |
| Porosity | When a draft in the room blows away a gas cloud that protects the bath from external influences. |
Sometimes transverse/longitudinal cracks may appear, but here the defect indirectly affects the welder, because the material may simply not withstand the temperature conditions. For each type of metal, it is necessary to select specific operating conditions. Even an experienced welder cannot insure himself against failures in this regard.
Criteria for selecting equipment and materials
Before starting any training, it is necessary to equip a home craftsman welding station. First of all, this concerns welding machines and electrodes, and then move on to the basics.
To carry out one-time work, you can rent a welding machine from specialized companies, but if there is a lot of work to be done, the best solution would be to purchase a reliable unit with a sufficient level of power.
You can weld with gas, but this is a more expensive method. For various purposes, the industry produces the following types of equipment:
- welding machine (transformer), designed to convert alternating currents into high-power welding current. Cheap welding machines can overheat greatly even under light loads, and they produce uneven welding current with large differences;
- Rectifiers convert alternating current from the network into direct current. These are the most productive devices with good characteristics, but they cost an order of magnitude more;
- Modern inverters are capable of converting alternating current into direct current; they are distinguished by high performance characteristics with small dimensions and weight. Today this is the most affordable, reliable type of welding equipment; many welders use them. This is the best option for beginners, where you can practice the basics of working with electrodes.
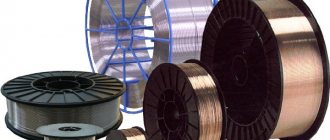
Beginners need to know that electrodes are used for electric arc welding.
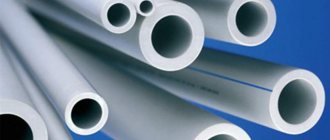
Information about electrodes refers to the basics of training. The success of welding depends on the quality of the electrode and a suitable core composition. The product is quite simple in design. This is a steel wire made of various materials and alloys, with a special coating applied to it.
The coating prevents unwanted gases from entering the weld pool. For household use, electrodes with a core thickness of 3 mm are most suitable. Manual welding of very thin sheet metal is carried out using electrodes with a cross section of 2 mm.
Selecting the angle of inclination
It is necessary to move the electrode at different angles. The choice of the desired position depends on the type of material, the location of the parts in space and the thickness of the metal. The main methods of core management include three methods.
Angle forward
In this case, the core is driven at an angle from 30° to 60°. In this position of the electrode, the molten coating forms slag.
It moves after the weld pool and reliably covers it from the invasion of harmful gases. Some slag that falls in front of the weld is displaced by molten metal on the sides of the joint.
If a large amount of slag forms in front of the bath, then the slope must be reduced. In rare cases, the tilt can be adjusted to a right angle. This must be done when there is severe slag formation.
In this case, it does not have time to harden and fills the bath, extinguishing the welding arc. Therefore, it is necessary to ignite the arc at a right angle, gradually changing it, to achieve normal slag formation.
This method is used when a small depth of heating of the base metal is necessary, for welding ceiling joints, welding a vertical seam on a channel, welding pipes with a fixed joint and for making a root weld on thick metal workpieces.
Perpendicular
It is quite difficult to constantly hold the electrode perpendicular to the surface, so the method requires sufficient skills as an electric welder.
Used for welding in inaccessible places where it is not possible to tilt the electrode at a different angle. In this case, you can achieve a small penetration of the metal parts.
Cutting edges for welding
The weld will be of high quality after carefully carried out preparatory work. They are necessary before welding structures whose element thickness exceeds 5 millimeters. For one-sided welding. The preparatory operation is called edge cutting. The rules and quality of such work are determined by GOST requirements. Removal of contamination from the entire edge should be carried out at a distance of at least 20 millimeters from the future welding site.
Download GOST 5264-80
The main types of this operation are:
- through careful cutting;
- without preliminary cutting;
- the so-called flanging.
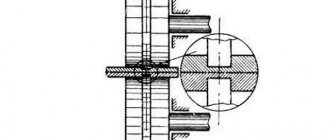
Edge preparation and parameters
The flanging is made one-sided for corner joints, double-sided for butt joints.
Preparation is carried out manually (using a file, sandpaper, metal brush) or using electric tools (drills equipped with the necessary attachments, grinders, factory equipment).
For metal with a thickness ranging from 3 mm to 26 mm, a V-shaped single-sided or double-sided type of edge bevel is used. For metal with a thickness of 12 to 60 mm, an X-shaped type of bevel is made.
Edge preparation procedure
A procedure has been established for preparing the material for subsequent work with any type of welded joints. It includes the following items:
- cleaning the edge of the metal (any dirt, deposits, corrosion are removed);
- removing the necessary chamfers (this operation depends on the method used for welding);
- preparation of the gap (size, quality must correspond to a certain type).
Cleaning the edge of the metal