In a modern home workshop, in addition to carpentry and electrical tools, there are often compact devices for solving various kinds of problems. Let's look at how to choose the right one and how to insert staples into a construction stapler or clips of nails. Let's get acquainted with the possible reasons for the malfunction of a simple device and solutions to each situation. Read to the end, and you will learn about the recommendations of specialists for operating equipment and doing your own repairs.
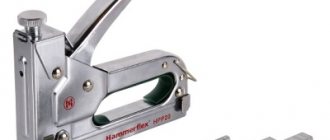
Household manual stapler Source onlinetrade.ru
How to open and thread a large stationery stapler with staples: description, video
How to open and load a large office stapler with staples: description, video
So, you bought staples and want to load the stapler. How to open and thread a large stapler with staples? Description in the form of instructions:
- Bend back the plastic cover of the stapler, which is held on by a spring. Opening the roof pulls a spring. The freed up space is the staple groove. Many large staplers have latches that need to be pulled back.
- Take the staples - one section. Insert them into the groove, the ends should point down.
- Close the stapler cover.
- Click them once without paper. If a paper clip with bent ends falls out, it means the stapler is working.
Advice: If the staple that has fallen out is bent incorrectly or has not fallen out at all, then repeat the procedure or buy another stapler; there may be a malfunction.
You can watch the video to learn how to thread the stapler correctly. A visual demonstration will help you cope with this process quickly and without problems. In addition, the video explains how to repair a stapler.
Algorithm for disassembling the stapler and troubleshooting problems
To independently repair a broken stapler for mechanical furniture, you will need the following tools:
- screwdrivers;
- vice;
- needle file or small file for metal;
- hammer;
- pliers.
In some cases, you may also need a hand saw for metal or a grinder; when repairing power tools, a multimeter and a soldering iron with a soldering kit.
To check the freedom of movement of consumables inside the magazine, simply open it or pull out the pusher.
Replacing a spring or repairing a worn impact mechanism is performed in the following sequence:
- take out the remaining consumables from the store;
- unscrew the screw that regulates the impact force;
- disassemble the tool body, to do this, remove the washers and pull out the pins;
- take out the impact mechanism;
- if the fault is related to the spring, then replace it;
- when the firing pin is worn out (there is wear in the striker or at the point of contact with the rocker arm of the starting lever), it is clamped in a vice and the parts are given their original shape using a file or needle file;
- Reassemble the tool in reverse order, lubricating the impact mechanism.
The spring stop on the impact mechanism may also be broken (photo below), and because of this, the staple gun does not work well. In this case, to eliminate the malfunction, you will need to weld the stop using welding.
Repairs do not take much time and often do not require financial costs, but they extend the service life of the staple gun.
How to disassemble and repair a pneumatic staple gun is shown in the video below.
Disassembly and preventative maintenance of the electric model of the staple gun is shown in the video below.
How to refill a mechanical stapler?
Furniture staplers are divided into three types:
- mechanical;
- electrical;
- pneumatic.
It is necessary to take into account the specifics of refilling the tool, which directly depends on its moving mechanism.
The design of such staplers is not much different from each other. They consist of a lever handle, through which mechanical pressure is applied, and at the bottom of the tool there is a metal plate that opens the receiver. This receptacle can accommodate staples.
The mechanical type is driven by the applied force of the hands, which indicates their weak power. The model contains a small number of staples. With their help it will not be possible to nail hard and thick structures. However, such assistants are light in weight and compact in size, so they will be needed for processing hard-to-reach places. The mechanical type of stapler is available due to its low price, is compact for carrying and easy to maneuver.
To insert staples into a mechanical stapler, you must follow these steps:
- To refill the stapler, you must first open the plate. To do this, you should take it on both sides with your thumb and forefinger, and then pull it towards you and down a little. Due to this, the metal tab located on the back of the plate will be pressed out.
- Then you need to pull out a metal spring, similar to the one found in an ordinary office stapler. If the staples are still loaded, they will fall out of the stapler when the spring is pulled out.
- The staples must be inserted into the receiver, which looks like a U-shaped hole.
- Then the spring is returned to its place and the metal tab is closed.
After completing these steps step by step, the tool will become suitable for further use.
What to do if a bracket gets stuck
It is worth noting another very important point that will help you in your work. It happens that the staples become bent and get stuck in the exit hole. They cannot be hammered into the surface and cannot be pulled out by hand.
In this case, we will need to pull out the feed magazine completely.
This option exists for almost all professional staplers.
First you will have to repeat the opening of the metal plate and pull out the spring.
Next, in the middle of the lower part of the stapler you need to find an iron part, slightly protruding from both sides. Grasp it tightly with your thumb and forefinger on both sides and pull down forcefully.
This will remove the entire feed magazine that was in the tool.
You will see a jammed staple that can now be easily pulled out by hand.
Putting the stapler back together is not difficult: the entire pulled out block returns to its place with a press. You should hear a click when you do this. Afterwards, do not forget to replace the spring.
Stapling Types
Not everyone knows that office staplers differ depending on how they fasten sheets.
Most office workers are familiar with the common closed-type stitching options. This type of stationery stapler bends the edges of the staples inward. This is considered the most reliable way to bind paper. It is also the most common. There is also an open type. In this case, the staples are bent outward. This method is preferable to use in cases where only temporary stitching of sheets is necessary. Papers fastened in this way can be easily separated, and the marks are practically invisible. Sometimes in offices they use a special stationery stapler with straight staples. It is necessary in situations where it is necessary to attach paper (some kind of announcement or document) to a special board with a soft surface. It can be made, for example, from cork.
Loading the stapler
Staples are inserted into the internal mechanism, which, when pressed sharply on the device, shoot and fasten the sheets. When the clip runs out, it simply needs to be replaced with a new one.
If you have a full-load stapler model, then you need to insert 1 new plate of compressed staples into it. But there are other options - they put ½ of the clip. The usual pocket and office options are easy to figure out. To change the staple plate, you don’t need to look for what the schematic of a stationery stapler looks like. Simply lift the top cover and insert the clip into the groove.
There are special models with front loading. They have a button on the body, pressing which you release the spring of the mechanism. At the same time, the gutter moves forward.
It's a little more difficult to deal with professional devices. Some of them can even load 7 types of staples. At the same time, users have the opportunity to adjust the mounting depth.
Professional or household
Like all other tools, construction staplers are conventionally divided into professional and household. The difference in price is very significant - many times over. And this is justified. It's a matter of functionality, number of settings, operating modes and working resource. Household models have a short working life, as they are mainly made of plastic. Professional models are made of steel, often stainless steel. They have plastic elements, but these are metal handle covers to soften recoil. It is clear that they will work longer, and they are usually easier to work with - staples fit easier, jam less often, etc.
When choosing a manual construction stapler, you need to pay attention to the body, the height of the handle
There is also an intermediate class - semi-professional. They fall between these two categories in price and quality. Often it is in this group that you should look for equipment for home use. It works fine and doesn't cost much.
Device repair
First of all, you need to remove the housing and remove the clip from the gutter. This way you can see that there are staples stuck at the exit that are interfering with its normal functioning. This is usually the main cause of failure.
In order for the stapler to start working properly, you need to remove all stuck staples. This can be done using tweezers or a thin screwdriver. The main thing is not to damage the groove itself, the spring and the pusher. After this, you can remember how to assemble a stationery stapler. It is necessary to reinsert the spring if you removed it, install the housing and press the upper part to the lower part so that they are locked.
Classification
There are different types of furniture staplers.
Manual
This category also includes manually operated mechanical devices.
These devices hammer the staples in with forceful blows. Compared to manual analogues, the performance of this model is much higher. This tool is convenient for performing the following work:
- Fastening insulating material.
- Installation of roofing felt.
This tool is used for installing cables with a voltage load of 50 V. The maximum cable diameter is 7.5 mm. These staplers are used when performing the following work:
- Cable fixation.
- Laying an electrical network.
- Installation of communication lines.
Classic model
This hand-operated tool has become a true classic. After the release lever is pressed, the staple is driven into the material. A special category is hybrid models, with which you can perform several types of described operations.
They have only one drawback: a relatively high price.
Video: How to charge a furniture stapler
Correct use of a construction stapler is a guarantee of obtaining high-quality results when making or repairing furniture. The functionality of such a tool should be regularly checked and any identified breakdowns should be corrected in a timely manner.
A construction stapler is a functional tool with which you can fasten various elements of upholstered furniture together. Such devices are now produced in various types and modifications, so choosing the only right option can be difficult.
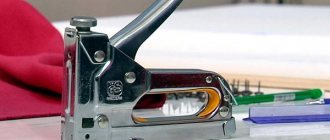
Appearance of a mechanical construction stapler
How to choose a quality pneumatic stapler?
First you need to decide on the range of planned actions. The conditions in which the tool will be used, the amount of consumables and the condition of the working surface determine the parameters that you need to rely on when choosing. For furniture production, universal models are suitable, which maintain a balance of efficiency in performing work and ergonomic qualities.
Super universal stapler Stanley Fatmax TR75.
If you plan to use the unit at home, it is better to choose an entry-level pneumatic model. Such equipment allows targeted activity with small hardware. If you plan to work with textiles, such a tool will be quite sufficient.
For plywood you will need a pneumatic nailer.
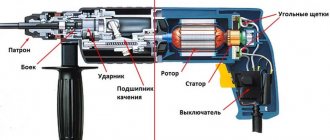
Stapler device
The main elements that ensure the operation of any stapler are the magazine and the impact-return device. The magazine contains a holder with U-shaped guides into which a cassette with consumables (staples, nails) is inserted. The magazine is equipped with a consumable supply mechanism and is made in the form of a spring-loaded pusher, on one side having a thrust plate, on the other - a clamp for fastening in the shop. The impact-return device is a striker made in the form of a plate with dimensions corresponding to the dimensions of the staples or pin used, the diameter and length of which correspond to the length and diameter of the nail head. The firing pin is mounted on a firing pin, which has a shape depending on the design of the stapler and, on the other hand, rests against a spring, the force of which is regulated by a screw. To eliminate shock loads, the device is provided with a buffer (shock absorber), which is made in the form of a polyurethane gasket installed in the device body.
The device is controlled:
- in a mechanical stapler - with a lever hinged on the stapler body and, on the other hand, having a movable rocker arm that fits into the groove of the striker;
How to charge other types?
Electric staplers operate by ejecting the staple after pressing the drive button. Such a device requires a network connection to a power source to operate. Among the assortment, you can choose the optimal model with a rechargeable battery or connection to a network adapter.
The dimensions and cost of electric staplers are significantly increased compared to conventional staplers. In addition, such devices have a bulky handle and an inconvenient cord location.
The pneumatic type is activated by supplying compressed air, which promotes the ejection of consumables from the store. The devices support long-term battery life, are spacious and have high performance. At the same time, pneumatic staplers have the disadvantage of noise emitted during operation. Such a device of impressive size is inconvenient to transport. Most suitable for construction professionals.
Learning how to use a staple gun is quite simple, but you need to read the instruction manual and make sure the tool is set up correctly in order to change fasteners. If you need to remove staples hammered into the surface, you will have to use an anti-stapler. To remove furniture brackets, you should carefully squeeze out their ends using a screwdriver or pliers when you do not have a special tool for removing them.
The construction stapler is refilled as follows.
- Before disassembling the spring, you need to lock the device using a button or lever. The type of blocker depends on the characteristic features of the model.
- The groove is pulled out. You need to make a physical effort or press a button.
- Pull out the inner rod by displacing the metal spring. Place the paperclips on the rod. The tip of the device should be facing towards the handle.
- The rod is inserted back, then the magazine is closed.
- The device is removed from the safety lock and test shots are fired to check its functionality.
After testing the device, you need to make sure that it functions without failures. To do this, adjust the spring tension and follow safety precautions. Please remember that the device is potentially dangerous. Working with it requires the following precautions:
- after use, you need to install the fuse back;
- It is prohibited to direct the device towards oneself or any living creature;
- It is not recommended to handle the device if you are feeling unwell;
- the workplace should be clean and the lighting should be bright enough;
- The stapler should not be used in damp rooms.
In order to correctly insert the brackets into the furniture unit and replace the consumables, you must open the lid or pull out the corresponding container before charging the device. After this, pull back the feed mechanism, then install the clip into the body. By filling the device with brackets, the mechanism is loosened and the clip is secured. Close the fixture or push in the tray.
Penetration of the material is realized by pressing the working area towards the area that needs to be fixed. Next, the lever is activated, causing the staple to pierce the surface.
Terms of use
Before using a construction stapler, you need to check whether it has fasteners. This is justified by the fact that its location is limited. The process involves performing one of three actions:
- lumbago;
- removing the bottom plate, on which side projections are provided for this purpose;
- removing the support rod with the spring.
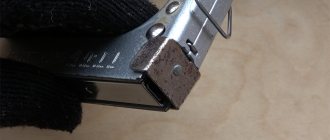
Stapler with the support rod removed and the bottom plate removed Source onlinetrade.ru
Refilling should be done only after the magazine has been released. The procedure is performed after removing the support rod. For this purpose, the protruding edge is equipped with a plate with a small hook. Just press on it and slide it down. There is a specially formed groove inside the tool that will not allow the fasteners to be placed incorrectly. That is, the clip is simply inserted into the magazine and pressed against the support rod.
If the clip does not fit into the magazine, then there is no need to try to insert it into the magazine. This means that the design of a particular model is not suitable for a particular fastener. The limitations here for the morgue concern not only the depth of the selected staples. This may also apply to the width and thickness of products and their shape. Not every tool is universal and suitable for shooting brackets or nails.
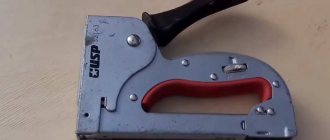
An example of a universal tool Source vseinstrumenti.ru
How many shells will fit into a stapler?
There is a wide range of staplers with different working holder sizes. Staples can be purchased in small rows that are separated into sections by hand. 1 stapler can freely accommodate 1-1.5 rows, which contain more than 20 staples.
When choosing brackets, builders and furniture makers are guided by their depth. This figure varies from 4 to 14 mm depending on the type of work being performed.
So, to upholster furniture items with fabric surfaces, you need to purchase a bracket with a depth of 8 mm. Fixing thicker structures requires choosing staples with greater depth.
The following types of staples are available in the market:
- 53 - is in greatest demand and has a width of 11.4 mm and a thickness of 0.7 mm. The fastening depth is 4-14 mm.
- 140 - characterized by a width of 10.6 mm and a thickness of 1.2 mm. The depth indicator is equal to the previous variety.
- 36 - the marking indicates brackets with a semicircular shape; they are in demand when laying cables.
- 300 - are a special type of stapler nails.
At the selection stage, you should also pay attention to the material of manufacture of fasteners.
Simple steel products are in demand for processing wooden structures. But if you are working with particle board or plywood, it is better to choose models made of hardened steel. They have an extended service life and cannot be bent.
Stapler device
The main elements that ensure the operation of any stapler are the magazine and the impact-return
device. The magazine contains a holder with U-shaped guides into which a cassette with consumables (staples, nails) is inserted. The magazine is equipped with a consumable supply mechanism and is made in the form of a spring-loaded pusher, on one side having a thrust plate, on the other - a clamp for fastening in the shop. The impact-return device is a striker made in the form of a plate with dimensions corresponding to the dimensions of the staples or pin used, the diameter and length of which correspond to the length and diameter of the nail head. The firing pin is mounted on a firing pin, which has a shape depending on the design of the stapler and, on the other hand, rests against a spring, the force of which is regulated by a screw. To eliminate shock loads, the device is provided with a buffer (shock absorber), which is made in the form of a polyurethane gasket installed in the device body.
The device is controlled:
- in a mechanical stapler - with a lever hinged on the stapler body and, on the other hand, having a movable rocker arm that fits into the groove of the striker;
- in an electric stapler, the function of the striker is performed by the electromagnet solenoid. When the button is pressed, the contacts close. The current passes through the elements of the control unit, made in the form of a circuit board, to the electromagnet coil, as a result of which the device operates;
— in a pneumatic stapler, the piston of the pneumatic cylinder performs the hammer function. When the trigger is pressed, acting on the pneumatic distributor, compressed air enters the cavity of the pneumatic cylinder, resulting in an impact action.
Not just parentheses
Some staplers can work not only with staples, but also with studs of various shapes. The designations of what the stapler works with are indicated on its body or in the instructions.
I tuck the nails into the stapler in the same way as with staples, but you need to be careful after pulling out the spring. A row of nails must be loaded along one of the outer edges of the letter “P”, and not inside this very letter!
If you want it to produce two nails side by side when working with a stapler, load the second row along the second outer edge. Next, the spring is inserted and the stapler is closed.
Recommendations from experts
A common mistake why a stapler bends staples is the wrong choice of products. How to adjust the tool is the most common mistake users make. Most models are equipped with a special adjustment screw. It allows you to increase or decrease the speed of bracket departure. The first is relevant in the case of hard materials, the second when working with loose or soft substrates, fabrics, PVC panels.
It also happens that the staple is not immersed in the material to the depth required by the master. That is, the workpiece is not securely pressed to the base. Here you need to perform two actions: press the tool to the area and press the adjustment screw with your other hand. This will additionally eliminate recoil after the shot.
An example of a stapler with an adjusting screw Source autopiter.ru
Removing the magazine bottom plate makes it easier to remove a stuck or bent clip. But before doing this, you should first remove the support rod, which prevents the remainder of the unused clip from flying out. The process here is simple. You need to pull the hooks away from where the fasteners exit. Next, just pull down a little. It is worth noting that such manipulations are not a solution to how to refill a construction stapler. But this way you can check for the presence of residual fasteners.
U-shaped brackets cannot be inserted incorrectly. Novice craftsmen often try to insert nails into the central part of the store. However, this is a mistake - it needs to be placed in one of the compartments under the legs of conventional fasteners. If necessary, you can insert two clips of studs at once and fire them simultaneously.
Clips with nails for a household stapler Source ozone.ru
When performing certain manipulations other than work, regardless of the type of stapler, it is important to monitor the position of the lever. An accidental shot can be dangerous. Therefore, it is necessary to lower the lever all the way and secure it with a special loop. In this case, the fasteners must be fired.
see also
Comments 9
Sometimes I also lubricate the stapler. Stayer companies. Still alive. I probably hit 10,000 staples with them at most.
I would throw it away if the new one works like that)) I have the same type, but I’ve never had any problems, I haven’t smeared anything, I haven’t taken it apart
It is advisable to lubricate. Works easier
again dust sticks to the lubricant, here you also need moderate lubrication and not static lubrication))
Yes, there are few places where dust can get in. And there are not such small parts that dust can cause harm. I think so. And everything doesn’t last forever. After lubrication it is more convenient to work. And the reach force is greater) Please lubricate the entire tool. As an option, Runway silicone lubricant dries leaving a slippery layer. But not so durable...
Yes, the gates too, only lubricating with silicone and VD is allowed, but as for the dust, as long as I’ve been living, I don’t understand where the money goes and where the dust comes from)) I don’t use it often for periods, until I had enough strength without lubrication)) maybe I’ll try the thread when
It's not for long. It’s easier to buy a normal stapler, with a leaf spring. They last quite a long time, and these cheap ones are designed for 500 staples.
I’ve been using it for about 5 years now, if not 7. Everything is fine, but like the whole instrument I have to lubricate it periodically
It's not for long. It’s easier to buy a normal stapler, with a leaf spring. They last quite a long time, and these cheap ones are designed for 500 staples.
Come on
What kind of staples are produced for construction staplers?
Staples are consumables that are needed to connect two elements (fabric to wood). Consumables are divided into various types according to the following criteria:
- Material of manufacture
- Degree of hardness and strength
- Availability of additional protective coating
- Dimensions
- Form
Let's consider what types of staples there are, depending on the above criteria.
Material for making staples for a stapler
Manufacturers produce staples from various materials, which allows them to expand their scope of application. They come in the following types:
- Aluminum - used for working with non-solid types of materials
- Copper - these staples are also called decorative, as they are intended for covering furniture with various types of fabrics
- Steel ones are the most popular and inexpensive. They can be used for driving not only into soft, but also hard materials. The main disadvantage is that they rust over time.
- Stainless - made of stainless steel, and used when it is necessary to prevent the occurrence of corrosion processes
Additional zinc coating of the brackets eliminates the occurrence of corrosion processes. When choosing fasteners of the appropriate material, it is necessary to take into account what you plan to connect.
The hardness of staples and what it affects
The greater the hardness of the consumable, the higher the efficiency of its penetration into the surface of the driven material. To understand why staples of different hardnesses are produced, you need to imagine a picture when it is necessary to drive a staple into a board made of hard wood. A soft aluminum or copper staple will not penetrate the surface of such wood. The result is a damaged bracket with bent legs. To prevent this from happening, manufacturers produce consumables with the following hardness names:
- Simple
- Very hard
- Red-hot
A description of the degree of hardness of the staples is presented in ascending order. The ends of the devices may have additional sharpening, which allows for effective insertion of the part into the surface of solid materials with the least resistance.
Types of faults and repairs
Absence of a fastening element (staple/nail) in the materials being fastened . Most often it occurs when consumables leave the store. The stapler should be rendered inoperative. The cartridge with consumables is removed from the holder. If possible, remove the pusher. The clip folds into
side, since it is hinged. The jammed part (staple/nail) is removed with tweezers or a narrow flat screwdriver. Next, the stapler is prepared for further work in the reverse order.
The slaughter of fastened materials with two or more elements (staple/nail) . This can happen due to two reasons. The first is due to wear (bevel) in any direction of the end surface of the striker. The impact device cover must be removed. Disconnect and remove the firing pin. Bring the end surface of the striker to the correct shape with a fine file or sandpaper. The main condition is that the end surface should not have a convex appearance. Otherwise, the edges of the staples will protrude when slaughtered. To maintain the action distance of the striker, grind off the supporting surface of the buffer/shock absorber (polyurethane gasket), adjacent to the body of the impact device, to a size corresponding to the size of the striker being ground.
The second is the deformation of the guide surface of the impact device body. For mechanical staplers, this is deformation of the surface of the casing adjacent to the firing pin.
Removed with a hammer or pliers.
The drummer works “idle”.
In mechanical staplers, it occurs as a result of early dismounting of the rocker arm from the supporting surface of the striker groove. In this case, a bevel is produced in this place, which is removed strictly perpendicular to the surface of the striker with a file.
For other staplers, if the body is overheated, this indicates an unsatisfactory condition of the rubbing surfaces or breakage of individual elements (for example, springs). Bringing the stapler into working condition is possible by replacing faulty elements.
When the lever/button is pressed, there is complete absence of action from the impact device.
In mechanical staplers, there is a violation of the interaction of the striker with the return spring (for example, a break in the support plate under the spring). In this case, instead of one upper rivet securing the striker to the striker, you can install a screw with two nuts and shorten the spring by the size from the screw to the support plate. For other staplers, there is no power supply to the electromagnet coil or compressed air to the cavity of the pneumatic cylinder.
Please remember: carry out all repairs and maintenance when there is no power.
tool and rendering it inoperative.
Source