LED strip helps make the interior of the room creative. Using LED lighting you can achieve original effects on walls and ceilings. It is also used for zoning space, creating spot lighting in rooms and lighting furniture.
LED tape is popular for its simple installation methods - you don’t need special training to figure out how to glue it. It is enough to determine a reliable method and have the tools. The most popular options among craftsmen are the use of tape, glue or liquid nails.
Surface preparation
The design feature of the LED strip provides a variety of applications for lighting and decorative lighting.
LED strip is used to create lighting in the living room, bedroom, bathroom, hallway, and kitchen. Thanks to its flexibility and adhesive base, it is attached to wood, plasterboard, metal, plastic, and ceramic surfaces. Their shape can be rectilinear, curved, spherical.
During installation, the following rules should be followed:
- Do not allow mechanical impact on the board.
- You can cut the tape at specially marked places.
- When LEDs operate, heat is generated, so the canvas must be cooled.
- Connectors are used to connect sections of the LED strip.
- The tape is connected to the network through a power supply of appropriate power, which provides a voltage of 12 or 24 V.
LED strips are divided into 2 types according to the degree of moisture protection.
The adhesive base of the LED strip is 3M acrylic tape. For its strong adhesion to the surface, the following conditions must be met:
- The surface must be smooth, without protrusions, sharp edges, or bumps.
- The base is pre-prepared: cleaned, dusted, degreased with isopropyl alcohol or a cloth with an adhesion activator. To degrease metal and plastic substrates, you can use white spirit or acetone. Painted surfaces are treated with a vinegar solution.
- Markings are applied to the base, allowing the canvas to be secured along the required trajectory.
- The room temperature is above 18 degrees. At room temperature, the tape sets as much as possible within 24 hours. At temperatures above 60 degrees – for an hour.
LED strip can be glued to wood. The wooden base must be smooth, painted or varnished. It does not adhere to an unprepared surface and quickly peels off.
How to use a homemade composition?
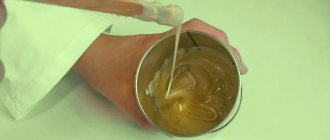
Instructions for using heat-conducting glue are no more complicated than for other adhesives. Gluing steps:
Surfaces are thoroughly cleaned of dust and dirt and degreased. Solvents such as white spirit, acetone, and gasoline can be used as a degreaser. If the mixture turns out to be liquid, then it is drawn into a syringe and applied to the part in a thin layer. Glue of a thicker consistency is spread with a brush.
It is important that the layer is thin; the thicker it is, the worse the parts will stick together. Excess can be blotted with a soft, lint-free cloth. The two parts are pressed firmly against each other for 15–20 minutes.
You can pinch them with your fingers or place a weight on top. The glue sets quickly, but dries completely after 24 hours. It is not recommended to use the parts before.
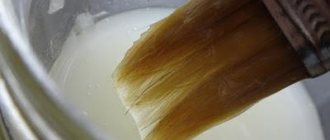
Thermally conductive adhesive for gluing LEDs on radiators can be replaced with thermally conductive tape. It is made of polyamide, and the adhesive part is made based on silicone adhesive. The material can withstand heating up to 260°.
Materials for gluing
The LED strip is cut through three diodes.
The LED strip has a standard self-adhesive backing. But it is not suitable for long-term fixation on rough surfaces, such as wood. The list of materials that can be used to glue the LED strip is as follows: aluminum profile, tape for LED strip, aluminum tape, quick-setting glue. They improve properties and increase fastening efficiency.
Adhesive tape for LED strip
Serially produced tapes are a printed circuit board with LEDs attached to double-sided tape. Its free side, used for installation, is protected by a smooth transport film. For high-quality models, the 3M marking is applied to it.
Acrylic tape 3M for various applications
How to glue LED strip:
- Markings are applied to the previously prepared surface.
- Wires and a power supply are connected to the backlight contacts or using a connector; install a switch.
- Using a sharp object, separate the beginning of the tape from the protective film and release a section 15-20 cm long.
- Apply the strip with LEDs to the surface and press firmly.
- Gradually freeing sections of the tape from the film, completely glue the tape along the marked path. When making connections in the corners, do not bend it, but use corner connectors or solder it.
- Install the power supply in a convenient place protected from moisture.
If, when removing the protective film, conductive paths are exposed, it is necessary to apply a backing of electrical tape to this place. Otherwise, a short circuit will occur when connecting.
The tape must be applied accurately to the markings. If it is placed incorrectly after detachment, the tape loses its properties. It will be difficult to reattach it firmly.
Aluminum profile
Aluminum LED profile
The optimal mounting for LED lighting is aluminum profiles. They are used for extended, powerful models SMD 2835 and SMD 5630, 5730 and for the popular LED-based SMD 5050. For fastening structures with a power of more than 14 W, their use is mandatory.
Profiles can be overhead, mortise, or corner. LED lighting is glued inside the profile, and it is mounted on the selected surface.
Using aluminum profile for LED strip
Properties of aluminum profile:
- The self-adhesive surface of the tape fits perfectly onto a flat and smooth base;
- Easily and firmly attached to the mounting plane;
- the heat generated during the operation of LEDs is removed through the aluminum surface;
- The matte diffuser, which covers the front part of the profile, gives a pleasant appearance and makes the lighting softer.
An inexpensive alternative to an aluminum profile is a plastic cable channel without a cover. Its disadvantage, which leads to premature loss of brightness of LEDs, is poor heat dissipation during operation. Therefore, its use is not justified.
Glue
Super glue is perfect for gluing LED strip.
The right glue for LED strip provides a quick-setting connection. Adhesives cope with this task:
- based on cyanoacrylate, called superglue, for example “Moment Super”;
- based on rubber or silicone, for example, liquid nails “Titanium” or “Moment Montazh”.
Recommendations for fixing with glue:
- Superglue is applied pointwise every 50 - 100 mm. This way the tape is securely fixed and, if necessary, it is easier to dismantle it than when applying a continuous layer of glue.
- The strip with LEDs is applied with its base to the surface on which the glue is applied and pressed firmly.
Adhesive joints are used on vertical, inclined porous surfaces. It is resistant to temperature and humidity. The tape adheres to a properly treated surface in 20-60 seconds. They completely glue together in no more than 2 hours. You can use glue to attach the LED strip to metal, wood, plastic, wallpaper, glass.
Hot melt adhesive is not recommended. It attaches well, but due to its low heat-dissipating properties, overheating of the emitting crystals and their premature failure are possible. When exposed to elevated temperatures, it melts and emits an unpleasant odor.
Aluminum tape
Aluminum tape is used instead of a profile for an LED strip.
If it is impossible to use a profile, LED strips of low and medium power (6-10 W) are attached to aluminum or foil tape. Its surface has heat-dissipating properties and can serve as a light reflector.
Aluminum tape for the LED strip is glued to the surface according to pre-applied markings. To ensure a good connection, superglue is applied pointwise to it. Then a strip with LEDs is attached to the tape.
Other mounts
Mounting clip
If the LED strip is hidden or appearance does not matter, you can use the following for fixation:
- disposable nylon zip ties;
- plastic clamps.
Do not fasten the LED strip using staples with a construction stapler.
Two methods of gluing LED strip have become widespread: with tape and with glue. The tape comes off over time. The strength of this installation is increased by using superglue. It is optimal to mount the lighting using an aluminum profile.
How to attach
Before attaching the LED strip, the first thing you need to do is mark the installation site.
Regardless of the room, along the perimeter of the ceiling in the living room or along the length of the cabinets in the kitchen, a straight line is drawn with a pencil. Fastening is carried out in two common ways:
- gluing the tape itself to the adhesive base;
- installation in an LED profile, which is also attached with glue or screws, dowels, depending on the base.
The first method will be an excellent solution for rooms with normal humidity and a straight, non-rough surface. Otherwise, over time it will peel off and fall off. Some craftsmen add expensive, high-quality glue to the base before installation. This approach has one drawback - the tape cannot be dismantled later without damaging it.
The second method is considered more reliable and safe, but at the same time labor-intensive and costly. It is worth noting that when installed in a profile, you can use diffusers; they allow you to get softer light.
After applying the markings and choosing the installation method, you need to decide on the location of the LED strip power supply (the driver is needed to power the entire circuit with electric current). A place in a niche or closet is best. If possible, try to place the driver so that air circulates around it, because... When working, it heats up and generates heat. Warm air must be removed, this will reduce the operating temperature of the power supply and extend its service life.
Once you have decided on a location for the power supply, proceed to installation. The LED strip is attached to the profile with glue and covered with a diffuser. During the process you will have to cut and join the tape. There are no pitfalls in this matter, but there are still some things you need to know. We have already talked about how to properly cut an LED strip; you can read about it here. In places where you need to connect, use connectors or soldering. Soldering will be preferable for aggressive environments (streets), because... less susceptible to oxidation. Afterwards all that remains is to connect the driver and the tape with a cable.
It is advisable to attach the connecting cable to the wall in a plastic box that matches the color of the walls. The ideal fastening approach is to groove the wall, lay the cable inside and putty. If this is not possible, then use a plastic box.
220V tape sticker
Using LED strip for street lighting
Models designed for 220 V voltage are produced without an adhesive backing and are placed in a hermetically sealed shell. They heat up during operation, so they are not recommended for use indoors. Used to organize external lighting of buildings in well-ventilated areas.
You can attach such a model in one of three ways:
- installation on an aluminum profile using clamps;
- fixation using fastening pads, clips, nails;
- gluing with double-sided tape.
To attach it to tape, it is cut into strips 3-5 cm long. One side is glued to the canvas every 5-7 cm. Then the structure, separating the free surface of the tape from the protective film, is fixed in the required place.
When using 220 V LED strip outdoors, the most reliable option is to mount it with clips.
Wood glue: review of popular brands
Types of wood glue differ in composition and properties. There are 4 types of wood glue: polyvinyl acetate, polyurethane, synthetic, epoxy. PVA is the cheapest among those listed. Thus, 750 ml of polyvinyl acetate glue “Moment Stolyar” costs about 220 rubles, and “Krass” – 195 rubles. for 500 ml. Other types:
- Polyurethane: “Akfix”, “Soudal”, “Kleiberit”. Average price – 600 rubles. for 0.5 l.
- Epoxy: “Uhu plus endfest”, “Titebond original wood blue”. The cost of the first one is 430 rubles. for 2 tubes of 15 ml. The price of the second one is 200 rubles. for 250 ml. Russian-made epoxy glue “EDP” is the cheapest - 65 rubles. for 100 g.
- On a synthetic basis: “FORBO 650 EUROSTAR FASTCOL”, “Quilosa Bunitex P-55”, “Titebond III Ultimate”. Average price – 700 rubles. for 1 l.
Synthetic adhesive compositions contain harmless components that help strengthen the bonding of surfaces and increase the service life of the product. Polyurethane products are resistant to moisture and mechanical stress, so they can be used in the manufacture of exterior furniture. Resin-based glue does not change the shade of the material, has electrical insulating properties, and holds parts together well. When working with epoxy, it is recommended to use personal protective equipment and ventilate the workshop.
Where to hide the LED strip
When illuminating a stretch ceiling, first install the tape, then stretch the ceiling.
Depending on the type and shape of the base on which the LED strip is attached, it can be hidden in several ways.
- Ceiling. LEDs are mounted in the ceiling plinth or plasterboard cornice. To prevent the tape from being visible, it is laid to a depth of at least 2 cm. If suspended ceilings are installed, first attach the lighting and lay the wires, and then stretch the fabric.
- Walls. To hide the tape in the wall, make a niche in the shape of a plasterboard box. Low-power models are mounted directly on the surface of the niche; for powerful ones, an aluminum profile should be used.
- Furniture. LED lighting can be attached to any cabinet furniture in the living room or bedroom, or kitchen unit. It is glued to the base of hanging cabinets, inside sideboards or cabinets with glass doors, highlighting their contents. To organize decorative lighting, it is glued to the top of the furniture.
- Stairs. You can highlight the staircase in a multi-storey building using LED lighting. It is placed under steps or in recesses in railings.
A hidden strip of diffused light complements the main lighting, creates illumination at night, focuses attention on decorative elements, or is used for zoning space.
Type of LEDs used
As a rule, the type of emitting diode used is determined by the size of the chip and is marked with a four-digit number. Today, the most commonly used LEDs are 5730, 2835, 3528 and 5050. The first two digits indicate the length of the chip, the second two indicate its width. Designations are indicated in millimeters.
Reliable, the product is manufactured at branded enterprises that have their own website with contact information for the buyer. It is produced under its own brand Samsung, Philips, LG, Epstar. Firms carry out control at all stages of production, checking the quality of components. Their costs for equipment, technology, and expensive materials affect the final cost of the products.
Cheap tape is made in small firms, where some advanced technologies are replaced by manual work. Components are chosen to be inexpensive. There is no complete quality control. Therefore, their price is lower and their durability is limited.
Flexible materials: Curtain rod for ceiling (ceiling): hidden, flexible
LED strips are indispensable when you need to provide lighting or illumination over a long length. Only LED strips that are not protected from moisture can be cut into pieces, that is, only those that are intended for indoor use. It is unacceptable to cut waterproof and moisture-resistant LED strips without subsequent sealing.
To eliminate this drawback, LED modules have been created that allow interior lighting and illuminated advertising to be carried out easily, quickly and reliably. The scope of application of LED modules in practice is limited only by human imagination. Modules for lighting in a car are especially convenient. It is enough to connect it via a fuse to the on-board network and glue or secure the module with self-tapping screws inside the car interior or on the outside.
The design of LED modules consists of a shallow bed made of plastic or metal in which a printed circuit board with LEDs is installed. The top of the board is filled with transparent silicone. This ensures protection against moisture and splashing water. The LEDs are connected in the same way as in the LED strip above.
On the outside of the bottom of the crib there is a sticky layer, which can be opened by removing the protective film and the module can be fixed on any flat surface. It is possible to attach modules to the eyes using self-tapping screws. All lighting and electrical calculations given above on the page for LED strip are also valid for LED modules.
The modules can be easily separated from the block one by one or in groups. Electrically, all modules are already connected to each other. It is enough to supply power to any outermost one and the LEDs on all modules will light up. Blocks can be increased in any quantity by connecting them in parallel.
If suddenly one of the triads of LEDs on the LED strip stops glowing, then one of the LEDs or a resistor has failed. The strip can be repaired by replacing the LED with a working one. You can try to find a faulty LED by external inspection, and if that doesn’t work, then using measuring instruments. Search instructions are described in detail in the article “Repair of LED lamps.”
Common errors and methods for eliminating them
The most important mistake is gluing a powerful strip without a profile directly onto the surface of the ceiling, wall, cabinet.
The service life of the LED strip will increase if you avoid the following mistakes:
- Gluing lighting onto the surfaces of ceilings, walls, furniture without a profile. This fastening does not provide cooling for the tape; if it overheats, it will quickly come loose and the LEDs will fail.
- Gluing bare LED tracks. Mounting the strip on a damaged base through which the LED board protrudes will cause a short circuit when connected. To avoid this, apply a layer of insulation to the damaged areas.
- Using a stapler for fastening on wood and drywall surfaces. Attaching the backlight requires shooting the staples many times. If you make just one mistake, the LED board will be damaged and the strip will be unusable.
- Installation on a plastic profile from a cable channel. This type of profile is not intended for mounting LEDs: it does not provide heat removal, which leads to overheating of the structure.
- Using hot melt adhesive. When LEDs operate, it will heat up, preventing heat dissipation, and emit a harmful odor.
The LED strip should only be glued using specially designed materials.
Simple gluing option
The prevailing proportion of commercially produced LED strips have an adhesive base on the back side, protected by a smooth transport strip. In other words, led tape resembles double-sided tape, in which printed conductors with SMD LEDs are glued on one side, and the other is free for installation.
In the simplest gluing option, you need to perform the following steps:
- indicate the direction for installation with a straight line, in the absence of a profile;
- degrease and dry the installation site;
- remove part of the protective film at the beginning of the tape;
- Gently press the section with the LEDs onto the work surface;
- remove the remaining film and glue the entire strip, adhering to the given direction.
How can you glue fabric to paper or cardboard?
When making crafts or making new DIY book bindings, sometimes you need to firmly glue the fabric to a sheet of paper or cardboard. You can do this in several ways:
- Double sided tape. Strips of adhesive tape are placed around the perimeter of the sheet, then the protective coating is removed from them and a cloth is applied. Gluing with adhesive tape is strong and the paper is not deformed. However, this method is inconvenient to use for irregularly shaped parts.
- PVA glue. Guarantees a strong connection and does not form stains on the front side of the fabric. A thin layer of PVA is applied to the cardboard, a cloth is applied and left under the press for 6–8 hours. It should be borne in mind that long-drying PVA has time to saturate the paper or cardboard base and lead to its deformation.
- Universal glue. It has a viscous consistency, so it does not saturate the paper and does not deform it. The fabric is glued tightly and is torn off only with part of the paper.
- Rubber glue. More suitable for thick fabrics such as denim. For strong gluing, the lubricated surface is left for an hour, after which it is moistened with acetone and the parts are connected. The complete drying period is about 10 hours.
Installation recommendations:
- Avoid mechanical impacts on the tape (sharp bends, mechanical pressure from other objects, etc.)
- Please note that for each type of LED strip only its own special connectors and connectors are suitable.
- The connections must not damage the conductive paths powering the LEDs.
- Mount the strips on an aluminum profile (to dissipate heat) in cramped areas with limited ventilation. Overheating significantly reduces the life of LEDs.
- Pay attention to the IP class for dust and moisture resistance. For example, IP 65 allows installation even in water.
- When installing, consider convenience for subsequent repairs in the future. Consider how to get to the tape and power supplies with a soldering iron. As my practice has shown, power supplies and tapes often break. But people do not foresee this and install them behind a suspended or suspended ceiling, which eliminates the possibility of repairs without partial dismantling of the ceiling.
- I do not recommend illuminating a glossy ceiling, because the diodes are reflected in it like in a mirror, and in addition, dust on the gloss will be clearly visible.
I recommend reading separately about connecting LED strips; if you have any questions, ask below in the comments.
Source: jelektro.ru
Correct cutting
Some models have a design that allows for outdoor installation of LED strips. This installation of the backlight even allows it to be immersed in water. The design of these models is sealed. During installation, the tape is usually cut into pieces of a certain length.
Before installing such a section outside in the open air, it is necessary to restore the tightness of the cuts in accordance with the recommendations of the technical documentation. The tape has a special mark for cutting with a certain pitch along the entire length. It should be remembered that, according to the established standard, all models are supplied in reels and their length is 5 meters.
Reel with LED strip
- For example, decorating a ceiling with an LED strip will require several pieces of it. Regardless of how it is attached, it will have to be connected to a power source to illuminate the ceiling or to decorate it. To do this, a special installation of the ends of the segment is performed. In this case, they are either connected to each other in a serial chain, or connected to the power source separately as parallel elements of an electrical circuit. Before installing the tape, cutting pieces from the reel, it is recommended to calculate their best length so as to attach everything without any residue.
- Before making an LED strip an element of decor, lighting or a car accessory, it is recommended to decide on the main stages of its installation.
The content of the article:
- Why do you need a ceiling plinth?
- Why installing LED lighting on baseboards has become one of the current trends in interior fashion
- Types of ceiling plinths for LED strips
- Types and methods of installing ceiling plinths under tape
- A few tips for installing a plinth under an LED strip
Increasingly, you can see LED strip lighting in apartment decoration. The popularity of such an interior solution is due to its high aesthetic qualities (a competent designer can work wonders with an LED strip), as well as the low energy consumption that LED strips are characterized by (the cost of illumination is practically not noticeable for the family budget). In addition, lighting can serve as a good tool for zoning a room: on the one hand, it is relevant and beautiful, and on the other hand, it allows you to create a harmonious living space with minimal investment.
Contour lighting of the room visually gives it additional volume, expands the space due to a kind of optical illusion: decorating with a ribbon around the perimeter seems to move the walls away from the center of the room.
To install the LED strip, a special ceiling plinth is used. It performs several functions at once:
- facilitates installation of the tape;
- hides the LED elements from view, gently scattering the light (without a plinth, the light from the strip comes out in concentrated beams, which looks quite sharp);
- serves as an element of interior decor during the daytime (an uncovered, disabled LED strip looks rude and not aesthetically pleasing).
Installation Basics.
The LED strip has an adhesive layer on the back side, so sticking it on is quite quick and easy, but don’t rush with the sticker. It is possible to stick only once, so first you need to prepare the surface of the wall or ceiling, which must be durable, dry and free of grease with solvent. It is recommended to degrease, putty, clean and prime again for drywall, concrete, brick, etc.
Remember that the tape is susceptible to mechanical stress, so the surface intended for gluing must be smooth and free of interference that could cause damage to the printed tape.
When gluing, you must avoid bending within a radius of more than 20 mm, otherwise you will damage it. Cut the tape only in places marked with special markings exactly according to the marks.
If necessary, different sections of the LED strip can be easily soldered together while maintaining polarity, but the soldering interval can be no more than 1 second, and the soldering iron temperature should not exceed 260 degrees Celsius.
Installation density
Multi-row samples are often produced using LEDs with different glow colors. This combination provides additional management capabilities. Along the entire strip, every 5-10 cm, cut lines are indicated in the form of a scissors icon. The exception is tapes powered by 220V. In them, a series chain is formed by 60 LEDs. Therefore, the cut can be made with a multiplicity of 50 cm (with a density of 120 pieces/m) or 100 cm (with a density of 60 pieces/m).
Flexible materials: Connection of wires. Videos and photos of connections. Electrical panels. Assembly. Design. Schemes.
Installation with fasteners
You can also attach it with screws. There are no ready-made holes for them in the profile. They are drilled with a drill with a diameter of 3–3.5 mm at a distance of 20–30 mm from the ends of the product.
In the installation area, for example, in a concrete ceiling or wall, the first hole for the dowel is drilled with a hammer drill. Having inserted the dowel, screw one end of the product with a self-tapping screw. Place it in the desired position and use a marker to place marks on the ceiling through the drilled holes. Remove, drill holes according to the marks, insert dowels and secure with self-tapping screws. Having degreased the area under the LED product, glue it with tape.
It is possible to mount the aluminum profile for LED strip on separate holders. They are installed on the surface with screws and dowels. The design snaps into 2 - 3 holders along its full length.
These methods are used to install overhead and built-in structures. The base can be a ceiling, wall, furniture, equipment, etc.
When deciding to install LED strip lighting, take care of the necessary materials. Buy them on our website.
Source: ledron.ru
Double-sided tape
If the above tips do not help and the tape still comes off, you can buy thin double-sided tape separately.
Tear off a few centimeters of the LED strip in those places where it has moved away from the surface.
Treat everything with an alcohol-containing solution and stick the purchased tape there.
Then press the old tape to this area. The good thing about this method is that you don’t need to re-glue the entire tape; use tape only in those places where it has already come off.
When choosing high-quality double-sided tape, such fasteners can be even more reliable than the original factory solution.