Discs for milling and grinding on an angle grinder - purpose and types
The capabilities of angle grinders do not end with cutting, sanding and polishing wood. To expand the range of tool capabilities, manufacturers produce grinder attachments for milling and peeling wood materials. Stripping attachments are designed to remove bark and remove the paint layer from wooden surfaces. Peeling circles are available in different types, and differ in design, shape and purpose.
- With an edge - their main purpose is to remove the top layer of wood, as well as grind the end part of wooden products.
The applied edge made of carbide materials ensures a long service life of the nozzles. After processing wood with such attachments, you will need to additionally grind and polish the surface. - Studded - and they are divided into products with large and small spikes.
Nozzles with small spikes are designed for removing the paint layer from the surface of wood, and with large spikes - for leveling. If a wooden floor has a defect in the form of a different arrangement of boards in height, then sanding discs with large spikes allow you to quickly and effectively smooth the surface - With a working part made of wire or brushes
- such attachments are used not only for processing metal, but also wood. A cup-shaped disc with an angular wire arrangement is used to remove paint layers from large surfaces. A nozzle with an end wire arrangement is used to remove the paint layer in places with limited access, for example, in the grooves of processed wooden structures. Another type of attachment that craftsmen use to work with wood is a brush with a thin wire. Used for finishing roughing of wooden surfaces - A disc plane is an alternative replacement for a conventional manual or electric plane.
The disadvantage of the first option is that it takes a lot of effort and time to complete the work. It is rational to buy an electric planer only when large volumes of work are being carried out to remove the surface layer. Special discs for grinders, replacing electric planers, came to the aid of the home craftsman. The attachment is a massive circle with three flat knives. It is intended for removing bark from a tree, and the end result is achieved very quickly. Dull knives can be sharpened
A special class of attachments for grinders are milling wheels. Special disks, driven by the spindle of the angle grinder, are used for sawing and cutting grooves of different widths. It is also worth noting that the use of milling attachments on an angle grinder is not safe
Every year the number of options for cutter wheels for grinders increases, but you need to work with such attachments with extreme caution. Let's look at the popular options for milling wheels for angle grinders:
- The wheel rim has the appearance of a thickened circle with cone-shaped spikes located on the end part.
Used for making grooves in wooden workpieces. The nozzle has teeth along the base, the main purpose of which is to obtain clean grooves without chips - Serrated toothed disc - used for making shallow rectangular grooves in woodworking materials
- Toothed disc with additional tenons over the entire surface - allows you to make deep grooves in wood workpieces
The production of various attachments for grinders for the purpose of wood processing can significantly expand the functionality of an indispensable tool in the household. The grinder today replaces most hand and electric tools, so every master must have at least one type of this tool.
This is interesting: Petrol mower - rating of the best models from popular manufacturers
The nuances of choosing a disc for an angle grinder for sanding wood
Any circle for an angle grinder is marked, which contains all the necessary information:
- diameter;
- thickness;
- seat size;
- permissible speed;
- recommended material for processing;
- best before date.
Marking of grinding wheels
The minimum standard disc diameter is 11.5 cm, but for sanding wooden boards with a grinder it is recommended to install attachments at 12.5 cm. Large diameters - over 15 cm - are not very suitable for processing wood, and create an increased risk of injury.
It is a bad idea to polish a wooden piece with a wheel of a larger diameter than intended by the angle grinder manufacturer. This option will not provide a single advantage, but there are plenty of potential problems:
- Causing injury;
- disk failure;
- lack of standard power of the grinder for working with a circle of the wrong size;
- the need to remove the protective cover under the nozzle.
The abrasiveness of the wheel depends on the type of work planned. For rough, rough processing, discs with coarse grains are used, but the finer the grinding should be achieved, the smaller the grain size of the abrasive selected.
Advice! An interesting option is a circle with replaceable adhesive attachments of different abrasiveness. True, the quality of the products is not the highest, which is why they wear out quickly.
Grinding technology
Working with wood to achieve the required roughness involves performing several main steps. They are as follows:
- Preparing the coating.
- Primary roughing.
- Fine grinding.
- Putty of the smallest elements.
- Final polishing and grinding with application of a finishing coating.
The final stage involves polishing. Through such actions, high surface quality can be achieved.
Coating preparation
The preparation stage involves primary surface treatment. Among the features of this process, we note the following points:
- It is recommended to work with P120 and P150 abrasives before polishing. The choice is made depending on how severe the defects are.
- The next stage is sanding with sandpaper P180 and P240. Due to this, the required roughness for coating the product with paint is achieved.
Primary preparation
At this stage, the main thing is to remove all defects that will not allow the paintwork to be evenly distributed over the surface. If the wood is properly prepared, it will look attractive after the finishing is applied.
Primary grinding
Primary removal of defects involves the use of sandpaper with a small grain size. This is due to the fact that fine sandpaper can wear out quickly.
Fine grinding
The degree of wood roughness can be reduced by using a fine abrasive. When carrying out such work, it is worth considering the following points:
- The skin will wear out quickly.
- It is necessary to ensure rapid movement of the abrasive.
After fine sanding, in most cases the wood is coated with varnish or paint. Further processing is carried out only when higher quality is required.
Filling gaps and small defects
The most problems arise with filling gaps and smaller defects. As a rule, such work is carried out manually. Let's call its features the following points:
- The skin with the finest grain is selected.
- Hard-to-reach places are treated by hand.
- During operation, dust generated should be removed periodically.
Wood putty
Such work is carried out extremely often in the case of making furniture and other utensils from wood.
Final sanding
This stage is often the final one. Among its features we note:
- All defects are removed.
- Consumables are carefully selected depending on the roughness that needs to be achieved.
- It is carried out using manual and automated equipment.
Final sanding allows you to obtain a very high-quality coating that can be covered with paint and varnish material.
Priming and finishing coat
The topcoat can be applied in various ways. Most often the process is carried out as follows:
- With a spray gun.
- With brushes.
- Soft material.
Priming wood
Priming is carried out to smooth out unevenness; the topcoat prolongs the life of the wood.
How to choose sandpaper for working with wood?
When choosing a consumable, quite a few different points can be taken into account. Let's take an example:
- Grain size.
- Type of abrasive used.
- For what purposes is the consumable material intended?
As a rule, the marking indicates the abrasive grain size according to ISO. When selecting, special tables can be used. Wood is processed with fine-grained sandpaper for a small number of defects and before polishing. Dry or wet sanding
Dry grinding is most often carried out. This technology is easy to implement and consumables are cheap. There is also wet sanding, which involves the use of special paper.
Wet grinding and polishing involves supplying water to the processing area. Due to this, the wood softens. Today, such technology is used extremely rarely.
How to sand timber walls
The tools used are the same as for processing logs. A specific choice can only be made by assessing how deeply you need to remove the top layer of wood.
If the bathhouse is made of profiled or laminated timber, most likely you do not need to level anything. Just remove the top darkened layer, if there is one. In this case, if you have a sufficient level of proficiency with an angle grinder, you can work with it. If you don't have enough experience, use an eccentric sander. It will take longer, but the result will be guaranteed to be at least good.
Timber needs to be sanded in different ways. Depending on its geometry
If the walls are made of ordinary timber, then you will have to do a lot of leveling. You can’t do without a grinder here. Moreover, in some places it will be necessary to remove a couple of millimeters of excess - non-ideal geometry and errors in cutting bowls lead to the fact that the difference can be quite significant.
I found a video fragment about a very interesting Pobedit grinding disk, which, it seems, can easily cope with rough grinding and easily remove excess thickness.
Procedure and organization of work
Since a minimum of time should pass between grinding logs or beams and processing, processing must be done along the crown. You can start from the top or the bottom - it makes no difference, but they sand one wall completely, then move on to the other. You can coat with impregnations and primers immediately after completing the treatment of one wall, having first removed the dust.
Questions often arise about what to do if there are blue spots or other dark spots on the wood. These are traces of fungal activity. They do not affect the quality and safety in any way, but they spoil the appearance considerably.
The blueness of the wood spoils the appearance
If you want to use light transparent paints for finishing, you will have to fight with the color. For this purpose, there are special compositions for bleaching wood. In this case, the procedure is as follows:
Then comes the treatment with fire retardants, primers and finishing compounds.
This video presents the experience of a man who polished a log frame himself. He goes into some interesting detail, so don't waste 20 minutes.
Log grinding technology
Before grinding the log house, it is necessary to prepare it. It is necessary to inspect the walls, remove large flaking pieces of wood, check the caulking of the log house and determine whether there are gaps and cracks. If a gap is found, seal it with sealant.
To fully organize the work, the wall is potentially divided into sections. This will allow you to treat the sanded area with paint and varnish coatings in a timely manner: within 1-3 days after finishing sanding.
Preparation for grinding Source yandex.net
After the preparatory work, you can proceed directly to grinding. We'll tell you how to properly sand a log frame to get maximum results. The grinding process is carried out in 4 stages; if you skip at least one of them, you will not get the desired result.
Stage 1 – rough grinding.
Primary grinding of a log house using coarse-grained nozzles. Mainly carried out by a grinder. During the work, the wood is covered with “lint”, blue stains and areas affected by mold and fungus, if any, are removed.
Rough grinding with a grinder Source master-srub.rf
Stage 2 – intermediate processing.
The “lint” that appears during the rough grinding process is removed using flap discs with fine-grained nozzles. The log house takes on a nice appearance, the required smoothness of the log is almost achieved.
Intermediate processing by machine Source sdelais.ru
How to use?
The grinder has a simple technical device. It is equipped with an electric motor connected to an angular gearbox. It ensures shaft rotation at high speeds of up to 1000 rpm (when working with wood, this speed is optimal). Powerful models require a three-phase power source; for household use, a standard power source with a voltage of 220 V is suitable. You have to work with the tool with a single point of support, holding the angle grinder suspended. Misalignment can lead to jerking, so a novice master needs to acquire serious skills for work.
Compliance with safety precautions will allow you to work correctly with the machine, namely:
It is convenient to work with a tool that has a support handle. The safest are those grinders that are equipped with a chainsaw chain. If the machine suddenly jams, the disc continues to rotate, which minimizes the risk of injury. It is also important to move the machine smoothly across the floor surface, avoiding vibration. Before starting work, you should once again make sure that the circle is securely and accurately attached to the axis.
photo of balconies in the country photo
It is better to start mastering the tool with cutters with small teeth. The smaller the teeth, the easier and safer the operations. During operation, any disk wears out, the diameter of the circle changes, and replacement is necessary. Change discs when switching from one type of processing to another during the grinding process.
You should follow the following step-by-step instructions:
See the next video for more details.
Grinding rounded logs and beams
Unlike hand-cut logs, rounded logs and beams have a smooth surface, which causes certain difficulties when processing them with a grinder. One awkward movement - and deep grooves and depressions will appear on the surface of a beam or rounded log that will remain there forever.
Working with an angle grinder is not for beginners; it requires certain skills. An angle grinder is a high-speed machine and, if handled improperly, can damage the surface. Do not press the tool too hard onto the area being treated. Sanding should be done with smooth circular movements, holding the grinder at an angle of 45 degrees. Grinding and polishing of timber should be done at low speeds. High speeds can lead to thermal destruction of the top layer of wood.
Sanding wooden floors: tools and work progress
Wood flooring is a great way to create a warm and cozy atmosphere in your home.
Especially if parquet or tongue and groove hardwood boards are laid. But in order for the wood fibers to acquire a characteristic pattern and become very smooth, you need to work hard with the tool after laying a new or restoring an old coating. We will talk about how to sand a wooden floor and then apply varnish. We’ll also tell you what tools are used for processing, whether you can do it yourself, and what to pay attention to when carrying out the work.
What you need to know when working with an angle grinder
Renewing flooring (parquet), furniture or the facade of a house where wooden structures or individual elements are present is carried out using a grinder for grinding, which is equipped with different attachments. Therefore, it is not surprising that an angle grinder for polishing wood is a popular power tool among professionals and at home. But in order to choose the right tool for the job, you need to carefully examine the wooden surface for the presence of fungus, cracks and irregularities. A video is provided to help beginners who want to know “How to properly sand wood with a grinder.”
A grinding attachment must be selected for each angle grinder model; only in this case will safe performance of work and high-quality surface treatment be guaranteed. Before you start working with a grinder (sanding wood), you need to make sure that the disc is properly secured. The angle machine must be moved smoothly over the surface and the tool must not vibrate.
Coarse grinding discs for wood for angle grinders
There are several types of circles that differ in shape, material of manufacture and purpose. As a rule, a wooden workpiece must first undergo a rough surface treatment, after which it is subjected to finishing or final detailing of the coating with abrasive segments.
For such work, there is a special attachment on the grinder for sanding wood. The most popular are:
- Grinding circles. This type of sanding attachment on an angle grinder is best used to remove a layer of old paint. Also suitable for varnished coatings that cannot be removed by hand. This could be a wooden floor painted several times or a window sill. The design of abrasive discs consists of a disc and metal bristles made of elastic wire. Nozzles are available with different arrangements of steel bristles. Depending on the desired effect, the bristles can be placed along the entire perimeter of the disc parallel to the tool or perpendicular to the segment - as in a regular brush.
- Cord brushes are a disc with a coarse abrasive coating designed for rough sanding and removing uneven surfaces on a wooden surface. With the help of this tool, a piece of wood takes on its final shape. The work productivity is significantly higher compared to conventional hand tools.
- End discs. Nozzles are used when you need to level a product from the end. Miter cuts and edges of the workpiece require such processing. The technique is identical to a file, but the effectiveness of the abrasive exceeds that of a hand tool. When working with a segment, it is important to have skills, and then such a simple tool can completely replace a molding cutter in terms of edge processing.
Using a grinder for polishing wood, you can completely restore furniture covered with varnish and paint. After such cleaning, the thickness of the wooden base practically does not decrease, but the newly painted furniture will look beautiful and impressive.
When performing grinding work with an angle grinder, the choice of tool is not so significant compared to the presence of well-dried wood and the absence of cracks on the surface.
Surface belt sanders
The most productive are surface belt grinders. They use abrasive sandpaper glued into a tape (Fig. 11). All such tools are equipped with a small bag for collecting wood dust. During operation, more than 80% of the dust generated accumulates inside this bag.
Rice. 11 Belt sander
Manufacturers recommend intermittent operation: grind for 5...7 minutes, and then give the tool a break. Even the presence of a fan inside does not effectively cool the device. After a three-minute break, you can continue working.
Manufacturers supply the tool with auxiliary devices with which you can fix the grinding machine in space (Fig. 12).
Rice. 12 Installing the belt sander on the table
Craftsmen make special stands for belt sanders, with the help of which the scope of application of the devices is significantly expanded (Fig. 13). With the help of such options, it becomes possible to polish the ends of products with high quality. The underframe itself can be fixed at any angle, which will allow for high-quality processing.
Rice. 13 Stand for belt sanderThe industry produces stationary belt sanders (Fig. 14). They are called grinders. With the help of such devices, it becomes possible to grind products by resting them on a special support table. A grinder is similar in many ways to a belt sander. In fact, it is a stationary machine where you can carry out quite complex wood finishing operations.
Rice. 14 Grinder
Types, purpose, features of work
There are different types of sanders that do the same type of work but with different results. There are tools for coarse (preliminary), medium (intermediate) and fine (finish) grinding. Part of the tool can even perform polishing.
A wood sanding machine can be of different shapes, sizes, and performance.
To choose a wood sander, you first need to decide what type of work you need it for. For rough grinding - leveling out unevenness, differences in height - one type is suitable, for finishing grinding - bringing it to perfection - another type. Moreover, both problems can be solved using different types of equipment.
The well-known grinder can also be used for sanding wood. It copes well with the rough grinding function. Of all the possible tools, this is the most productive. If you need to quickly level large wooden surfaces - sanding the floor, wall, frame - this is work for an angle grinder.
For wood, red sanding wheels are used - this is a special abrasive.
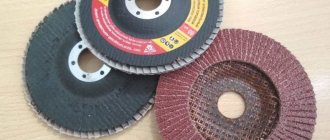
For grinders, there are special attachments for sanding wood. The best option is flap or disc wheels with sandpaper of different grits. When they are installed, the working plane is below the protective casing, it is safe to work, and you can move in any direction. Carefully handle areas with protruding nail heads and screws. We lower the tool from above and carefully move it. A sharp movement can easily break the grinding wheel, so be careful.
By changing the grain size of the grinding wheels used, you can carry out coarse and medium (intermediate) grinding. The work will take less time than if you use any other wood sander. But it may take more time to bring it to a smooth surface, since, with a lack of experience, there will be more flaws.
When sanding wood, the sandpaper becomes clogged and the speed of work decreases. In addition to a decrease in speed, there is another sign - the smell of burnt wood. It is not necessary to immediately change the disk; you can restore its functionality. To do this, grind the metal for a few seconds. Everything stuck to it—resin, wood fibers, dust—burns off, the surface is cleaned, and the processing speed increases again. This trick, by the way, can be used with other grinders.
This attachment is used if you need to quickly change sandpaper.
If you have to clean and change the wheels frequently, install a Velcro attachment on the grinder. Replacing the sandpaper is much easier and faster - unstick/stick in a matter of seconds. But working with the nozzle is more dangerous. Due to its height, the grinding area is above the level of the protective casing; it does not fulfill its functions.
During the launch, it happens that a precariously fixed circle or even the nozzle itself flies off. They weigh little, the injuries are not serious, but they are still injuries. An angle grinder with a smooth start helps reduce risks, but, all the same, you need to work with gloves, protective clothing with tightly buttoned sleeves, boots that cover your feet, and safety glasses.
It is called so because the sandpaper has the shape of a belt that moves continuously using rollers. That’s why such a wood grinder is also called “endless.”
The wood belt sander is designed for rough and intermediate surface leveling. By installing sandpaper with a finer grain, you can achieve a medium-finish finish. This is sufficient for joinery that cannot be painted. To bring it to perfect condition, you need a different type of wood sander.
modern pvc interior doors
A belt sander is good if you need to remove the old coating - paint and varnish
What are the benefits of a belt sander for wood? It has good performance. The tape on it is installed in such a way that one side allows you to sand close to the wall. What are its disadvantages? Due to the design, not all points can be “reached”. For example, corners, shaped recesses, grooves and other small parts.
The following disadvantages are a high noise level, not the largest grinding spot. It is so noisy that working without headphones is extremely uncomfortable. Why is there a small sanding spot when it looks quite large? Even with a large belt width, it grinds only in the center - the part in front and behind is not used due to the fact that it is raised to feed the rollers.
It can be turned into a sanding machine.
The wood belt sander has some special features in its operation. To reduce the depth of the furrows it leaves, it must be driven along the fibers. Then finishing sanding takes less time. And one more thing - if you get lazy while working and leave the machine in one place for a long time, a solid “hole” will form. Despite this, this is the most productive wood sander that is often used.
An orbital sander for wood has a round sole with Velcro, onto which sandpaper discs are attached. The discs are the same as for the grinder, so they are interchangeable. There are holes in the sole of the machine to remove dust. The dust is collected in a bag, a cassette-type container; almost all models allow you to connect a construction vacuum cleaner.
An eccentric sander allows you to process curved surfaces
The operation of an eccentric wood sander is based on simultaneous rotation and back-and-forth movement (reciprocating motion). This achieves a fairly good speed for intermediate and finishing wood processing. When working with this type of grinder, the platform moves in a spiral or orbit. That’s why these tools are also called orbital sanders.
Eccentric grinders are good for processing curved or profile surfaces - the machine is light in weight, makes little noise, is easy to control, and the angle of the disc allows you to reach recesses, notches, etc. With all this, she also processes large surfaces at a good pace. When installed, coarse-grain sandpaper can be used for both coarse and intermediate sanding.
There are small and compact ones, there are powerful ones with decent dimensions.
The disadvantages of this type of machine are the inability to work in corners. The round platform simply does not fit there. Also, there is an area of uncertain sanding along the edges—it won’t be possible to sand close to a wall or vertical surface.
Vibrating
The vibratory sander pad can be rectangular or triangular. When working, it makes circular movements with a small amplitude - it vibrates, which gives this type of equipment its name. This wood sander is used for fine finishing - for varnishing or painting, but is characterized by low productivity.
We suggest you read: How to remove soot from wood without damaging the wood
A vibrating wood sander with a rectangular surface allows you to process large areas, but with its help it is not possible to sand wood near vertical planes and walls - it begins to hit the obstacle. In this regard, the triangular one is more suitable for working in corners and hard-to-reach places, but you still can’t fit it tightly to the wall.
Vibrating machine is used for finishing
Another disadvantage of vibration devices is the so-called “lamb”. If a grain of sand or other hard fragment gets under the surface, it leaves small circles on the wood - “lambs”. It is difficult to remove these marks. You have to use increasingly finer sandpaper, gradually removing scratches.
Oscillatory
Strictly speaking, this is not a sander, but it can be used for sanding. Moreover, those places that are inaccessible for other types of machines - corners (even sharp ones), places directly next to vertical walls. For grinding, a specially shaped triangular platform is installed on the tool, on which sandpaper on a self-adhesive base is fixed.
This is what a multifunctional renovator looks like, which has a grinding function
During operation, the platform moves in a horizontal plane with a very small amplitude - the vertices of the triangle deviate by approximately 1.7° (this is an average of 2.5 mm). Due to this small movement, grinding occurs. This machine can be used for sanding in corners and close to vertical surfaces. Moreover, you can remove not only wood, but also smeared and dried glue.
To summarize, we can say that for housework and construction work, ideally you need two sanding machines - for rough and fine finishing. The most commonly used pair is an eccentric belt. If you are planning to start making furniture, then you cannot do without an oscillator.
If you do not like the result of the belt sander, you can purchase two orbital sanders with different eccentricities. For rough grinding, a tool with an eccentricity of 6-8 mm is suitable, for finishing grinding and even polishing - 2-4 mm. The only disadvantage of this solution is that good eccentric grinders are expensive.
Grinder cutting wheels for wood materials
Operating an angle grinder in tandem with a cutting disc for wood necessarily requires compliance with safety precautions. Work should be carried out in special protective clothing, and the workpiece to be cut should be firmly fixed in a vice or clamp
It is important to hold the tool with both hands to prevent it from being knocked out of your hands. Preference should be given to an angle grinder that has a speed regulator. Manufacturers produce discs for grinders on wood of four main types, which we will learn about in detail:
Manufacturers produce discs for grinders on wood of four main types, which we will learn about in detail:
- Circular or serrated - appeared the very first, but did not gain widespread popularity due to their kickback effect.
The disk has an external (end) arrangement of large teeth. Manufacturers produce wood cutting discs for grinders with a maximum diameter of up to 180 mm. The teeth can be equipped with special brazings made of carbide materials. Although such circles are the most common, they are the most dangerous attachment in action. If possible, avoid using it. It should be noted that such discs can only be used on grinders if the tool is used as a stationary circular saw - Chain - they look like a disk, only along the outer circumference instead of teeth there is a chain, like on chainsaws.
This type of attachment is safer and can be used to cut medium-density wood chips. With wheels of this type, the risk of jamming and kickback is minimized. This is achieved due to the special design of the nozzle, which is similar to a chainsaw bar. The circle consists of two parts, and there is a groove on the end side. The saw chain is located in this groove, moving due to the force of inertia. This design prevents the disk from jamming, and is thus a safer option compared to the first type. It is strictly contraindicated to saw wood with nails. At the same time, the teeth quickly become dull and fail - Universal - received this name due to the fact that it allows not only sawing wood, but also cutting metal, as well as making grooves.
The universal type nozzle has the appearance of a regular steel disk, but with three additional teeth in the form of grooves. The teeth are tipped with hard metal, which increases the service life of the cutting attachment. The advantage of a universal cutting disc for an angle grinder lies in the fact that it is as safe as a chain wheel, and at the same time costs 2 times less. Produced by Graff, which is why it got the name “count” - With a tungsten carbide edge, manufacturers do not stop there and are constantly improving their products.
Another type of cutting disc that is completely similar to a concrete cutting attachment. The only difference is that on the end part of the circle there is a tungsten carbide coating (diamond coatings are also found). The disk is equipped with slots with holes that serve to dissipate heat when working with dense materials, such as wood. Wheels with a tungsten carbide edge are effective not only for cutting wood, but also other materials - plastic, metal, etc. It is better not to use such an attachment for cutting one metal, because it will quickly fail. The wheel does an excellent job of sawing wood that contains nails, screws and other metal objects.
Now it’s not difficult to choose saw blades for wood for an angle grinder, knowing what types there are. For housework, it is recommended to use a wood saw blade with a universal or tungsten carbide edge. They are not only considered effective, but also safe. Circles with a saw chain are more expensive, but they are also safe when cutting wood with a grinder. The most dangerous are circles with teeth. They are recommended to be used only in situations where a stationary circular saw is made from an angle grinder.
Varieties
Grinding is the basic purpose of an angle grinder. In the case of working with wood, this is a complex process that requires care and skill from the master. Natural wood of varying structure is brought to perfection with high-quality and reliable discs. Regular diamond cutters will not work here. There are special grinding wheels for the woodworking industry.
There are several types of grinding wheels for angle grinders. First of all, the initial cleaning of surfaces is carried out. This work is performed by several disks, differing in shape and size.
When sanding with a sander, the wood layer remains intact, only the decorative coating is removed. This property of the grinder is indispensable when restoring products. Having removed the previous colorful design, you can apply another one to the fresh and smooth panel. At the same time, the furniture will change its appearance and will look new. A brush is used to brush or artificially age the material. To do this, the soft fibers are removed to reveal the rings and grain of the natural wood. The stain emphasizes the relief transitions.
At the next stage of processing, the surface is smoothed. Here experts advise using polishing wheels. They are made of sponge, felt and coarse fabric, with replaceable sandpaper. Fabric and felt are secured for work using Velcro. The attachments are sold in sets of five for easy replacement. Sandpaper is selected with medium or fine grit. The brand is usually indicated on the packaging.
The design of the nozzle is also important. Lapping or finishing wheels are divided into petal, solid and movable. The use of a petal wheel allows you to achieve an absolutely smooth surface. Several layers of emery are placed on the disc as an abrasive, overlapping like fish scales. This arrangement of the abrasive material reduces wear. The product is brought to an ideal state by such a modern attachment as a cup circle. The bowl provides minor texturing and penetrates joints easily. It has a pile made of synthetic material or corrugated wire reinforced on it.
A nylon wood brush consists of a large number of small bristles. It is used for final polishing. The bowl-shaped attachment allows the craftsman to sand the most difficult to reach areas of the part. The brush removes burrs and minor dirt and polishes the varnish. End brushes are made of polymer abrasive, cylindrical brushes are made of brass and steel wire.
Types of nozzles
There are several types of drill attachments, each of which is used for clearly defined work. The sizes, shapes and characteristics of these components vary. Let's take a look at the main types of grinding attachments.
Disk
Figure 4. Disk
A very popular type, which is a structure made of a certain amount of grinding material located around the circumference. The material used is different. Thick steel wire is used to process hard metal surfaces. Final grinding with a drill and polishing is done using polymers.
Disc nozzles are capable of working not only with the surface, but also with the edge, which allows you to polish narrow recesses. Widely used for processing complex parts. In their design, such attachments are a bit like cup attachments. But the difference is that all the bristles are based on a round disk in the middle.
The use of such tools requires certain skills from the master, so it is better to practice properly before performing important work.
Cup
Figure 5. Cupped
A drill attachment for sanding, consisting of a cup-like base and many fibers of sanding material. Used to remove paint or varnish from the surface of a part. For wood it is also used as a skin. There are many different types of cup attachments designed for different jobs. You can find a component for any task.
After using such a skin, it is recommended to treat it with plate attachments. This will help highlight the wood structure, which can easily be coated with varnish.
Petalaceae
Figure 6. Petal
A separate type, which consists of many strips of material attached to the axis of rotation. Sometimes such models are called fan models. Each petal is made of an abrasive material, which helps to provide the desired impact on the object being processed.
Very often, ordinary sandpaper is used as a material. This helps to reduce the cost of the product and make it as effective as possible. Suitable for processing wooden products of various shapes.
Drums
Figure 7. Drums
Sections of sanding paper are secured to a strong cylinder. This cylinder may be made of rubber or other material. To prevent the paper from moving from the drum, special holding mechanisms are used.
In order for the paper to fit tightly to the drum, it is artificially deformed, causing it to increase in size. The paper is stretched and securely attached to the nozzle. Such models are used for processing parts made of wood, glass or metal. Allows you to polish the surface to a mirror shine. Convenient to use for cleaning holes in parts.
Plate
The model is made up of two components: a round plastic disc and a sheet of abrasive material. This sheet is attached using adhesive material
An important feature of such a nozzle is the presence of a damper, which will smooth out the unevenness of the material and allow you to evenly clean the surface of the part. If this damper did not exist, processing would be greatly complicated
It is difficult to accurately guess the force with which you need to clean the surface. There are high risks of violating the integrity of the part and causing damage. This is especially true for weight lifting.
Any elastic material is inserted as a damper. Simple foam rubber seems cheap and convenient.
Working with devices requires a high level of specialist training. It can be difficult for a beginner to maintain a right angle when processing a part. Sometimes you can find models with a special mechanism that allows you to adjust the angle of inclination. It is used for both roughing and final processing. Everything will depend on the type of abrasive used.
Soft
These components are typically used on sensitive surfaces that are easily scratched. Also used for polishing mirror surfaces or varnish coatings. They are usually made of felt, polymers, foam rubber or some woven materials. There are different shapes. It all depends on the part being processed and its characteristics.
Abrasive
End bits that can be used to bore holes or give a part the required shape. They have quite a lot of rigidity, allowing you to remove entire layers of excess material. All parts are processed perpendicularly, maintaining a right angle. This can be difficult for inexperienced craftsmen.
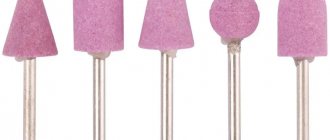
Heads come in different shapes: ball, cone, cylinder and more. Stones can be used to make such heads. The model is widely used for sharpening tools.
Grinding with a surface grinder and angle grinder (grinder)
An angle grinder (grinder) is a multifunctional device that is also used in this situation. Special circles are used for this. Petal wheels are made from sandpaper, which is attached to a flat surface. In this case, the circle can be of different diameters, with different grain sizes. When choosing, you can highlight the following recommendations:
- to remove paint, use a coarse-grained wheel;
- if it is necessary to remove a thin layer of wood, you can use an abrasive that has a medium grain size;
- In order to give the wood a special smoothness, you can use a fine-grained abrasive.
However, it should be noted that the surface removal will not be carried out along the fibers. At the same time, it is almost impossible to regulate the rotation speed and feed. You can use an angle grinder in cases where there is no need for a high performance indicator.
In order to sand wood, you can use special equipment called a surface grinder. The features of this include:
- The wood is combed using a reciprocating motion of the abrasive material.
- The sandpaper moves at high speed, which allows you to achieve good results when working.
- Unlike other methods, in this case the grinding machine carries out processing along the fibers, which determines the high quality of the product.
The design is quite simple, allowing you to achieve good quality. But when changing large surfaces, the grinder has low efficiency. Certain models have a fairly large surface to which the skin is attached, but in this case it is quite difficult to provide the necessary force.
Belt type sander
The belt sander is the most productive tool that can be used for processing wood with high productivity. The inkjet technique also has high productivity.
DeWalt Belt Sander
The work of the structure is carried out using a round sanding belt, which can have varying degrees of grain size. The design removes material along the fibers. However, do not forget that it is impossible to polish the corners using this design. The tape can be used for a large volume of work: floors, walls, furniture, and so on.
Despite the greater automation of work, it is possible to provide mechanical action manually. This is due to the fact that fiber removal can be done in the desired direction. It is also possible to process corners. However, in order to achieve the desired result, you need to have certain skills. The work is very difficult and time consuming. Therefore, hand tools are very popular only in certain cases.
If you find an error, please select a piece of text and press Ctrl+Enter.
When the part is ready, its surface should be carefully sanded.
For solid wood parts, it is customary to smooth out saw cuts or remove traces of glue, sand down areas where chips have broken off, or smooth out protruding wood fibers with the finest sandpaper before the wood is covered with stain or varnish. Even cladding made of plywood or veneer, which has an almost smooth, flawless surface, can be varnished without preliminary sanding only as a last resort.
Panels and parts made of solid wood may have almost imperceptible irregularities, which will become clearly visible after applying varnish, stain or other protective agent.
It is clear that sanding should not lead to the appearance of new scratches and grooves. You will avoid this danger if you use the correct sandpaper and block for your product.
Cycling
When planing blanks made of solid wood, more or less noticeable grooves remain after the plane. The best way to eliminate them is cycles.
Many home craftsmen prefer to process surfaces with just a scraper and completely abandon sandpaper. A well-sharpened scraper can clean planed surfaces and give them an almost flawless appearance.
The cycle is a metal rectangle with a cutting edge sharpened at a right angle, which is passed along the surface. The cutting edge becomes dull, so it needs to be sharpened from time to time. First, a chamfer (the beveled side of the cutting part) is ground on a whetstone or wheel, then the grinder is turned over, placed flat on the whetstone, and in this position it is driven along the stone in straight or circular movements, grabbing the cutting edge of the edge.
When working, take the cycle with both hands so that the thumbs are in the middle of the edge facing you. Always place the cycle at an angle and guide it in the direction of the wood fibers. Use the scraper only on solid wood, plywood or veneer. Particle boards quickly dull the cycles and leave nicks on them. It is better to use sandpaper to process putty surfaces.
Cycles smooth out unevenness left by a plane or protruding wood fibers.
Moistening the wood and applying primer
Whether you use scrapers or some other method, in any case, before sanding the surface of parts made of solid wood or lined with plywood or veneer, it must be moistened.
Read also: Structure of the rotor of an asynchronous motor
To do this, it is better to use warm water (you can even use hot water if the part is made of solid wood). Then you need to wait until the parts are completely dry. Small dents will disappear when exposed to water.
But the cut wood fibers, pressed to the surface of the part before they are moistened, swell and, having dried a little, stand upright. Therefore, the surface, which seemed impeccably smooth before moistening, often becomes rough and fleecy.
After sanding, the surface becomes smooth again.
Primer for quick sanding
The surface of a wooden part, regardless of whether it retains its natural appearance or is covered with stain or varnish, is primed.
The primer closes all the pores, as if sealing them.
As a result, the hygroscopicity of wood is reduced, and the paint applies better and more evenly than on an unprimed surface.
Make sure that the room you work in is dry, dust-free and not too cool. This way you will create ideal working conditions. It is more convenient to apply the primer with a soft flat brush.
The primer dries in about half an hour. But wait at least an hour before you start sanding the primed surface with the finest grit sandpaper (no. 240). Work only in the direction of the wood grain, change the sandpaper often and knock out the fine dust that forms during sanding.
The surface, which seemed impeccably smooth, became rough and fleecy after moistening.
Using a flat brush, carefully apply the diluted primer onto the prepared surface.
Sanding smooth surfaces
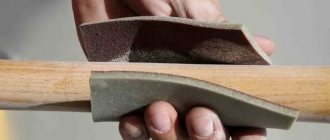
When sanding smooth surfaces, it is important to use sandpaper correctly: sandpaper that is too rough will scratch the wood, sandpaper without a boss will sand the surface unevenly. The boss ensures an even fit of the skin to the wood over a relatively large area. Usually a cork boss is used. But a small wooden block with even, smooth edges will do just fine. You can also use special holder pads made of hard rubber or plastic: they consist of two parts - upper and lower, between which sandpaper is placed.
First rough, then fine
To clean rough cuts with a saw, use sandpaper with a coarse abrasive coating (100 grit). Planed surfaces are sanded with 120-grit sandpaper. For a fine, final sanding, use 180- or 240-grit sandpaper. Sand the wood all the time in the direction of grain growth and without excessive force. Experienced craftsmen avoid working surfaces with sandpaper for a long time, and their movements are very light, almost without pressure. As a result, the tiny ends of the fibers are only pressed against the surface, but are not cut off.
A special grinding device is the so-called “sand plates” of different sizes and grain sizes. Each is a steel plate with tiny “pins” protruding from the surface with sharp edges. When grinding with such a plate, due to the large distance between the pins, a lot of sawdust is formed, and their cutting edges remain sharp for a long time. In practice, “sand plates” are noticeably more “aggressive” than ordinary sandpaper.
If the surfaces of large parts are sanded by running a boss wrapped in sandpaper over them, then when processing small parts they proceed differently: a piece of sandpaper of a suitable size is secured on a workbench with strips of tape and the part is passed over the sandpaper. This avoids rounding of the edges. Before proceeding with further processing of the part, after grinding it should be thoroughly cleaned of dust.
When sanding smooth surfaces, use a special pad so that the sandpaper is evenly pressed against the wood.
Small parts are best sanded by running sandpaper on a workbench.
Auxiliary devices made of cork and plastic for fixing sandpaper. “Sand plates” are glued to the handle plate.
Curved lines and profiles
Sanding difficult edges and profiles requires special flair and the right sanding tool. A boss with a sandpaper pad will not work here. It is often more convenient to work by simply taking the paper in your hand and holding its edges between your fingers so that they do not scratch the part.
When processing parts of complex shapes, it is advisable to use homemade “files”. They are made as follows. Narrow strips of sandpaper are glued onto strips or round sticks. With such “files” you can cleanly process the smallest curves or the narrowest recesses on turned parts.
Sanding sponges, which are sold in hardware stores along with sandpaper, are well suited for sanding rounded surfaces. The sponges have an abrasive coating of coarse, medium or fine grain on both sides, and a thin soft spacer between the coatings gives the sponge special flexibility and elasticity. There are also sanding sponges that are thicker and quite rigid: they are designed for sanding smooth, defect-free surfaces.
Wood dust is removed from the sponge by squeezing it. You can also wash the sponge, but wait until it is completely dry before using it again.
Coarse, medium and fine grit sanding sponges are particularly suitable for sanding curves and profiles.
The sanding jaws are so flexible that they fit tightly around any curve and even multi-stage profiles.
If you hold the sandpaper with your hand, be careful not to let the edges of the paper scratch the wood.
Sanding "files" can be made from strips of suitable sandpaper glued to strips or round sticks.
Roundings
The processing of a wooden part is usually completed by slightly rounding its edges, that is, the sharp edges of the transitions from one plane to another or from the front to the end surface are slightly ground down.
Be very careful and careful when performing this work, as the sharp edges of the part can cause injury. Do not make sudden movements when turning the part over, which could cause it to hit some hard object and, consequently, cause damage. After completing the roundings, the treated surface can be varnished. Note that on the rounded edge the varnish lays down in a uniform film and adheres better, whereas on the sharp edge of the transition from one plane to another this film is very thin and often breaks.
Perform roundings using sandpaper only with a boss, which is directed at a 45-degree angle to both surfaces. The boss ensures uniform grinding and rounding.
Make sure that the work is carried out, if possible, in the direction of the wood grain, and on the end sides - from the middle to the edges. When sanding along the edge, you need to slightly press the boss with sandpaper to the surface so as not to break off the wood fibers.
When rounding edges, guide the sandpaper-wrapped boss at an angle to the side edges or with light pressure along the edge.
Materials from which nozzles are made
All grinding attachments have one property in common: impact on softer material with the ability to scrape it off. But different jobs may require different rigidities. The following materials are used for nozzles:
- sandpaper;
- fabric materials or soft fibers;
- stones.
Sandpaper is used in the vast majority of work, as it allows you to process the surface with different forces, depending on the grain size of the material. Cloth or soft fibers are used for final polishing. Stones can be useful if it is necessary to make major changes to the shape of a part.
Types of grinding devices
A wide variety of attachments is represented by more than ten types. The most basic of them are given and described in more detail below. Any attachment is a rod with a grinding material attached to it, which can be sandpaper, an abrasive hard element, a hard cloth such as felt, or special brushes. The most popular types of grinding attachments for drills are:
- plate - have several versions from plastic to rubber;
- cup - in the form of brushes or with soft filling;
- disk with metal or soft padding;
- drum attachments with sanding tape are divided into several subtypes, which are described in more detail below;
- fan - with elements secured with sandpaper;
- soft attachments in the form of polishing discs;
- end ones in the form of drums, cones and washers made of hard and soft materials.
The following is a more detailed description of each type of grinding and polishing device that is used only in conjunction with a drill.
What will be required to complete the work?
Unfortunately, it is almost impossible to cope with sanding wood using improvised means. A special machine is needed, or better yet two - one for the main area, and the second for the corners. The cost of such equipment is quite high, and there is no point in buying it for domestic use. What to do? There are two ways out of this situation:
Of course, the second option will require significantly lower costs.
So, here is a list of tools and materials that you need to prepare before renting a grinder, so that during the paid time it does not sit idle while you run around the city looking for the missing little things:
1. Cycle – a special tool for manual processing of hard-to-reach places.
2. Sandpaper - you can calculate the required amount of this material based on the fact that one charge of the machine is enough for 15-20 m2 of surface. In addition, you need to take into account that you will have to sand several times, constantly reducing the grain of the paper.
3. A small hand-held corner machine will greatly facilitate the work. You can rent it in the same place as a large grinding machine.
Tips for choosing
In a good half of cases, grinding attachments are sold under the brand name of electrical equipment manufacturers. It's good if both devices are of the same brand. Then there shouldn't be any compatibility problems.
It is better to look towards well-known brands. They care about quality due to high competition in the market. Although products from no-name manufacturers are much cheaper, the chance of running into a mediocre product in this case is much higher.
Popular manufacturers:
- "Bosch"
- "Makita";
- Dremel
- "Bison";
- "Matrix";
- Fit;
- "Enkor";
- Verto.
When is the best time to sand?
There are a lot of possible answers to this question. Traditionally, the frame is sanded after at least the main shrinkage has passed. During this time, the log dries out and it becomes easier to work with. It is extremely difficult to remove even a thin layer from raw wood. If you need to level it, it will take a lot of time, money for disks and effort.
On the other hand, if you have a frame made of dried timber and logs, then you can sand and process it right away. In this case, having placed the frame under the roof, it is sanded, immediately treated with impregnations and left to shrink in this form. This is done infrequently, although no one forbids it. They usually act according to the usual scheme.
The log house is polished after it has settled
Source
Choosing a grinding wheel for wood
The most common angle grinder accessories needed for these purposes are:
- Peeling, stripping - needed at the preparatory stage, when it is necessary to remove old varnish and paint. The design of the discs involves the presence of bristles made of metal.
- Cord brushes have large abrasive particles. They will be useful for the initial stage of processing.
- End - used on the edges of the workpiece, bevel cuts.
- Petal types are for final gentle sanding, while the first three types are for rougher sanding. It has the shape of a plate on which there are abrasive parts that overlap each other. This arrangement slows down the wear process of the accessory.
How to clean after use?
During operation, the sandpaper becomes clogged with dust, shavings, resin and loses its working properties. To extend its service life, it can be cleaned. There are special cleaning bars for machine belts and discs. They are usually made of rubber. For regular sheet sandpaper, hard brushes are available. You can also clean the abrasive using improvised means. Suitable for this:
- a hard brush with plastic bristles for cleaning household surfaces and clothes;
- rubber (a piece of an old hose, tires, the sole of sneakers);
- rubber;
- hard ribbed plastic.
But sharp metal objects cannot be used for cleaning, as they will damage the connecting compound and the abrasive grains will simply crumble.
The cleaning technology is very simple:
- the sandpaper is thoroughly shaken off;
- lightly moisten the skin with water;
- wipe gently.
A good skin can withstand several cleaning cycles.
Where are sanding attachments used?
Figure 2. Areas of operation of the drill
Grinding attachments for drills significantly increase the range of application of the device. With such parts, the device can replace a full-fledged grinding machine. This allows you to stop keeping a large selection of different power tools at home and limit yourself to a few components.
Attachments are used for a wide range of work on metal, wood and even concrete. They help clean the surface from rust, old varnish or paint. Suitable for sanding coatings after priming. If necessary, surface polishing materials can be used.
Work performed using grinding devices includes:
- cleaning the surface for subsequent processing or painting;
- getting rid of rust;
- polishing surfaces to a shine;
- boring holes in metal, giving the required shape;
- ridding the part of burrs, excess protrusions and growths.
These are just the main tasks that can be solved using such a tool. In addition to them, there may be other types of work that require a similar type of surface treatment.
To install attachments in a drill and screwdriver, attachments are used that are securely attached to the chuck. But it is worth noting that the screwdriver will not allow you to work comfortably with attachments, as it operates at low speeds.
For the convenience of carrying out some types of work, the drill is fixed in a stationary tripod. In this case, the tool is used as a full-fledged grinding machine.
How to choose grinding attachments for an angle machine
Circles should be selected according to the main parameters:
- outer diameter (larger sizes speed up the processing process and increase service life);
- landing diameter (installation of a larger circle on a smaller one is possible using a special adapter);
- thickness (the greater the thickness, the longer the segment will last);
- grain size (the fraction must correspond to the type of processing: coarse abrasive for rough work, and fine abrasive for soft processing and creating a finishing coating);
- type of segment (special attachments for processing wooden surfaces are suitable).
Reference! The shaft diameter in modern angle grinders for wood is 22.2 mm.
Using a grinder when grinding concrete
Using an angle grinder, you can clean not only the wooden elements of the house. It can be used when you need to level concrete products with your own hands. Most often, concrete is polished with a grinder.
Before starting work, you should let the poured floor stand for about two weeks: during this time, the concrete will gain the necessary strength. Before grinding a concrete floor, its surface should be coated with a special compound, which, when reacting chemically with calcium hydroxide, forms a mineral binder. It can close the pores in concrete, which will give greater strength to the material and resistance to moisture. Floor grinding is performed with diamond cups specially designed for grinding concrete.
If you use cups with a grit of 400 or higher, you can get a perfect mirror finish.
Processing of grooves and ends of logs
Grinding the grooves of logs is always done with a grinder. The grooves are processed with a nozzle smaller than the disk. If the attachment and disc are the same size, this may cause the machine to jam.
To process the ends, use a grinding wheel with 40-grit sandpaper. Usually in these places they limit themselves to rough and medium processing, without grinding the ends to perfect smoothness. Immediately after grinding, the ends are treated with protective impregnations and antiseptics.
Grinding rounded logs and beams
Unlike hand-cut logs, rounded logs and beams have a smooth surface, which causes certain difficulties when processing them with a grinder. One awkward movement - and deep grooves and depressions will appear on the surface of a beam or rounded log that will remain there forever.
Working with an angle grinder is not for beginners; it requires certain skills. An angle grinder is a high-speed machine and, if handled improperly, can damage the surface. Do not press the tool too hard onto the area being treated. Sanding should be done with smooth circular movements, holding the grinder at an angle of 45 degrees. Grinding and polishing of timber should be done at low speeds. High speeds can lead to thermal destruction of the top layer of wood.
Types of grinder discs: the most suitable circles for wood
The range of attachments for this tool is quite wide. Products are classified according to purpose, depending on which 3 main groups of wheels for angle grinders can be distinguished:
Grinder discs are divided into three types: abrasive, saw and diamond-coated
- saws;
- with diamond coating;
- abrasive.
Saws. They are similar to standard saws, but are made from different materials. The most common option is tungsten carbide discs. They are not suitable for working with wood.
Diamond coated. This group of circles for an angle grinder is the most extensive. The high popularity of diamond-coated nozzles is due to their wide operational range. With the help of such circles you can process metal parts, as well as elements made of stone and concrete. Such disks are not used for wood.
Abrasive discs are best suited for wood processing.
Abrasive. They are highly versatile. Abrasive discs are used not only for cutting, but also for grinding and polishing surfaces. Products from this group are also used for wood processing.
These products are differentiated by one more characteristic - dimensions. The modern market provides a wide selection of products, the sizes of which vary from 115 to 230 mm. The 115 mm wood grinder blade is the most compact and is used for quick and accurate cutting of material. It is worth noting that the largest discs are not suitable for working with wooden surfaces.
Types of wood discs for angle grinders: design options
Many experts do not recommend using a grinder for cutting and processing wood. This is explained by the operating principle of the device and the characteristics of the material itself. However, the variety of discs for angle grinders is growing every year. They can be divided into several types according to the characteristics of their work.
Circular saws. Such wood wheels for grinders are used, as a rule, for more technologically advanced equipment, but many install them on angle grinders. They are divided into two types: large diameter with soldering and more compact, without soldering.
Segmented discs are made of tungsten carbite, which is characterized by high strength
Chain. Ideal for working with wooden materials. Many people are interested in the question of whether it is possible to cut wood with a grinder. There is no clear answer to this, but chain products are best suited for this purpose. The edge of the circle in this case is equipped with a chain on which the teeth are located. This design has many advantages. This attachment is most often used for smooth cutting of boards. It can also be used to process other materials: chipboard, fiberboard, plywood.
Saws with a small number of teeth. This type of circle was specially invented to ensure maximum human safety when working with wood. Compact products belonging to this group have 3 teeth, and larger ones have 4. This group also includes cutting discs for an angle grinder for wood 125 mm. Such products do an excellent job of their functions. They can be used to cut wood along and across the grain. In addition to standard functions, such disks are used to organize grooves in workpieces.
Segmental (material – tungsten carbide). Such products appeared relatively recently, but have already gained enormous popularity. A distinctive feature of such products is the absence of teeth. The edge of the disc consists of segments that are characterized by high strength.
Wood discs are divided into chain, circular, segment and attachments with a small number of teeth
This is interesting: Ferrules for wires for crimping - how to connect cables
What and how to sand wood
When carrying out various types of repairs, at the time of production of furniture or wooden things, it is often necessary to sand the wood. There are quite a few methods that can be used to sand wood. They have their advantages and disadvantages, some involve the use of hand tools.
You can sand wood:
- When using an angle grinder, you can bring the condition of the tree to the required condition. The grinder has an abrasive material represented by a circle;
- a regular drill can also be used to bring the surface of the wood to the desired condition;
- a surface grinder can become the main design for sanding wood;
- belt sanders are used for sanding wood using an abrasive material;
- Sanding can also be done using hand tools.
Despite the fact that the natural material in question has a fairly high structural hardness, quite a few grinding methods can be used; we’ll talk about some in more detail.
Professional polishing of logs
Specialists offer professional polishing services. Our craftsmen are highly qualified and know all the subtleties and nuances of grinding with an angle grinder. We use a professional tool with the necessary set of attachments, which has high performance and provides excellent grinding quality. We provide a guarantee for all grinding work that will be completed on time. We are ready to perform grinding of any complexity and volume. You can contact us in any way using the coordinates located in the “Contacts” section.
Calculate the cost of painting and insulating your home right now
Is it possible to sand wood with a grinder - application features. Sanding and polishing
In the home corners of a craftsman, most often only those electric tools are found whose range of applications approaches the mark of versatility.
This tool can grind.
This set can be easily reduced to 5 tools:
All this is enough to carry out basic construction and repair work in a house or apartment. The presence of another tool is not necessary, although cases vary. That's when the eternal questions arise.
Grinder or grinder - what's the difference?
Both devices are variations of the same electric tool - an angle grinder. They vary in power and actual capabilities. So, while some models are used primarily for cutting, others are more suitable for grinding.
The grinder in the form in which most consumers imagine it has relatively low power and simple functionality. During prolonged continuous operation, the 1.5 kW motor overheats and has to be turned off. It can be successfully used exclusively for domestic needs; such a tool cannot cope with large volumes of work.
Professional grinders are equipped with a much more powerful motor of 1.8 to 2.5 kW, which ensures long continuous operation. In such tools you can adjust the speed, they have greater productivity.
Grinders have a soft start function, unlike household grinders, which pick up speed immediately after switching on. At low speeds they “fade out”, while professional machines continue to work at the set frequency thanks to the available load compensator.
How to make a grinder from a grinder? + (Video)
This question can be confusing, because this is exactly what an angle grinder is - an angle grinder.
But it is very universal and must be prepared for each operation. To prepare the grinder for grinding, you need to purchase a support wheel that is installed directly on the machine shaft. To process wood, you need to stick an emery pad on this circle. The number of sandpaper is selected for the immediate moment of work. On sale you can find both a grinding wheel of the required diameter and sanding wheels of the appropriate size. Sanding wheels with Velcro are also available for sale, which are very easy and quick to change on the tool.
To convert our grinder for concrete grinding, it would be a good solution to purchase a special protective boot. It is good because it has a connection for connecting a vacuum cleaner. Well-known housings are produced by Hilti. The casing from this company has a sliding sector that opens part of the wheel for grinding in the corners.
Grinding metals with a grinder is usually performed with standard metal grinding wheels. They have different diameters, different thicknesses and different grains of the grinding surface. But, if you are going to sand an indecently rusted surface, then first you need to go over it with a metal brush. Such brushes of the required diameters are also available for sale.
