Repair / From Vladimir
- How can I restore functionality?
- Ball restoration options
- Making a serviceable cover
Plug: do it yourself
- Repair glass: everything ingenious is simple
- Welding as an alternative to replacement
- Flaring as a repair method
- Consultations from a practitioner on video
The ball joints carry the load of the front end of the vehicle, including the weight of the engine. At the same time, when moving, they receive constant impacts from the wheels in any direction. No matter what durable material these parts are made of, their service life is limited. It’s good that in many cases restoration with your own hands is possible.
An important component of a car suspension
The ball joint performs functions that are important for its comfort and safety in every car. It is a suspension element equipped with an iron rod with a ball-shaped tip on one side and a thread on the other end.
The configuration of this part requires the presence of a special casing into which polymer filler can be poured. The casing must have a hemispherical receiving part for attaching the ball part of the pin.
Strong fixation and dust protection
Thanks to the presence of such a mounting socket, the support can be easily mounted into the casing and will not cause problems in the future in terms of abnormal vibrations and jerks. At the same time, the technically correct location of the ball end allows the finger to oscillate completely unhindered and in different directions.
This entire assembly is protected from dirt by a boot, which is a strong and durable rubber cover with a cylindrical and conical section.
Thanks to the boot, sand, stones, and deicing agents do not penetrate into the suspension unit, which can significantly extend the service life of the articulated joint and thereby reduce the cost of operating the vehicle.
Device and purpose
The ball joint allows for a reliable movable connection between the wheel hub and the suspension arm. The assembly includes a housing, a ball pin , and an insert made of plastic. The body most often has a welded structure - two parts with a stamped spherical recess for the finger are connected using spot welding.
Essentially, this element is a thick-walled glass made of metal into which an insert with a finger is then inserted. To make the housing structure non-separable, its edges are flared. Often the liner is not manufactured separately, but the area between the walls of the housing and the ball surface of the finger is filled with a special polymer material. To protect the unit from dirt and water, a boot is placed on top.
It should be noted that active wear of the ball joint begins after the boot is damaged . Until this happens, the unit is practically not subject to wear. Thus, if you monitor the condition of this element and replace it in a timely manner, you can significantly increase the life of the unit.
However, it is worth remembering that the weld joints do not have sufficient tightness and even with an intact boot, water can get inside. To avoid this, the case should be filled with lithol.
Installing the hinge into the suspension
The segment of the hinge assembly on which the thread is provided is mounted in the corresponding receiving holes in the lever, after which it is fixed with a nut.
For the sake of full operation of the unit, care should be taken to ensure that there is 100% mutual mobility of the support part and the lever.
Don't delay repairs
The first and main reason to think about it is knocking. It usually occurs at low speeds when hitting bumps (potholes, speed bumps). This indicates the presence of play in the pin in the body, which is a consequence of wear or lack of lubricant. But not only ball joints can knock, but also worn-out silent blocks, stabilizer struts, etc. Therefore, in this case, a thorough diagnosis is needed to determine whether there is any play in the ball joint in the lever. If there is one, even if it is small, then you need to prepare for repair work.
The main purpose of the ball joint
To understand exactly what functions a rubber joint performs, it is enough to study the design of the steering knuckle, which is a component of the front suspension that ensures the wheels are connected to the body.
- The task of the ball joint is to provide the necessary mobility of the fist, thanks to which the machine is able to turn quickly and smoothly at any speed.
- An additional guarantee of comfortable steering is the use of a trouble-free steering system.
Most common problems
Every car enthusiast is quite capable of identifying deviations from the norm that have accumulated in the hinge on their own.
The fact that the current performance indicators of the ball joint no longer correspond to the standard indicators can be guessed by the following signs:
- The appearance of suspicious noises emanating from the suspension, especially when driving on dirt and concrete roads, overcoming ruts, holes and tile joints. Most of all, this sound resembles the effect of plastic fence panels hitting its iron posts during strong winds. In the car suspension, there is also impact contact between plastic and metal;
- In the cold season, car trips are accompanied by continuous squeaking. This development of events serves as evidence of the fact that the boot protecting the hinge has ruptured. In the future, if moisture penetrates into the cracks on the rubber boot body, it is possible that the lubricant will harden in the cold.
Removal & installation
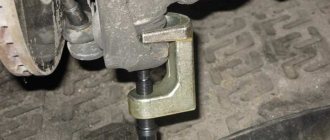
Puller
Necessary equipment:
- Ball joint remover.
- Jack.
- Car stand.
- A set of keys.
- Pliers.
- Mount.
The ball puller is usually not universal. If you do not find a suitable puller, it can be successfully replaced with a hammer. You just need to know where to hit. There is no need to knock your finger out of its seat. The blow should be perpendicular to the finger, and it should be hit on the eye (since the conical finger, a slight landing pressure will squeeze it out of the eye). Hammer is a universal puller. It should not be too heavy or too light; 600 grams will be just right.
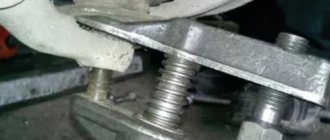
Removal: Loosen the wheel. Raise the car on a jack. Remove the wheel. Turn the steering wheel so that it is convenient to work. If the pin nut becomes cotter, remove the cotter pin using pliers. Unscrew the nut. Take a puller and squeeze your finger out with it. Unscrew the ball housing fastening. Using a pry bar, press down the lower arm and remove the ball joint. Removing and repairing tie rod ends and ball joints is no different, you just need to use another puller. The recovery methods are identical.
Installation: Attach the hinge body to the lower arm, tighten the fasteners, use a pry bar to press the lower arm, insert the pin into the seat. Screw the nut onto the pin and tighten it. If the finger rotates, pull the lever upward (the pin with the seat is conical, so when the finger is pressed in, it stops turning in the seat). Don't forget to tighten the nut. No puller is needed for installation. The next replacement of supports will not force you to fiddle with cotter pins if you change the nuts to self-locking ones.
The most vulnerable element of the hinge
The car enthusiast should keep in mind that cracks and tears on the surface of the boot are formed with one hundred percent probability. They are an inevitable consequence of long-term use of the machine, its chronic overloads and destructive atmospheric and climatic factors.
In a number of cases, driving style that is merciless to the suspension contributes to the destruction of the boot.
If signs of damage to the integrity of the boot appear, you should stop using the vehicle as soon as possible. Otherwise, the likelihood of debris and dirt penetrating into the support will increase, causing abrasive deformation of the components.
Is it possible to replace the ball joint with your own hands?
As you know, everything ingenious is simple. That’s why for an inexperienced car enthusiast, the best way to fix a damaged ball joint is to visit a branded car service center.
Its craftsmen will not reinvent the wheel, which is what the Kulibins from garage workshops are very prone to, and will restore the unit’s functionality in full compliance with official repair regulations.
- At the same time, in a number of cases it is possible to diagnose ball joint problems without the help of professional car mechanics.
- Car enthusiasts with extensive experience are quite capable of repairing the ball unit on their own.
In order to avoid annoying mistakes, you should find out exactly how badly the boot was destroyed, whether there is noticeable play and long wide cracks in the assembly.
Making a serviceable cover
The blind part of the support body is made removable. At the same time, you can change the plastic inserts many times, each time restoring the functionality of the support. The removable bottom allows for routine inspection without removing the ball joint from the suspension.
Plug: do it yourself
- A hole the size of a finger ball is drilled in the bottom (with a small gap, of course). It is drilled out - it is said conditionally. A milling machine is required. Don’t be afraid to damage the plastic liner when boring, you will still need to change it. The thread is cut inside. This is a rather complicated procedure due to the large diameter. But in any tool shop they will do this kind of work for a nominal fee. Entrust the work to professionals if you are not one yourself
- Then a threaded plug is made for this hole, repeating the shape of the standard bottom.
Tip: To make the plug accurately, use two ball joints. Cut the bottom off one using a grinder and use it as a template for the shape.
- On the manufactured bottom, you must cut slots for the key, otherwise it will be impossible to firmly tighten the repair unit. Replace on a clean surface, otherwise the meaning of the work is lost.
- Now for repairs it will be enough to unscrew the plug, remove the pin (checking its geometry) and replace the plastic inserts.
Important! It is necessary to ensure that the thread is locked, otherwise the bottom may unscrew during operation.
Repair glass: everything ingenious is simple
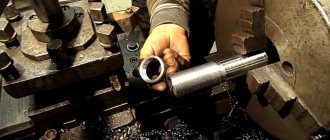
The principle is the same as in the first case - to make a replacement bottom. Only the execution is different. If the bottom of the support is too thin to make a full threaded connection, it is necessary to make a repair cup. It is turned on a lathe from a steel circle of suitable diameter. The same hole is made in the bottom of the glass and a thread is cut. And finally, the support replacement bottom is made.
Then the bottom of the cylinder is cut off from the ball joint using a grinder or a hacksaw. A repair glass is welded in its place. The method is more labor-intensive, but it does not allow the finger to heat up during the dismantling process.
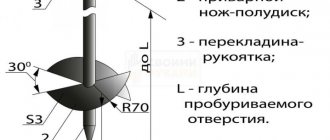
Scheme for manufacturing a product variant
Further operation follows the same scheme: when play appears, unscrew the repair plug, remove the pin, change the plastic inserts.
It is worth noting that spare parts manufacturers produce many options for repair ball joints. Replacement inserts and new pins are sold for these collapsible housings. However, in our article we are considering self-production.
Welding as an alternative to replacement
The fastest option for restoring a ball joint. The rear (supporting) part of the cylinder is simply cut off. The method doesn’t matter - you can use a hacksaw, or you can use a grinder, but there will still be a temperature effect afterwards.
Having gained access to the cylinder cavity, you can change the polymer liners.
Important! Before installing new liners, be sure to remove any burrs formed during cutting. Torn metal edges will quickly split the liners during use.
After installing the new liners, the bottom is carefully welded. In this case, it is necessary to compensate for the production of metal formed during cutting with the thickness of the seam. Usually it is 1.5–2 mm.
Welding is one of the most painstaking options
Important! Use a welding method that minimizes temperature effects. The polymer liner inside may reach the melting point. Therefore, until it cools completely, do not apply any loads to the finger to avoid deformation of the liner.
Flaring as a repair method
This technology requires professional equipment, so it is impossible to flare a ball in a garage. A crimp ring is cut to fit the diameter of the finger ball.
Turning work will find its place here too
The seat and ball are cleaned of dirt and polished. New liners and a crimp ring are selected or machined from caprolon.
It happens that caprolon is not available, but replacing it with steel is not recommended. It’s better to spend money on this material once than to replace it more often than it could be
After assembly, the crimp ring is pressed in and rolled on a press. When crimping, special inserts-clips are used according to the diameter of the ring.
Inserts can also be found in car dealerships.
Correct diagnosis of ball joint
After determining the degree of wear of the hinge, repairs are carried out according to the following scenarios:
- If the boot is cracked, but no play is observed, then the boot is replaced;
- If the boot is destroyed and there are signs of play, then the entire ball joint will need to be replaced, and immediately. Otherwise, every new trip, even with an empty trunk, can lead to dire consequences.
Which restoration method is better?
- The threaded plug looks preferable since there is no temperature effect on the support. However, this method requires a thick bottom, which is not always present on compact parts.
- A glass with thread is the golden mean. Welding occurs without affecting the plastic, but the strength characteristics of the metal deteriorate.
- Welding is the simplest, but ineffective method. After treatment at high temperatures, new polymer inserts lose their properties and their service life is reduced.
- Flaring is an ideal method from a quality point of view. You actually get a new ball joint, manufactured using factory technology. However, this technique does not work at home.
Consultations from a practitioner on video
Inadmissibility of using damaged hinges
It is important to keep in mind that the integrity of ball joints has a decisive influence on traffic safety, even on smooth city highways.
In the event of a critical rupture of the ball joint, the wheel breaks, causing it to stop rotating.
As a result, the car rushes not along the trajectory given to it by the steering wheel, but along the vector created by the locked wheel.
- If the ball joint is still intact, but there is play in it, then there is a risk of loss of controllability.
- This means that on a road crowded with cars, the driver simply will not be able to avoid a collision or side contact at the right time.
In order to prevent such a development of events, it is necessary to carefully diagnose them at the slightest manifestations of excessive depreciation of the hinges.
How can I restore functionality?
It is important to know! After repair, the ball is not restored to the condition of a new part. The service life will be shorter. But you don’t have to worry about operational safety.
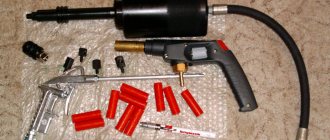
There are many recovery methods. A fairly popular repair method is the SJR technology, when molten polymer is pumped into the cavity between the holder and the ball.
We will consider repairs with disassembly of this unit.
To understand the mechanism of operation of the support, look at the diagram:
Often the problem occurs due to damage to the boot, and not to the metal itself
Only the polymer liner is subject to wear. It is when it is abraded that backlash appears. If you continue to drive with a loose ball joint, the top of the cylinder will also break, and then the pin may fly out of the race.
Inserts are sold in car dealerships as consumables. If your ball joint is collapsible, you can easily pull out the bottom and replace the polymer inside the product.
Consumables can be sold in a store at a more reasonable price than buying a new spare part
