Today, a loom in the house is exotic. And some 70-80 years ago every village housewife had one. In many ways, this is a plus, because it means that the modern standard of living allows everyone to purchase ready-made clothes and fabrics, rather than waste time and effort on making them. However, modern women (and men) are increasingly interested in this forgotten craft, recreating ancient village weaving looms. Let's find out a little more about the features of these devices, as well as how you can make them yourself at home.
Weaving machine and its structure
This device was invented before our era. Over the past millennia, its design has been improved. However, some elements remained unchanged.
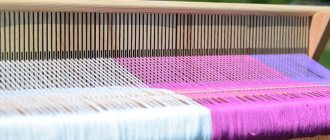
The basis for fabric production on any loom is vertical threads. They are called the main ones. The very process of creating a canvas is the interweaving of horizontal (weft) threads between the base ones. To do this, manual looms use a shuttle (a rectangular, flat spool with pointed edges). Its shape allows it to easily slide among the warp and pull through the weft threads.
Another important part of any loom is the reed. This is the name given to the frequent comb used to compact the fabric after each shuttle run. Without such “combing”, the finished fabric will be loose and uneven. In most household and industrial weaving looms, a special bar with teeth is used instead of a reed.
The last integral element of each such device is the frame that controls the base threads. Their function is to take turns raising either the even or odd ones. Thus, a more reliable and varied weave of the fabric is achieved.
Types of machines
These devices are classified according to different indicators.
- By design they distinguish between flat and round looms. The latter is used to produce only a special type of fabric.
- Based on the width of the fabric produced, narrow (up to 1 m) and wide (over 1 m) machines are distinguished.
- Based on the type of weaving of threads, weaving devices are distinguished that produce simple fabrics (eccentric), with a small pattern (carriage) and large-patterned fabrics (jacquard) for the production of the most complex patterns.
- Regarding the principle of operation, there are: manual, semi-mechanical, mechanical and fully automatic machines.
Particularly worth highlighting are the so-called frame looms. Usually they are completely devoid of any mechanisms; they have to be woven by hand.
What to spin from
The need for material for spinning and weaving led to the development of plant growing: in addition to edible plants, spinning plants began to be grown - flax, cotton, hemp . A new industry also appeared in livestock farming: sheep began to be raised for spinning wool . In Asia they also spun the wool of camels and mountain goats, and the Indians used llama wool .
In China, back in the 3rd millennium BC. The material for spinning was the fibers that envelop the pupae of silkworm . They produced a very strong, thin, smooth and shiny thread - silk . Silk fabrics came from China to the West along trade routes and conquered the Europeans. In addition to beauty and durability, silk had another valuable quality - fleas and bedbugs avoid silk fabrics, and when there were difficulties with hygiene in the Ancient World, this was very important.
The Chinese have kept the secret of silk production for centuries and themselves sold silk fabrics to the whole world. The name of the main trade artery between East and West - the Great Silk Road - speaks about how valued silk was.
Short story
Judging by ancient Egyptian images, already in those days humanity invented some kind of handloom. Most peoples had a similar design. This is evidenced by the drawings and archaeological finds that have reached us.
As a rule, they were woven from threads of plant (linen, silk, hemp, cotton) and animal origin (wool yarn). Naturally, such fabrics were not very strong and durable. To provide clothes for the family, they had to weave every year. In this regard, almost every peasant family had a home loom.
Although weaving was practiced in every family, there were craftsmen who specialized in the production of special fabrics or carpets (tapestry). For many centuries this profession was very profitable and prestigious.
Everything changed with the advent of the mechanical loom. Now it was possible to produce large quantities of fabric with minimal time and labor. Gradually they began to equip factories that produced cheaper fabric than weavers. Soon the latter were forced out of the market. By the beginning of the 20th century, the weaving profession was losing its former prestige. Now they were engaged in the production of homemade linen only for their own needs.
As a rule, machines inherited from grandmothers were used for this. Or we had to make them ourselves.
Information on how to make a loom was taken in those days from two sources. It was either a manual by I. Levinsky, published back in 1911. The book was called “Improved Handloom”. It contained fairly clear illustrations, with the help of which it was not difficult to assemble the necessary equipment.
The second reference book was V. Dobrovolsky’s manual “How to build a loom and weave simple fabrics,” published in 1924.
Both publications can still be found in libraries today.
By the beginning of the 80s, the standard of living of the peasantry began to rise. This allowed many of them to give up weaving, buying ready-made fabrics in stores. Now the looms were gathering dust again in closets and attics. Only fans of this craft have preserved them. It is noteworthy that today most of them are well over 70 years old.
Since the 2000s (when store shelves were filled with various factory-made textiles), interest in making linen by hand has increased again.
From fiber to thread
Coarse twigs or stems were not suitable for making fabrics; thin, even and strong threads were needed. Since ancient times, people have obtained fiber from the stems of flax, nettle, hemp, from the fleecy pubescence of cotton seeds, and from animal wool.
The fiber was spun into thread . A lump of fiber was mounted on a spinning wheel - a stick with a slingshot. A bundle of fibers was pulled out of the lump and attached to a spindle a spindle whorl attached to it . The spindle was twisted and released. Hanging in the air, it quickly rotated, twisting the fiber into a thread. The rotation was supported by the weight of the spindle whorl, and a twisted thread was pulled out of the fiber. The finished thread - yarn - was wound on a spindle.
Spinning
Factory machines
If you are wondering how to make a DIY loom, then you are one of those who want to create their own textile products from scratch. To do this, it is not necessary to make the machine yourself. You can buy it.
Read also: How to make an ax handle for a cleaver
There are hundreds of varieties of factory-made looms on sale. Domestic or European manufacturers provide a guarantee for their products, so you can buy machines without fear that they will not be able to work.
Judging by the reviews, among Russian manufacturers the best are looms and Pelsi. The latter specializes in the manufacture of wooden toys.
As for manufacturers from other countries, their products are many times more expensive.
Weaving
Weaving machines for beginners and professionals. warranty from our Ashford .
If you are just thinking about buying a loom, you will certainly have questions. Answers to the most common questions from beginners are given below.
Question No. 1 Where to buy a loom?
Buy any weaving equipment directly from our factory (Russian representative office). Equipment is always in stock, factory warranty, professional advice.
Question No. 2 Is it possible to learn weaving on your own?
You can easily master the Rigid heddle and knitters loom weaving machines on your own. But for such things as working with two reeds at the same time, we recommend that selective technicians turn to professionals - they “ate the dog” in this matter and in four to five hours they will teach you what you will take weeks to disassemble on your own. As for heald looms, it is advisable to learn how to at least stretch the warp and thread the loom. You can take weaving training (in groups and individually) in Ukras workshops (contacts and directions).
Question No. 3 What materials can be used for weaving?
You can weave whatever you want - wool, silk, linen, cotton, scraps of fabric... even metal wire! The machines are very durable and will withstand any material. Our store has a special section - Threads and Yarn for Weaving - where materials that real professionals work with are displayed!
Question #4 Where can I see what can be made on your looms?
You can not only view the works of our clients and craftsmen, but also buy them. Regularly review the Finished Products section on the Ukrasa studio website. The works of real masters appear there, with descriptions of the materials and weaving equipment used to make the products.
Question No. 5 Which loom to choose - a regular one with a reed or a heald one?
The answer to this question lies only in your dreams and plans. If you plan to create fabrics with complex weaves, your choice should fall on a heald machine. However, conventional reed machines have much greater capabilities than meets the eye. Therefore, do not hesitate to contact our consultants for advice (contacts and directions).
Question No. 6 What blade width is best to choose?
We make machines with a width of up to 120 cm. And this is not the limit, considering that on conventional machines of the Rigid heddle and knitters loom series you can create a fabric twice as wide as the width of these machines suggests (i.e. on a machine with a width of 30 cm, you you will be able to weave fabric with a width of 55-58 cm, and, accordingly, on a loom with a width of 120 cm you will be able to weave fabric with a width of 235-238 cm). The most popular machines with us are those with a width of 50, 60 or 80 cm.
Question No. 7 What else should I buy in addition to the loom?
Ashford factory machines are equipped with everything you need to get started. In the box with the machine, shuttles and everything else will be waiting for you. You don't need to buy anything additional. If you wish, you can purchase additional accessories for the loom later if you realize that you need them. The only thing you will need to purchase immediately with the machine is yarn (threads) for weaving.
Question No. 8 Does it make sense to buy a stand for a loom?
Stands (especially for large and heddled looms) are undoubtedly a necessary thing. Having a stand, you don’t have to constantly move the machine around your apartment (it takes up a lot of space on a regular table).
For heald machines, stands are sold with pedals. This allows you to increase not only comfort, but also the speed of work - the hands are busy with their work, the legs are busy with theirs (raising the jaw, changing healds, etc.). On both sides of the stand there are convenient shelves where you can place shuttles and hooks.
How to make the simplest machine from thick cardboard
The process of creating fabric itself is not very complicated. If you plan to weave small items like belts, bracelets or napkins, you can make a very simple handloom.
To do this you need a sheet of thick cardboard. If you don’t have it on hand, you can use juice or milk packaging material.
To begin with, take an even rectangle. Next, equal distances are measured along the edges and tiny rectangles are cut out at the top and bottom. All.
Now the warp threads (vertical) are pulled through these holes and secured. An ordinary gypsy needle will act as a shuttle. Using it to stretch horizontal threads between the main threads, you will gradually be able to weave a small piece of fabric.
Of course, on such a primitive machine it will only be possible to weave coarse fabric. However, most craftswomen who began their creative journey with such a device advise in their reviews not to neglect this machine. It will be an excellent budget start that will help you get your bearings and understand the process a little. In addition, once you start working on it, you will be able to decide for yourself whether this trade is interesting to you.
Frame type machines
If you've mastered the cardboard jig and are ready for more, it's worth taking up making a frame loom.
It's easy to do. A rectangle or square of the size you need is knocked out of wooden planks. Next, nails are driven evenly into it from above and below. They will serve as fasteners for threads.
Before starting work, a base is stretched between the upper and lower rows of nails. Next, weft threads are passed between these threads.
If the frame is very large, it is worth making a small shuttle for it from a piece of the remaining plank. To do this, you need to sand it well, give it a thin streamlined shape and make grooves along the edges so that it is convenient to wind the thread onto it.
If the frame size is modest, you can use a large gypsy needle.
Please note that for this type of hand loom a reed is already required to ensure that the fabric is dense. This comb can be made from the same wooden plank by cutting holes in it corresponding to the location of the threads on the nails.
If you plan to sew clothes from woven fabric, you can make frames in the shape of patterns for future parts. This way, you won’t have to waste extra material when cutting, which you spent so much effort creating.
From basket to canvas
Look at the fabric - individual threads are intertwined there, like rods in a basket. Weaving is much older than weaving. People were still sewing clothes from skins, but they were already weaving baskets from flexible rods, baskets from bast (the soft part of the bark), and mats from plant stems. Weaving technology was also used in the manufacture of fabrics; it became the basis of weaving .
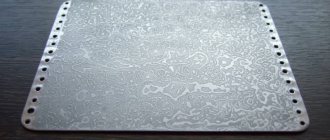
Weaving: 1. From twigs (basket) 2. From bast (body) 3. From stems (mat) 4. Woven base fabric
Weaving loom for rugs
In addition to clothes, bed linen and towels, our grandmothers wove carpets and bedspreads on their looms. To create such products, the same classical devices were used. However, they are quite bulky. In addition, it takes a lot of time and effort just to thread the machine to start working on carpets.
Therefore, a simpler weaving device, the frame type, is very popular.
As a rule, rugs that are well known to all of us are created on such a machine from scraps of old clothes. You can also use special thick woolen threads.
How to make such a loom with your own hands? Quite simple. It is an improved version of the classic frame. However, it will be larger and longer. As fasteners for the base threads, you will have to use large nails or screws with thick legs and wide heads.
Pay attention to the special detail. You need to place 4 metal loops along the four edges of the machine. They are needed to fix 2 rods. When working on a rug, they will need to be inserted into its edges so that the width of the finished product is uniform.
Round machine for rugs
Many people like round floor mats rather than rectangular ones. To weave them, you need to use a round loom.
You can make it, for example, from an ordinary plastic hoop. Just make sure that it is not curved, as this will affect the quality of the finished product.
First, the edges are marked around the entire circle. Next, you can drill holes at the marks or drive in nails. Some people simply tie the threads to the rim itself. However, with this technique, the finished rug will not be of very high quality, since poorly secured threads can sag or move out.
If you were not lazy and made normal fasteners for the base, you can start working. To do this, the main threads are pulled radially. The machine begins to resemble a bicycle wheel. Now you can start weaving the rug from the very middle.
As a rule, this machine is operated by hand. Reviews advise using a miniature shuttle or a large needle only when making very thin fabric.
Read also: VVGBM APG cable decoding
How to make a machine from plywood or wood
If you have enough space to accommodate a full-fledged weaving device, it is worth trying to make a more professional model. Most often they are made from plywood or wood.
There are many ways to make such a device with your own hands.
There should be two rollers at the very beginning and at the end. Threads are wound onto one, and finished fabric onto the other. The ideal option is to make them with bolts or handles with the possibility of fixation.
If your machine does not have a separator that facilitates the slipping of the shuttle, you should first attach not 1, but 2 rollers. One will place the even warp threads, and the other will place the odd warp threads.
The last required detail is the reed. It can be made from 2 wooden planks with nails often driven between them.
When threading the machine, the threads will need to be passed between these teeth.
If all this is done correctly, you can get to work.
For Warp Training Belt Waist Project
Weave, you can hold a pair of bets on the board should be spaced 36" (90 cm). Ajústenlas firmly. They should not move the entire time they are being built.
Make a net of 1 yard (±90 cm), with 92 threads, i.e. a full 46 circles around their share in a “figure 8” shape. This will give belts from 25 ½" (±65 cm). Long, including braids and approximately 4 ½" (± 11.5 cm). Wide. To demonstrate, I've taken a quick photo of the basics above.
With two sticks ready to save the crossing wire, tie them together by hand. If you don't have grooves in your cross stick to hold the thread, you can tie it with ribbon. Use the length of wire at each end to secure the wire as shown in the picture above.
Its fabric consists of two puffs, one controlled by a held and the other by a bar or loop.
Fabrics
- Let the first 6 "(± 15 cm). Warp into braids.
- Tejana until they are 6 “fabrics.
- Let the last 6 “braids.
All together the basics will be used so that nothing is wasted. The strings will be transmitted through the cores, which serve to connect the strips to the bars of the loom.
Weaving on Shade Shade Mounting Waist
The basics are in the shadow of the bars as shown below. Threads that have knots at the beginning and end will be fixed to the loom bar with a fixed object.
There are several ways to do this. Experiment with them and find which one is most convenient for you.
Weavers in Guatemala have their warps stuck at a significant upward angle. In Bolivia, women weave narrow fabric, stretched between their waist and thumb so that the fabric is actually at the corner down. I prefer to work on the web, which is on the corner a bit and for me, option 3 above is the most stable set.
Another shade bar is attached to your waist by a belt. Ideally, the belt is placed around the weave hips.
Weavers come in all shapes and sizes. You can see in the picture exactly how she should make the belt on his body. Considering that the fabric area in this painting is 17 ½" (±45cm.) Yes, you can make necessary changes in the length of your project according to your shape and size. I feel comfortable with a shade bar of about 4 ½" (±11.5 cm) from my body.
(In the video below, you can see that my loom bar is actually quite far from my body; this was only done to give you an unobstructed view.)
Remember that the fabric shade you are making is part of the same loom and there are some basic steps and techniques that they need to become familiar with.
- Increase and release tension on the warp threads from his body, allowing them to open up and unfold effectively.
- Gently open the shed warps so there is no excessive wear, which is what produces the yarn fluff.
- Keep the edges neat and straight.
Practice Project-weaving narrow strip shows
I recommend knitting a narrow stripe pattern of about 28 threads (14 rounds per beat) to familiarize yourself with its shadow before the wider project that will be used to make your waist belt. At the end of this article, I have given some suggestions for using narrow stripes for small gifts for projects.
I'll show, through a short video, these basic techniques on a narrow swatch of fabric, but first we need to make heddles loops out of ropes and resistance. My teachers use their fabrics in the Bolivian warp yarn to make your Held and I do so. However, in Guatemala, all the weavers who have seen nylon are used for his Held, as it is soft and slippery and does not burn the wires. Nylon certainly has its advantages, however, I personally didn't prefer it as it slides around too much and doesn't hold knots well.
Lizos Finance for Narrow Weave
Now you are ready to start knitting! Have you tied one side of your shadow to a fixed solid object? Is your belt around your hips and connected to the other end of the shade? So let's get started!
- Come in line with the cable passing over the cross to glue.
- Anchor rope with his left thumb, pulling over the rope between the first and second lines.
- Take the rope and over your side. The first thread is currently blocked in fundamentals.
- While attaching the rope to his left thumb, pull more rope between the second and third strands.
- Once again, pass the rope and over your side.
- And then along the base.
- Pass another short rope (black) through all the loops that wound on the left arm and tie a knot at the top.
- Held cut his own rope and took the beginning and ending tails, added it to the black string and made two knots at the top.
- Make your shed loop a short string passing under the wires that pass over another crossing club.
- Aten is the length of the thread per knot. Pull out the sticks cross. His hold and drag loops have been completed.
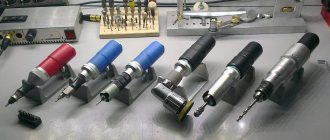
Machine tools from other scrap materials
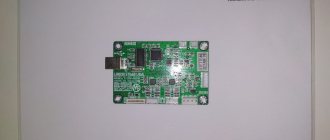
In addition to wood and plywood, weaving jigs of the above type can also be made from other materials. For example, from plastic pipes. When making miniature models, ordinary combs or cards are used. A photo of such a machine is presented above.
Also, when making miniature models, ordinary combs or cards are used. And the machine itself can be built from a cardboard box.
If you want to show your creativity even in the way of creating your own loom, go for it! You will succeed.
Nowadays you can buy almost all home craft products in stores. But sometimes you don’t have the money to buy it or you want to make something yourself. Recently, the variety of interiors has simply gone off scale. Designers often use antique items to create a unique and unique atmosphere in the home.
Many people cannot afford to hire a designer and purchase unusual decorative elements, so you can make such items yourself. For example, woven carpets will add color to the interior. And if they are made on their own, they will delight you every day. Moreover, with them your home will become cozy and warm. In addition to carpets, you can make napkins or lampshades. All these items are made using a loom.
All these things were made using a handloom. The first looms were large wooden structures. There were weaving looms in almost every house. And they were taught to use them from childhood. The skills of patterned weaving were passed down to the younger generation. Ancient looms were mostly shuttleless.
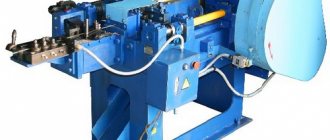
If you are interested in an activity such as weaving, then you can make a loom with your own hands at home. The loom is widely used in the modern world. The shuttleless table loom is also designated as STB. It is used in the processing of various fabrics to obtain finished products.
Team
Here you can see the equipment used to create and weave on the selvedge loom. If this is the mysterious arrangement of sticks and strings I mentioned above! But be patient... this mess is going to become a loom.
Forget the fancy names, a loom is basically two sticks with a warp stretching between them. Two more sticks strategically placed in the center, let you manipulate the basics of creating sec. And finally, the frame that holds it all together is transported and hits to be in place with two additional instruments. And "lifting stick? Don't worry, everything will be discovered.
But what is missing from this picture...? Of course, you. Imagine, there in the bar there is a loom and a waist belt.
Well, it seems like we should make a trip to the store, doesn't it? "Not necessary. Take a look at some of the choices made at home.
Although they rotate this project and make their own waist belt, they can make temporary belts with a pillowcase. An excellent bar loom can be made with a broom cut pieces from 14" - 19". You can use a wooden ruler as a sword and kicker, some pencils can replace sticks, are used to keep crosses and hold heddles, and can be a simple tool for carrying a cardboard frame.
Working principle of table loom
The design of the weaving machine involves laying threads using a special threader. The amount of yarn that enters the installation can reach 2-4 kg. Thus, you can work on the STB loom for a long time without stopping.
This installation is a combination of shafts. This is a roller-beam for winding thread on it and a roller for the finished fabric. The threads are made through holes - healds. The healds are connected to each other by a braid that is thrown over the heald rollers at the top and bottom. There are also two rollers, which are necessary when exiting the main part and the finished product, respectively.
The type of mechanism on the devices represents the formation of a pharynx. There are 3 types of mechanism:
- cam type;
- carriage;
- jacquard.
If simple patterns are intended to be produced, then the cam type is used. The cams also make it easy to move from pattern to pattern. The jacquard mechanism provides wide installation possibilities.
Depending on the filling width, the machines are divided into wide (from 25 m) and narrow (22 m). If there is a multi-color weft addition, it becomes possible to introduce threads of different textures and densities.
Main stages of work:
- Yawning.
- The process of inserting the weft into the shed.
- Surf the duck to the edge of the product.
- The mechanism of movement of the product.
- The process of lowering the web from the warp shaft.
Self-production of the machine
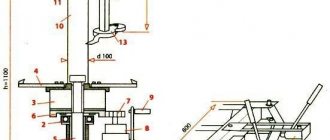
Many people are faced with the task of how to make a loom? Moreover, to spend less materials. So how to make a loom with your own hands? First of all, you need to adhere to the manufacturing scheme, which contains successive steps:
- A quadrangular frame is selected.
- Round openings are made in two slats.
- Slats with the smallest circumference are placed in the openings made at the ends of the bar and secured with wedge parts.
- There are grooves in the middle part of the side bar to accommodate the comb.
- The equipment has a solid bottom for stable standing.
- Nails are driven into the nearest round block at a distance of 5 mm to tighten the threads.
- At the rear of the installation, a rail is used to wind excess fabric.
The comb can be made from thick plywood. Its height reaches 15 cm. The length of the comb should be greater than the distance between the frames, which are located on the side. The number of nails driven in must be divided by two to obtain the number of teeth. Select the height of the teeth to be approximately 70-100 mm, and the width 5-7 mm. The interdental space is 5 mm.
Read also: Rollers for zig machines dimensions
On the near shaft there are nails to which threads of equal length are tied. Then the threads are divided into even and odd. Behind the comb there is a moving shaft where the odd threads are attached. And the even threads are on the comb, namely, they are wrapped around the nails of the teeth. A homemade loom works according to the rule of winding the remaining amount of thread on a bar, and the base of the product is made.
Next comes the winding of the threads onto the wefts. The end of the thread is attached to the left side of the frame, which is located in front of the drive rack. When the bar is raised, the weft is pushed into the shed. Movement occurs from left to right. By alternating multi-colored threads, you can get designs on the product (checkered, striped).
Video: how to make a loom?
Making a simple weaving device
You can also make a simple mini-device at home, which will serve as a play device for children, and also teach them how to weave. A children's loom will be useful for teaching children the ancient art of weaving. Using such a simple loom, you can make a compact rug that will be useful at home.
Moreover, this device does not require special devices. All you need is thick cardboard, scissors, a hook, a pencil, a fork and yarn. Instead of cardboard, you can use old plywood, chipboard or other rigid base.
The loom operates by threading threads into slits and then weaving. The yarn is made into a cut, and its end is located on the wrong side. Threading the yarn should be done in the form of a snake. The end result is tying the resulting cutouts. On the other side, stripes of threads are also made. One side will be the front side and the other side will be the back side. The front is a completed canvas.
You have to pull the threads smoothly so as not to bend the cardboard. You can use a larger needle for convenience. The number of threads must correspond to the edge being an edge and the transition from row to another row to be made. You can move the threads close to each other using a fork. So, such a loom for children will help you teach your child spinning skills without putting in a lot of effort.
You can tell children how the first looms were spun, and how a homemade device works. After all, getting into weaving is a very interesting activity.
It is difficult to find a needlewoman who would not like to try her hand at weaving at least once, but, alas, not everyone can afford to buy a weaving loom. There is an exit!
Making a machine at home seems to many to be too labor-intensive and time-consuming. We hasten to dispel your doubts and offer a simple and affordable way to make a loom with your own hands.
You will need:
- twine or cotton thread
- wooden picture frame without a backdrop (the width of the product will depend on its size)
- wooden slats (a long wooden dowel, which can be purchased at hardware stores, is best; its length should be no less than the width of the frame)
- scissors
Step 1
Woven fabric, as you know, consists of warp threads (running lengthwise) and weft threads (running across them). We will use twine as warp threads. Even if you use some other thread, the main thing to remember is that the warp thread should be strong, not too thick and not too thin.
Tie the end of the thread with a double knot to the lower left corner of the frame, then pass the ball through the frame, throw the thread over the top crossbar, and go down to the bottom.
Step 2
Your movements should resemble a figure eight: each time you go around the top or bottom crossbar, the ball should pass through the frame. Continue pulling the thread, making sure it is evenly and moderately tight, with no slack.
Step 3
The width of your final product depends on both the number of “loops” you create and the size of the frame. On average, you should make at least 10 and no more than 25 “loops”, the distance between them should be 1 cm. Keep in mind that the greater the distance between the threads, the easier it is to work, so it is better for beginners to start with a minimum number of “loops” and maximum distance between them.
When finished, secure the free end with a double knot.
Step 4
Look at your loom from the side - the threads should cross in the middle (if not, it means you didn't follow the figure eight when stretching).
Using a long wooden strip, we will divide the threads into two parts - insert it between the threads, exactly under the place where they cross, and then pull the strip to the top crossbar of the frame.
Remez to help
The master performed hundreds of movements, alternately passing the wefts above and below the thread. Soon they figured out how to halve the amount of work: the ends of the even threads were tied to a horizontal stick - a razor . Raising the hem with half the warp threads, the craftsman threw the weft under it, passing at once under all the even threads and over all the odd ones - the row was woven. But the odd threads cannot be lifted with another hedge - they collided with the first hedge. The reverse row was woven in the old way.
The problem was solved by turning the first hedge into a dividing stick , which was used to lift the even threads in order to insert the wefts under them. The odd numbered threads were tied to the second hedge with threads - heddles . The hems passed between the even threads and, when the second heddle was raised, they pulled the odd threads forward, allowing the weft to be passed under them as well. So alternately the even and odd warp threads appeared at the top, and the weft was freely thrown in both directions. The work has become hundreds of times easier.
Scheme of using a hedge and a dividing stick when weaving on a vertical loom