How to choose and make an electric cultivator?
- 1 Types of cultivators
- 2 How to choose and use an electric cultivator?
- 3 How to make an electric cultivator?
An electric cultivator is an indispensable device for cultivating a summer cottage and loosening various types of soil. Despite all the positive features of this device, it is quite expensive, so before purchasing you should study the features of each type of cultivator.
Types of cultivators by type of working part: 1 - disk, 2 - milling, 3 - tine, 4 - rotary.
Simple cultivator "Tornado"
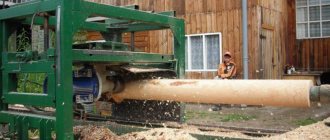
One of the simplest and cheapest cultivators to manufacture is the Tornado. It received this name due to the shape of the working part of the spiral-shaped sharp pins twisted in a spiral.
This design is designed to remove weeds along with the roots . To do this, four twisted pins are welded to the crosspiece at its ends perpendicular to the plane, and a pipe holder is welded to the middle at a right angle to the plane.
The length of the pipe is selected based on the ease of use of the tool and directly depends on the height of the person. A lever with equal arms relative to the center line of the pipe is attached to the end of the pipe to rotate the tool. The result should be something similar to a corkscrew, but much larger in size.
To make the working part of the cultivator - the teeth, you need to take a steel rod with a diameter of 10 mm and bend it half a turn on a bending machine with a distance equal to half the length.
Therefore, the rods must be selected up to 35 cm. After this, they must be bent in a certain way so that their maximum coincidence is achieved. The uniformity of the tool’s penetration into the ground and the quality of loosening depend on how accurately they are bent. Then they are welded to a cross made of a metal plate with a thickness of 4 mm and flat dimensions sufficient to secure the holding pipe.
The diameter of the pipe must be at least 20 cm to ensure the reliability of the structure. A handle-lever made of a pipe of the same diameter is attached to the upper part. aluminum pipes in order to significantly reduce the weight of the structure. The length of the lever must correspond to the width of the shoulders of the person who will carry out the processing with this tool. After this, you should sharpen the ends of the pins.
Typically, such a cultivator is made in the form of a hand tool , but it can be modified to create a more universal device that runs on electricity. To do this, the lever is made removable, and the pipe is telescopic with several height-mounted bolts. Then an adapter for the cartridge holder of an electric drill is made from a rod and pipe.
The main task is to maintain alignment relative to the axis so that there is no beating during operation, as well as the strength of fastening of all parts. After this, you need to choose a powerful drill with speed control and reverse, as well as a chuck for conventional drills. As a result, the cultivator will work like a regular drill attachment in the presence of electricity or manually when working in the field.
Making a walk-behind tractor
After testing a homemade cultivator in your garden, altering some components and eliminating all the shortcomings, you should think about expanding the functional capabilities of this mini-unit. After all, they can not only loosen the ground, but also hill up rows of plantings, make furrows between them, arrange beds, weed, as well as collect and plant potatoes.
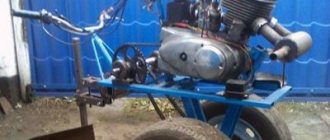
To do this, the electric motor is replaced with a motorcycle or other gasoline engine, which has higher power and has reverse (forward/backward). Instead of the loosening working tool, two additional wheels or lugs are installed and the speed is reduced due to the gearbox. Thus, from a simple cultivator a full-fledged walk-behind tractor is built, the mechanical capabilities of which are much higher. Further improvement leads to the creation of a mini tractor that is capable of not only working in the field, but also transporting loads using a trolley.
Attachments
To carry out planting and other work, a hiller is made from the disks of agricultural harrows, various cutters, a roller, a flat cutter for weeding, a plow-digger and other attachments that facilitate physical labor in the garden. Each of these devices has its own mount, which clings to a homemade walk-behind tractor.
Using a plow-digger, you can plant 10 acres of potatoes for one person within 2-4 hours. First, a furrow is made into which the seeds are laid. And when creating the second furrow, the first one is simultaneously backfilled. This way the potatoes are planted evenly and quickly. Digging is done with the same plow and exactly the same method. Just before this, you need to mow the tops with a lawn mower or trimmer, which you can also make yourself.
Model based on a meat grinder engine
Much of what you need for work can be found on your farm or easily purchased. To manufacture structural elements you need:
- A serviceable engine from a meat grinder;
- Wheels with axles;
- Autospring;
- Corners;
- Scrap;
- Screw;
- 2 pipes.
There are also a lot of tools at hand:
- Sledgehammer;
- Pliers;
- A set of keys;
- Hammer;
- A welding machine, but if you don’t have one, you don’t need to buy it at all, but you can rent it.
2 corners are screwed to the gearbox made of metal, and then 2 pipes are welded to them, which will serve as handles, so they must first be bent to a shape that is convenient to use.
For strength, you can weld a metal spacer between the pipes. Next, axles for wheels are welded to the corners, which must be selected in medium sizes. Because small ones will get stuck in the ground, and large ones are inconvenient to control.
An ordinary crowbar is used as a shaft. The workpiece from it is installed in the sleeve, which remains after removing the meat grinder attachment. She removes it with a sledgehammer. Grousers are made from autosprings, which must be slightly screwed out during installation to make it easier to control the cultivator. They are then welded to the shaft at an angle of 120 degrees.
For ease of operation, a switch is attached to the handle, which is connected according to the “triangle” circuit; a capacitor electric start is used.
If you move the cultivator quickly, large clods of earth will remain, and if you move it slowly, the soil will be crushed. If desired, a homemade plow can also be made for it. Then it will be possible not only to loosen, but also to plow the soil. Such a homemade cultivator can last for quite a long time.
Homemade concrete mixer
If you have started a small renovation that requires, for example, plastering the walls, a concrete mixer will come in handy. Once again, washing machine parts will come in handy.
As a result, you will receive a compact device with low power, which you won’t mind throwing away after the repair work is completed.
As a container for concrete, you can use the same drum with pre-sealed holes for draining water. It is best to use parts from a front-loading machine; there will be almost nothing to redo. To strengthen the body, use a metal corner, and for convenient movement of the concrete mixer, equip it with wheels. The main difficulty in the design is the manufacture of a “swing” for the correct tilt and subsequent pouring of concrete. How to do it correctly in the video:
How to make an electric cultivator with your own hands?
In order to enjoy all the benefits of mechanized labor, it is not at all necessary to purchase a walk-behind tractor.
Anyone who is more or less familiar with technology can make a useful device. To work you will need:
- working motor from a meat grinder;
- 2 pipes;
- corners;
- screw;
- wheels with axles;
- scrap.
- welding machine;
- pliers, sledgehammer, hammer;
- a set of keys.
Sequencing
- Screw 2 corners to the metal gear housing.
- Bend the ends of two tubes to obtain comfortable handles , weld the pipes to the corners.
- Weld to the corners of the axle for future wheels. When choosing transportation elements, keep in mind that wheels that are too large will not be easy to control , and that wheels that are too small may get stuck and fall into the ground. Therefore, these elements should be of medium size.
- Creating a structure shaft. Use a sledgehammer to break the meat grinder attachment. Place a scrap piece into the sleeve.
- Weld the grouser screw .
- An engine switch can be placed on one of the handles for more convenient use of the unit.
When moving quickly, such a cultivator will break the soil into large clods. With slow processing, the unit will help make the soil soft and loose, the work done will be neat.
reviews of electric cultivators say that these devices are becoming increasingly popular among summer residents, regardless of who the manufacturer of the unit is: a well-known company or self-assembly. The model is selected depending on operating conditions (soil type), volume and nature of work.
Device control
When the engine starts, the rotation of the working body with knives begins. In this case, it is necessary to hold the cultivator in place with the help of a coulter, which is deepened into the ground. After processing this piece of soil, the unit is lifted by the steering wheel, thereby releasing the coulter, and the cultivator moves to the next place. Further, similar actions occur.
This iron assistant can process up to 6 acres in one day, provided that the soil is normal and without roots. The depth of loosening depends on the length of the blades and engine power and can reach from 17 to 22 cm. For loamy and heavy soil, you need to install a motor of about 3 kW.
Cultivator: purpose and characteristics of types
Cultivators are very convenient and popular agricultural tools used to perform surface loosening of the soil, as well as destroying weeds, applying fertilizers and cutting furrows for irrigation activities. When choosing a model of such equipment, you must be guided by the following basic parameters:
- relief features of the site;
- useful area of the site;
- qualitative composition and characteristics of the soil;
- scope and criteria of assigned tasks.
Depending on the purpose, there are several main types of agricultural cultivators:
- continuous tillage during pre-sowing tillage with simultaneous harrowing;
- inter-row tillage of the soil and simultaneous fertilizing of cultivated crops with basic mineral fertilizers;
- pre-sowing tillage, represented by loosening and layer-by-layer grinding of the soil, as well as the destruction of weeds, leveling and compacting the soil.
Equipment can also be classified depending on the operating mechanisms:
- electrical equipment used on small plots of land. Operation is ensured by electricity. The equipment is lightweight, compact in size and does not emit harmful substances into the environment. Disadvantages include low power and low mobility;
- battery equipment designed for soil treatment in small areas. The difference from electric models is sufficient mobility while maintaining small dimensions;
- Gasoline equipment is the most popular due to its high performance. Such units are quite powerful, mobile and convenient. The main disadvantages of the application are the emissions of harmful substances into the atmosphere, as well as the need to regularly perform competent maintenance.
What do you need for work?
To make various devices for soil treatment at home, you need to prepare special materials for this.
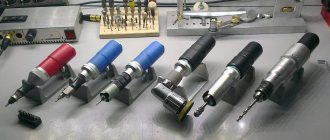
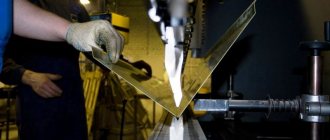
First of all, you need to take care of getting steel. The more different pipes, sheets or metal rods you have, the better. When working with metal pipes, you cannot do without special tools.
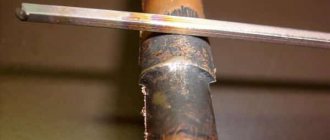
A welding machine is one of the most important tools for working with metal products. With it, you can connect different parts made of metal in just a few seconds. Of course, in most cases you can do without a welding machine by connecting the parts using self-tapping screws. But the quality of such connections cannot be compared with the quality of welds.
Inverter welding machine
How to make a cultivator
Every summer resident is well acquainted with all the difficulties of cultivating garden crops. And what is most tiring is tilling the soil before planting and during further care of garden plants. To make your life easier, all you need to do is make a homemade gasoline or electric cultivator for your garden, which will be used to solve various agricultural problems.
Before you begin assembly, you need to understand the types, structure and operating principle of garden tools.
Depending on the type of engine, electric and fuel cultivators are distinguished. The former are characterized by environmental friendliness and low energy consumption. However, they are tied to a source of electricity, so they can only be used in greenhouse conditions or in a small garden that has access to electricity. Making such a unit is quite simple.
Models with internal combustion engines are superior to the previous type in terms of power and the ability to work without connecting to an electrical outlet. But servicing the machine becomes more expensive, and harmful exhaust gases are released during operation.
According to the method of soil cultivation, homemade motor cultivators are either self-propelled, equipped with driven wheels, or with a rotating working attachment, which can be used as a means of movement.
The first option uses two gearboxes. The first helps the mechanism move at a given speed, and the second rotates the rotary attachment for cultivating the soil. If there are drive wheels, the cultivator is additionally equipped with flat-cutting knives.
There are also simplified homemade products, where the wheels only rest on the surface, making movement easier.
From the starter
If you have an unnecessary starter from a car in your home workshop, you can use it to create a primitive version of a motor cultivator. To do this, you need to shorten its shaft and slightly alter the front cover, making several holes in it with a diameter of up to 5 mm. This is necessary for the flow of air from the ventilation system. Then the prepared starter is combined into one unit with cutting elements (cutters).
The almost finished installation is fixed onto the working platform of the cultivator and checked for functionality. You can make an electric cultivator with your own hands from a starter in a couple of hours and with minimal financial costs.
From the Bulgarian
The homemade version of a mini-cultivator made from a grinder is not very productive, but it perfectly solves the problem of weeding a small area with light soil. The grinder in this homemade invention plays the role of an electric drive. The remaining components and parts can be taken from an old non-working cultivator.
A grinder is attached to a frame created from improvised means or taken from an old frame, as well as an extension cord on a reel for connecting to a source of electricity.
After assembling the main elements, you can test the machine. If everything is done correctly, the cutters will produce up to 300 rpm.
From the washing machine
Craftsmen make a cultivating device from an old, unnecessary washing machine, which still works, but can no longer be used for its main task - washing. The engine must be removed from old equipment. It will serve as the basis for a future cultivator and give the washing machine a second life.
In addition to the power plant, you will have to find a two-core wire, a gearbox, a three-meter metal corner, switches, car springs, a start button and a drum with a piece of tin.
Having prepared the necessary elements, you can proceed to installation work. Initially, welding is carried out, and then the cutting elements are prepared. It is important to ensure that each knife does not overlap with any other.
The starting and working windings are connected to the motor itself. The first is needed only to start the device, and the second is used all the time.
After completing the above steps, you can begin testing the device.
From an old bicycle
An equally interesting homemade product is a manual cultivator made from a bicycle. To make such a device, you need to prepare a metal pipe, frame and bicycle wheel. You will also need metal blanks, steel strips, a drill, an angle grinder and a cultivator head.
Installation work consists of the following stages:
- The cultivator head is attached to the bicycle frame. The crossbar and handles are made from a metal pipe. They are connected using bolts.
- Next comes the locknuts. They will be needed to secure the wheel to the frame.
- After completing these steps, the mechanism can be considered ready. A plow and related accessories can be attached to such a cultivator, which will make it more functional.
From a chainsaw
You can create a motorized cultivator with your own hands from a chainsaw. A powerful chainsaw of domestic or foreign production is used as the basis. It is advisable to take the “Friendship” model, because... it is cheaper than imported devices and has the required characteristics.
The garden assistant based on “Friendship” accelerates to 2.5 km/h and the power value is 4 hp. With.
The step-by-step assembly guide is as follows:
- The main halyard is equipped with a collar flange. This is necessary for the subsequent connection of bridge gearboxes.
- Next, sprockets are taken (can be from an old UAZ) and a double-row chain. Parts are needed to raise the distance from the geared axle to the ground. Timing sprockets can increase the distance by 15 cm.
- Housing bearings and a gearbox are installed on the key bridge.
- To fix the cutting elements, you need to use a steel pipe. In this case, it is important to ensure that the direction of the cutters corresponds to the movement of the walk-behind tractor.
- After completing the assembly work, a load is attached to the frame that can maintain the center of gravity.
- For convenient control of the unit, it is equipped with handles.
Tillage implement LOPLOSH.
Utility model patent No. 71850
1. Purpose.
The Loplosh electric cultivator is designed for cultivating a vegetable garden and performs the following operations:
- deep loosening;
- formation of furrows, hilling and plowing of manure;
- chopping turf and weeds (mulching and developing virgin soil)
2.Technical data:
- supply voltage 220 V;
- power consumption 1.1 kW;
- loosening depth up to 18 cm;
- working width 30 cm.
- weight 35kg.
3.Completeness
- Electric cultivator Loplosh-1pcs
- Side walls - 2 pcs.
- Hiller-1 piece
- Right tilling knife - 1 piece
- Left tilling knife - 1 piece
- Right huller knife – 1 piece
- Left huller knife – 1 piece
- Mulcher knife - 1 piece
- Bonks 20 mm–4pcs
- Bolt M10x30-4pcs
- Leash - 1 piece
- Instruction manual - 1 piece,
4.Safety requirements
5. Design of the LopLosh electric cultivator.
The LopLosh electric cultivator consists of a gearbox connected through a support roller to handles, the position of which is fixed by a comb using traction. An electric motor is mounted on the gearbox, which is connected to the electrical network by wire. The position of the wire is fixed by a leash mounted on a console welded between the handles. The gearbox has one speed and two power shafts with mounting holes for attaching knives, as well as mounting holes for installing side walls and a hiller. When transporting the loaf in vehicles, the handles are folded. To readjust the LopLosh electric cultivator, the handles are set to the highest position and placed on the floor.
5.2 Deep loosening
Left and right tillage knives are installed on the power shafts, and side walls are installed on the gearbox. The knives are installed with the cutting edges in the direction of rotation (on the longitudinal axis of the gearbox, the cutting edges are directed towards the roller, at the walls - away from the roller). The side walls are installed with studs in the gearbox seats with their bent places towards the roller and secured with M8 nuts. The depth of loosening is adjusted using booms by installing them under the knives or above the knives (options B and C in the figure).
5.3 Formation of furrows
Left and right tillage knives are installed on the power shafts, and a hiller is installed on the gearbox. The hiller is installed in the mounting holes against the gearbox and secured with M10 nuts. To dump the soil on one side, install an additional side wall.
5.4 Mulching
For mulching, a mulcher knife is installed on the high-speed shaft of the LopLosh electric cultivator, and side walls are installed on the gearbox.
6 Operating procedure
After setting up the LopLosh for the desired operation (deep loosening, forming furrows, mulching), the LopLosh is installed at the beginning of the furrow being processed with the handles facing the direction of movement.
The leash is turned in the direction convenient for moving the cable. The cable is laid in rings against the leash. The switch is set to position “0” (off). The cable plug is inserted into the socket. Using the handles, raise the knives and turn the switch to position “I” (off), and the knives should begin to rotate. The knives are smoothly lowered into the soil, while the shovel should rest freely on the soil under the influence of its weight. Using the handles, the ripper is smoothly fed at a speed that ensures normal operation of the electric motor. This speed depends on the hardness of the soil.
When changing knives, fill the vacated holes on the shafts with thick lubricant.
Cultivator Loplosh - Video review of the electric cultivator Loplosh.
Andrey Dmitriev:
People, don't fall for this crap. Imagine that you have a complete imbalance of all the wheels on your car, but you still got behind the wheel and decided to drive 100 km - the veins in your arms pop out from holding this steering wheel, and it’s already burning, as your hands are cramping. There is a plus - for women it dispels cellulite, and for men it improves potency (if you have a false jaw, then remove it before starting gardening work). I bought this crap for inter-row weeding of potatoes from weeds with high tops. What do you think - everyone pissed with boiling water: it fell to the left, and I flew to the right at 105 kg of my weight and height 184 - 30 bushes were hushed up. Mine wanted to get into the greenhouse with it, I said go damn it: firstly, it runs on gasoline mixed with oil and you can get high from the fumes in this greenhouse and sit back, but secondly, if it goes like a torpedo through the polycarbonate, then who will repair the hole.
Toothed hand cultivator
To make a gear cultivator, more effort and skills will be required, but if you really want to, it is also quite simple to make; it had steel plates and a pin, as well as teeth and an axle.
Steel pancakes are put on an axle of a certain diameter (it is necessary to make calculations in advance regarding the severity and compatibility of the weight of both. The pancakes should already have holes into which teeth made of steel rods or spring steel are inserted. They are secured with rivets, which are subsequently unlinked.
Although this is far from the only option that has been invented by savvy summer residents.
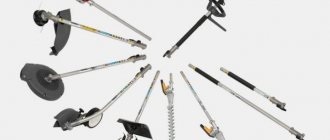
Types of cultivators
This equipment is available in different models:
- disk
- paws
- rotary
- milling
Almost all cultivators work on the same principle: the mechanical part is started, which sets the device in motion, loosening the soil.
Diagram of a manual cultivator (click on the photo to enlarge)
Its classification depends on the purpose of the equipment: differences in size, engine power, operation, scope of work. Considering these criteria, they are:
- light
- moderate severity
- heavy.
For relatively small areas with soft soil, light equipment is suitable, usually flower beds and greenhouses. Medium-weight equipment is designed for clay soil. Heavy equipment is universal, it is suitable for any type of soil.
Cultivators differ in the way they function:
- hand cultivators;
- with electric drive;
- on gasoline.
We will focus on manual cultivators, which you can make yourself to save money.
A number of advantages of manual designs:
- They are economical and do not require refueling.
- Several devices are replaced: a shovel, a hoe, a rake.
- They take up little space.
- Help distribute the load across all muscles.
Our next article tells us what is better to use in the country: a walk-behind tractor or a cultivator.
Reviews
Homemade electric cultivators in the household help make work easier and get better results than with old-fashioned methods. Of course, they cannot be compared with modern factory models. But devices made literally from unnecessary trash are obtained almost free of charge and at the same time often help out their owners.
For my garden, I have a cultivator with a gasoline engine. But in greenhouses (I have three of them) I work with a homemade electric cultivator, it’s very convenient and doesn’t smoke.
Electricity is a little expensive, but it doesn’t require fuel, doesn’t stink, doesn’t buzz.
If a craftsman undertakes the production, the quality and service life can be even better than the factory one.
Assembling a functional cultivator with your own hands is quite simple. Talented craftsmen create it from available materials with minimal financial costs. If you have the necessary materials, time and desire, you can make such a device for your dacha in a couple of weekends.
DIY electric cultivator
An electric tool can be made from scrap materials in 2 days, but you need to prepare in advance.
Electric cultivator device
To assemble it you may need: a motor from a washing machine, a gearbox, sprockets and a chain from a children’s bicycle, bearings, cultivator blades welded from car springs, angles, wheels, a cable about 50 m long, a piece of tin to protect the motor from the soil . Instead of a washing machine engine, you can use a powerful Soviet drill, plus a gearbox from a burnt grinder, or an electric meat grinder.
A structure assembled from one or another of the proposed elements will look something like this: a metal frame with two wheels on both sides. The motor from a washing machine, meat grinder or drill is in the center. It needs to be connected to the cultivator blades and ensure rotation using a chain and “sprockets” from a children’s bicycle.
DIY electric cultivator
On two handles you can attach a cable with a trigger mechanism.
Advice. The sharpened parts of the knives must be positioned on the side of rotation of the shaft. The blades should be 5 cm apart, at an angle of 120°.
- First, the main parts are made and fastened, then a frame is made for them. The dimensions depend on the available materials you use.
- A gearbox with a transmission mechanism is welded to the engine housing.
- Blades are attached to the output shaft of the gearbox. You can use sharpened and fastened car springs or any other metal.
- The engine is attached to a frame made of angles with clamps and bolts.
- There should be an axle along the central axis with wheels on the sides.
- Handles and cable are welded on top.
Homemade electric cultivator from a chainsaw
- lightweight and convenient electrical design;
- environmentally friendly, unlike gasoline-powered mechanisms. This means that it can be used in greenhouses and greenhouses.
- welding must be used during manufacturing;
- not suitable for processing large areas.
Mechanical improvements not only make labor easier, but also increase the efficiency and speed of tillage. Any of the considered farmer's tools is indispensable when working on the land and is easy to use.
Device with a motor from an electric saw
In this electric cultivator, the function of the power unit is performed by an electric chain saw of the Parma brand. It is attached using clamps to the cultivator frame. If necessary, the saw can be quickly dismantled and used for its intended purpose.
The frame is welded from steel pipes Ø24 mm. Working cutters are made from a Ø30 mm pipe, and steel teeth are welded to them - 6 pieces at an angle of 30 degrees to each other. The rotation of the cutters is transmitted by a two-stage chain transmission. In the first stage, the drive sprocket is used from the saw, and the driven one is installed from the bicycle. The second stage consists of a motor sprocket and chain.
The cutter shaft is made of a round metal profile and is mounted in the frame fork using rolling bearings. The cutters and sprockets are secured with dowels. This device requires protective covers to be installed on the drive chains.