other methods
In some cases, it is better not to solder metal surfaces, but to glue them together. True, you won’t be able to cook food in sealed pans; this will only work as a bucket. But just in case, you need to know these methods. Adhesives suitable for you:
- BF-2;
- BF-4;
- epoxy.
BF-2 and BF-4
These adhesives are made from phenol-formaldehyde resin, so cookware repaired with their help is not suitable for cooking. The method of application is simple:
- Clean surfaces thoroughly to ensure no grease, rust or dirt remains.
- Treat the gluing area and patch with acetone or gasoline.
- Apply a thin layer of glue - it is more convenient to do this with a brush.
- Allow the item to dry for about an hour.
- Apply a second layer of glue.
- Let it dry a little.
- Place the surfaces against each other (for example, a metal plate to a hole), press.
- Place the product in the oven and heat for an hour.
Epoxy adhesive
This solution consists of several components. He has:
- epoxy resin;
- dibutyl phthalate (plasticizer);
- aluminum oxide or quartz flour;
- hardener
After the patch is glued, the product must be placed in the oven, preheated to 200°C and heated for about three hours. This is the best variant. If you don’t have an oven, you can preheat it to 120°, and then leave the pan alone for a day, after which it will be ready for use. You can store food in it, but you shouldn’t cook it.
Brazing Solder
Repairing pans using a bolt is the simplest method, but it is not suitable for every case. For example, it is unlikely that it will be possible to repair a curved surface this way. In this case, you will have to solder, and you need to use hard solder - that is, do the same as tinkers used to repair metal utensils on the streets and markets.
You need:
- tin plate;
- tin solder;
- flux;
- sandpaper;
- file;
- high power soldering iron.
Tinned sheet metal is used to make AA battery cases - from there you can take it and use it in this way:
- Sand the area around the hole until the enamel is completely removed and only bare metal is left.
- Apply flux.
- Tin the damaged area with a soldering iron using hard solder.
- Cut out a patch from tin.
- Tin it in the same way.
- Apply a patch to the hole.
- Warm it up with a soldering iron.
- Wait for the solder to melt.
- Press the patch onto the outside of the pan.
- Remove excess solder - this is done with a file.
Solder must be applied in a thick layer - no less than 5 mm. With such a repair, the patch will not fall off for quite a long time. You can cook in a saucepan, but not too often.
Important! Lead is toxic, so if you plan to cook in a pan in the future, use pure tin as solder.
One is good, but two is better
For strength, it is better to use two bags. We put one into the other so that the corners on the bottom match. We place the bags on a flat surface (table, floor) and expel the air from them, stroking them with our palms from the bottom to the top edge. Of course, some air will still remain, but it doesn’t matter. We align the upper edges and use narrow tape (8-15 mm) to fasten the bags over the edge along the perimeter along their upper edge every 10-15 cm. The length of the fastening adhesive tape is enough to be 4 cm. Now the interlocked edges of the bags will not move relative to each other, and we get a double package
Do not seal the edges of the bags along the entire length - this is very important, and you will appreciate this later, since the air remaining between the bags will be able to freely escape when water is poured into the inner bag
Place the double bag into the barrel. We bend its upper edge (5-15 cm) onto the outer surface of the barrel along its entire perimeter.
If the length of the bag allows, it is better to bend the edges as much as possible, but make sure that the bag in the barrel does not hang in the air, as the water will simply tear it apart.
To prevent the bag from sliding to the bottom of the barrel when we start pouring water into it, you need to attach the bent part of the bag to the outer surface of the barrel with wide tape (60-80 mm). This is a very important operation, it is better to do it together. For example, a husband places a barrel obliquely on a beam, round block or box and slowly turns it around its axis, and at this time the wife, slowly, glues the bag with tape: half the width of the tape to the bag, the other to the barrel. The operation requires care; the tape must lie flat and tight, without swelling or distortion. Of course, you can perform this procedure alone, but it’s difficult. In the photo next to me is a barrel, which I wrapped with tape absolutely alone (before this, the operation was carried out together with my wife as I described above). Look how great I did! And you, dear readers, I am sure, are incomparably more talented than me, you will do even better!
Special solders
The highest quality connection at home can be obtained using low-melting solders based on tin and copper and special fluxes.
The most popular domestic flux is F64, which allows you to solder aluminum parts without mechanical stripping. So, for example, soldering aluminum to copper can be done without problems, or an aluminum tube can be sealed from the inside, which cannot be cleaned by any other means. In this case, conventional low-melting tin-lead solders with a melting point of 200−350 degrees are used. The soldering iron should be quite powerful - from 100 W and above. The reason is the high thermal conductivity of aluminum. An insufficiently powerful soldering iron simply will not be able to heat the soldering area to the melting temperature of the solder. Only very small parts (mainly in radio electronics) can be connected with a 60 W soldering iron.
A soldering iron is not suitable for soldering large aluminum parts. Here it is better to use any gas burner that provides heating up to 500-600 degrees, and one of the specialized solders. One of the most popular is HTS-2000 - a flux-free solder for soldering aluminum, copper, zinc and even titanium.
Read also: Carbide cutters for metal
It has several advantages:
- Low melting point (390 degrees Celsius).
- Can be used without flux.
- Reliability of the connection (in many cases it can replace argon welding).
True, HTS-2000 does not exclude the stripping process. Moreover, during the soldering process it is necessary to remove the oxide film with a solder rod or a wire brush to ensure a reliable connection. However, this method allows you to perform such work as sealing leaky aluminum containers, for example, cans, or even car aluminum radiators.
In addition, HTS-2000 is practically the only (with the exception of argon) way of joining two “winged” metals: aluminum and titanium.
There are other high temperature solders designed specifically for aluminum soldering. For example, 34A, which contains two-thirds aluminum, as well as copper and silicon. But the melting point of such solders is 500-600 degrees Celsius, which is close to the melting point of aluminum itself.
Therefore, using high-temperature solders at home is dangerous - an aluminum part can be irreparably damaged when heated to such high temperatures.
Soldering aluminum at home is a real way to repair household utensils, household and automobile aluminum radiators, pipes, plumbing fixtures and much more. In industrial conditions, soldering and welding of parts made of this material is carried out using automated equipment. At home, soldering and welding aluminum is also possible.
To do this, use an ordinary soldering iron, ordinary POS-50 and POS-61 solders containing tin. In addition, it is possible to use a magnesium welding stick or use a gas torch.
Once you have chosen your solder, you need to select a soldering flux. The biggest secret when soldering aluminum is to work quickly, connecting the parts to be soldered immediately after they have been cleaned of oxide.
How to seal an enamel pan: preparation and instructions
Damaged metal utensils are repaired as follows:
- Prepare a small piece of aluminum wire or special solder. If the hole is large, use a copper patch. It should completely cover the hole.
- Before soldering, the damaged area of the pan is cleaned of enamel with abrasive paper or a file. Stripping is carried out until metal appears. There should be no soot, greasy film or deposits on the surfaces. The copper strip is cleaned to a shine.
- The surface of the dishes is degreased with acetone. After this, the pan is treated with flux using a brush. Soldering acid is used to remove residual grease and oxide deposits from metal.
- Heat the soldering iron, immerse its tip in ammonia or rosin. This helps remove oxides from the surface of the nozzle. After smoke appears, you can begin to tin the pan. The tool touches the solder, on which a shiny film should appear. The molten tin is transferred to the desired area. Solder is applied to the entire damaged part of the pan.
- If it is not possible to seal the hole with tin, use a plate. The areas adjacent to the hole are coated with solder. After leveling the layer, apply a patch. Its surface is heated so that the plate sits firmly in place.
- When the tin has cooled, wipe the surface with a dry cloth. After this, the repaired area is cleaned with sandpaper.
Repairing an aluminum bucket is easy. After cleaning and degreasing, the surface is quickly coated with rosin, which prevents the appearance of an oxide film. You need to solder with a tool with a power of at least 100 W.
The solder must contain at least 80% tin, 5% bismuth. Paraffin or stearic flux is suitable for pre-treatment.
Solder Types
Stainless steel products can be soldered with both soft solders made on the basis of tin and lead, and hard types of filler material, which includes more refractory metals.
Soft solder, due to the fact that it is based on tin, is a low-melting material characterized by high ductility and fluidity in the molten state. What is especially important when soldering stainless steel products is that it has good deoxidizing ability.
More reliable connections both in production and at home can be achieved by soldering using hard solders.
The metals from which they are made melt at a higher temperature than tin, which makes it possible to obtain reliable and durable connections with their help.
Very often, materials of this type are produced on the basis of technical silver, which can contain up to 30% in their composition.
One of the popular types of hard solder is the HTS-528 material, which is successfully used for soldering not only stainless steel, but also copper, brass, bronze, nickel and other metals.
Conveniently, it is produced in the form of a rod, the surface of which is already covered with a layer of flux.
When working with such solder in a production environment or at home, you should keep in mind that its melting point is 760°.
Tell me how to seal a hole in an enamel pan?
You can repair the hole, but there is no way to restore the enamel coating at home. So over time, the enamel chip at the hole site will only increase. Anyway.
The easiest way to seal a hole is to plug it with a bolt of a suitable diameter. But since the holes are small, you take a drill with a diameter of 3 mm, drill out the leak, insert a bolt there and tighten the nut.
Of course, it is not recommended to cook in such a pan, but you can boil water. By the way, if you find a bolt and a drill with a diameter of 2 mm, then even better.
But this method is not suitable if the pan is leaking on a curved mating plane.
Well, if you know how to solder and you have a tool for hard soldering, feel free to solder the leak - the pan will serve for a long time and you can even cook! By the way, this is how pots at the market were previously repaired.
How to seal a leaky pan. How to patch a hole in a saucepan
The pan became leaky and a hole appeared at the bottom. Don't rush to throw it away. Having the skills to use a soldering iron, you can repair the pan yourself.
Preparatory work
First of all, the area of the pan where the hole has formed should be thoroughly cleaned, first with a file and then with sandpaper. At worst, if you don’t have a file, a needle file will do. After thorough cleaning, the surface around the hole must be treated with flux or soldering acid.
If the pan is not enameled, but aluminum, the cleaned surface will instantly become covered with a layer of oxide and soldering will be difficult to the point of impossible. Therefore, immediately after cleaning, the treated surface must be covered with a layer of molten rosin.
Let's cheat
Turn on and heat the soldering iron to operating temperature (by the way, the power of the soldering iron should be large enough to ensure good heating of the pan at the repair site). If it was not possible to find a high-power soldering iron, the pan can be heated over the flame of a gas stove immediately before soldering.
Use the soldering iron tip to grab a small amount of rosin and apply it in a thin layer to the surface of the pan around the hole. The resulting film of rosin will prevent the surface of the metal from which the pan is made from oxidizing.
We pick up a small amount of solder with the tip and slowly, conscientiously apply it to the area around the hole. The surface is tinned, we move on.
Soldering
Using a soldering iron tip, thoroughly warm up the area of future soldering. Scooping up solder in small portions, carefully fill the entire hole in the pan with it.
If the diameter of the hole in a leaky pot is more than 3-5 mm, we recommend not filling it with solder, but applying a patch of copper plate slightly larger than the hole.
The copper plate should be cleaned with sandpaper and treated with soldering fluid. Next, apply a copper patch to the prepared and tinned surface of the pan and thoroughly heat the entire surface of the patch with a soldering iron. When heated, the solder on the surface of the pan will melt and securely fix the patch.
–Applications
- always no analogues at hand
^_^ Allows you to insert a panel with an arbitrary Html code into your profile. You can place banners, counters, etc. there - I am a photographer
Plugin for publishing photos in the user's diary. Minimum system requirements: Internet Explorer 6, Fire Fox 1.5, Opera 9.5, Safari 3.1.1 with JavaScript enabled. Maybe it will work - Video congratulations on mobile
It is not difficult to download completely free video congratulations and send them to someone. You can also copy the code and place the video card you like on your blog, online magazine, website
– Quote book
A list of the most realistic ways to make money. Of course, this article was not written for that.
//img-fotki.yandex.ru/get/4009/yes06.b9/0_1e769_8673e9d4_XL.jpg Norma Jean Mortensen (Me.
MALE NAMES A August Aver.
What could you spend 1 ruble on in the Soviet Union: - a full lunch in the canteen (more precisely.
Add to your quote book! Everyone should have this! Wandering regularly on the Internet.
Big hole
But what should you do if a large hole has formed in your favorite saucepan, for which there is simply not enough tin from the battery? You will need a piece of copper, that is, a copper plate. Also very useful:
- needle file;
- file;
- sandpaper;
- gasoline or acetone;
- soldering iron;
- tin;
- rosin;
- flux.
Before applying the patch, everything needs to be carefully prepared:
- Wash the pan thoroughly.
- Clean the damaged area from all deposits and rust, if any.
- Clean the plate too until it shines.
- Wipe both surfaces with acetone, gasoline, and white spirit.
- Apply flux or treat the surface with soldering fluid (available at any hardware store).
- Warm up your soldering iron.
- Place the sting in rosin.
- When a light smoke appears, you can start.
- Pick up solder - you need to hold the tip until a film appears.
- Apply solder to the repair area.
- Level it from the outside and inside of the pan.
- Gradually apply pieces of solder and smooth out until the hole disappears.
How to prepare a soldering iron?
If you have already dealt with a soldering iron, repairing a pan will not seem difficult to you. For those who have decided to do this for the first time in their life, it makes sense to first prepare a soldering iron. It needs to be tinned:
- Clean the tip - this can be done either with sandpaper or a file.
- Warm up the device by plugging it in.
- Rub the tip over the piece of rosin.
- Separate a little solder with the heated tip.
- Making circular movements, ensure that the tin spreads evenly over the entire tip - the end should be coated on both sides.
- If you don’t get an even layer, repeat the procedure, but try to clean the tip as best as possible.
Important! If you notice a blue film on the prepared soldering iron, it needs to be cooled.
Can it be used?
You can use the pan, but not right away. It must first be prepared. This is done like this:
- Wait for the solder to cool.
- Clean the soldering area so that the patch does not stand out too much.
- After this, you can try to boil the water - if you did everything correctly, the pan will not leak.
Important! Well, the utensils are saved, it’s time to check whether milk will flow out of it. By the way, if you still don’t know in which pan it is better to cook milk, we will tell you in our article: “In which pan is it better to cook milk porridge.”
Advantages and disadvantages of metal utensils
At the moment, the selection of dishes on store shelves is surprising, both in color and shape, and in the materials used for production. Of course, many people prefer dishes made of ceramics or glass, but metal is a classic option that is invariably in demand. There is a justification for this, because this material has a number of advantages, namely:
- Easy to care for.
- Low cost.
- Resistant to high temperatures and temperature changes.
- Heats up and cools down quickly.
However, metal, like any material, has disadvantages, for example, not in all cases the dishes can be repaired. The following types of metal are used to produce kitchen utensils:
- Aluminum.
- Stainless steel.
- Enameled steel.
How to close it?
If a hole appears on an aluminum, steel or enamel surface, you can do one of the following:
- plug the hole with a bolt;
- solder;
- make a rivet;
- seal;
- brew.
Important! The first method, as well as riveting, is suitable for any material. But not everything can be soldered - for example, the steel must first be annealed, but the method is extremely unreliable. The best option is to brew it if you have the equipment.
Methods for calcining cookware made from other materials
Not only cast iron products need to be calcined, but also pans made of other materials. Cookware made from stainless steel is calcined in the same way as cast iron. You can choose the method of calcination with salt, or use fat or oil of vegetable origin. In both cases, the desired result will be achieved.
Calcination methods differ for cookware made of aluminum. How to heat an aluminum frying pan and do it correctly? You can use one of these methods:
- Wash and dry the pan. Pour vegetable oil into the bowl; there should be enough of it to completely cover the bottom. Add 1 tablespoon of table salt and place the container over medium heat. You will need to warm it up until the oil gets very hot and a specific smell appears. This usually takes 15–20 minutes.
- Before calcining, rinse the dishes well and wipe dry with a kitchen towel. Rub the surface with vegetable oil, not only from the inside, but also from the outside. Preheat the oven to 180 degrees and place the frying pan there for 1 hour. Please note that you need to place the container with the bottom facing up. After the dishes are heated, the oven must be turned off, but you cannot remove the frying pan right away. Wait until it cools completely and only then take it out.
- Pour table salt onto the bottom of the pre-washed dishes so that the bottom is completely covered. Heat the pan over low heat until the salt darkens, then allow the pan to cool and rinse with water and a mild detergent.
Calcination forms a protective layer on the surface that will prevent food from burning and protect the surface from stains of burnt fat.
If your frying pan has a ceramic coating, then it can only be calcined using vegetable oil. Ceramics is a fragile and sensitive material; a delicate approach is required here, and salt should not be calcined in a ceramic frying pan, as this will ruin the coating.
Pour vegetable oil into the container so that it completely covers the bottom and heat over moderate heat for at least 15 minutes. Allow the pan to cool before pouring in the oil and then rinse gently with warm water.
The proposed calcination method will extend the service life and strengthen the non-stick properties of ceramic-coated cookware. The above tips will allow you to keep the frying container in “working” condition for a long time and avoid unnecessary costs for purchasing new utensils.
Which soldering iron is suitable
What to solder with, what tool is needed for this - it all depends on the soldering area. Aluminum and copper conduct heat well, so you need a powerful soldering iron. With a part area of 1000 cm², the soldering iron power is needed 50-60 W. Often two or more parts are soldered, in which case the power increases to 100 W. When heating the joint, a lower power soldering iron is suitable. The tip is chosen to be wide; notches can be made on it to remove the aluminum oxide film.
You need to consider how to solder aluminum with a soldering iron. This is done with a well-heated tool after removing the oxide film and tinning; solder sticks well to the tinned area (tinning can be done using special solders) and any soldering iron will do.
How to care for enamel products
Although such dishes are called durable, if used incorrectly they quickly become unusable.
Therefore, you need to handle enameled products with care:
- You cannot boil milk in them, as it will definitely burn to the bottom of the pan;
- it is necessary to avoid mechanical impact and falling dishes;
- Under no circumstances should you pour cold liquid into a heated pan;
- You should avoid using metal ladles and spoons; it is better to use wooden products.
Immediately after purchase, the dishes can be tempered with a saline solution (2 tablespoons of salt per 1 liter of water). To do this, pour it into a saucepan and bring the liquid to a boil, then cool.
Also, you should not expose the product to sudden temperature changes, so you should always let the dishes cool completely before washing. It is necessary to wash in warm water, using a sponge and liquid dishwashing detergent.
Do not use metal brushes or abrasive cleaning powders as they will scratch the surface. If the coating is systematically exposed to such objects, cracks will begin to grow and the dishes will become unusable. If an enamel baking tray has been damaged by grease, you should not wash it with aggressive agents either.
If the pan is used frequently, sooner or later it will darken. You can wash off such deposits using vinegar; just add it to a bowl filled with water at the rate of 5 tbsp. l. substances per 1 liter. water and boil. Then pour out the water and wash the product in the usual way.
In order for the dishes to last for many years, it is enough to properly care for them and not allow them to be exposed to high temperatures. In this case, it will not only retain its properties, but also its attractive appearance.
Metal kitchen utensils can last a long time. With proper care, it practically does not fail. But still, during cooking, various troubles happen, including overheating, which can result in a hole appearing. After such an incident, the pan is most often thrown away, but is it always necessary to immediately run to the trash heap? Repairing an enamel pan is sometimes possible, and this is what will be discussed next.
Cleaning aluminum and steel cookware after repair
If you need to restore the appearance of aluminum cookware, simply clean it. The most common soda is suitable for this. Clean the pan and it will regain its former beauty.
Important! Every housewife knows how easily aluminum pans get dirty and smoke. But not everyone knows how to return kitchen utensils to their former appearance. Our blogs will help you understand this issue:
- How to clean aluminum pans at home.
- Aluminum is harmful to health.
- Cleaning stainless steel cookware.
- The best stainless steel pans rating.
In the same way, the spectacular appearance of stainless steel products is restored. In this case, you don’t even need soda - any dishwashing detergent is enough.
What to do if an aluminum pan leaks
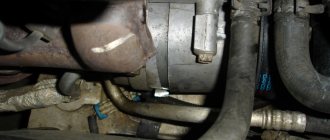
This old three-liter aluminum pan started leaking the other day. Mostly due to the fact that the remains of hodgepodge were left in it, which began to disappear and at the same time corrode the aluminum. I had already riveted a similar aluminum pan with my own hands, although it was a long time ago, but after watching various videos online about soldering small holes in enameled steel pans, I decided to try soldering my own aluminum pan, because until that moment I had never soldered aluminum pans.
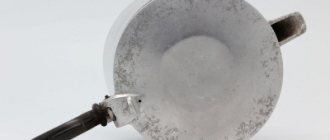
Actually, this nice hole formed on the corner of the aluminum pan (photo below). It feels like termites have been at work, and judging by the shells, it looks like they were eating the pan from the outside
At the construction market I bought this flux for soldering aluminum (photo below). I will solder aluminum with clean, crisp tin, tiny reserves of which remain from the times of the USSR. Therefore, we do not pay attention to the lead-tin coil shown in the photo below.
To begin with, I made small chamfers on both sides with a metal drill (photo below). So that there is somewhere to apply tin, and at the same time the aluminum in the soldering area is cleaned.
Using a 40-watt soldering iron (in my case) it is almost impossible to heat the soldering area on such an aluminum radiator, so I had to warm up the entire pan on a gas burner and solder at the same time. As a result, I fiddled with this hole for about an hour (apparently my handiwork took its toll), while I crap all over the pan with tin and flux (photo below), but somehow, cursing everything and everyone, I still soldered this hole.
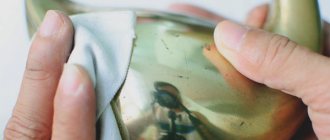
After which, for about another half hour I got rid of the traces of the crime using all sorts of files, sandpaper and other abrasives, because working inside the pan with a Dremel was somewhat inconvenient.
I was about to run to wash it and put the pan on the shelf, but in the light I suddenly discovered two more holes on the bottom (photo below), which were not there before, because before soldering I carefully examined the pan for other holes. In general, this heating of the pan over an open fire backfired on me; apparently, when heated, soot and fat burned out of the old shells and thereby cleared the holes.
In order not to jump twice on the same rake with soldering, I decided to seal the holes a second time the old fashioned way, with an ordinary rivet made of 2mm thick aluminum wire (photo below).
We drill holes in the pan to the diameter of the rivets (2mm), then with a larger drill, we make small chamfers on both sides so that there is somewhere to rivet the protruding fragments of wire (rivets).
We rest the inner end of the rivet against something solid and, if possible, center (raise) the pan so that the rivet protrudes evenly on both sides. After that, use a hammer to carefully rivet the fragment of rivet sticking out from the outside. Do not make the rivets very long; it is enough for the rivet to protrude 1-2mm from both sides relative to the plane of the pan.
Finally, we sand down all the protruding fragments of the rivets with sandpaper (photo below).
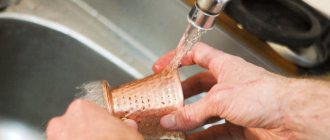
After sanding and if desired, wash the pan thoroughly and let the water idly boil.
In general, I fiddled with the first hole for about two hours, because I have no experience in soldering aluminum with a low-power soldering iron. The other two holes were drilled, riveted and cleaned in about 15 minutes. So decide according to the circumstances which is the best way to seal this or that hole in the pan and thereby extend its life. I think you should use a soldering iron if the hole is very large and you can’t do without patches, but in other cases, it’s better to rivet it. On the other hand, if in an ordinary household pan of 3-4 liters, a hole has formed for a patch, then perhaps it’s time to take on a new pan, and not a soldering iron
source
The most expensive, powerful, nimble and fast cars
–Categories
- Auto-moto (31)
- Jokes, jokes, humor (126)
- Army, weapons (91)
- Aphorisms, quotes, phrases (49)
- Relationships (15)
- Video, cinema (68)
- Questions and answers (15)
- Cities and countries (50)
- Demotivators (24)
- Children (6)
- For parents (22)
- For your girlfriend (20)
- House of Soviets (28)
- Wife (25)
- Female look (12)
- Laws and rules of life (52)
- Stars, celebrities (46)
- Health, well-being (22)
- Do you know? (64)
- Dating, dating (16)
- Ideas, thoughts, maxims (35)
- History, retro (183)
- War (46)
- USSR (74)
- Computer, Internet (57)
- Short stories (77)
- Babes (50)
- Creative (40)
- Love (13)
- Masters of Arts (46)
- Sculptors (1)
- Photographers (24)
- Artists (20)
- Dreams, desires, fantasies (32)
- Myths and misconceptions (60)
- My hobbies (25)
- Male mistakes (27)
- Men's wardrobe (28)
- Man and woman (48)
- Music (42)
- We and foreigners (65)
- Real men (85)
- Mood, emotions (3)
- Our home (78)
- Cottage, vegetable garden (18)
- We do it ourselves (25)
- Interior, design (29)
- Our life (26)
- Nifigasse! (53)
- New fairy tales (21)
- About business (73)
- About food and drinks (50)
- About women (77)
- About a friend and lover (19)
- Society, politics (58)
- Vacations, travel (38)
- Congratulations, wishes (18)
- Useful tips for playboys (48)
- Holidays (28)
- Psychology (37)
- Friday! (47)
- Stories, parables (38)
- Russia and Russians (101)
- The very best (96)
- Wedding, marriage (9)
- Sex as it is (86)
- Sex stories (58)
- Family (12)
- Modern girl (39)
- Sports, physical training (54)
- Poems (38)
- Superpeople and superthings (19)
- Creativity of our readers (8)
- Life Lessons (42)
- Success, victory (39)
- Courtship, compliments, gifts (17)
- Self care (6)
- Flash drives, videos, clips (23)
- Flora and fauna (12)
- Photo galleries (51)
- Photo sessions (30)
- Economics, finance (19)
- Erotica (80)
- This is interesting (64)
- This is a must see! (60)
-Always at hand
Banners of men's and women's clubs. Copy the code to your blog!
–Photo album
–Search by diary
–Subscription by e-mail
–Interests
-Friends
– Regular readers
-Statistics
Monday, August 27, 2022 11:53 + to quote book
This is the easiest way to solder aluminum that you can imagine. With its help, anyone, at home or in the garage, can easily repair and restore any aluminum products, without any argon welding. You can easily make various structures from aluminum profiles and much more.
Now, in order to solder a radiator or an aluminum bicycle frame, you don’t have to go to a workshop and spend a lot of money, everything can be soldered at home. With the right approach, soldering turns out to be no worse than a welded joint, but certainly more reliable than any cold welding, which is usually used as an alternative.
Read also: Many sockets in one, what is it called?
You will need: ● Cored wire for soldering aluminum. ● Gas burner.
A gas burner does not have to be professional. A regular burner attachment for a gas cylinder is sufficient, or any other will do.
But you need to buy tubular powder solder
, specially designed for soldering aluminum (why powder? - powder inside the tube). It consists of two components: a shell and a powder base inside. We won’t go into details about the chemical composition, there’s no need for that.
It can be purchased in specialized stores and is used in car repair shops. The most accessible way for everyone is to buy it on Ali Express - link to solder. It’s inexpensive, I advise you to buy the package right away – it will definitely come in handy in life.
Soldering aluminum with a gas torch
We take the profile or parts that need to be welded.
Clean the surface with a metal brush. Alternatively, you can use coarse-grain sandpaper. The higher the roughness of the soldering surface, the better the bond with the solder.
We fix the connection with a clamp or other device. Turn on the gas burner and heat the joint.
We bring tubular solder. It melts and spreads along the seam.
The entire process occurs at approximately 450 degrees Celsius. Solder has incredible fluidity and flows into any, even the smallest, cracks in the metal.
After distributing the solder, we warm up the connection a little more so that it is distributed and spreads out at the joints of the assembly as much as possible.
Flux
Before soldering the radiator, you will have to take care of the flux. It is this that ensures a reliable connection between the solder and the metal surface being repaired. You can either buy flux or make it yourself. You can purchase it at any store specializing in the sale of radio components. The packages of Russian fluxes intended for soldering aluminum usually have a corresponding inscription. Also, their name may contain the markings F-59A, F-61A, 34A, etc.
How to solder a car radiator at home without buying flux? Is it possible to do it yourself? Yes, you can make flux yourself. It, of course, will not have the same properties as the factory one, but it will cope with its task. To make it, you only need two ingredients: rosin and iron filings.
You can probably find rosin at home, and shavings can be obtained by processing any iron part with a file. All this needs to be mixed in a small fireproof container and heated over a fire. The resulting mixture is the simplest flux for aluminum.
To obtain a more durable connection between solder and metal, you can make a so-called flux. To do this, you need to mix the following substances in the following proportions:
- potassium chloride – 56%;
- lithium chloride – 23%;
- cryolite – 10%;
- coarse table salt – 7%;
- sodium sulfate – 4%.
The ingredients need to be crushed, mixed and poured into an airtight glass container. Store flux in a place protected from direct sunlight.
Soldering instructions
The process of soldering aluminum parts does not have its own distinctive features; it is carried out in the same way as with steel or copper.
The algorithm of actions is as follows:
- the soldering area is degreased and cleaned;
- the parts are fixed in the desired position;
- the connection area heats up;
- touch the solder rod (containing active flux) to the joint. If flux-free solder is used, then flux is applied to destroy the oxide film, after which a solid piece of solder is rubbed over the soldering area.
A brush with steel wire bristles is also used to break down the aluminum oxide film. This simple tool is used to rub molten solder over an aluminum surface.
Soldering aluminum - complete video instructions https://www.youtube.com/watch?v=ESFInizLE9U
What to do if you don’t have the necessary materials?
When it is not possible to prepare all the materials necessary for soldering, you can use an alternative method that uses tin or tin-lead solder. As for the flux, it is replaced by rosin. To prevent the formation of a new aluminum oxide film in place of the old one, stripping is carried out under a layer of molten rosin.
The soldering iron, in addition to its direct purpose, will be used as a tool that destroys the oxide film. To do this, a special scraper is put on its sting. You can increase the effectiveness of the process by adding metal filings to the rosin.
The process is carried out as follows:
- use a heated tinned soldering iron to melt the rosin at the soldering site;
- When the rosin completely covers the surface, they begin to rub it with a soldering iron tip. As a result, metal filings and stings destroy the aluminum oxide film. Since the layer of molten rosin does not allow air to penetrate to the aluminum surface, an oxide film does not form on it. As the film is destroyed, tinning of the part will occur;
- When the tinning process is completed, the parts are joined and heated until the melting temperature of the solder is reached.
It must be warned that the process of soldering aluminum without special materials is a rather troublesome process with no guarantee of successful completion. Therefore, it is better not to waste your time and energy on such work, especially since the quality and reliability of such a connection will be questionable.
It is much easier to buy active flux and high-temperature solder, with which soldering aluminum even at home will not cause difficulties.
Soldering aluminum at home is a real way to repair household utensils, household and automobile aluminum radiators, pipes, plumbing fixtures and much more. In industrial conditions, soldering and welding of parts made of this material is carried out using automated equipment. At home, soldering and welding aluminum is also possible.
To do this, use an ordinary soldering iron, ordinary POS-50 and POS-61 solders containing tin. In addition, it is possible to use a magnesium welding stick or use a gas torch.
Once you have chosen your solder, you need to select a soldering flux. The biggest secret when soldering aluminum is to work quickly, connecting the parts to be soldered immediately after they have been cleaned of oxide.
[Instructions] Soldering aluminum at home
Soldering aluminum Aluminum is a fairly common metal, widely used in the national economy. Its alloys are mainly used, but sometimes it is used in almost pure form. We will tell you how to solder aluminum at home.
Why do soldering problems occur?
This metal has many advantages, in particular, lightness and flexibility.
In addition, thanks to the oxide film formed on its surface, the metal is practically neutral and does not react with aggressive environments or food products.
However, it is precisely this property of the metal that poses a problem in cases where it is necessary to connect several aluminum parts using soldering.
Aluminum radiator
Most often, aluminum is used as a material for the manufacture of various radiators: heating systems, cooling electronic components, automotive fluids, etc.
This use is due to the low heat capacity and high thermal conductivity of the metal.
Despite the fairly low chemical activity, time and temperature take their toll and cracks appear in the housings of aluminum radiators, which are quite problematic to repair.
Microcracks that occur in radiators may not even be visible to the human eye,
but they can leak quite a large amount of liquid, which will have to be regularly added to the cooling system.
Microcrack
Repairing the cooling system is quite an expensive undertaking.
Often, service centers or auto repair shops, without particularly straining, simply change the entire radiator instead of fixing it by soldering the hole.
Soldering of several elements
There are two ways to fix the hole yourself:
by soldering or cold welding. However, in both cases you will have to face one serious problem.
Aluminum immediately oxidizes in air
When aluminum interacts with air, it immediately oxidizes, and its surface is covered with a thin film of oxide.
The oxide has insulating properties and traditional materials used as solder are not able to not only connect two aluminum surfaces, but even simply “stick” well to the surface that the oxide covers.
This is why soldering aluminum is very, very difficult.
Soldering with a regular soldering iron does not give the desired results.
You can even say that it does not give any results, since even when using special fluxes for soldering, instead of an even soldered seam, you regularly end up with an uneven pile of solder, which clearly does not have good contact with any of the soldered surfaces.
How is soldering done?
For soldering aluminum, specialized solder is used,
capable of resisting the protective effect of the oxide film on the metal surface.
Special solder for soldering
Several brands can serve as such solder, for example, HTS-2000 or Castolin-192.
Structurally, these solders are a tube made of low-melting metal (zinc compounds are used), in the center of which a special flux for soldering aluminum is poured.
It is this flux that is used to dissolve the thin oxide film on the surface of aluminum.
In order to carry out soldering correctly, it is necessary to ensure the temperature of the surfaces being soldered is +480°C.
Solder comes in different sizes
At lower temperatures, the solder metal will not be able to react with the oxide and decompose it into its components, thus allowing the solder material to make good contact with the surface.
In order to give the structural elements the required temperature, a conventional gas burner is used.
For this purpose, you can use either a portable or stationary gas burner.
You can get solder that allows you to solder aluminum in specialized stores that manufacture and sell various products from copper tubes and radiators.
This could be, for example, a service center for repairing refrigerators, etc.
Sometimes finding the right solder can take quite a significant amount of time, since the problem is quite specific and the information of interest may not be available everywhere.
As a last resort, you can use the services of any trading platform. This could be, for example, the same Avito network.
Online store
But it’s best (if, of course, you can wait) to contact Aliexpress.
There you can order any aluminum solder you are interested in at an attractive price and fairly fast delivery times.
It is advisable to practice soldering the holes before starting soldering, especially if it is being done for the first time.
To do this, several holes should be made in any unnecessary tube that will need to be soldered.
The soldering area must be well heated
Therefore, there is no need to choose low-power burners or frankly low-quality products for heating the soldered parts.
The flame of such burners will be too narrow and will not heat the edges of the seam well.
, and soldering will take a very long time, since the solder will constantly try to drain from the soldering site, collect into balls, reluctantly stick to the metal, etc.
Soldering aluminum parts using low-power torches is very problematic, so it is better to use a torch attachment on a cylinder
Its wide flame allows you to heat in one pass not only the areas being soldered, but also the metal at some distance from them.
Soldering sequence
Sheet aluminum
In order to solder two aluminum parts, you must do the following:
1Heat the aluminum tube a little without using solder. This is necessary to destroy the aluminum oxide layer on the surface
2After warming up the soldering area, concentrate the torch flame directly on the point of connection of the aluminum parts and warm it up for a few seconds
3Next you need to bring the solder tube directly to the place of heating, to the point of the center of the flame from the burner
4The solder begins to quickly spread over the surface of the seam and completely fills it.
Using this method, you can not only solder aluminum products,
but also solder sheet aluminum together.
Two elements soldered together
Similar to the previously considered case, first, all-round heating of the surfaces to be soldered is carried out,
and then introducing a solder-flux tube into the burner flame at the point of contact of the two parts.
The end result should look something like this:
- The soldering strength in this way is very high, and the connection is reliable.
- It is very, very difficult to break a seam
Let's look at an example of how to solder two tubes.
At the beginning, they are placed opposite each other and aligned.
It is important that the tubes are correctly positioned and secured.
Then everything happens according to the classical scheme: the ends of both tubes are heated to a depth of at least 3 cm.
Next, concentrate the fire on the seam and simply bring the solder to the seam.
The solder spreads quickly and the tubes are immediately soldered.
Soldered elements
The solder completely fills the seam in a circle.
At the same time, thanks to the flux, which spreads exclusively along the seam, the solder does not get inside the tube and does not clog it. This makes the seam very strong. The tube bends quite easily, but the seam remains intact.
Checking the strength of the finished solder
Zinc solder has very high fluidity;
it fills the groove completely, making the connection airtight. In a similar way, you can solder any aluminum structures of any diameter.
Naturally, in cases where the radiator tubes have numerous places of damage or are covered with a layer of corrosion, this soldering method is a compromise option, since sooner or later the radiator can leak in any other place.
In such cases, a complete replacement of the element may be necessary. But that's a completely different story.
Conclusion
The soldering method itself using zinc solder in the form of a tube with flux inside is a working option, in addition, it can be classified as budget.
The cost of a 50 cm tube with flux is about 90 rubles. This is a more than successful solution compared to operations such as argon welding. Its cost can be several hundred, or even thousands of rubles.
This soldering method is often used in car workshops to repair radiators.
If you liked our article, please like it)
Subscribe to the channel so you don't miss anything interesting!
More photos and video content on the website
https://krrot.net
What to do if a chip appears on the dishes?
It is believed that enamel cookware will be harmful to human health if its integrity is compromised. When chips appear, a reaction of metals occurs upon contact with various substances. They oxidize, releasing harmful components into food. To restore your dishes to their former attractiveness and give them a second life, the pan is restored.
If the damage is not large, then fix the defect yourself. To do this, use enamel paint, which is sold in stores. It is available in cans for greater convenience.
You can buy the following options:
Surface preparation required. Clean the area, remove remaining enamel and dirt. After the preparatory work, they begin to apply paint. Be sure to follow the manufacturer's instructions.
Chips are treated with paint only in those areas that do not come into contact with food.
Soldering iron to help
To repair a chip you will need: a soldering iron, soldering acid and solder. They also take pure tin, which can melt at a temperature of 232 degrees.
If this is your first time using a soldering iron, remove the insulation from it. To do this, clean the ends with sanding paper, then heat the device, which is wiped on rosin. Before soldering problem areas, use sandpaper to clean off stains, remove dirt and grease from the surface.
Once the area is prepared, it's time to pick up the soldering iron and solder. A small portion of the solder is distributed with the working end of the soldering iron. The area where the enamel has broken off also heats up. Next, it is treated with flux and a small amount of tin is applied. When the solder is smoothed out, repeat the procedure. And so on until the surface becomes smooth.
Home repairs
You don't have to run to the workshop to bring your favorite pan back to life. You only need to prepare putty, which will become the main material in the repair. To prepare it you will need:
- White clay;
- calcined borax;
- slaked lime;
- powder glass;
- sodium metasilicate;
- water, mortar and bowl.
The components are sold freely in a specialized store, so do not be afraid of their names. Their cost is also not high.
Place all ingredients in one container and mix thoroughly. The mixture should be thick. This is necessary not only for ease of application, but also for good adhesion to the surface. Before work, the area is cleaned, grease and dirt are removed from the surface. Then apply putty to the chip and leave for two days. During this time, the mixture adheres well to the enamel and becomes stronger. All that remains is to clean the place and remove roughness.
You can do it differently. Go straight to the workshop, where specialists will quickly fix the defect. Here they will prepare the chip for work, applying enamel of the desired color to the problem area under pressure and high temperature. Of course, the master’s work will be perfect, and your pan will be no different from new, but the cost for the services is high.
High and low temperatures contribute to the oxidation of the metal, which is why chemical compounds get into the cooked food. In small doses they are not dangerous, but as they accumulate in the body they will lead to poisoning.
source
Restoring enamel
How to repair an enamel pan if there is no hole, but the enamel has chipped? We need to restore the enamel. To do this you will need putty, which you can make yourself. You need:
- kaolin – 225 g;
- trephine – 60 g;
- calcined borax – 40 g;
- sodium silicate – 30 g;
- powder glass – 20 g;
- slaked lime – 20 g;
- water – 10 ml;
- capacity;
- mortar and pestle:
- pharmacy scales.
All ingredients can be purchased at chemical stores, but it is easier to do this through an online store. Grind the ingredients thoroughly and mix. Then follow this procedure:
- Clean the surface and dry it.
- Degrease the area where you will apply the putty.
- Apply putty.
- Let it dry for two days.
Quartz sand enamel
There is another type of homemade enamel. For it you will need:
- casein;
- sodium liquid glass;
- borax;
- quartz flour;
- crushed glass.
Here's what needs to be done with all this so that the repair of an enamel pan gives the expected result:
- Combine 12 parts casein, 6 parts liquid glass, 10 parts borax, 14 parts quartz flour and 5 grated glass.
- Mix everything well, add a little water to make a homogeneous dough.
- Prepare the enameled surface in the same way as in the previous case, that is, strip it down to the metal and wipe it with acetone or gasoline, and then dry it.
- Apply the composition you prepared, rub and let dry.
- Then sand it smooth and nice, and you can use it.
How to repair a hole in an aluminum pan - Metalist's Guide
admin · 02/22/2017
If your favorite pan starts to cook, try sealing it. With the help of this method, you can increase the life of this necessary utensil. You need to solder according to every rule, because the operating conditions of the pan (high temperature and water) can lead to the formation of a new hole.
You will need
- - solder;
- - copper plate;
- - file or sandpaper;
- — gasoline, flux or “soldering acid”;
- - soldering iron.
Tip 2: How to clean an aluminum pan
Even the tidiest housewife has troubles such as a burnt dish. One has only to turn away - in the blink of an eye, the food being prepared manages to turn into coals and, in addition, firmly stick to the bottom and walls of the dish.
Food burns extremely easily in aluminum pans, so much so that eliminating the consequences can puzzle any housewife. However, you shouldn’t give up on badly burnt dishes.
You can clean an aluminum pan using several available tools.
You will need
- - soda;
- - sponge for washing dishes;
- - plastic brush;
- - a jar of silicate glue;
- - laundry soap;
- - a huge boiling container.
Tip 3: How to solder aluminum
Aluminum is very difficult to solder. When soldering, an oxide film forms on the surface. But aluminum is used to make a ton of home appliances, car parts, and mechanical parts. If the device is out of order, not everyone can afford to buy a new one, especially since it is absolutely possible to repair an old one yourself.
You will need
- -sandpaper;
- - ammonium chloride;
- -zinc chloride;
- -water;
- - steel filings;
- -rosin;
- -tin;
- -bismuth;
- -gloves;
- -soldering iron.
Hole in an aluminum pan
Quote (ensign 12/26/2010 - 02:43)
Try Aluminum-A4, there is such a solder, in my practice it is used in aviation. It worked flawlessly, but you have to play with the melting temperature, if I’m not mistaken, about 680C* with a hammer soldering iron. Good luck
Hmmm.
680C* is exactly the melting temperature of aluminum, and in this case, your miracle solder.
Z.Y.
And there are no such soldering irons, even sledgehammer ones.
Soldering aluminum with mercury
Members 537 posts
- Moscow city
So active that you have to grind it in a mortar
https://www..com/watch?v=7PmQ5N4uuxY
I conducted an experiment on this subject with mercury vapor when I was a tenth grader. I put a drop of mercury and a pinch of crushed sulfur in a medical bottle. Seal the jar hermetically with a rubber stopper.
After a week, all the mercury turned into cinnabar. Rubbing sulfur with mercury just shows how actively they react with each other.
I even saw an anti-mercury gas mask somewhere, and the working substance was sulfur.
How to solder aluminum
Craftsmen have no difficulty soldering copper, brass and steel wires and parts, but if they have to deal with aluminum surfaces, the solder does not even stick to the product, and soldering turns into torture.
The difficulties are caused by the fact that a thin but very strong film of Al2O3 oxide forms on the surface of this metal.
You can remove this film mechanically - for example, by cleaning the product with a file, but upon contact with air or water, the metal will immediately become covered with a film again.
Despite the difficulties that arise, it is possible to solder aluminum products. There are several ways to solder aluminum.
Soldering aluminum alloys
Excellent results can be obtained using the following alloys:
two parts zinc and eight parts tin one part copper and 99 parts tin one part bismuth and 30 parts tin
Before soldering, both the alloy and the part itself must be well heated. It should also be remembered that soldering acid must be used with this soldering method.
Soldering aluminum using special fluxes
Standardly used fluxes do not dissolve the oxide film on the surface of aluminum, so special active fluxes must be used.
Repairing an enamel pan
Metal kitchen utensils can last a long time. With proper care, it practically does not fail.
But still, during cooking, various troubles occur, including overheating, which can result in a hole or chip if restoration of broken dishes is possible.
After such an incident, the pan is most often thrown away, but is it always necessary to immediately run to the trash heap? Repairing an enamel pan is sometimes possible, and this is what will be discussed next.
Despite the fact that many housewives have long been using pots and pans made of fireproof glass or ceramics, metal cookware is still extremely popular. She has many advantages:
True, metal pans also have disadvantages - in particular, not all of them can be repaired. Utensils are mainly used from the following materials:
- of stainless steel;
- aluminum;
- steel coated with enamel.
Important! Cast iron cookware is still used to prepare some dishes; it retains heat better and distributes it evenly. Read about what and how to cook in such dishes in our culinary blogs:
But, unfortunately, cast iron cookware most often cannot be repaired. But you can try to put the rest in order.
How to close it?
If a hole appears on an aluminum, steel or enamel surface, you can do one of the following:
- plug the hole with a bolt;
- solder;
- make a rivet;
- seal;
- brew.
Important! The first method, as well as riveting, is suitable for any material. But not everything can be soldered - for example, the steel must first be annealed, but the method is extremely unreliable. The best option is to brew it if you have the equipment.
Install the bolt
This method has a significant drawback - the enamel cannot be restored in this way. Just the opposite - it will gradually peel off. So this option can be regarded as temporary. If you urgently need to repair a small hole in the bottom and absolutely don’t care what happens to the pan later, you can’t think of a better way. The enamel can then be restored.
How to repair an enamel pan? Very simple. You need:
- bolt of suitable size;
- drill;
- metal drill.
The hole is rarely exactly the right shape. Therefore, first of all, it needs to be brought into relative order:
- Take a 3 mm drill (if you have a 2 mm bolt, then you need the same drill).
- Drill the hole, giving it the most correct shape possible.
- Insert the bolt.
- Tighten the nut firmly from the inside.
Important! It’s hardly worth cooking in such a pan, but you can boil the water for a long time - as well as use it for other purposes (for example, if it is steel or enameled, you can paint things in it, boil laundry, etc.).
Brazing Solder
Repairing pans using a bolt is the simplest method, but it is not suitable for every case. For example, it is unlikely that it will be possible to repair a curved surface this way. In this case, you will have to solder, and you need to use hard solder - that is, do the same as tinkers used to repair metal utensils on the streets and markets.
You need:
- tin plate;
- tin solder;
- flux;
- sandpaper;
- file;
- high power soldering iron.
Tinned sheet metal is used to make AA battery cases - from there you can take it and use it in this way:
- Sand the area around the hole until the enamel is completely removed and only bare metal is left.
- Apply flux.
- Tin the damaged area with a soldering iron using hard solder.
- Cut out a patch from tin.
- Tin it in the same way.
- Apply a patch to the hole.
- Warm it up with a soldering iron.
- Wait for the solder to melt.
- Press the patch onto the outside of the pan.
- Remove excess solder - this is done with a file.
Solder must be applied in a thick layer - no less than 5 mm. With such a repair, the patch will not fall off for quite a long time. You can cook in a saucepan, but not too often.
Important! Lead is toxic, so if you plan to cook in a pan in the future, use pure tin as solder.
How to repair an enamel pan if there is no hole, but the enamel has chipped? We need to restore the enamel. To do this you will need putty, which you can make yourself. You need:
- kaolin – 225 g;
- trephine – 60 g;
- calcined borax – 40 g;
- sodium silicate – 30 g;
- powder glass – 20 g;
- slaked lime – 20 g;
- water – 10 ml;
- capacity;
- mortar and pestle:
- pharmacy scales.
All ingredients can be purchased at chemical stores, but it is easier to do this through an online store. Grind the ingredients thoroughly and mix. Then follow this procedure:
- Clean the surface and dry it.
- Degrease the area where you will apply the putty.
- Apply putty.
- Let it dry for two days.
Quartz sand enamel
There is another type of homemade enamel. For it you will need:
- casein;
- sodium liquid glass;
- borax;
- quartz flour;
- crushed glass.
Here's what needs to be done with all this so that the repair of an enamel pan gives the expected result:
- Combine 12 parts casein, 6 parts liquid glass, 10 parts borax, 14 parts quartz flour and 5 grated glass.
- Mix everything well, add a little water to make a homogeneous dough.
- Prepare the enameled surface in the same way as in the previous case, that is, strip it down to the metal and wipe it with acetone or gasoline, and then dry it.
- Apply the composition you prepared, rub and let dry.
- Then sand it smooth and nice, and you can use it.
Other ways to restore enamel with video
If the dishes are white, you can use a simpler method. You can easily find glass enamel on sale. It is applied to any metal surfaces, including dishes, if they are used at temperatures up to 350°C:
- Read the instructions.
- Sand the surface with coarse sandpaper.
- Degrease the repair area.
- Apply enamel.
Big hole
But what should you do if a large hole has formed in your favorite saucepan, for which there is simply not enough tin from the battery? You will need a piece of copper, that is, a copper plate. Also very useful:
- needle file;
- file;
- sandpaper;
- gasoline or acetone;
- soldering iron;
- tin;
- rosin;
- flux.
Before applying the patch, everything needs to be carefully prepared:
- Wash the pan thoroughly.
- Clean the damaged area from all deposits and rust, if any.
- Clean the plate too until it shines.
- Wipe both surfaces with acetone, gasoline, and white spirit.
- Apply flux or treat the surface with soldering fluid (available at any hardware store).
- Warm up your soldering iron.
- Place the sting in rosin.
- When a light smoke appears, you can start.
- Pick up solder - you need to hold the tip until a film appears.
- Apply solder to the repair area.
- Level it from the outside and inside of the pan.
- Gradually apply pieces of solder and smooth out until the hole disappears.
How to prepare a soldering iron?
If you have already dealt with a soldering iron, repairing a pan will not seem difficult to you. For those who have decided to do this for the first time in their life, it makes sense to first prepare a soldering iron. It needs to be tinned:
- Clean the tip - this can be done either with sandpaper or a file.
- Warm up the device by plugging it in.
- Rub the tip over the piece of rosin.
- Separate a little solder with the heated tip.
- Making circular movements, ensure that the tin spreads evenly over the entire tip - the end should be coated on both sides.
- If you don’t get an even layer, repeat the procedure, but try to clean the tip as best as possible.
Important! If you notice a blue film on the prepared soldering iron, it needs to be cooled.
Can it be used?
You can use the pan, but not right away. It must first be prepared. This is done like this:
- Wait for the solder to cool.
- Clean the soldering area so that the patch does not stand out too much.
- After this, you can try to boil the water - if you did everything correctly, the pan will not leak.
Important! Well, the utensils are saved, it’s time to check whether milk will flow out of it. By the way, if you still don’t know in which pan it is better to cook milk, we will tell you in our article: “In which pan is it better to cook milk porridge.”
Repairing an aluminum pan
The situation is much more complicated with aluminum surfaces. Soldering them is very difficult. Of course, if you have argon welding (and such a device can now be bought completely freely) - there are no problems. But it only makes sense to buy such expensive equipment if you are going to do this all the time - it’s definitely not worth doing this just for one aluminum pan.
Is it necessary to throw away a damaged pan? Not at all. It can be used for a variety of purposes - for example, it is quite suitable in the garden. You can use it to collect fruits and vegetables, as well as carry water for irrigation. For repair you need:
- piece of aluminum;
- bolt with nut;
- drill;
- hacksaw for metal.
You need to make two patches from aluminum. They must be larger than the hole:
- Apply patches to the hole from the outside and inside.
- Fasten them with one or more bolts - the nuts should be on the inside.
Important! A steel pan can be repaired in any way - both soldering and patching.
Sealing an aluminum pan
Aluminum is difficult to solder due to the rapid formation of an oxide film. In addition, you will need a very powerful soldering iron - 100 W or more. There are difficulties with solder - bismuth is added to it, and it is not as easy to get as other metals.
Solder consists of two components:
- tin – 80-95%;
- bismuth – 5-20%.
Important! It should be kept in mind that bismuth is toxic. It’s hardly worth cooking food in such a pan, but it can be used for other purposes.
The following is used as flux:
To avoid the appearance of an oxide film, you can try the following method:
- Clean the surface where the hole is located.
- Melt the rosin.
- Fill the hole with melt
- Apply flux.
- Apply solder to the tip and seal the hole from the edges to the middle.
Cleaning aluminum and steel cookware after repair
If you need to restore the appearance of aluminum cookware, simply clean it. The most common soda is suitable for this. Clean the pan and it will regain its former beauty.
Important! Every housewife knows how easily aluminum pans get dirty and smoke. But not everyone knows how to return kitchen utensils to their former appearance. Our blogs will help you understand this issue:
In the same way, the spectacular appearance of stainless steel products is restored. In this case, you don’t even need soda - any dishwashing detergent is enough.
other methods
In some cases, it is better not to solder metal surfaces, but to glue them together. True, you won’t be able to cook food in sealed pans; this will only work as a bucket. But just in case, you need to know these methods. Adhesives suitable for you:
BF-2 and BF-4
These adhesives are made from phenol-formaldehyde resin, so cookware repaired with their help is not suitable for cooking. The method of application is simple:
- Clean surfaces thoroughly to ensure no grease, rust or dirt remains.
- Treat the gluing area and patch with acetone or gasoline.
- Apply a thin layer of glue - it is more convenient to do this with a brush.
- Allow the item to dry for about an hour.
- Apply a second layer of glue.
- Let it dry a little.
- Place the surfaces against each other (for example, a metal plate to a hole), press.
- Place the product in the oven and heat for an hour.
Epoxy adhesive
This solution consists of several components. He has:
- epoxy resin;
- dibutyl phthalate (plasticizer);
- aluminum oxide or quartz flour;
- hardener
After the patch is glued, the product must be placed in the oven, preheated to 200°C and heated for about three hours. This is the best variant. If you don’t have an oven, you can preheat it to 120°, and then leave the pan alone for a day, after which it will be ready for use. You can store food in it, but you shouldn’t cook it.
Rivet
If you don’t have glue on hand, but you have a lot of metal working tools in your house, you can make a rivet. You need:
- a good hammer (it should fit tightly on the handle);
- hacksaw;
- chisel;
- pliers;
- vice;
- wire cutters;
- anvil;
- metal plate;
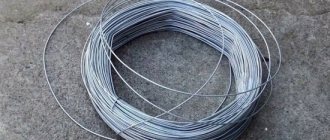
- thick wire - copper or aluminum.
The procedure for repairing a pan:
- Cut a piece of wire 10-12 cm.
- Clamp it in a vice.
- Using light blows of a hammer, flatten one end to form a cap - it should be larger than the hole.
- Insert the free end of the wire into the hole so that the cap covers it.
- Trim the free end.
- Flatten it so that the other side also has a cap covering the hole.
material
A pan repaired using any of the above methods will last for a long time. In addition, the very feeling that arms grow from the shoulders gives a person confidence - if you succeed, you can repair anything.
Install the bolt
This method has a significant drawback - the enamel cannot be restored in this way. Just the opposite - it will gradually peel off. So this option can be regarded as temporary. If you urgently need to repair a small hole in the bottom and absolutely don’t care what happens to the pan later, you can’t think of a better way. The enamel can then be restored.
How to repair an enamel pan? Very simple. You need:
- bolt of suitable size;
- drill;
- metal drill.
The hole is rarely exactly the right shape. Therefore, first of all, it needs to be brought into relative order:
- Take a 3 mm drill (if you have a 2 mm bolt, then you need the same drill).
- Drill the hole, giving it the most correct shape possible.
- Insert the bolt.
- Tighten the nut firmly from the inside.
Rivet
If you don’t have glue on hand, but you have a lot of metal working tools in your house, you can make a rivet. You need:
- a good hammer (it should fit tightly on the handle);
- hacksaw;
- chisel;
- pliers;
- vice;
- wire cutters;
- anvil;
- metal plate;
- thick wire - copper or aluminum.
The procedure for repairing a pan:
- Cut a piece of wire 10-12 cm.
- Clamp it in a vice.
- Using light blows of a hammer, flatten one end to form a cap - it should be larger than the hole.
- Insert the free end of the wire into the hole so that the cap covers it.
- Trim the free end.
- Flatten it so that the other side also has a cap covering the hole.