Mechanical engineering parts and mechanisms, as well as tools intended for their processing, have a set of mechanical characteristics. Hardness plays a significant role among the characteristics. The hardness of metals clearly shows:
- wear resistance of metal;
- possibility of processing by cutting, grinding;
- resistance to local pressure;
- ability to cut other materials and others.
In practice, it has been proven that most of the mechanical properties of metals directly depend on their hardness.
Signs of metals
The following basic mechanical properties are distinguished:
- Hardness - determines the ability of one material to resist the penetration of another, harder one.
- Fatigue is the amount and time of cyclic impacts that a material can withstand without changing its integrity.
- Strength. It is as follows: if you apply a dynamic, static or alternating load, this will not lead to a change in shape, structure and dimensions, or damage to the internal and external integrity of the metal.
- Plasticity is the ability to maintain integrity and the resulting shape during deformation.
- Elasticity is deformation without violating integrity under the influence of certain forces, and also, after getting rid of the load, the ability to return to its original shape.
- Resistance to cracks - under the influence of external forces they do not form in the material, and external integrity is also maintained.
- Wear resistance – the ability to maintain external and internal integrity during prolonged friction.
- Viscosity – maintaining integrity under increasing physical stress.
- Heat resistance - resistance to change in size, shape and destruction when exposed to high temperatures.
What product characteristics are affected by hardness?
Specific criteria and indicators are important for each area. For example, wear resistance , which is the susceptibility of a metal to abrasion, surface destruction, and change in size during operation under certain conditions, is absolutely important in every area of use of this material. It is impossible to find an area where this indicator would not be just important, but even paramount, be it a children's construction set or a new viaduct, a surgical needle or a communications tower, a gas pipe or a wedding ring. Naturally, the higher the wear resistance, the longer the product will last, and the more expensive it will cost.
The next thing that hardness directly affects is the ability to process a particular metal or alloy and the type of processing. Here we can distinguish several large groups of processing methods:
- mechanical,
- casting,
- thermal,
- pressure,
- welding,
- electric,
- chemical
Of course, when choosing a method, several criteria must be taken into account (the main ones are the initial properties of the metal and the desired result), but the hardness of the starting material is one of the fundamental ones in this matter.
The hardness of metals also affects resistance to pressure and other forces. This is important, for example, for shafts or bearings that are subject to centrifugal and frictional forces.
The hardness of the material determines the possibility of using the product as a tool for working with other metal or non-metal products. Here we are talking about tool steel with a high carbon content (from 0.7% and above). Various tools are made from it for both industrial and home use: drills, cutters, hammers, pliers, files, surgical scissors, scalpels, etc.
The natural conclusion from all of the above is the recognition of the enormous importance of the hardness indicator of metals and the question of the likelihood of its increase.
!!! It is important to keep in mind that a certain hardness is expected for a certain product. There is no such thing as “the harder, the better.” Products with very high hardness are difficult to process and at the same time become brittle.
For example, the higher the hardness of the knife, the longer it will remain sharp, but problems with sharpening may arise, and with frequent use the blade will crumble and break.
Knives with a hardness below 60 HRC will serve a hunter or tourist for a long time, because... They are quite reliable: they withstand shock loads well, do not deform greatly, are resistant to corrosion, and are easy to sharpen.
Metal classification
Metals include materials that have a combination of mechanical, technological, operational, physical and chemical properties:
- mechanical confirm the ability to resist deformation and destruction;
- technological indicate the ability to perform different types of processing;
- operational ones reflect the nature of changes during operation;
- chemical ones show interaction with various substances;
- physical ones indicate how the material behaves in different fields - thermal, electromagnetic, gravitational.
According to the metal classification system, all existing materials are divided into two volumetric groups: ferrous and non-ferrous.
Technological and mechanical properties are also closely related. For example, the strength of a metal can be the result of proper processing. For these purposes, so-called hardening and “aging” are used. Chemical, physical and mechanical properties are closely interrelated, since the composition of the material determines all its other parameters. For example, refractory metals are the strongest. Properties that appear at rest are called physical, and under external influence - mechanical. There are also tables for classifying metals by density - main component, manufacturing technology, melting point, and others.
The influence of carbon on the structure and properties of steels
The mechanical properties of carbon steel depend mainly on the carbon content. As the carbon content in steel increases, the amount of cementite increases and, accordingly, the amount of ferrite decreases, i.e. Strength and hardness increase and ductility decreases. Strength increases only up to 1% C, and at higher carbon content it begins to decrease. This happens because the network of secondary cementite formed along the grain boundaries in hypereutectoid steels reduces the strength of the steel.
As the carbon content in the steel structure increases, the amount of cementite, a very hard and brittle phase, increases. The hardness of cementite exceeds the hardness of ferrite by approximately 10 times (800HB and 80HB, respectively). Therefore, the strength and hardness of steel increase with increasing carbon content, while ductility and toughness, on the contrary, decrease.
As the carbon content increases to 0.8%, the proportion of perlite in the structure increases (from 0 to 100%), so both hardness and strength increase. But with a further increase in carbon content, secondary cementite appears along the boundaries of pearlite grains. In this case, the hardness almost does not increase, and the strength decreases due to the increased fragility of the cementite mesh.
With an increase in carbon content in steel, the physical properties also change: density decreases, electrical resistivity and coercive force increase, thermal conductivity and magnetic permeability decrease.
In addition, an increase in carbon content leads to an increase in the cold brittleness threshold: every tenth of a percent increases t50 by approximately 20°. This means that steel with 0.4% C goes into a brittle state at approximately 0ºC, i.e. it is less reliable in operation.
Carbon in an iron-carbon alloy is mainly in a bound state in the form of cementite. It is found in the free state in the form of graphite in cast iron. With increasing carbon content, hardness and strength increase and ductility decreases.
The carbon content also affects all the technological properties of steel: the more carbon there is in the steel, the more difficult it is to process by cutting, the worse it deforms (especially in a cold state) and the worse it welds.
Black metals
Materials belonging to this group have the same properties: impressive density, high melting point and dark gray color. The first large group of ferrous metals includes the following:
- Iron - cobalt, manganese, nickel, iron. They are used as a base or additives to alloys.
- Refractory - chromium, tungsten, molybdenum, titanium. All of them have a melting point higher than the level at which iron melts. Used as a base or additive for the production of alloy steels.
- Uranium – actinides and metals obtained as a result of synthesis. They are widely used in nuclear energy.
- Rare earths – neodymium, cerium, lanthanum. All metals have related chemical properties, but completely different physical parameters. They find their application as additives to alloys.
- Alkaline earth - calcium, sodium, lithium. In their free form they have no practical use.
The influence of chem. elements on the properties of steel.
Symbols of chemical elements:
| chromium (Cr) - X nickel (Ni) - H molybdenum (Mo) - M titanium (Ti) - T copper (Cu) - D vanadium (V) - F tungsten (W) - B | nitrogen (N) - A aluminum (Al) - Yu beryllium (Be) - L boron (B) - P bismuth (Bi) - Vi gallium (Ga) - Gl | iridium (Ir) - And cadmium (Cd) - Kd cobalt (Co) - K silicon (Si) - C magnesium (Mg) - Ш manganese (Mn) - G | lead (Pb) - AC niobium (Nb) - B selenium (Se) - E carbon (C) - U phosphorus (P) - P zirconium (Zr) - C |
INFLUENCE OF IMPURITIES ON STEEL AND ITS PROPERTIES
Carbon - found in steel usually in the form of a chemical compound Fe3C called cementite. With an increase in carbon content to 1.2%, the hardness, strength and elasticity of steel increase, but ductility and impact resistance decrease, and workability deteriorates, and weldability also deteriorates.
Silicon - if it is contained in steel in small quantities, it does not have a special effect on its properties. (Useful impurity; introduced as an active deoxidizer and remains in the steel in an amount of 0.4%)
Manganese , like silicon, is found in ordinary carbon steel in small quantities and does not have any particular effect on its properties. (A useful impurity; introduced into steel for deoxidation and remains in it in an amount of 0.3-0.8%. Manganese reduces the harmful effects of oxygen and sulfur.
Non-ferrous metals
The second largest group has low density, good ductility, low melting point, predominant colors (white, yellow, red) and consists of the following metals:
- Lungs – magnesium, strontium, cesium, calcium. In nature they are found only in strong compounds. They are used to produce light alloys for various purposes.
- Noble ones. Examples of metals: platinum, gold, silver. They have increased resistance to corrosion.
- Low-melting materials - cadmium, mercury, tin, zinc. They have a low melting point and are used in the production of various alloys.
The low strength of non-ferrous metals does not allow them to be used in their pure form, so in industry they are used in the form of alloys.
Copper and copper alloys
In its pure form it has a pinkish-red color, low resistivity, low density, good thermal conductivity, excellent ductility, and is resistant to corrosion. It is widely used as a conductor of electric current. For technical needs, two types of copper alloys are used: brass (copper with zinc) and bronze (copper with aluminum, tin, nickel and other metals). Brass is used for the manufacture of sheets, strips, pipes, wires, fittings, bushings, and bearings. Flat and round springs, membranes, various fittings, and worm pairs are made from bronze.
Table of relationships between hardness numbers according to Brinell, Rockwell, Vickers, Shore
Rockwell, Vickers and Shore hardness values indicated correspond to Brinell hardness values determined using a 10 mm diameter ball.
| According to Rockwell | According to Brinell | Vickers (HV) | By Shore | |||
| H.R.C. | HRA | HRB | Imprint diameter | HB | ||
| 65 | 84,5 | – | 2,34 | 688 | 940 | 96 |
| 64 | 83,5 | – | 2,37 | 670 | 912 | 94 |
| 63 | 83 | – | 2,39 | 659 | 867 | 93 |
| 62 | 82,5 | – | 2,42 | 643 | 846 | 92 |
| 61 | 82 | – | 2,45 | 627 | 818 | 91 |
| 60 | 81,5 | – | 2,47 | 616 | – | – |
| 59 | 81 | – | 2,5 | 601 | 756 | 86 |
| 58 | 80,5 | – | 2,54 | 582 | 704 | 83 |
| 57 | 80 | – | 2,56 | 573 | 693 | – |
| 56 | 79 | – | 2,6 | 555 | 653 | 79,5 |
| 55 | 79 | – | 2,61 | 551 | 644 | – |
| 54 | 78,5 | – | 2,65 | 534 | 618 | 76,5 |
| 53 | 78 | – | 2,68 | 522 | 594 | – |
| 52 | 77,5 | – | 2,71 | 510 | 578 | – |
| 51 | 76 | – | 2,75 | 495 | 56 | 71 |
| 50 | 76 | – | 2,76 | 492 | 549 | – |
| 49 | 76 | – | 2,81 | 474 | 528 | – |
| 48 | 75 | – | 2,85 | 461 | 509 | 65,5 |
| 47 | 74 | – | 2,9 | 444 | 484 | 63,5 |
| 46 | 73,5 | – | 2,93 | 435 | 469 | – |
| 45 | 73 | – | 2,95 | 429 | 461 | 61,5 |
| 44 | 73 | – | 3 | 415 | 442 | 59,5 |
| 42 | 72 | – | 3,06 | 398 | 419 | – |
| 40 | 71 | – | 3,14 | 378 | 395 | 54 |
| 38 | 69 | – | 3,24 | 354 | 366 | 50 |
| 36 | 68 | – | 3,34 | 333 | 342 | – |
| 34 | 67 | – | 3,44 | 313 | 319 | 44 |
| 32 | 67 | – | 3,52 | 298 | 302 | – |
| 30 | 66 | – | 3,6 | 285 | 288 | 40,5 |
| 28 | 65 | – | 3,7 | 269 | 271 | 38,5 |
| 26 | 64 | – | 3,8 | 255 | 256 | 36,5 |
| 24 | 63 | 100 | 3,9 | 241 | 242 | 34,5 |
| 22 | 62 | 98 | 4 | 229 | 229 | 32,5 |
| 20 | 61 | 97 | 4,1 | 217 | 217 | 31 |
| 18 | 60 | 95 | 4,2 | 207 | 206 | 29,5 |
| – | 59 | 93 | 4,26 | 200 | 199 | – |
| – | 58 | – | 4,34 | 193 | 192 | 27,5 |
| – | 57 | 91 | 4,4 | 187 | 186 | 27 |
| – | 56 | 89 | 4,48 | 180 | 179 | 25 |
Threaded holes
Table of drills for holes for cutting cylindrical pipe threads.
Wrench nut sizes
Basic spanner dimensions for hex bolt heads and hex nuts.
Read also: Identification of the spotlight on the diagram
G and M codes
Examples, description and interpretation of L and M codes for creating control programs on CNC milling and lathes.
Thread types
Types and characteristics of metric, pipe, thrust, trapezoidal and round threads.
Drawing scales
Standard scales for images of parts on mechanical engineering and construction drawings.
Cutting modes
Online calculator for calculating cutting conditions during turning.
Threaded holes
Table of drills and holes for cutting metric threads with large (main) pitch.
CNC machines
Classification of CNC machines, CNC machines for metal for turning, milling, drilling, boring, threading, reaming, countersinking.
Cutting modes
Online calculator for calculating cutting conditions when milling.
Drawing formats
Table of side sizes of main and additional formats of drawing sheets.
CAD/CAM/CAE systems
CAD computer-aided design systems, 3D programs for design, modeling and creation of 3D models.
Magnesium, titanium and their alloys
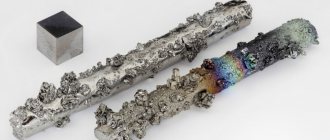
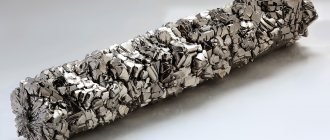
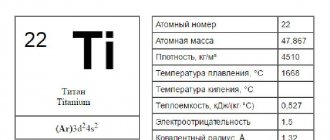
Magnesium is not resistant to corrosion, but there is no lighter metal used for technical needs. Basically, it is added to alloys with other materials: zinc, manganese, aluminum, which are perfectly cut and are quite strong. Alloys with light metal magnesium are used to make housings for cameras, various devices and engines. Titanium has found its application in the rocket industry, as well as mechanical engineering for the chemical industry. Titanium-containing alloys have low density, excellent mechanical properties and corrosion resistance. They lend themselves well to pressure treatment.
Hardness Units
Each method of measuring the resistance of a metal to plastic deformation has its own methodology, as well as units of measurement.
The hardness of soft metals is measured using the Brinell method. Non-ferrous metals (copper, aluminum, magnesium, lead, tin) and alloys based on them, cast iron (except for white) and annealed steel are subjected to this method.
Brinell hardness is determined by indentation of a hardened, polished ball made of ShKh15 ball bearing steel. The circumference of the ball depends on the material being tested. For hard materials - all types of steel and cast iron - 10 mm, for softer materials - 1 - 2 - 2.5 - 5 mm. Required load applied to the ball:
- iron alloys – 30 kgf/mm²;
- copper and nickel – 10 kgf/mm²;
- aluminum and magnesium – 5 kgf/mm².
The unit of hardness measurement is a numerical value followed by a numerical index HB. For example, 200 NV.
Rockwell hardness is determined by the difference in applied loads to the part. First, a preliminary load is applied, and then a general load, at which the indenter is introduced into the sample and held.
A pyramid (cone) of diamond or a ball of tungsten carbide (hardened steel) is introduced into the test sample. After removing the load, the depth of the indentation is measured.
The unit of measurement for hardness is conventional units. It is generally accepted that one is the amount of axial displacement of the cone, equal to 2 μm. The hardness designation is marked with three letters HR (A, B, C) and a numerical value. The third letter in the marking indicates the scale.
The technique reflects the type of indenter and the load applied to it.
| Scale type | Tool | Applied load, kgf |
| A | Diamond cone with 120° apex angle | 50-60 |
| IN | 1/16" ball | 90-100 |
| WITH | Diamond cone with 120° apex angle | 140-150 |
Basically, measurement scales A and C are used. For example, the hardness of steel is HRC 26...32, HRB 25...29, HRA 70...75.
Products of small thickness or parts with a thin, hard surface layer are measured by Vickers hardness. The blade used is a regular tetrahedral pyramid with an apex angle of 136°. The display of hardness values is as follows: 220 HV.
Hardness measurement using the Shore method is carried out by measuring the rebound height of a fallen striker. Indicated by numbers and letters, for example, 90 HSD.
Microhardness is determined when it is necessary to obtain the values of small parts, thin coatings, or individual alloy structures. The measurement is made by measuring the imprint of a tip of a certain shape. The value notation looks like this:
Н□ 0.195 = 2800, where
□ — tip shape;
0.196 — tip load, N;
2800 – numerical value of hardness, N/mm².
Anti-friction alloys
Such alloys are specified to increase the service life of surfaces subject to friction. They combine the following characteristics of the metal - good thermal conductivity, low melting point, microporosity, low coefficient of friction. Antifriction alloys include those based on lead, aluminum, copper or tin. The most used include:
- babbitt. It is made from lead and tin. Used in the production of liners for bearings that operate at high speeds and under shock loads;
- aluminum alloys;
- bronze;
- metal-ceramic materials;
- cast iron.
Soft metals
According to the metal classification system, these are gold, copper, silver, aluminum, but among the softest are cesium, sodium, potassium, rubidium and others. Gold is highly dispersed in nature. It is found in sea water, the human body, and can also be found in almost any fragment of granite. In its pure form, gold has a yellow color with a hint of red, since the metal is soft - it can even be scratched with a fingernail. Under the influence of the environment, gold is destroyed quite quickly. This metal is indispensable for electrical contacts. Although silver is twenty times more abundant than gold, it is also rare.
Used for the production of tableware and jewelry. The light metal sodium has also become widespread and is in demand in almost every industry, including the chemical industry for the production of fertilizers and antiseptics.
The metal is mercury, although it is in a liquid state, therefore it is considered one of the softest in the world. This material is used in the defense and chemical industries, agriculture, and electrical engineering.
Hard metals
The hardest metals practically do not exist in nature, so it is very difficult to obtain them. In most cases they are found in fallen meteorites. Chrome belongs to the refractory metals and is the hardest of the purest on our planet, and it is also easy to machine.
Tungsten is a chemical element. It is considered the hardest when compared with other metals. Has an extremely high melting point. Despite its hardness, any necessary parts can be forged from it. Due to its heat resistance and flexibility, it is the most suitable material for smelting small elements used in lighting fixtures. The refractory metal tungsten is the main substance of heavy alloys.
Hardness measurement methods
All methods for determining the hardness of metals use mechanical action on the test sample - indentation of an indenter. But this does not destroy the sample.
The Brinell hardness method was the first to be standardized in materials science. The principle of testing samples is described above. It is subject to GOST 9012. But you can calculate the value using the formula if you accurately measure the imprint on the sample:
HB=2P/(πD*√(D2-d2), where
P – applied load, kgf; D – ball circumference, mm; d – imprint circumference, mm.
Brinell hardness test principle
The ball is selected relative to the thickness of the sample. The load is pre-calculated from accepted standards for the relevant materials:
iron alloys - 30D²;
copper and its alloys - 10D²;
babbitts, lead bronzes - 2.5D².
Schematically, the Rockwell research method is depicted as follows according to GOST 9013.
Rockwell hardness measuring principle
The final applied load is equal to the sum of the initial load and that required for the test. The device indicator shows the difference in penetration depth between the initial load and the test load h –h0.
The Vickers method is regulated by GOST 2999. It is schematically depicted as follows.
Vickers hardness measuring principle
Mathematical formula for calculation:
HV=0.189*P/d² MPa
HV=1.854*P/d² kgf/mm²
The applied load varies from 9.8 N (1 kgf) to 980 N (100 kgf). The values are determined from the tables relative to the measured print d.
Principle of determining Shore hardness
The method is considered empirical and has a wide range of readings. But the device has a simple design and can be used when measuring large-sized and curved parts.
The Mohs hardness of metals and alloys can be measured by scratching. Mohs at one time proposed making scratches on the surface of an object with a harder mineral. He classified known minerals by hardness into 10 positions. The first is occupied by talc, and the last by diamond.
After measurement using one method, transfer to another system is very conditional. Clear values exist only in the Brinell and Rockwell hardness ratios, since machine-building enterprises widely use them. The dependence can be observed when the diameter of the ball changes.
| d, mm | HB | HRA | H.R.C. | HRB |
| 2,3 | 712 | 85,1 | 66,4 | – |
| 2,5 | 601 | 81,1 | 59,3 | – |
| 3,0 | 415 | 72,6 | 43,8 | – |
| 3,5 | 302 | 66,7 | 32,5 | – |
| 4,0 | 229 | 61,8 | 22 | 98,2 |
| 5,0 | 143 | – | – | 77,4 |
| 5,2 | 131 | – | – | 72,4 |
As can be seen from the table, increasing the diameter of the ball significantly reduces the readings of the device. Therefore, machine-building enterprises prefer to use measuring instruments with the same type of indenter size.
Metals in energy
Metals, which contain free electrons and positive ions, are considered good conductors. This is a rather popular material, characterized by plasticity, high electrical conductivity and the ability to easily donate electrons.
They are used to make power, radio frequency and special wires, parts for electrical installations, machines, and household electrical appliances. The leaders in the use of metals for the manufacture of cable products are:
- lead - for greater resistance to corrosion;
- copper - for high electrical conductivity, ease of processing, corrosion resistance and sufficient mechanical strength;
- aluminum - for low weight, vibration resistance, strength and melting point.
Categories of Ferrous Secondary Metals
There are certain requirements for ferrous metal waste. To send alloys to steel furnaces, certain processing operations will be required. Before submitting an application for waste transportation, you must familiarize yourself with the GOST ferrous metals to determine its cost. Black secondary scrap is classified into steel and cast iron. If the composition contains alloying additives, then it is classified as category “B”. Category “A” includes carbon materials: steel, cast iron, additives.
Metallurgists and foundry workers, due to the limited primary raw material base, are showing an active interest in secondary raw materials. Using scrap ferrous metals instead of metal ore is a resource-saving as well as energy-saving solution. Recycled ferrous metal is used as a coolant for converter smelting.
The range of applications of metals is incredibly wide. Black and colored are used indefinitely in the construction and machinery industries. The energy industry cannot do without non-ferrous metals. Rare and precious ones are used to make jewelry. Both non-ferrous and ferrous metals are used in art and medicine. It is impossible to imagine a person’s life without them, from household supplies to unique instruments and apparatus.


