Application area
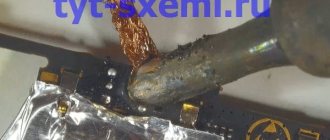
A pulse soldering iron (IP) is used for mounting and dismantling components and assemblies of electronic and electrical equipment. The working body of the IP is made of copper wire in the form of an elongated curved loop. The tip is convenient for soldering radio components, wire connections, and can also be used to tin small areas on radio circuit boards.
A comfortable handle and a fairly large tip extension allow you to work in hard-to-reach soldering areas. Due to the heating element quickly raising the melting temperature of the solder, a pulse soldering iron can perform large volumes of work in a short time. This quality of the device is used when unsoldering connectors on the laying of electrical networks, installing light fixtures inside buildings and structures.
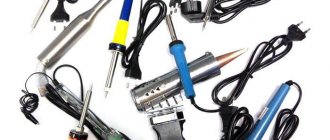
Nichrome soldering irons
The types and design of pulse soldering irons have their differences. In the case of the device inside, they are insignificant. The models themselves differ more. There are quite a few types of soldering irons, which is due to the features of their design, operating principle and purpose. Let's look at the main ones.
Nichrome soldering irons have a spiral of the same name through which electricity passes. It can be constant, as from an electrical network, or variable, such as that which can be obtained from transformer installations.
More expensive models are equipped with a special temperature sensor, which can limit the device’s operating temperature, depending on the user’s preferences. This is done using a good old thermocouple.
The design of such soldering irons may vary slightly, depending on the manufacturer and price category. Cheaper modifications work with a nichrome spiral.
This option is not very economical, so more expensive modifications already use an insulator system to which a nichrome element is attached. This increases useful energy transfer and reduces energy losses. This design is similar to a ceramic tip, which is why buyers are often confused. We will talk about such models a little later.
Principle of operation
Soldering iron 12 volt
The tip is heated due to the passage of a low voltage current through it. The current-carrying bars are connected to the secondary winding of the induction coil and consist of 2 turns of a metal strip with a cross section of 6-10 mm2. This factor allows the powerful coils and tires to remain cold during operation, while all the heat is concentrated at the end of the tip.
IP's sting
The primary winding is a receiver of mains current with a voltage of 220 V. As a result of induction, a high current and low voltage are excited in the secondary winding. The result of this is the conversion of a powerful pulse of electricity into thermal energy.
A universal soldering tool has its advantages and disadvantages. Analyzing numerous consumer reviews in the media, they can be summarized in two sections.
Selection and cost of the device.
The choice of pulse soldering irons on the Russian and foreign markets nowadays is quite wide. Therefore, when purchasing a device, you will most likely have many questions. And yet, which device should you choose to buy? There are a lot of recommendations to choose from. Therefore, below is a small rating of pulse soldering irons that you may encounter on the sales market today.
Pulse soldering iron Sparta 913095.
Pulse soldering iron Sparta 913095, 100 W (Fig. 4)
Specifications:
| Type | pulse soldering iron |
| Power | 100 W |
| Power adjustment | No |
| Nutrition | circuit |
| Supply voltage | 220 V |
| Max. heating temperature | 600°C |
| Warm-up time | 90 s |
| Tip material | copper |
| Handle material | plastic |
The Sparta 913095 pulse soldering iron has not earned love and recognition on the market, as it has a number of significant shortcomings. Firstly, poor heating of the tip, due to the thickness of the wire. The power of the soldering iron is simply not enough for proper heating. Often, garage kulibins solve this problem by sharpening the tip with a file. Secondly, the low quality of the device’s materials. Thirdly, the massive dimensions, which do not contribute to comfortable work with this soldering iron. The cost of this device is about 600 rubles.
Pulse soldering iron PATRIOT ST 501.
Pulse soldering iron PATRIOT ST 501 (Fig. 5)
Specifications:
| Type | pulse soldering iron |
| Power | 100 W |
| Power adjustment | No |
| Nutrition | circuit |
| Supply voltage | 220 V |
| Max. heating temperature | 500°C |
| Warm-up time | 4 s |
| Tip material | Copper coated |
| Handle material | plastic |
| Additional Information | work area lighting |
One of the advantages of this device is its fast heating, which is 4 seconds. But in addition to its advantages, the soldering iron also has disadvantages:
- Large mass of the device;
- The soldering iron does not cope well with its main task. Compared to a similar Soviet-made soldering iron with a power of 60 W, this heats even worse, with a declared power of 100 W.
- The housing itself, where the transformer is located, becomes very hot.
The market price of this device is 1129 rubles.
Pulse soldering iron ZD-507 220.
Soldering iron gun imp. ZD-507 220 (Fig. 6)
Specifications:
| Type | pulse soldering iron |
| Power | 100 W |
| Power adjustment | No |
| Nutrition | circuit |
| Supply voltage | 220 V |
| Max. heating temperature | 500°C |
| Warm-up time | 6 s |
| Tip material | Copper coated |
| Handle material | plastic |
Another representative of the Chinese market. Inside there is a 50 Hz transformer, the current of which is only enough to heat the steel tip. It takes a long time to heat up; when you try to warm up massive parts, the protection is triggered and it turns off. You have to wait a long time for it to cool down. The cost of the device is 790 rubles.
Pulse soldering iron BISON 55412-H4.
Soldering iron ZUBR 55412-H4 (Fig. 7)
Specifications:
| Type | pulse soldering iron |
| Power | 150 W |
| Power adjustment | No |
| Nutrition | circuit |
| Supply voltage | 220 V |
| Warm-up time | 7 s |
| Tip material | Nickel |
| Handle material | plastic |
| Additional Information | work area lighting |
Perhaps this is the most expensive, but also the best option of the presented devices. Among the advantages: good workmanship, fast and quiet heating. Disadvantages: a little heavy (weight is 1 kg), high cost. The cost of this device is 1850 rubles.
In conclusion, I would like to say that there are currently a sufficient number of pulse soldering irons on the market. Therefore, before purchasing a device, you should weigh the pros and cons and base it primarily on your needs. As practice and reviews from owners show, representatives of the Chinese market in this niche have not proven themselves properly. Therefore, it is worth taking a closer look at domestic representatives.
Nov 3, 2020HowElektrik
Advantages
Soldering iron with temperature control
The advantages of pulse soldering irons are as follows:
- Successful ergonomics of the IP design. A pulse soldering iron, unlike conventional rod soldering equipment, has the shape of a gun, which allows you to hold and turn on and off the tool with one hand.
- A high-frequency voltage converter heats up the tool tip within a few seconds.
- With a power regulator, the scope of use of the soldering iron expands from soldering small elements to joining large parts.
- Pulse operation reduces power consumption.
Optimal selection rules
Among the variety of pulse soldering irons, you should choose the most suitable one.
In this case, the future owner should focus on a number of parameters:
- Design power. The heating rate of the working part will depend on this indicator. The optimal power for a household appliance is 25-40 watts.
- Be sure to clarify how the temperature of the coil is regulated. For adjustment, a dimmer, manual switch or built-in control unit can be used.
- For the sting, the material of manufacture, length and thickness are assessed separately. The best tips should be resistant to corrosion as well as mechanical stress. You should not purchase soldering irons with too fragile spirals.
- The convenience of the soldering iron handle, its weight is selected by the owner individually.
- You should definitely pay attention to the manufacturer’s company rating and study customer reviews of the device you like.
Immediately before purchasing the model you like, you need to inspect the handle and body, which may contain buttons, warning lights, built-in lighting and a manual temperature control.
Flaws
Soldering iron EPSN
Along with the positive characteristics, the disadvantages of IP should be noted:
- When working for a long time, your hand gets tired from having to hold a heavy soldering gun suspended.
- A modern pulse soldering iron with additional options is quite expensive.
Important! Due to the accumulation of high-frequency voltage on the IP tip, sensitive microcircuits can be destroyed during soldering.
Characteristics
One of the most popular on the market is the STING pulse soldering iron model. This device has the following characteristics:
- Supply voltage 145-270 V
- Voltage frequency 50-60 Hz
- Power consumption 30-125 W
- The heating time of the tip reaches operating temperature is 1.5-6.0 seconds.
- Maximum temperature of the working area St 500 °C
- IP 2.0 protection rating
- Dimensions 176 × 130 × 26 mm.
- Cable network 1 m long
- Weight 0.18 kg
You may be interested in this Features of the electrician's kit
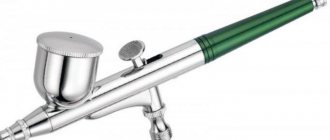
Soldering iron STING
Differences from a regular soldering iron
An individual entrepreneur can always be recognized by his appearance. The tool is made in the form of a pistol. A tip made of copper wire in the form of an elongated loop is a sign that the device belongs to pulse soldering irons.
The difference between conventional soldering irons and pulse irons is that the soldering tip of the IP almost instantly heats up to the melting temperature of the solder. If for conventional soldering tools the tip is a factory-made rod tip, then for IP it can be made from a piece of ordinary copper wire.
DIY soldering iron: simple assembly diagrams
Before making a soldering iron with your own hands, you should determine what exactly it will be used for and what materials are available at home.
“Moment” from a house-saving lamp
Components of the device:
- Converter from an energy-saving lamp (power 40 W);
- Transformer;
- Copper wire;
- Frame.
The characteristics of the converter are suitable for a medium-power soldering iron. The safety of the device is enhanced by a standard fuse and overheating control on the thermistor. The circuit is very compact and can be placed in any housing.
The transformer is made independently. You can use a ferrite ring from a broken electrical transformer. The primary winding must be wound from 0.5 mm wire, the number of turns is 100-120. And the power one should be made of wire with a cross-section of 3 to 3.5 square meters. mm. You need to make one turn. We attach a tip made of nichrome or copper wire (1.5 - 2 mm) to it. The thickness of the last winding should be greater than the thickness of the tip. Next, you need to come up with a body for the device, make a switch, and the device is ready.
From a Chinese transformer
For manufacturing, you need either a working twelve-volt power supply, or one with a burnt-out secondary winding. Any Chinese device will do just fine.
It is necessary to remove the circuit from the case and check the serviceability of the parts. We do not touch the converter, since we only need to change the appearance of the transformer. Next, we remove the secondary winding and make a new one from copper wire (the cross-section should be 1.5-3 sq. mm). If the cross-section is small, fold the wire in half
What is important is the overall cross section, which will be at least three squares. The winding is equal to one incomplete turn
Then, carefully thread it into the transformer body, first bending it like a hairpin. The transformer is soldered to the control board, and the power winding must be fixed with dielectric glue (for example, cold welding)
Next, we insert the circuit into the case.
A wooden handle from a regular soldering iron can be used as a handle. Other options are possible, given the compactness of the device as a whole. We insert a non-fixed switch into the handle. The operation of a pulsed device is based on a short circuit of the secondary winding, as a result of which prolonged heating can lead to destruction of the transformer and a fire. For this reason, a fixed starter is not permitted. Next, you need to assemble the device completely and install the clamps for the tip (for example, inserts from a terminal box for wiring). This device is very compact and easy to use for small soldering jobs. Thanks to the replaceable tip, you can change its appearance.
These options are only a small fraction among the variety of schemes for manufacturing pulsed devices.
It is important to understand the principle of operation:
- A device that converts electricity into high-frequency voltage;
- Step-down transformer, designed only for high frequency;
- The secondary winding, which forms a closed ring with a loop-shaped tip.
A pulse soldering iron is a reliable and economical device, and if you do it yourself, it’s also practically free. And in most cases, even a novice electrician can assemble a homemade instrument without having professional knowledge of working with radio equipment.
Making homemade pulse soldering irons
To design a homemade pulse soldering device, you need to decide on the type of power source.
Homemade pulse soldering iron
Current sources for powering pulsed soldering irons
If we repeat the structure diagram of a factory-made power supply, then the source of electricity will be an ordinary household power outlet. In the case of creating a 12-volt soldering tool, the power source can be a 220/12V network adapter, a car battery, or a battery from a screwdriver.
Soldering iron from an electronic transformer
To make a pulse soldering iron, you will need an old or failed network power supply, a low-power electronic transformer, and a copper screen of a television antenna cable.
Transformer device assembly:
- The secondary winding (10 turns of 1 mm2 wire) is removed.
- Instead of the removed wire, install a power winding - 1 turn of a busbar from a cable screen.
- The transformer is built into the body of the old soldering iron, having first removed the mains voltage converter.
- The ends of the bus are soldered to the tip holders.
- The soldering iron is connected to a 12 volt power source and soldering work begins.
Electronic transformer
Making a pulse variety
The power supply is based on the induction principle of converting electrical energy from a low current intensity into a powerful low voltage pulse. Observing this effect, home craftsmen make various types of impulse designs.
Battery type mechanism
Making soldering equipment powered by batteries is quite feasible. Such a device will be of significant benefit when there is a need to resolder terminals and connections of an automobile power supply system away from mains power supplies.
Note! For a car pulse generator, you need to attach pliers to the power cord to grab the battery terminals. You cannot use twisted cord wires for contacts.
Pulse made from an energy-saving lamp
The power unit is assembled based on parts of the old fluorescent lamp housing. You need to prepare the following:
- ballast (voltage converter) from a fluorescent lamp;
- transformer;
- a piece of copper wire ø 2-3 mm.
The craftsman decides what body to use and what to make the handle from. How to make a pulse soldering iron from parts of an energy-saving lamp can be seen in the diagram below.
Schematic diagram of a power supply based on an energy-saving lamp
Microcircuit product of pulse principle
A pulse soldering iron for microcircuits can be made based on a 0.5 W/8 Ohm ceramic resistor. Manufacturing is carried out as follows:
- One resistance lead is removed and a hole ø 1.2 mm is drilled. To isolate the tip from the resistor, a mica tube is inserted into the opening.
- A piece of copper wire is inserted into the insulated hole. The tip of the sting is ground with a needle file to a cone.
- The resistor is wrapped in mica or textolite.
- One piece of copper wire is attached with a loop to the sting and brought out to the opposite end of the resistance.
- The resistor is once again covered with insulation.
- The resulting structure is placed in any suitable cylindrical body.
- The terminals are connected to a 12 volt power source.
Operating principle
The design and principle of operation of this type of device is based on a simple physical effect in which the conductor is heated when a large current flows. When the device is turned on by pressing a button, the primary circuit of the input signal source is turned off, the transformer switches to low voltage on the secondary winding. In this case, there is a current in the output circuit to quickly heat the tip. When the button is released, the circuit turns off, the current stops flowing and heating stops.
At a low voltage of about 2 volts, the current in the operating circuit reaches 25-50 amperes. The secondary winding of the transformer must be wound with wires, and the cross-section of the winding must be several times larger than the cross-section of the tip. The same rule must be followed for the conductive busbar that connects the end of the spike to the secondary winding. This will prevent energy wasted on heating. Switching power supplies are replacing transformer power supplies, and their popularity is slowly growing. They allow you to significantly reduce the weight and size of equipment with the same performance.
Soldering Features
The process of soldering various IP connections differs significantly from the method of soldering with other types of tools. The tip and solder wire are combined at the junction of the parts. By pressing the trigger, the soldering tip is heated until a drop of molten alloy forms. Solder and soldering iron are removed from the work area.
Additional Information. Lead-tin solder is made in the form of wire of different diameters. For impulse soldering, it is better to choose solder with a diameter of 1-3 mm.
Soldering techniques with a soldering iron
What is needed for soldering? When working with metals, it is necessary to use consumables: flux or rosin, which results in a strong, permanent connection.
Important! Additional compounds are needed to ensure high adhesion of solder to parts. Soldered parts
Soldered parts
Rosin
Rosin is a glass-like material with a softening point between 55-70℃. For its production, coniferous tree resin is used. The regulations are prescribed in GOSTs 19113-84 and 14201-83, which state that the product dissolves patina. The working temperature range for soldering household appliances is 100–130℃.
Rosin is used in 2 cases:
- Preparing the tip for work - cleaning it, heating it, coating it with a molten wax component, and then with tin. The parts are processed in a similar way, distributing the solder.
- Working with parts that do not require preparation. In this case, tinning of the contact surface is performed; for this purpose, a hollow rod made of an alloy of lead and tin is used, inside of which there is rosin.
Rosin
Flux
Flux goes on sale in a liquid state, or in the form of a gel, paste, or powder, which is explained by the different composition of the material. So, the former are used to work with microcircuits, and the latter - with copper pipes. All materials can be divided into three groups:
- Neutral, without acids in the composition and with minimal conductive ability.
- Active - with hydrochloric acid in the chemical composition.
- Protective – to prevent damage to contacts and rust.
Important! Reactive group flux cannot be used as an insulating material due to its low electrical resistance. Neutral materials include powdered rosin, which is diluted in industrial alcohol, glycerin or turpentine.
This tool is used to work with microcircuits and radio equipment, copper and alloys based on it. The presence of a thin film of oxides is acceptable
Neutral materials include powdered rosin, which is diluted in industrial alcohol, glycerin or turpentine. This tool is used to work with microcircuits and radio equipment, copper and alloys based on it. The presence of a thin film of oxides is acceptable.
Flux
The other two components may contain rosin in combination with organic components. Such compositions are relevant for soldering copper, aluminum, nickel, silver and steel. For complex work, there are compounds with zinc chloride additives, and they serve to protect the metal from corrosion.
We prepare everything you need
It all starts with preparing the workplace and tools. Remove everything unnecessary from the table and turn on the light. You will need: a soldering iron, solder (tin or lead), flux (rosin), tweezers or pliers and a sponge.
Tin and its alloys are considered low-melting solder, and lead is considered refractory. Although it all depends on the alloy. If you bought a soldering iron with a power of 5 to 40 W, use low-melting solder.
Solder is needed to connect circuit elements together. But you need to not just drip it onto the soldering area, but make sure that the solder gets into the gaps between the contacts. This results in higher conductivity and strength.
Rosin is needed to prevent the oxidation of metals by isolating them from oxygen. Beginners, by the way, can use solder with the addition of rosin.
Turn on the soldering iron and wait a couple of minutes until the tip warms up. Then apply some solder and flux to it. Moisten the sponge with water and wipe the sting. This cleans the soldering iron of old, oxidized solder.
During soldering, you will have to repeat this procedure periodically. Just don’t keep the wet sponge on the tip for too long - the soldering iron will cool down and you’ll have to start over.
How to solder correctly
Now that everything is ready, you can get started. It will be better if you practice on something first before you start soldering what you want.
Beginners are advised to start with this exercise:
Take a piece of wire and divide it into 12 identical pieces. Then we solder the ends together to form a cube. The pieces of wire should be bare (you can take an already bare wire or simply remove the insulation). You can only take them with pliers or tweezers.
This will help you get into the habit of never handling parts with your bare hands and keeping them stationary until the contact has cooled.
Once your cube is ready, take it in your palm and squeeze it. Not a single contact should come apart. If it still comes apart, repeat the exercise again.
Once you get the hang of connecting the elements, you can try tinning. To do this, take a piece of PCB and try to draw tracks on it. It is not necessary to somehow process the textolite before doing this. Without processing it’s even better - it will teach you to control the process.
Modern boards are very small, so tinning must be done under a microscope. Otherwise, you will simply go off the edges of the path. After a couple of attempts at tinning, regular soldering will seem like kindergarten to you.
You also need to practice a little with insulated wires. For example, you decide to repair your headphones. Multi-core wires are used there. Each vein is separately insulated, not counting the general insulation. And in order for there to be at least some contact, the insulation must be removed.
Doing this manually is time-consuming and inconvenient, but you can use a soldering iron. Take some solder and then apply it to the end of the wire. The insulation should burn off. Do this so that the ends are not too long. In this case, the solder must completely envelop them so that contact is everywhere.
Try to apply solder carefully so as not to touch other elements of the circuit. Especially if you are soldering something on a printed circuit board. Ideally, there should be a minimum amount of solder and rosin. As Antoine de Saint-Exupéry said: “perfection is achieved not when there is nothing left to add, but when nothing can be taken away.”
Idea No. 1 – Use a resistor
The first and simplest technology for making an electric soldering iron with your own hands is using a powerful resistor. The device will be designed to operate at voltages from 6 to 24 Volts, which will allow it to be powered from various current sources, and even make a portable version powered by a car battery. In order to make your own instrument, you will need the following materials:
- Soviet wirewound resistor (WWW), covered with ceramic insulation with a resistance of 20 Ohms and a power of 7 Watts. You can choose components with other characteristics, depending on what power you want to make the soldering iron and what voltage you plan to power it from. Here is the simplest formula for calculation: R = U²/P. Where R is resistance measured in Ohms; U is the voltage that is planned to power the soldering iron, in Volts; P is the desired heater power in Watts. This part can be bought at the market or in a radio parts store, or it can also be pulled out of an old Soviet device.
- Textolite or plywood plate for making a comfortable handle. You can also use other non-conductive materials that can withstand high temperatures, such as some types of plastic.
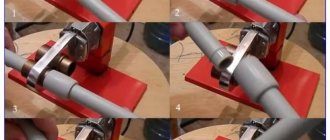
- Two copper rods of different sections. The thicker one is selected strictly according to the internal diameter of the resistor. The quality of heat transfer from the heating element to the tip, and therefore the heating time and ease of operation, will depend on this. The second one should be thinner; it will act as a sting. Using a file, you will need to sharpen it to a shape that is convenient for you. The main types of stings are shown in the picture. I would immediately like to note that the most convenient option is the type of flat screwdriver, since it is convenient to transfer solder to the place of work, and it is possible to both solder massive contacts and perform delicate work.
- One bitten off spring ring (will serve as a retainer), a screw and a washer. You can see all the components in the photo below.
To make your own soldering iron from a resistor at home, you must complete the following steps:
- You need to drill a hole in the end of a thick copper rod and drive the thread under the screw using a tap. It is also necessary to cut a groove for the retainer, which in our case is the spring ring. This can be done using a triangular file or a hacksaw for metal.
- From the second end, drill a hole with a diameter similar to that of a thin rod, which will act as the tip of a mini soldering iron.
- All elements of the rod must be assembled into one whole, as shown in the photo.
- The resistor is prepared for attaching the soldering iron tip, which must be inserted and secured at the back with a screw and washer.
- From a textolite or plywood plate you need to make a comfortable handle with your own hands with a seat for a resistor and wire. To do this, use a jigsaw to cut out two identical halves of the handle and make holes and recesses for screws and nuts.
- A power cord must be connected to the heater terminals. It must be screwed to ensure reliable contact.
- The finished homemade soldering iron is twisted and tested.
Please note that with such a portable gun you can easily solder microcircuits and even make a charger for a car battery with your own hands. It can work not only from a power supply, but also from a battery
We came across many reviews on the forums where this homemade version was connected from a 12-volt cigarette lighter, it’s also very convenient!
Please note that when first turned on, all soldering irons may smoke and stink for a while. This is normal for any model, as some elements of the paintwork fade
This will stop later.
Which soldering iron to choose for soldering wires, microcircuits and radio components
Soldering iron for microcircuits: which one should beginners and experts in the field of radio electronics choose? First of all, it is worth considering that high temperatures can cause the board to burn out.
Experts recommend giving preference to models whose power does not exceed 10 W. With them it will be easy and convenient to solder wires, microcircuits and radio components. The device must be equipped with a built-in thermostat.
The nichrome device is not sensitive to mechanical damage