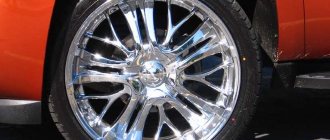
The rims of any car are an important part that not only ensures its movement, but also emphasizes its appearance. Therefore, the condition of this element is far from the last priority for the car owner. Discs require regular maintenance and restoration, in which primer plays an important role. Many car enthusiasts can afford to order the restoration of this element through special services or buy completely new wheels. But the majority, nevertheless, engage in disk recovery on their own, especially since there is nothing complicated about it.
Primer for painting wheels
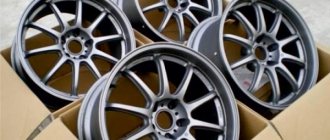
The rims are tired - some of the paint has peeled off and bulged in places.
This is understandable, the car is 14 years old. It's time to repaint. Since powder painting is expensive for me (about 10,000 rubles), I decided to repaint it myself. The discs are in a deplorable state, I didn’t even take a photo, I rather wanted to put them in order. Preparation for painting
This is the most labor-intensive and time-consuming process, but the quality of painting directly depends on it (the photo will show paint jambs in unfinished areas). On the Internet, people write that it takes them from 1.5 hours to 8 hours to grind one disc. It took me about 4.5 hours per disc, and I cleared it in a couple of days. It takes another 1.5 hours to remove/install, degrease and seal all four wheels.
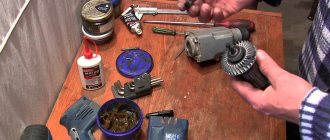
For sanding, I bought petal fan attachments for the drill with two grains P80 (large and small) and one P120 (it was not needed) and one sheet of sandpaper with grains P80, P120, P240, P320, P600, P1000.
- Using a large and small fan attachment with P80 grain, we scrape the disc on both sides. Around the rim I used a carving brush/cord brush attachment (it was there, I didn’t buy it), because... The fan nozzle did not reach, but it took a long time to do it manually. But it is very rough and leaves deep scratches, so be careful. I did not use the P120 petal circle because... It is soft for roughing, and grinding is easier to do by hand, because... The nozzle cannot pass through all surfaces evenly.
- After sanding, I sanded it by hand with sandpaper from P80 to P1000 in turn. I sanded without fanaticism - 7-10 minutes per disk per grain. After P1000 the difference is obvious – the disc is smooth and pleasant to the touch.
- Wash the disc with water and a brush.
- We degrease with white spirit (we used it too). Why screw the spray bottle onto the jar, spray it and wipe it with a cloth.
- We seal the rubber from paint, for which we lay out decks of cards (I read it on the Internet). And it’s actually very convenient - the cards are dense and flexible. R17 takes 4.5 decks of 36 cards. I took 4 pcs. and I didn't have enough. Then we tape everything with masking tape. Don't feel sorry for him, because... There will be fog and my tires will still be a little stained.
The whole process is tedious and requires a lot of patience; sanding left my fingers sore for a couple of days.
Painting
A very important stage. If you mess up here, you will need to re-prepare the surface. In addition, this is the final stage, which is already difficult to correct.
The choice of paint immediately fell on Motip (Germany). A lot has already been written about it on the Internet - it applies well, you don’t need to prime it, it lasts a long time, it’s a nice color. Therefore, the entire Motip line was purchased - primer, paint for brake discs and varnish. The closest color to the original was silver, so I took it.
- Primer. We lay the disks on cardboard and cover them with soil from a distance of 20-25 cm. One can was enough for 2 layers of the outer part of the disk and 1 layer inside the disk. In two coats it completely covers the color of the disc and covers up small scratches. I didn’t pause until I painted all four discs; the first one was already drying.
- Painting. We wait 10 minutes for the primer to dry completely and begin painting. I laid thinner layers so that the paint would not bleed. I applied 4 layers of paint, which I think is more than enough. Silver is a pleasant color.
- Varnishing. We wait 30 minutes for the paint to dry completely and varnish. The process is identical, everything according to the old scheme - painted all the disks, turned them, painted the other sides. Two cans were enough for 3 layers on the outside of the disc and 2 layers on the inside of the disc.
The whole process took about 2.5 hours. It took 1 primer, 2.5 paint, 2 varnish. I’m very glad that I didn’t skimp on paint and took Motip instead of domestic paint. The primer, paint and varnish applied very smoothly, without drips or bubbles, the spraying was uniform in a round spot. Excellent hiding power. The only thing I noticed is that when the can runs out, when you press it there may be small droplets of spitting, but after that, it still sprays evenly.
Stubs
The plugs are also used up, this is already the third set. Because a new set of plugs (4 pcs.) costs from 2000 rubles. I decided to revive the installed one, especially since the new original plugs will not match the color of the painted wheels.
For the black emblem, I decided to save money and take black matte paint Kudo (Russia) for 140 rubles, because... The painting area is small.
- We clean, degrease, prime and paint in the same way as the discs, but do not varnish them.
- We take a self-adhesive sticker, print out the emblem on it, stick it on the plug and cut it out along the contour with a utility knife. Cutting it out first and then pasting it won’t work, so carefully cut it in place and remove the part that needs to be painted over.
- Painting. Shake the can and start painting. Black paint is cheaper, and on the first (thick) layer it started to bubble, I carefully removed them and the next layers covered everything. Kudo sprays in a stripe, unlike Motip's circle. But overall there were no problems with painting. I put 4 layers - one thick to cover the silver color and three thin ones.
- We varnish in five thin layers with the remaining Motip varnish.
It turned out very well. Already at arm's length, contour irregularities are not visible.
The need for painting wheels
Car wheels (rims) often suffer when driving - they are the ones that are subject to the greatest wear, scratching, and other types of mechanical and chemical damage. Various defects do not affect functionality, but greatly spoil the aesthetics of the car. The need to paint the surface of the discs may arise in the following cases:
- too long service life, multiple chips;
- purchasing used disks;
- restoration carried out after a serious defect;
- corrosion of the disk coating by chemical reagents;
- repeated washing with high pressure washers;
- upcoming off-road trips;
- getting into an accident;
- the desire to highlight and decorate the car, to give the wheels a more expensive look.
Also, applying a coloring agent to the rims is a good way to extend their service life, since the film will serve as protection and protect against chips and scratches. Under a layer of paint, alloy wheels do not corrode, and plastic parts become much more attractive and repel dirt. In parallel with painting the casting, tuning of the brake calipers is carried out - usually in the main selected color.
The choice of shade is made by the owner individually. Now it is possible to choose a dye from a huge range of colors. There are even glowing, luminescent paints. Tinted chrome, graphite, as well as silver and black paints are considered “classics” among drivers. Colors can be matte and glossy, modest and bright - the range is large.
Coloring methods
There are many technologies that can be used to paint wheel rims. Which one is better? The choice will depend on the equipment of the workplace, the price category of paints, and the presence or absence of experience. Not all methods are suitable for home use; some are only available to professionals.
Previously, car enthusiasts painted stamped wheels with conventional paint - nitro enamel, oil enamel, pentaphthalic enamel. Now they have been replaced by more modern, durable paints and varnishes specifically for cars. The most popular are acrylic ones in cans or jars. Also, rim tuning can be done by the following means and methods:
- application of polymer (powder) coating;
- laying liquid rubber;
- chrome plating
The latter method allows you to create a chrome-plated disk that does not differ in appearance from the original one, but the cost of such work is high, and the technique is complex and requires a lot of experience of the craftsman. There is a cheaper alternative - applying regular acrylic paint “chrome-look” with special additives. It is sprayed galvanically or from cylinders.
Chrome disks
Chrome bathing is a procedure, the essence of which is the application of a special coating to create a mirror-like effect with gray or gold finish. This tuning looks solid and has already become a classic. The chrome coating protects the discs from corrosion and various damage. It eliminates the negative influx of temperature surges. However, the unimportant procedure has not been shortened. All types of chrome have high potency and require repeated application on the surface, even if it’s just a rip off.
There are two ways to apply chrome:
- Electroplating. It is distinguished by its high viscosity and durability, but is also easy to use in terms of technology. It relies on the introduction of chromium into a molecular mesh of metal in which the discs are formed. This method allows you to make them more resistant to moisture and high temperatures. When the warehouse is caught on the surface of the part, a melt of oxides is created. This will speed up the corrosion process.
- Diffusion method. Roughly, apparently, tse zvichaine preparation of powdered barvniki. This is less expensive. With the diffusion method, the farba forms the thinnest possible ball and ensures a mirror effect. Unfortunately, the discs are prepared in such a way that they are more susceptible to corrosion and physical abuse.
Preparation and equipment
Vikonati can do it independently with the help of other tools. A solution to this situation may be the preparation of a lacquer-based solution, which contains chromium. These car parts are from the “chrome effect” series. To carry out restoration work, you need a warehouse that has chrome, dark paint, primer, abrasive papier, a drill with a George nozzle and a hair dryer. Preparatory steps in this phase are similar to those before preparation with an acrylic warehouse. To get a good result, the discs need to be thoroughly cleaned, degreased and polished. Before carrying out the procedure, for greater ease, it is important to remove the tires.
Farbuvanny technology
In order to get an effect that is as similar as possible to the one that occurs during chrome bathing, it is important to select the barvnik correctly. For which expensive options are better suited than those from domestic sources? With a variety of budget options, you can achieve a gray metallic effect, which reduces the characteristic glare.
The preparation is carried out according to the same scheme as in conjunction with acrylic barnacles. The same difference is due to the fact that the farb is applied in two balls. The surface is blackened, and then there is a layer of chrome.
Types of car paints for wheels
Large car paint manufacturers usually produce a full range of paints and varnishes - rubber, acrylic, powder. Kudo remains the most popular brand; its products are distinguished by high quality and durability. Paints eliminate minor scratches, chips on wheels and other car parts, as they contain chemicals that increase wear resistance.
Another well-known brand is Motip; it has long been recognized as the best by automotive repair and tuning professionals. A number of paints are used for wheels and the body, others are intended only for rims. Most of the paints of this brand are sold in spray cans and are characterized by low consumption.
Rubber paints
Liquid rubber, or rubber paint, has become popular due to its versatility. It is well suited for all types of discs - cast, stamped steel, forged, titanium, and plastic elements. Even wheel caps are covered with liquid rubber to give them a more beautiful appearance. This type of paint comes in glossy and matte finishes.
The advantage of rubber coatings is its ability to harden quickly, forming a durable layer like rubber. A unique property is the ability to remove this layer at any time without damaging the surface or using special tools. The disadvantages are the high cost of paint due to high consumption, as well as greater susceptibility to scratches compared to acrylic enamel.
Powder paints
Powder paint has the highest protective properties. This paintwork material copes well with corrosion, the action of salts, alkalis, acids, and reagents. The paint is not afraid of water, resistant to mechanical damage, does not fade, and is heat-resistant. It can be applied to titanium, steel, various alloys, except aluminum (they can be deformed).
The disadvantages of powdered formulations include the complexity of the application technology - they cannot be used at home. The method involves melting the product in a special chamber at a temperature of +200 degrees and then applying it to a sheet or disk or other product. Otherwise, the powder will not stick to the metal, and the necessary equipment is quite expensive. Often this type of coating is used by the disc manufacturers themselves.
Acrylic paints
Acrylic-based products are suitable for all types of rims, there are no exceptions. Even on aluminum, a durable and high-quality result is obtained in a short time, and the color palette is the richest. Acrylic paints are sold in cylinders, cans, and other containers, but the most convenient method of application is aerosol spraying.
The advantages of paints of this type are as follows:
- high quality coating;
- affordability;
- the ability to combine colors and create unusual designs;
- surface protection from corrosion, dirt, precipitation;
- long-term preservation of discs even with regular exposure to reagents;
- quick drying (only 15-20 minutes).
And yet, powder paints last much longer than acrylic and rubber paints. But for cosmetic repairs, acrylic will be the fastest and most affordable option.
Choosing a primer for aluminum to use at home
Aluminum products are used in various spheres of life.
Non-ferrous metals can be painted, but before doing this the surfaces must be properly prepared. That is why it is important to choose the right primers for aluminum and know the main rules for using this material.
Today I will tell you the standards for recognizing primers so that the quality of the finish does not suffer in the future.
Primer for aluminum
The main thing is surface preparation
We always wonder what paint to choose and how to properly apply it to walls and various surfaces. But, unfortunately, we do not always pay constant attention to preparing the foundation and materials for this process. I want to say right away that the adhesion of aluminum to paints and varnishes is very low. This is due to the smoothness of aluminum products.
Primer for aluminum bicycle frameImportant! Always choose only specialized soils from manufacturers with quality certificates. Aluminum products are sold in aerosol cans.
To apply the aerosol, you need to do some things with the surface to be painted. Let's divide them into 4 stages:
- We etch aluminum with acid and degrease the surface
- Using chromate treatment we create a conversion layer. This event improves the adhesion of soil and paintwork materials.
- Using water, wash the aluminum from salt residues. To do this, use only good purified water
- Dry the area to be painted
This technology occurs in factory painting conditions, and therefore, if you apply primers for aluminum with your own hands, then use acetone or another solvent, which can be used to remove grease stains and dirt from the surface. Before applying the aerosol, the aluminum is sanded with fine-grained sandpaper. After this, it is possible to apply primer on aluminum, which dries on average within a day.
Soil VL-02
Let's look at soil from a domestic manufacturer that meets all GOST standards. This mixture is two-component and consists of the following parts:
- Base - thanks to the complex components in the material, the primer acquires excellent adhesion for the complex aluminum surface and becomes impact-resistant
- Acid thinner - thanks to it, the aluminum base is etched during priming
If we talk about the method and technology of application, then adhere to the following rules:
- You need to take a glass container and pour the base into it. Don't forget that the capacity
must be acid resistant
- The acid thinner is mixed with the base in a ratio of 1:4, where 1 part of the thinner and 4 parts of the base are taken
- After this, wait 20-30 minutes and mix the resulting solution well until smooth. Be sure to wait at least this time, otherwise the polyvinyl butyral will not have time to dissolve. When the primer is ready, it should be used within eight hours
- Apply the primer on aluminum in a thin layer. You can use a spray or just take a brush. The soil dries very quickly - on average, in one hour the entire surface will dry out.
Soil VL-02
The pricing policy for the material is quite attractive and allows you to use this particular mixture for the preparation of aluminum. On average, for one kilogram of VL-01 soil you will pay about 100-120 rubles.
Important! If you use polyurethane paint, then aluminum does not need primer at all. It is enough to degrease the base well and then apply a polyurethane mixture, which itself has the properties of good adhesion.
Corrosion protection
The sick side of metal is its corrosion, which arises from the adverse effects of moisture, air and electrochemical reactions.
Aluminum is of course more resistant to the appearance of corrosive plaque, however, as I noticed, it also needs protection.
It is painting that provides high-quality protection for the material, and primer, which provides not only good adhesion, but also strengthens the structure, as well as protection from chemical exposure, is an indispensable attribute when painting.
Apply primer to aluminum wheels
At home, only an aerosol will help protect and prepare aluminum for the next painting. This method is usually called “without anodizing,” but industrial conditions allow anodizing methods to be carried out using chemical or electrical processing of aluminum.
Important! In many automotive stores you can purchase a one-component composition called HB Body primer. This is an aerosol that is easy to apply and is a great alternative to diluting your own soil.
Choosing paint based on the primer used
Paint and primer are components that must be selected based on each other. But if we think that the paint is applied after the primer, then we choose paintwork materials depending on the primer used. The list of primers for aluminum is very long and here are some of them:
- VL-02 and VL-08
- GF-031
- Zinc white
- EP-51 – white epoxy paint
Primer for aluminum wheels
When choosing paint, you should also focus on the manufacturer’s price. There are a lot of cheap mixtures, but many do not take risks and use only high-quality materials. For myself, I have identified several brands that have long proven themselves only on the good side.
This is Tikkurila, HEMPEL, Dyukson. Always look at the palettes and read reviews about paintwork materials. In my own experience, I have already verified that white mixtures fade much faster than the discoloration of colored paints.
And this is all despite the manufacturers’ stated properties of protection against ultraviolet rays.
Is it possible to paint over an old coating?
When all the issues with choosing a primer have been resolved, all that remains is to understand whether it is possible to apply new paint to the old one? So, there is no need to clean the surface only if two conditions are met:
- Old paint should not peel off the aluminum surface
- The old coating should not differ from the type of new paintwork material that will be used for painting
Using primer for aluminum before painting the boat
If you do not fall under these conditions, then organic removers that are used in this way will come to your aid:
- Once the remover is applied to the aluminum, cover it with a layer of polyethylene. This layer should remain on the surface for about half an hour
- Using plastic or wooden scrapers, remove the swollen mixture from the aluminum. With the help of weight washes the process will be quite easy and fast
In order to understand whether paintwork materials are compatible with the old coating or not, conduct some experiments. This will take some time, but you will find out for sure whether or not you can apply primer and paint to such a surface. Using 646 solvent, dampen a piece of cloth and apply it to the aluminum.
After this, put polyethylene on top of the rag and cover the edges with tape to achieve a seal. Now leave this area for at least a day and do not perform any actions on the surface.
If after this the paint does not begin to swell, then the surface is completely ready for applying primer and paint of any kind.
Important! If you plan to paint an aluminum boat, never use red lead or titanium paints. These mixtures have the negative property of destroying the structure of aluminum, not to mention the rivets that are used in the production of boats.
Results
For any surface, it is very important to use high-quality and most suitable materials. However, for aluminum this is extremely important due to its smooth structure, which cannot ensure good adhesion. That is why use a special primer, which will serve as an excellent basis for paintwork.
Primer for trunk lid
Give preference to certified materials and do not buy cheap, untested soils. For ease of application, you can use aerosols, which, although a little more expensive, are still more convenient to use with your own hands. Only good soil will be the basis for the long service life of an aluminum product.
link:
(2 5,00 of 5) Loading...
Painting technology
Before painting yourself, you need to clarify how much base material (paint) is needed. You should buy enamel with a reserve so that there are no problems with matching the tone, otherwise the discs will be different in color.
Necessary materials and equipment
In order for the job to be done efficiently, you should not skimp on paint. It is also important to check the expiration date of enamel and other materials. The technician will need automotive primer and varnish, acetone or another solvent, and car putty (if there are defects).
Tools and consumables you need:
- fine grain sandpaper;
- gloves;
- respirator;
- Sander;
- construction hairdryer
When purchasing paint, it is better to immediately purchase primer and putty of the same brand to improve compatibility and, accordingly, the final result. An electric drill with a special attachment (for removing old coating and traces of corrosion) is suitable as a replacement for a grinding machine. A construction hair dryer, if necessary, is replaced with a heat gun. These tools are needed to dry the paint as quickly as possible, but many types of enamels dry well at room temperature. If you purchased paint in a can, no tools are required. When using other forms, you need to buy a roller, brush and spray gun.
Preparing for work
Before work, remove tires, plastic caps and plugs that will interfere with quality painting. Further preparation includes the following steps:
- thoroughly rinse the products from dirt using ordinary household chemicals or special automotive products, as well as a brush with plastic bristles;
- sand the disc to remove minimal chips and scratches (first you can use coarser sandpaper, then fine sandpaper);
- if there are deep chips, use putty;
- degrease the discs with acetone or another solvent;
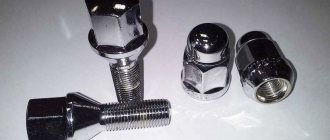
- wrap the wheel nipples with masking tape if the rims have not been removed;
- You can start priming.
Dyeing process
The primer is applied to car wheels in 2-3 layers with an interval of 15 minutes. This time is required for the soil to dry (you cannot apply a second layer to a wet disc!). Next, you can make the first layer with a spray gun, holding the nozzle at a distance of 40 cm from the product (it is also acceptable to apply paint with a roller and brush). It is important to apply only thin layers so that the paintwork does not leak. After each layer has dried (from 15 minutes), the next one is applied, up to 2-4 layers in total. To complete the work, the discs need to be varnished. This is done 30 minutes after the paint has completely dried. Usually 2 layers of varnish are enough for the outside and 1-2 for the inside.
Using paint in spray cans
The most convenient is the use of paint in the form of ready-made auto enamel, which is sold in cylinders. There is no need to dilute it, add a hardener or solvent, which some products in jars require. You just need to first test the paint on an unnecessary surface in order to get used to it and then apply layers evenly, without drips. The most economical paint consumption is with a round spray nozzle; more material will be required if the nozzle is vertical.
Before starting work, it is important to cover all unpainted parts of the car with masking tape or film, because it is impossible to completely control the spraying of the aerosol. The contents of the container should be shaken well; during long-term work, the procedure should be carried out every 10-20 minutes. The room temperature should not be lower than +10...+15 degrees (optimally +20 degrees).
To make it easier to apply paint, the discs should be removed from the machine and hung on a hook in the wall. Preparation does not differ from that described above for other types of paint. If there is rust, you should buy a converter, cover the damaged areas with it, and leave for 2 hours. You can then remove rust from the wheels with high efficiency.
How to paint aluminum wheels yourself
One of the easiest ways to make a car more attractive is to install high-quality alloy wheels, since their range allows you to satisfy the needs of even the most demanding car owners.
However, during operation, they may lose their former luster, as scratches, chips, peeling and abrasions appear on them, which negatively affects the external perception of the machine, and also reduces the service life of the discs.
Painting, which is easy to do with your own hands, can correct the situation.
Painting options for alloy wheels
In order to paint car rims, you need special paint. The most popular types of paint for them:
- powder,
- acrylic,
- so-called liquid rubber.
Powder paint is considered the most wear-resistant and durable
Powder paint is considered the most wear-resistant and durable. It is created on the basis of special polymer materials.
Often, such paint is used by the manufacturer himself during industrial production.
At home, powder paint is used extremely rarely, since its use requires specialized and very expensive equipment, as well as the complexity of the application process.
Acrylic paint can be applied from a spray can or spray gun
Acrylic paint is the most common among car owners. It is available in liquid form, so it can be applied from a spray can or spray gun. This paint has excellent adhesive properties, due to which it adheres well to the surface and reliably protects the disc from negative environmental factors.
Liquid rubber is a new type of painting material that is rapidly gaining popularity. It is a rubber-based paint that can be used both on the body of a vehicle and on individual elements of the car, including rims.
Each of the presented types has its own advantages, however, in everyday conditions, car owners opt for painting with acrylic paints.
Equipment and materials needed for painting
For quality work, the following materials are required:
- specialized paint for rims;
- primer;
- special varnish;
- sandpaper with different grain sizes;
- acetone or solvent;
- putty;
- gloves and respirator.
If you have all the necessary materials and equipment, the work will not take much time
Important: when choosing paint, primer and varnish, it is preferable to use products from the same manufacturer.
In addition to the right materials, you also need to acquire the necessary tools:
- A compressor and a spray gun, which allow you to make painting better (in fairness, it is worth noting that paint in cans also allows you to achieve good painting results).
- A grinder or electric drill with a grinding attachment, with which you can quickly and easily get rid of old coating and remove traces of corrosion.
- A heat gun, a hair dryer or a regular hair dryer are necessary to speed up the drying process of the paint.
If you have all the necessary equipment and materials, the work will not take much time and effort.
Dyeing process
Before you start preparing for painting, you need to remove the tires, as well as the plastic plugs, otherwise it will be impossible to paint the wheels properly.
Preparing for work
- The first step is to wash the surface from contaminants, for which you can use both specialized automotive and ordinary household chemicals.
We process the disc with sandpaper to remove chips and cracks
How to paint: description step by step
- We proceed to the primer, which is carried out in 2-3 layers. It is important to remember that before starting a new layer you must wait until the previous one has completely dried. Depending on the situation, it may also be necessary to sand with sandpaper before applying the final primer coat.
- We apply paint, holding the spray gun at a distance of at least 35–45 cm from the surface of the disc. Like the primer mixture, the paint is applied in 2-3 layers, and each new layer is sprayed only after the previously applied layer has completely dried.
- Applying varnish. The specifics of applying varnish are similar to the same process for primer and paint.
Priming of wheel rims: why is it necessary and how to carry it out when painting?
The rims of any car are an important part that not only ensures its movement, but also emphasizes its appearance. Therefore, the condition of this element is far from the last priority for the car owner. Discs require regular maintenance and restoration, in which primer plays an important role. Many car enthusiasts can afford to order the restoration of this element through special services or buy completely new wheels. But the majority, nevertheless, engage in disk recovery on their own, especially since there is nothing complicated about it.
Types of car coating: what kind of primer is needed?
In automobile factories, after welding a body from stamped parts, priming takes place in 7 stages, including phosphating, high-temperature drying, etc. When carrying out repair work, car enthusiasts do not use such complex industrial technologies on their own. The maximum that is available is to warm up the applied coating with a hairdryer. Ordinary household, not professional.
Primers used for DIY repairs have the following composition.
| Kinds | Preliminary work | Application |
| One-component. | Do not require special preparation before use. Sold in metal or plastic cans. Available in an aerosol can. | Brush or spray gun. Used for small repairs with a small area of damage. |
| Two-component primers. | Consist of polymer and hardener. The ingredients are mixed immediately before application. | They are often made from acrylic polymer or epoxy resin. This composition must be applied quickly until it hardens. |
Why do you need to prime your wheels?
One of the most important stages of restoration work with discs can be called priming, since the final result depends on it. What does a primer do? Let us note the following points:
- A high-quality primer is, first of all, an excellent barrier to moisture and salts, which contribute to the development of metal corrosion. Even if the car is equipped with cast wheels made of composite non-ferrous metal, this still does not mean that they do not need protection against oxidation;
- The second important purpose of the primer is to ensure adhesion for the painting material. The primer is very securely fixed to the surface of the disc, thereby ensuring the durability of the applied paint;
- The final purpose of primer is to provide a smooth surface for paint to be applied. Correctly applied primer makes the metal smoother to a greater extent, which has a positive effect on the final result in terms of appearance.
Not every primer is ideal for discs and will provide the expected effect; here you need to pay attention to many factors. Firstly, the soil must match the material from which the wheels are made, that is, for cast wheels - one type, and for stamped wheels - another. Secondly, to achieve an ideal result, the primer should be selected in accordance with the paint and varnish that will be used for the job. This will eliminate a conflict reaction between materials and extend the service life of the applied coating.
The most popular brands of primers for aluminum
Hand sanding or grinders are used when sanding to solve problems with aluminum surfaces. Due to the protection against acidic substances, etching with their help is permissible. The correct choice of composition also plays a role.
Primer brand VL-02
Manufactured taking into account all the requirements described in GOST 12707-77. A two-component composition based on thinners. To create the base for this primer, other types of components can be used:
- Acidic additives that dissolve the surface. Usually these are aqueous-alcoholic solutions to which orthophosphoric acid is added;
- Polyvinyl butyral. Formed when butyraldehydes react with polyvinyl alcohol. Guarantees increased adhesion to non-ferrous metals. Resistance to mechanical damage after application is guaranteed;
- High concentration zinc crown. Pigmented substance of a yellow tint, protected from corrosion.
Body brand primer
A foreign company that has released its own alternative to domestic developments. In the case of non-ferrous metals, a variety marked 969 is used. There is an acid etch primer from the same manufacturer, with its own characteristics and scope of application.
Forms a greenish-yellow protective film. Retains its properties for at least 6 months and requires a minimum of two layers of application. Forms a semi-matte glaze coating and is an elastic type of protection.
GF 031
Glypthal paint and varnish material. Designed to protect structures that are also operated at elevated temperatures. The main thing is to thoroughly mix the composition until a homogeneous mixture is formed. A brush or pneumatic method is best for spreading over the surface.
Zinc-based whitewash
An absolutely white product with a slight bluish tint, if we talk about its original appearance. Absolutely devoid of any odors. Protected from the effects of harmful microorganisms and bacteria, does not collapse if they are present.
They have the following positive properties:
- Weather resistance;
- Compatible with different types of paints;
- Easy application;
- Sun color protection;
- Low toxicity.
Tools and materials for working with discs
Before you begin restoration work, you should ensure that you have all the necessary materials and tools. Do not forget that after the painting work begins, the car will be without wheels, and it will be difficult to quickly run to the store for the missing can of varnish.
Therefore, before taking off the car’s shoes, we prepare the following tools and materials:
- detergent for cleaning discs from dirt;
- hand drill or grinder with brush attachments;
- sandpaper of different grain sizes;
- good product for degreasing disc surfaces;
- in case of deep scratches or chips - automotive putty;
- special primer for a particular type of disc;
- paint of the desired color;
- clear nail polish.
To work with discs, it is quite reasonable to buy primer, paint and varnish in cans. If you are not engaged in restoring wheels at a professional level, then there is simply no point in purchasing a compressor, a spray gun, primer and paint in cans for this work. To repair all four discs, two cans of primer, three to four paints and two cans of varnish are usually enough.
An important point that significantly influences the result is the correct preparation of the room for applying primer and paint. There should be complete cleanliness, recommended air temperature and normal, uniform lighting of the work area. The biggest enemy in such work is dust, so preliminary wet cleaning is mandatory.
What is automotive primer?
Primer is a special substance that is intended for application to a metal surface (hereinafter we mean auto primer) that has previously undergone special preparation.
Soils are classified by type, type and composition. If we talk about the first ones, then there are 3 of them:
- Epoxy primer for metal;
- Leveling, also known as primer;
- Primer-sealant.
The first type has good resistance to moisture due to its dense structure. As a rule, after drying such a primer does not need to be sanded, limiting itself to only eliminating drips with fine sandpaper. Often used as a primary primer.
The primer also has good anti-corrosion properties, and it also perfectly smooths out small pits due to its thick consistency, which is what it is mainly used for. Needs sanding.
The sealant is a finishing primer. It promotes uniformity of previous layers and prevents paint from penetrating into the soil and corroding it.
Preparatory work
When all materials and tools are prepared, you can begin to work. The discs are first removed from the car, and it is also advisable to remove the tires. Next, the metal surface is processed with a grinder, the old paintwork and traces of corrosion are carefully removed.
If the old paint is not very outdated and does not come off, then the surface of the discs can simply be matted with sandpaper. However, for a major overhaul, you need to remove the old coating down to the metal.
When the discs are cleaned, they should be blown with compressed air or washed with detergents. After this, you need to inspect the treated surface for defects. Small scratches are removed using fine abrasive paper until smooth. If there are deep scratches or even chips, then putty will come to the rescue - the defects are covered up and sanded to perfect condition.
At the last stage of preparation, the metal surface must be properly degreased. To do this, you can use alcohol, thinners and even gasoline, but it is best to use a solvent that will not react with the applied primer. You can inquire about this from the seller of painting materials.
Types of automotive primers
Types of car primers vary depending on the manufacturer and price.
There are three classes:
- Epoxy.
- Primer/car putty with a leveling structure.
- Sealant.
Types of soil according to protection mechanism:
Types of car primers vary depending on the manufacturer and price.
Passivating - metal chromates are added to their composition, which gives the car material passive characteristics:
- if droplets of water subsequently fall on the body, the oxidation process will not occur;
- This class includes goods marked GF-031 and other types that comply with GOST;
- the fender and bottom of the car are additionally protected with a lead-based compound.
Tread protection - protects the body. This layer takes on any negative impact of the environment.
Features of tread protection:
- the manufacturer supplemented the composition with metal dust with the most insignificant potential, in comparison with the body, based on lead, zinc, aluminum;
- This class of goods includes epoxy primers of the EP-057 type. This is an ideal suspension of powder with metal particles in resin. The composition must be stabilized before application; bentonite and polyamide hardeners are most often used;
- primer, which is dominated by inert microparticles, is intended for minor repair work on vehicle bodies. It does not react with impurities and elements of other products used. Mechanical features protect the metal from water droplets;
- in this class, FL-OZK and GF-21 are in demand;
- phosphating primer for cars. Acids are considered their main component, they work firmly with the metal of the vehicle and create a tread ball with their hardly soluble layer. Maximum adhesion rates allow these mixtures to be applied with a minimal ball, compared to others;
- aggressive acids uniquely penetrate the metal ball, adhesion increases to the maximum level;
- This series is distinguished by the brand - VL.
The primer takes on any negative environmental impact
Corrosion modifier - it is rational to apply when painting vehicles with visual traces of rust:
- the active substances begin to interact with the untreated surface, forming a deeply penetrating tread ball;
- To ensure an ideal reaction, the master must ensure the proper air temperature. Its indicator is from fifteen degrees and above. The primer is applied by hand, brush or spray. Doesn't corrode your hands.
Soils by component components:
- with one active substance - without hardening particles, their disadvantage is a long drying time, so craftsmen use them less and less in their work;
- with two active substances - the composition includes hardeners, the average drying time is 24 hours, they are used often;
- ethanol based - thanks to the esters included in the composition, the drying process takes only 60 minutes. It has a hard and soft consistency. This has a positive effect on the effort during manual grinding and the strength of the coating ball.
The highest quality and best-selling are two-component ones, their ethanol-based compositions.
Two-component primers are considered the highest quality
Padding
At this stage, it is best to hang the discs on homemade wire hooks. This will make it possible to work comfortably, dust will not rise from the floor and small details will be better visible. It should be borne in mind that in a suspended state it is easier to leave smudges on the surface. To remove them, you can use napkins or sand them with sandpaper on an already hardened primer.
The primer should be applied as recommended by the manufacturer of the specific brand of material. Usually, detailed instructions are written on the can, which in most cases states the following. Shake the can thoroughly and spray the primer in an even layer from a distance of 25 centimeters. To achieve a better effect, the procedure can be repeated a couple of times.
Usually, if the disc surface is properly prepared, then applying two layers of primer is sufficient. The first is applied from a slightly greater distance in a very thin layer - this will make it possible to identify missed defects on the fly and eliminate them in a timely manner.
After applying the first layer, give it time to dry thoroughly. If possible, the soil can be dried with a hairdryer. Next, a second layer of primer is applied. If it is the last, then it should be applied thicker, but so that there are no smudges, otherwise the area will have to be redone. Before applying each successive layer, the surface must be matted with fine abrasive paper. The last layer is also sanded to a perfectly smooth and matte finish.
Advantages and disadvantages of primer
High-quality primer is expensive, but you shouldn’t skimp on it to avoid the need for repainting. When doing your own priming, it is recommended to immediately choose the most suitable high-quality product, taking into account how long it takes to dry. Almost all inexpensive primers shrink after a certain time, and all the flaws begin to appear on the surface of the car. As a result, damaged areas have to be restored, which leads to additional financial and time costs.
If the primer is chosen correctly and the work is done correctly, then such a primer will have the following advantages:
- significant anti-corrosion properties;
- high adhesion (adhesion);
- durable and smooth surface.
A car primer is a reliable base for paintwork and high protection for metal. There are many nuances in performing priming work, but if you choose a suitable primer from a well-known manufacturer, consult with the experts and take into account all the recommendations, then priming the car yourself will be quite possible.
Why do you need to paint alloy wheels?
The condition of car rims often deteriorates after a couple of months of use. And this applies even to those cases when a person drives only on city roads. Products are scratched, they are subject to wear and abrasion, and to this should be added the aggressive influence of the environment, including chemical reagents that are used in winter.
Do-it-yourself painting of alloy wheels is the easiest and most cost-effective way to protect them from harmful influences, allowing you to extend the service life of the products.
In addition, painted wheels look more attractive.
Which paint to choose
Painting car wheels involves choosing high-quality products that provide a coating that retains its properties, integrity and color for a long time.
For these purposes, the following types of paints can be used:
Most often, car wheels are painted with acrylic, since this is the most practical option. But in terms of durability, such a coating is somewhat inferior to powder paint.
The latter also has a drawback. To apply it you will need special equipment. You also need to have experience and skills, so in such cases it is not always possible to cope with painting on your own.
What is acidic soil made of?
Acid soil is a transparent composition with a shade of gray or light green.
As already mentioned, the composition of acid soils may differ from each other, depending on the manufacturer and have different proportions.
The base polymer is usually polyvinyl butyral; the composition also contains phosphoric (orthophosphoric) acid (small amount), isopropyl alcohol, zinc chromate (or zinc phosphate), talc (about 2%) and other additives.
Consumables and tools
In order for painting steel wheels to be not just a decorative technique, but to protect against rust and various road hazards, you need to choose the right paint not only but also all the tools necessary for its application.
To begin with, preparatory work is carried out. It doesn’t matter whether the products are aluminum or steel, they must be cleaned of contaminants and dried. Only after this can you apply primer and then paint.
Sometimes light alloy cast products require cleaning from traces of corrosion, so the work will require a metal brush or sandpaper (the degree of grit depends on the situation). You also need a rag - it should absorb well.
- solvent;
- putty for leveling the surface;
- set of spatulas;
- masking tape to protect surfaces that cannot be painted;
- knife.
All work can only be carried out using personal protective equipment. This includes, at a minimum, gloves, a respirator and special glasses.
Sometimes an electric tool equipped with metal attachments is needed to remove a layer of old coating. In severe situations, this can even be sandblasting equipment, which will clean the discs from coating and rust to an intact layer of metal.
Directly for priming and painting, you need to choose a well-ventilated room. Because of this, it is not always possible to carry out such work at home (even in the garage). Then it is better to turn to professionals.
All paint options are considered, and if we are talking about a powder composition, a compressor and a spray gun are needed. To carry out the process itself, a special stand is required.
The technology of using powder paint requires a drying chamber. In it, drying is carried out at a temperature of +250. +300°C. The discs are left in this chamber for 4-6 hours - this is where the polymerization of the powder composition occurs. For some areas of the discs you will need an industrial hair dryer.
Types of primer compositions for cars
Today, the construction and automotive markets offer a huge amount of material for priming the metal surface of a car. Let's look at the main popular and common types of mixtures.
Acidic and reactive soil
This type refers to the virgin material when applied. Used on uncleaned metal, and even on previous paint residues. The main active ingredient in the composition is phosphoric acid, which reacts poorly with coatings that have a polyester base. This acid primer for cars adheres perfectly and protects the surface from corrosion, but it is recommended to apply an automotive acrylic primer, consisting of two components, on top of the mixture.
Important! It is forbidden to apply paintwork directly to this type of primer.
The material should not be applied in a thick layer, which does not interfere with the quality of protecting the surface of the car from rust.
Epoxy primer
This type is not a chemical substance, as it involves protecting the metal of the car physically, not allowing oxygen and liquids to reach the coating, due to the formation of a thick and durable film, while forming the anti-corrosion properties of the soil.
The use of an epoxy primer for metal for cars allows you to use putty on top of the coating, unlike other materials, to prevent the occurrence and spread of corrosion on the metal. This is practically the only mixture that prevents the subsequent formation of bubbles, which significantly increases the service life of the repaired part.
Due to excellent adhesion, it is possible to use several layers of primer after drying the coating first.
When using liquid putty, it is recommended to apply a product containing epoxy, both before and after application.
Also, this type of mixture is an excellent insulator between new paint and a layer of old paintwork.
But with all the advantages of the substance, it should be borne in mind that this composition has great rigidity, as a result of which it is difficult to process. Therefore, it is most often used as an initial coating, after which a special filler is applied.
Acrylic two-component primer
This acrylic primer for cars is usually used as a spray or spray. It is one of the most common types. There is no need to apply epoxy or acidic materials to it; the car can simply be tinned, matted, puttyed and a two-component primer applied. This mixture is usually used to smooth out damage, and it dries very quickly.
Primer for plastic
This primer is usually used to repair bumpers. As a rule, this type is one-component and is a substance that enhances adhesion. It should be applied using a special gun used for painting parts. It increases the contact between the plastic parts of the car and increases the interaction of the varnishes used, which contain acrylic or polyurethane.
Dyeing process
Do-it-yourself painting is a simple task, but at the same time time-consuming. This is due to the fact that careful surface preparation is required. And, if the motorist is not sure how to handle the equipment, it is better to seek help from specialists.
Preparing for work
To begin with, the wheels of the car need to be washed; tires are removed from them as standard. Many motorists do not want to do this and therefore wonder whether it is possible to paint without removing the rubber. Theoretically, it is possible, but then it will have to be sealed with masking tape or other similar material, which can be easily removed later.
So, you need to remove the tire and check the integrity of the rims. They are cleaned of the old paint coating using a brush or power tool. Hard-to-reach places are processed manually using sandpaper, local rust and contamination are removed. Then the products are thoroughly washed with water, their surface is degreased using a solvent. It is recommended to dry them afterwards in a drying cabinet heated to 40°C.
Then the metal surface is covered with primer to remove minor defects and scratches. The primer is applied in 2-3 layers, carefully so that there are no drips.
The discs are dried again in a special cabinet (since a polymer product is used as standard) or using an industrial hair dryer. When they cool to normal temperature, the treated surface is cleaned with sandpaper. This should be done in a crisscross motion to avoid damaging the disc. It is recommended that a minimum layer of primer be left on it.
It is advisable to blow off the surface after operating the compressor to get rid of any debris and see if there are any damages that were previously invisible. If they are present, apply the primer again and repeat the above procedure.
Features of use
Good craftsmen who work in professional car services work according to the following scheme:
- Before applying the first layer of paint material, several types and types of primer are applied to the treated area. Initially, acid-based primers or any other phosphating base can be used, which guarantees maximum adhesion.
- The primary ball is applied to the cleaned area, which is also degreased. The main thing is to optimally distribute the material. Using sanding paper is not advisable. Caution: you need to be extremely careful when applying phosphating and acid compounds! It is important to ventilate the room to avoid poisoning from chemical gases.
- Then the secondary ball of car primer is laid in several layers. It is more rational to use materials based on two components (soft in texture). They optimally mask minor deformations on the surface.
- Each ball is applied after a set period of time. In the workshop, where high-class specialists work, they use materials that cannot be further polished.
- If it is possible to achieve a perfectly smooth metal surface, compositions that give a glossy surface can be used as a secondary primer. Grinding in this case will be unjustified.
In order for the primer for the car to dry, just wait up to half an hour and you can begin the final painting.
Step by step painting instructions
The painting algorithm looks like this:
- Take a fairly thick wire on which the disk can be hung so as to provide access to it from all sides. If possible, a special stand is used.
- The surface of the product is once again blown with compressed air, and then wiped with a lint-free cloth. The rags are moistened with a composition that ensures degreasing of the base.
- Coloring is carried out in several stages, from a distance of 40-50 cm. It is advisable to do 2-3 passes with breaks of 20 minutes between them. Each individual layer of paint should be thin. You can apply a new one only after the previous one has completely dried. First, the inner surface of the disk is painted, and only then its front part.
- The painted disc should be dried thoroughly, preferably in the drying chamber already described at the same temperature.
- The surface is treated with sandpaper.
The paint should dry within 24 hours. Afterwards the disc can be varnished in 2 layers. The algorithm is the same - first apply a layer of transparent varnish, let it dry, and only then apply the 2nd layer. It is also recommended to dry varnished discs in a chamber for 24 hours.
At the final stage, specialists also use a polishing machine to make the surface of the disc smooth. The tire should only be put on a completely dried product, i.e. a day must pass from the completion of all work.